Delicate Dahlias You Inspire Me Card

by Joanne James16. August 2021 21:00

I'm late with my post today as I held my monthly card class this morning, but I did manage to squeeze in a little crafty time afterwards so today I'm sharing a card that takes it's inspiration from the challenge prompt photo over at Just Add Ink this week:

So much to love about that photo! The colours, flowers and textures ... I decided to pair those with some free Sale-A-Bration product for my card today - take a look at what I came up with:


Here's the low-down on today's card:

Delicate Dahlias - The focal point flower on my card is the outline flower from 'Delicate Dahlias' - a stamp set that can be yours with a purchase of £90 or more during the current Sale-A-Bration promotion. I heat embossed the flower in gold onto some Cajun Craze cardstock, then added tone-on-tone colour with my Stampin' Blends markers. The sentiment on today's card is also from this set.

Blended Colour - Having used Cajun Craze for my flower and (retired) Pretty Peacock for my card base, I brought both colours together by blending them from the outside in on a piece of Very Vanilla cardstock at the centre of my design.


Texture, Texture - I tried to incorporated lots of textural elements from the inspiration photo on my card: the texture from the vase is similar to my dry embossed card base, and the texture from the cushion is on the gold metallic specialty paper beneath my sentiment. I also added other golden elements through my heat embossing, ribbon and gems.

So what do you think? Can you see how the photo inspired my card today? I would love to know what you use to inspire your crafting - do leave me a comment below.

Here is the visual summary of the key products used on today's project for you to pin for easy reference:

 to follow

You can see all of my 'How To' summaries on my 'How To - Tips and Techniques' Pinterest board in case you've missed any. 

Enjoy your evening and I'll be back tomorrow with another project. Until then, happy stampin'!


Stampin' Up! Supplies Used:

Table built using Product Table Builder by The Crafty Owl - Independent Stampin' Up! Demonstrator.
 
This card was the Winner over at Just Add Ink this week!

Clean and Simple Whale Done Congratulations Card PP554

by Joanne James15. August 2021 08:00

Today it's Sunday and time for this week's new challenge over at The Paper Players! It's the turn of the fabulous Anne Marie to host this week and she has a clean and simple challenge for you to work with:


With GCSE exam results announced here in the UK last week, I have had the need for lots of exam congratulations cards, including some for boys, so today's clean and simple masculine challenge gave me the perfect opportunity to come up with another quick and easy-to-replicate design - take a look:


Here's the low-down on today's card:

I used Jen Timko's fabulous sketch over at Freshly Made Sketches this week for my layout and kept things simple by creating only in 'shades of blue', in keeping with the colour challenge over at Less Is More. I used a piece of retired Whale Of A Time designer series paper featuring ombre blue waves inside my oval aperture, and added a Night of Navy stamped whale and sentiment from the 'Whale Done' stamp set. I kept my card base white and didn't add any additional embellishments in order to preserve that all-important 'white space' and masculine feel:

Super simple and not at all girly - this whale has been getting lots of use lately! Perfect to send congratulatory wishes. This week was a big one for the James family: my nephew received A Level results and Rebecca received her GCSE results. Both of them had worked very hard and did very well, with a full set of A*s and As between them, so we had lots to celebrate. More importantly, they both achieved everything they need to move on to the next stage of their education, which is the most important thing. This year has been tough for all those in examination years and I think all GCSE and A Level students should be mighty pleased with their achievements at all levels. 

Here is the visual summary of the key products used on today's project for you to pin for easy reference:


You can see all of my Product and 'How To' summaries on my 'How To - Tips and Techniques' Pinterest board in case you've missed any. 

Before you reach for your ink and papers, check out what our amazing team has created to inspire you this week:

Here's a quick recap of our challenge rules:
 
1.  Create a new paper project
2.  Upload your creation to your blog with a link back to us and provide a direct link to the post featuring your challenge submission.
3.  Please link your card to no more than four challenges, TOTAL.
4.  Have FUN!

You can see all of my 'How To' summaries on my 'How To - Tips and Techniques' Pinterest board in case you've missed any. 

Enjoy your day; no big plans here, so hoping I'm lucky enough to squeeze in some crafting!  I'll be back tomorrow with another project. Until then, happy stampin'!


Stampin' Up! Supplies Used: 

Table built using Product Table Builder by The Crafty Owl - Independent Stampin' Up! Demonstrator.

Merriest Moments Traditional Christmas Card PP553

by Joanne James8. August 2021 08:00

Today it's Sunday and time for this week's new challenge over at The Paper Players! It's the turn of the fabulous Claire to host this week and she has a colour challenge for you to work with:


These colours immediately made me think of florals, then Christmas and since I had just taken delivery of some new goodies that ticked both boxes I couldn't wait to try them out - take a look:


Here's the low-down on today's card:

Merriest Moments - Merriest Moments, like the Art in Bloom bundle in the annual catalogue, is a 3 in 1 bundle comprising a stamp set, dies and a hybrid embossing folder that enables you to get beautifully textured die-cut images in seconds.

Perfect for the challenge over at Just Add Ink this week, where they are asking us to 'use a frame' on our cards, the Merriest Moments hybrid embossing folder adds a beautifully textured frame, choc full of festive foliage. I embossed my card base, then embossed and cut my frame and I added some sponged white kraft ink to give it some highlighting:


I added a sentiment panel and a trio of red and yellow Christmas poinsettias to accent it. I also stamped another flower and a sentiment inside my card to finish:


This bundle has everything you need to make your Christmas cards in one go - just add your colours and create! This bundle will feature in my class on October 11th so if it appeals to you, then do drop me a line to be added to class list. Meanwhile, I can't wait to create more cards with this bundle!

Here is the visual summary of the key products used on today's project for you to pin for easy reference:


You can see all of my Product and 'How To' summaries on my 'How To - Tips and Techniques' Pinterest board in case you've missed any. 

Before you reach for your ink and papers, check out what our amazing team has created to inspire you this week:

Here's a quick recap of our challenge rules:
 
1.  Create a new paper project
2.  Upload your creation to your blog with a link back to us and provide a direct link to the post featuring your challenge submission.
3.  Please link your card to no more than four challenges, TOTAL.
4.  Have FUN!

You can see all of my 'How To' summaries on my 'How To - Tips and Techniques' Pinterest board in case you've missed any. 

Enjoy your day; I am looking forward to a catch-up day today, since I've been out of action decorating for the last few days. I'm hoping to squeeze in a little crafting too so that I can be back tomorrow with another project. Until then, happy stampin'!


Stampin' Up! Supplies Used: 

Table built using Product Table Builder by The Crafty Owl - Independent Stampin' Up! Demonstrator.
 

White on White Greenery and a Simple Bee

by Joanne James4. August 2021 06:00

Today I'm sharing a clean and simple card inspired by a couple of challenges:


AAA Cards are looking for designs 'along the edge' with an optional twist of dry embossing and over at The Alphabet Challenge they are on 'I is for Insect'. I embraced all three to come up with a super simple card - take a look:


Here's the low-down on today's card:

I embossed my panel of thick Basic White with the Greenery embossing folder; it goes off the edge on both sides, but here I just ran it through along one edge. I added a get-well soon sentiment in Night of Navy and to finish could resist a golden bumble bee trinket for my insect:


And that's it - super simple but I hope you'll agree quite effective nonetheless.

Here is the visual summary of the key products used on today's project for you to pin for easy reference:


You can see all of my 'How To' summaries on my 'How To - Tips and Techniques' Pinterest board in case you've missed any. 

Enjoy your day and I'll be back tomorrow with another project. Until then, happy stampin'!


Stampin' Up! Supplies Used:

Table built using Product Table Builder by The Crafty Owl - Independent Stampin' Up! Demonstrator.
 
This card placed in the Top 3 over at AAA Cards this week!

Celebrate With Flowers Tri-panel Card

by Joanne James2. August 2021 06:00

Today I'm sharing a card that uses Judy's current sketch over at Freshly Made Sketches and the fresh colour palette over at Just Add Ink:


I though the panels on Judy's sketch would be perfect to break out another new stamp set, Celebrate With Flowers - take a look:


Here's the low-down on today's card:

I added elements of the flowers from the set into two of the boxes and saved my sentiment for the third one. I stamped my stem and leaves in black and the flowers in the other two colours and fussy cut them before adding with dimensionals. I added in-colour gems to the centres and stamens in each of the colours for a little extra sparkle:


The paper behind the panels is some of the Beautifully Penned black and white paper that can be yours free with an order of £45 or more from tomorrow when our next Sale-A-Bration campaign begins.

Here is the visual summary of the key products used on today's project for you to pin for easy reference:


You can see all of my 'How To' summaries on my 'How To - Tips and Techniques' Pinterest board in case you've missed any. 


Before I go, a reminder that today is your last chance to receive 15% off in the designer series paper sale - you can read all about it here.

Enjoy your day and I'll be back tomorrow with another project. Until then, happy stampin'!


Stampin' Up! Supplies Used:

Table built using Product Table Builder by The Crafty Owl - Independent Stampin' Up! Demonstrator.

Happy As Can Be Seaside Scrapbook Layout PP552

by Joanne James1. August 2021 08:00

Today it's Sunday and time for this week's new challenge over at The Paper Players! It's my turn to host this week and I have a timely theme challenge for you to work with:


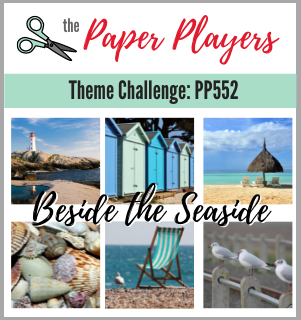
Whilst lots of us are already starting to work on Christmas projects, it is still very much summer time and I chose this week's theme with that in mind. As the rhyme goes, 'Oh I do like to be beside the seaside, oh I do like to be beside the sea' - sand between your toes, fish and chips, buckets and spades and more - the seaside is one of my favourite places to be. I decided to break from my usual card and make a scrapbook page to share with you for a change this week.

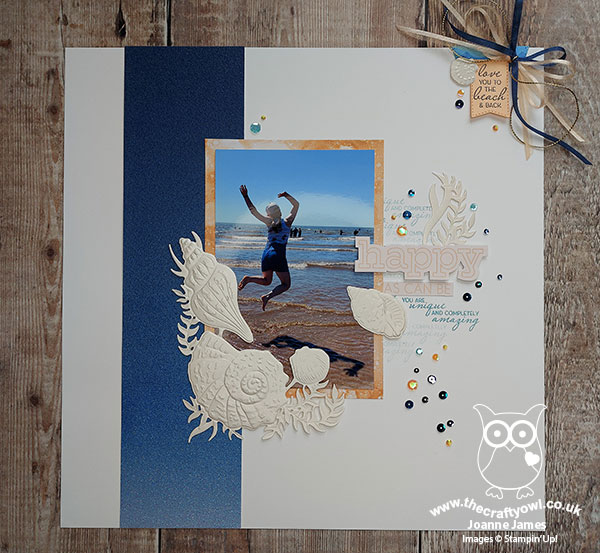
I live in Northampton which is very close to the very centre of England, so is about as far from the coast as you can get. I recently took the James Juniors to visit their grandparents, my parents, in Wales for the first time since the start of the Covid pandemic and the first place they always ask to visit is the beach. This left me with lots of great photos ready to scrapbook. I am mostly a Memories and More pocket scrapbooker, but occasionally I do make full 12" x 12" layouts and with the gorgeous 'Friends are Like Seashells' bundle in the annual catalogue I couldn't resist. Take a look at today's layout:


Here's the low-down on today's project:

I captured a great photo of Rebecca jumping the waves as I followed her down to the shoreline, so thought it would be perfect for my layout. Here's a close-up of my photo and the surrounding decoration in more detail: 


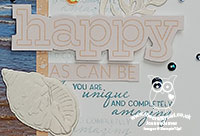
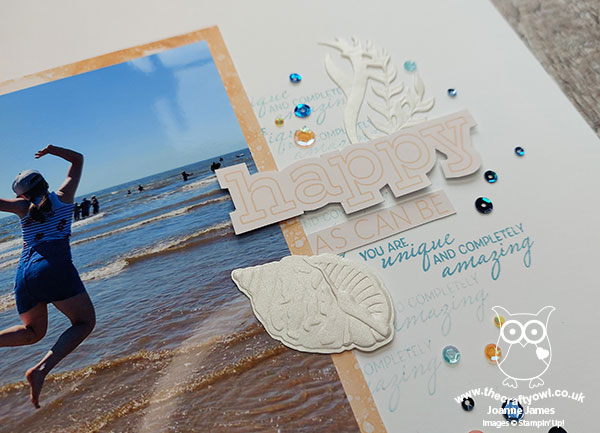
 I backed my photo with a piece of 'Expressions In Ink' designer paper and added a strip of the gorgeous Night of Navy ombre glimmer paper down the left side, to pick up on the bright blues of the sky in the photo. I embossed and diecut the seaside shells from pearlescent paper, then used the corner to decorate my photo whilst snipping the the other shells and seaweed apart to add as decoration elsewhere. I did a little background stamping beneath my layering and my main sentiment is fussy cut from one of the 'What A Year' Memories and More cards; you can see that more closely below:


I love that sentiment and it totally sums up the mood of the day and Rebecca in particular in that moment. Both of the James Juniors were so thrilled to be at the beach that day, jumping the waves, fishing in rock pools and generally enjoying the sea air.

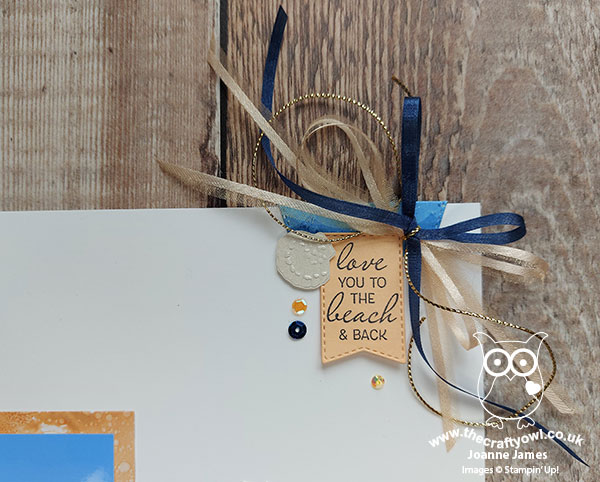
In addition to a sprinkling of sequins and gems, I also added a sentiment tag to the corner of my page, decorated with a fussy ribbon bow:


My layout is actually quite simple, and very much like my card making style - although if you could see the pile of patterned papers that covered my desk as I made this page you would think that it must have been anything but and I did procrastinate for quite some time before deciding on my final papers and design!

So what do you think? Did you enjoy my scrapbook layout today for a change? Should I share more of this kind of thing on my blog? Feel free to leave me a comment below - I'd love to hear your thoughts.

Before you reach for your ink and papers, check out what our amazing team has created to inspire you this week:

Here's a quick recap of our challenge rules:
 
1.  Create a new paper project
2.  Upload your creation to your blog with a link back to us and provide a direct link to the post featuring your challenge submission.
3.  Please link your card to no more than four challenges, TOTAL.
4.  Have FUN!

I can't wait to see how my theme inspires you this week!

Since I did something other than a card today, I am going to link up over at Just Us Girls where that happens to be their theme this week.

Enjoy your day; I have a family day at home today, with nothing special planned. I'll be back tomorrow with another project. Until then, happy stampin'!


Stampin' Up! Supplies Used: 

Table built using Product Table Builder by The Crafty Owl - Independent Stampin' Up! Demonstrator.
 
Edited to add - I was Chic of the Week with my scrapbook page over at Just Us Girls for the 'Anything But A Card' Challenge:
 

Festive Foliage Red and White Split Panel Christmas Card Times Two

by Joanne James28. July 2021 17:00

Today I have a couple of festive Christmas cards that I made using my favourite 'Festive Foliage' background stamp from the annual catalogue - here's the first one:


I stamped one background stamp in Real Red on Basic White and another in Versamark onto Real Red cardstock and heat embossed it in white, then split the panels and swapped them so that there is one of each on each card for contrast. Here's the second one:


I added a sentiment from 'Poinsettia Petals' on a label cut with my Tasteful Labels Dies and backed each with some white glittered organdy ribbon from the upcoming mini catalogue:  


Here is the visual summary of the key products used on today's project for you to pin for easy reference:


You can see all of my 'How To' summaries on my 'How To - Tips and Techniques' Pinterest board in case you've missed any. 

I've been looking at creative ways to use background stamps for my upcoming online class in September that features both the 'Festive Foliage' and 'Daisy Garden' background stamps and will look at ways to use them for all-year round cards. A split panel card is a great way to create two cards quickly using the same background stamp, so today's post is a nice taster for my class ladies who are already signed up for this class. If you would like to join them, you can find full details for this and all my online classes on my Facebook Page here or just message me for more information.

I used the sketch over at Inspire.Create and the monochromatic red colour scheme from over at The Rainbow Challenge as further inspiration for my cards today and since I'm still doing Christmas I'm also linking up with Christmas Craft Creations and their 'anything goes' theme.


The weather here has alternated today between brilliant sunshine and torrential downpours and apart from giving up on using the washing line completely, I have successfully managed to get a whole bunch of errands run whilst dodging the rain (mostly!) Since we are on the summer holidays, the children are taking turns to help out with cooking the evening meal. One is more enthusiastic than the other (I wonder if you can guess which one!) Needless to say, if I survive the flour tornado that is currently my kitchen, I will be eating Turkish-style flatbread pizzas for dinner this evening! Enjoy the rest of your day and I'll be back tomorrow with another project. Until then, happy stampin'!


Stampin' Up! Supplies Used:

Table built using Product Table Builder by The Crafty Owl - Independent Stampin' Up! Demonstrator.

Feels Like Home And Gingerbread And Peppermint Sneak Peeks

by Joanne James26. July 2021 08:00

Happy Monday everyone! I had a little extra crafting time at the weekend so to start the week I have not one, but two cards that were inspired by some current challenges. My first card is using Amy's sketch over at Freshly Made Sketches this week and I'm also linking up over at Time Out where the code word is 'hungry' and at Christmas Craft Creations where their theme is 'anything goes':


I didn't let myself be put off by Amy's diagonal lines and decided that some festive gingerbread was in order - take a look:


My card features two of the designs in the Gingerbread & Peppermint designer series paper set from the upcoming mini catalogue - the gingerbread cookies are cut out of one of the papers (the sentiment is from a retired set):


This suite makes me hungry just looking at it - I mean, is it too early to start baking gingerbread in July?!

Here is the visual summary of the key products used on this project for you to pin for easy reference:


You can see all of my 'How To' summaries on my 'How To - Tips and Techniques' Pinterest board in case you've missed any. 

My second card uses the colours over at Color Throwdown and I went across the top row of Paper Craft Crew's tic-tac-toe board with trees/diecut/watercolour:


Following my AYSI team mate Amy's fabulous watercolour using this stamp set, I was itching to have a go at creating with a stamp called 'feels Like Home' that will be free with a £45 purchase in the upcoming Sale-A-Bration promotion. I though the Color Throwdown colours had a lovely Mediterranean feel to them, so I had visions of holiday isles as I watercoloured my simple scene. I added a sentiment cut with one of the label dies in another new set, Harvest Dies:


This set so reminds me of summer holidays abroad; such a distant memory, but whilst my own garden doesn't look anywhere near as Mediterranean, it is my happy place so will be just fine until we are able to truly travel far and wide again.

Here is the visual summary of the key products used on this project for you to pin for easy reference:


You can see all of my 'How To' summaries on my 'How To - Tips and Techniques' Pinterest board in case you've missed any. 

I hope you are enjoying my sneak-peek shares - I can't believe I'm feeling so in the festive zone when it's so warm and sunny outside, but the temptation of a box of new goodies is too much to resist!

Enjoy your day and I'll be back tomorrow with another project. Until then, happy stampin'!


Colours And Contours Rainbow Glimmer Congratulations Card PP551

by Joanne James25. July 2021 09:00

Today it's Sunday and time for this week's new challenge over at The Paper Players! It's the turn of the fabulous Ann to host this week and she has my favourite, a sketch challenge for you to work with:


I had so many great ideas for this sketch! I also loved the rainbow of purples, blues and greens on that fabulous bird on the Color Dare inspiration photo, so decided to pair them with the stamp in the Colours & Contours set for a stem of rainbow flowers - take a look:


Here's the low-down on today's card:

Colours and Contours - I coloured the infill stamp of the main flower stem in the Colours & Contours stamp set using my sponge daubers and a trio of blue and purple inks, the cut it out with the co-ordinating die. I added it to a panel cut with one of the Scalloped Contours Dies (and narrowed slightly), having stamped the sentiment directly onto this panel. I added another sentiment and additional flower from the same set to the inside of my card:


Rainbow Glimmer - The rainbow of colours that I used enabled me to use some co-ordinating rainbow glimmer paper for my horizontal strips to compliment flowers. Whilst there's only a little of it visible, I love the addition of that sparkle and glimmer:

Pattern Party - In order to allow my glimmer paper to really stand out, I chose a piece of neutral black and white Pattern Party paper for my background. The Pattern Party paper pack is a hostess reward that you can earn with purchases of £150+ and is such great value with a great variety of patterns and designs too. 

Here is the visual summary of the key products used on today's project for you to pin for easy reference:

You can see all of my Product and 'How To' summaries on my 'How To - Tips and Techniques' Pinterest board in case you've missed any. 

Before you reach for your ink and papers, check out what our amazing team has created to inspire you this week:

Here's a quick recap of our challenge rules:
 
1.  Create a new paper project
2.  Upload your creation to your blog with a link back to us and provide a direct link to the post featuring your challenge submission.
3.  Please link your card to no more than four challenges, TOTAL.
4.  Have FUN!

You can see all of my 'How To' summaries on my 'How To - Tips and Techniques' Pinterest board in case you've missed any. 

Enjoy your day; I will be spending mine cooking and having a lazy day with the family. I'll be back tomorrow with another project. Until then, happy stampin'!


Stampin' Up! Supplies Used: 

Table built using Product Table Builder by The Crafty Owl - Independent Stampin' Up! Demonstrator.
 
This card was a Diamond Winner over at Color Dare this week!


Quiet Meadow CAS Bee Trinket Card PP550

by Joanne James18. July 2021 08:00

Today it's Sunday and time for this week's new challenge over at The Paper Players! It's the turn of the fabulous LeAnne to host this week and she has a fun clean and simple challenge for you to work with:


I resisted the urge to go with something punny today and instead used Narelle's sketch over at Freshly Made Sketches as the basis for a cluster of wildflowers to attract my solitary bee - take a look:


Here's the low-down on today's card:

I added a recessed panel featuring a piece embossed with the Bricks and Mortar embossing folder and used this as the backdrop for my trio of wildflower/grass elements courtesy of the Meadow Dies. Two of these I cut out of coloured cardstock and the third I sponged to create a cornflower-inspired bloom to attract my golden bumblebee trinket:

I added a sentiment from the Quiet Meadow stamp set to a banner piece that is included in the Meadow Dies set to complete the outside of my card. I also added a little more stamping to finish the inside:


I hope you like my shiny bee as much as I do! We look forward to seeing your bee creations, but remember this is 'clean and simple' week so ensure your cards have: 

  • minimal layers
  • little to no embellishments
  • lots of clean white space (minimal pattern)

Here is the visual summary of the key products used on today's project for you to pin for easy reference:


You can see all of my Product and 'How To' summaries on my 'How To - Tips and Techniques' Pinterest board in case you've missed any. 

Before you reach for your ink and papers, check out what our amazing team has created to inspire you this week:

Here's a quick recap of our challenge rules:
 
1.  Create a new paper project
2.  Upload your creation to your blog with a link back to us and provide a direct link to the post featuring your challenge submission.
3.  Please link your card to no more than four challenges, TOTAL.
4.  Have FUN!

You can see all of my 'How To' summaries on my 'How To - Tips and Techniques' Pinterest board in case you've missed any. 

Enjoy your day; the weather has been absolutely scorching here in the UK this last few days, so there's unlikely to be much crafting done today as my office becomes a furnace from about 11am onwards! I will definitely be taking it easy and enjoying it whilst it lasts! I'll be back soon with another project. Until then, happy stampin'!


Stampin' Up! Supplies Used: 

Table built using Product Table Builder by The Crafty Owl - Independent Stampin' Up! Demonstrator.

Mini Catalogue

BROWSE THE CATALOGUE

The mini catalogue is now live! Read and download your copy here.

Shop Online

Access my online shop 24 x 7, 365 days of the year:

Current April hostess code:

VDKNV7BH

Shop Online

Join My Team

It's always a great time to join Stampin’ Up! New team members can get £130 worth of products for only £99 + free business supplies + free shipping + all the fun being a part of Stampin’ Up! Stampin' Up! has something for everyone: join my growing team and benefit from my support to enjoy Stampin' Up! however you choose.

If you're interested, call me for a chat to understand how I can help you realise your goals. Alternatively, if you have already decided to sign up and you just can't wait, please click here for the link to the online form where you can sign up and order your starter kit right away! 

Latest Kit!

Stampin Cut and Emboss

The Rock Legend Kit has all you need to make 8 cards with coordinating envelopes. Along with the new Panda Friends Kit, both are available from January 4th for just £14 each - get yours here!

2023-24 Annual Catalogue

BROWSE THE CATALOGUE

Click on the catalogue for a full list of current SU! supplies - if you would like to order any of the items featured, please drop me a line at [email protected] or give me a call on 07773 421446 - I'd be happy to help.

New Online Exclusives

There are new products available exclusively in the online store from 5 March - check them out here.

About Me

Hi I'm Joanne and live in Northampton and when I'm not looking after my husband and two beautiful children, am an avid crafter with a passion for all things Stampin' Up!

I must confess that I have never been a big rubber stamper - until I discovered Stampin' Up! that is. I love the fact that I can get such great results with co-ordinating stamps, inks, papers and punches - the possibilities are endless! Join me on my stamping journey as I share the things I love and be inspired to create amazing things yourself!

Follow Me

Monthly Newsletter

Box Builder

Click the button above to use Box Buster to create your custom box design using the Envelope Punch Board!

Kits Collection Now Available!

Stampin Cut and Emboss

The new Kits Collection from Stampin' Up! is now available!

Click here to see the current kits available and order yours online today.

I Design For


Stampin' Up Stuff

This is my personal blog and is not endorsed by Stampin’ Up! I hope you find it a plentiful source of ideas and personal inspiration but please don't copy my designs for contest submission or use for classes, publication or sale without express permission.