Softly Falling And Hang Your Stocking - A Perfect Pair

by Joanne James11. December 2016 09:00

It's Sunday and time for a new challenge over at The Paper Players! Before I get into my post, I must just give a shout out to the lovely Linda, Hannelie and Colleen who have been the most awesome guest designers with us for the last six months; these ladies have done a fabulous job and I will miss your contributions and do hope you continue to play along with us from time to time. Thank you for sharing your designs and creativity with us! Whilst we are sad to see these ladies leave, it also means we will have some new guest designers joining us too; watch out for more news on this with my mid-week reminder post on Wednesday to see who will be joining us to kick off 2017!

Meanwhile, it's the turn of the lovely Jaydee to host this week and she has a glamorous colour challenge for us to work with:


All the sparkle of silver and gold, paired with brilliant white! I decided that a glamorous stocking was going to be my focal point today and I also used Amy's sketch over at Freshly Made Sketches for my layout - here's my card:


My card today is another one with lots of layers and a variety of foil and glimmer paper to add lots of sparkle: my diecut stocking is gold foil layered with gold glimmer and a white glimmer top with embossed holly decoration, I layered a silver foil doily behind and added a piece of silver foil acetate between my white cardbase and mat, which I embossed with my favourite embossing folder of all time, Softly Falling, for added detail. I used my Stitched Shape Framelits for my sentiment square (you will be pleased to know theses will be available to order again early January in time for Sale-A-Bration - yay!) and chose a sentiment from the Christmas Pines stamp set to complete my card as this seemed the most appropriate, which I also heat embossed in gold.

This is the kind of stocking I imagine someone like Joan Collins to own (or maybe Donald Trump, since he seems to be a fan of all things glitzy and gold!) - either way, definitely all about the luxury! I'm more of a traditional red and white girl myself :-)

Here is the visual summary of the key products used on today's project for you to pin for easy reference:


You can see all of my Product and 'How To' summaries on my 'How To - Tips and Techniques' Pinterest board in case you've missed any. 

Before you reach for your ink and papers, check out what our amazing team has created to inspire you this week:

The Paper Players Design Team
 
 
Here's a quick recap of our challenge rules:
 
1.  Create a new paper project
2.  Upload your creation to your blog with a link back to us and provide a direct link to the post featuring your challenge submission.
3.  Please link your card to no more than four challenges, TOTAL.
4.  Have FUN! 


I look forward to seeing what you create with this colour palette this week. This morning I will be recovering from a Christmas night out yesterday and this afternoon we are officially decorating the James household for Christmas. My wreath is made and hanging proudly on my front door already, so with the tree up and the rest of the decorations in place, I'm sure it will start to feel like Christmas is well and truly on its way!

Enjoy the rest of your weekend as it will be over all too quickly; I'll be back tomorrow with another project; until then, happy stampin'!


Stampin' Up! Supplies Used:

Table built using Product Table Builder by The Crafty Owl - Independent Stampin' Up! Demonstrator.

Christmas Tree Warmth and Cheer Washi Tape Card

by Joanne James5. December 2016 19:27

Happy Monday everyone! I've had a busy start to my week with deliveries and appointments but did manage to catch up with a couple of friends for a festive afternoon tea, which was lovely. I have a quick card to share with you today  - this one is from one of last month's classes where we were using the Santa's Sleigh bundle. This was our warm up card and features the traditional colours that the Paper Craft Crew are challenging us to use this week:

Visit the Paper Craft Crew and play along with Color Challenge 221. www.papercraftcrew.com

I got out the washi tape and set to work - here's my card:


Here's the low-down on today's card:

O Christmas Tree -  The tree framelit in the Santa's Sleigh Thinlits set makes for an elegant Christmas tree, and does double duty when the negative space is used creatively too. On this card the focal point is the absence of the actual tree, as opposed to the tree itself. 

Warmth and Cheer Washi - Here the tree is decorated with Warmth and Cheer washi tape, simple strips of colour onto the Crumb Cake card base. Perfect within the Garden Green top layer, to add to the feeling of foliage.

And A Star - I finished my card with a stamped sentiment, tied twine bow and a metallic gold star.

A great simple card, easy for mass production - and don't we all need those at this time of year!

Here is the visual summary of the key products used on today's project for you to pin for easy reference:


You can see all of my 'How To' summaries on my 'How To - Tips and Techniques' Pinterest board in case you've missed any. 

That's all from me; I'll be back soon with another project; until then, happy stampin'!


Stampin' Up! Supplies Used:

Table built using Product Table Builder by The Crafty Owl - Independent Stampin' Up! Demonstrator.

Frosted Medallions Snowflake

by Joanne James4. December 2016 09:00

It's Sunday and time for a new challenge over at The Paper Players! It's the turn of our fearless leader the wonderful Nance to host this week and she has a fun wintery theme to get your creative juices flowing:
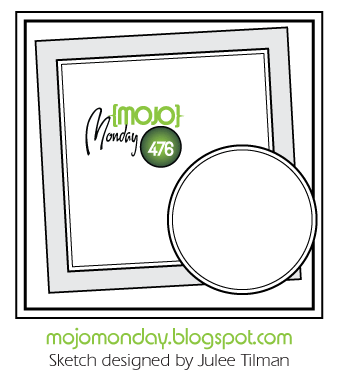
       

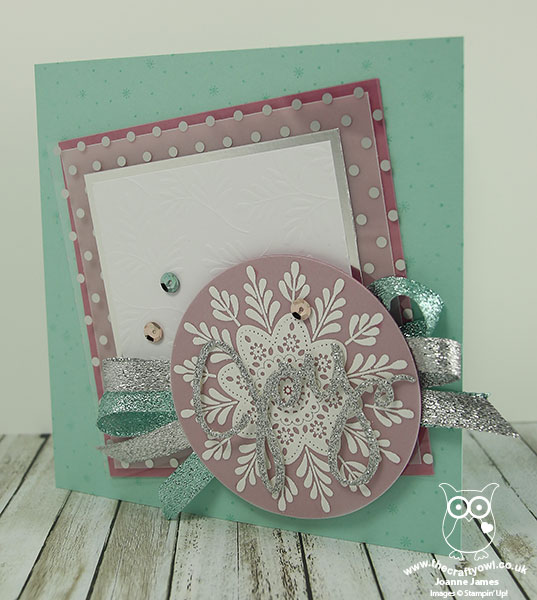
Use a snowflake (or two!) on your card. I decided that I wanted to feature the large frosted medallion snowflake from the stamp set of the same name on my card this week and this week's Mojo Monday sketch gave me the perfect layout - here's my card:
 

Here's the low-down on today's card:

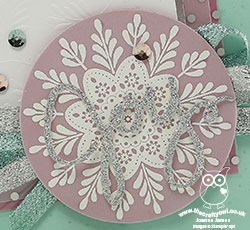
All About The Layers - My card this week has 9 layers in total, rather a lot even by my standards! Can you spot them all? They are, in order: Pool Party card base, Sugarplum square panel, vellum square, Fabulous Foil Designer Acetate, silver foil, Fancy Frost Specialty DSP, Sweet Sugarplum circle, a vellum circle with the frosted medallion stamped in Versamark and heat embossed in white and lastly the word 'joy' cut out of silver glimmer paper with my Wonderful Wreath framelits. A lot of layers indeed, yet I think they all play a part in contributing to the balance of the card design.

Glitter, Glitter - I used lots of elements to add sparkle to my card, from the Fabulous Foil Acetate, to the glimmer paper and sprinkle of Fancy Frost sequins, along with a rather fancy bow in silver (current) and Pool Party (retired) glitter ribbon beneath my snowflake. This card is definitely not practical for posting, but will make a nice special one to be hand delivered. The snowflake/glitter combination means I am linking up with CAS-ual Fridays too where these are both the order of the day!

A Contemporary Colour Combination - you may recognise my colour combination this week as the one our very own lovely Nance used for her pines card last week - you can see her card here. This isn't a colour combination I would ordinarily choose for a Christmas card, and I did start out using just white, silver and Sweet Sugarplum, but I felt it needed something more. I decided to add in the Pool Party as it looked so great on Nance's card and voila - an altogether brighter card, so thank you Nance! If you like this colour combination, feel free to save it:
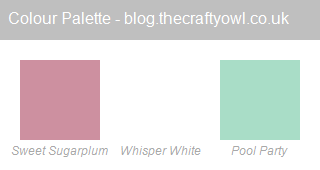
 

So only one main snowflake on my card, but it is a big one! That said, I did use the snowflake background stamp from the Pretty Pines stamp set on my card base to add a little background decoration, so there are lots more there too!

Here is the visual summary of the key products used on today's project for you to pin for easy reference:
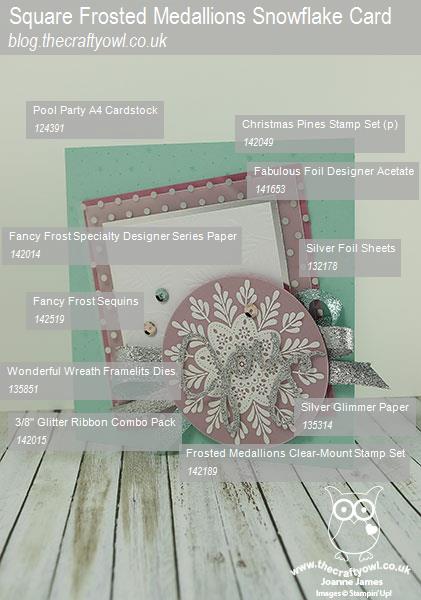
 

You can see all of my 'How To' summaries on my 'How To - Tips and Techniques' Pinterest board in case you've missed any. 

Before you reach for your ink and papers, check out what our amazing team has created to inspire you this week:

The Paper Players Design Team
 
 
Here's a quick recap of our challenge rules:
 
1.  Create a new paper project
2.  Upload your creation to your blog with a link back to us and provide a direct link to the post featuring your challenge submission.
3.  Please link your card to no more than four challenges, TOTAL.
4.  Have FUN! 


I look forward to seeing what you create with our theme this week. We are off for our usual Sunday morning of sport, followed by a spot of lunch and then we are going to watch a basketball game this afternoon - go Northampton Neptunes!

Enjoy the rest of your weekend as it will be over all too quickly; I'll be back soon with another project; until then, happy stampin'!


Stampin' Up! Supplies Used:

Table built using Product Table Builder by The Crafty Owl - Independent Stampin' Up! Demonstrator.

Cozy Critters Pastel Owl Christmas Card - Last Day of 25% Off Stamp Sets

by Joanne James30. November 2016 08:00

Wednesday already?! Where does the time go! Firstly today I have a reminder for you: today is the last day you can take advantage of 25% off selected stamp sets as part of the Stitched From the Heart promotion - you can read full details, including the sets that are on offer, in my previous post here. For today I have another card that uses Sandy's sketch over at The Paper Players this week, but one that is quite different to my Design Team card from Sunday and that includes one of the stamps from the current offer sets:


Here's the low-down on today's card:

Book A Party, Earn An Owl -  One of the hostess sets in the current seasonal catalogue is 'Cozy Critters', which includes a sweet fox along with this adorable owl, which co-ordinates with the Owl Builder Punch for easy assembly. This stamp set is exclusively available to customers who either host their own party or place a single order of £150 or more and has been incredibly popular. This set will only be available until the 3rd January and will not be available on the retired list or clearance rack; I don't have any slots left for pre-Christmas parties now, but if this set is on your wishlist you still have time to place a qualifying order and grab yours with your Stampin' Rewards. 

Woodland Trees - I used that panel for an embossed piece again - this time the Woodland Textured Impressions Embossing Folder. Difficult to see in the photograph, but I brushed the debossed areas in between the trees with my clear Wink of Stella, along with the owl's oversized hat and co-ordinating scarf - this card is so, so sparkly!

Not Just For Tags - The sentiment and background snowflake are from the versatile Tin Of Tags stamp set. This stamp set co-ordinates with the Tin of Tags kit in the seasonal catalogue, however can be used for so much more besides and are perfect in a layered stitched circle on a card. This set is available for today only at a discounted 25% - £14.25 instead of £19. Why not buy one with a Tin of Tags kit (£20) and give someone a pre-Christmas gift that will not only provide some creative respite in the run up to the big day, but result in a set of beautiful handcrafted tags to add the finishing touch to their gift packaging:


I know I would appreciate a gift like this at this time of year!

Here is the visual summary of the key products used on today's project for you to pin for easy reference:


You can see all of my 'How To' summaries on my 'How To - Tips and Techniques' Pinterest board in case you've missed any. 

I'm also linking my card up with one of the other teams that the lovely Sandy designs for - Stamps, Ink, Paper - where the challenge is embossing, dry or heat. 

sip-any-challenge-76-800

I'll be back tomorrow with news of another great set of pre-Christmas offers from Stampin' Up! which you won't want to miss; until then, happy stampin'!


Stampin' Up! Supplies Used:

Table built using Product Table Builder by The Crafty Owl - Independent Stampin' Up! Demonstrator.

Wrapped in Warmth Cable Knit Christmas Card

by Joanne James27. November 2016 05:00

It's Sunday and time for a new challenge over at The Paper Players! It's the turn of the talented Sandy to host this week and she has a fun sketch challenge for you to work with:


 You all know me well enough by now to know how much I love a good sketch and this one is no exception - so many possibilities! I could have stamped the offset panel or featured a designer series paper; unusually for me though, I decided to showcase an embossing folder. Take a look:


Doesn't that look all warm and cosy and remind you of nights in by the fire?!  Here's the low-down on today's card:

Create An Impression With Cable Knit -  For my central panel I embossed a rectangle of Cherry Cobbler cardstock with the Cable Knit Dynamic Textured Impressions Embossing Folder. This is one of Stampin' Up!'s new Dynamic folders, made to create deep, dimensional embossed impressions and it really does - you can almost feel the knitted stitches in that would-be sweater, the grooves are so deep.

Stitched Wrapped in Warmth - I inked my sentiment, from the Wrapped in Warmth stamp set, using Cherry Cobbler, Delightful Dijon and Basic Black Stampin' Write Markers and added a stitched border using the new Stitched Shape Framelit Dies, before adding a little enamel heart embellishment too. I just love the stitched edging, so effective. 

Warmth and Cheer Colour Combo - The colour combination for my card came right out of the plaid background paper from the Warmth and Cheer paper stack, with its warm red, mustard yellow and basic black. Feel free to save it if it's a favourite of yours too:


A little ribbon and burlap to finish completes my festive, warm and cosy Christmas card.

Here is the visual summary of the key products used on today's project for you to pin for easy reference:


You can see all of my 'How To' summaries on my 'How To - Tips and Techniques' Pinterest board in case you've missed any. 

Before you reach for your ink and papers, check out what our amazing team has created to inspire you this week:

The Paper Players Design Team
 
 
Here's a quick recap of our challenge rules:
 
1.  Create a new paper project
2.  Upload your creation to your blog with a link back to us and provide a direct link to the post featuring your challenge submission.
3.  Please link your card to no more than four challenges, TOTAL.
4.  Have FUN! 


I look forward to seeing what you create with Sandy's sketch this week. We are off for our usual Sunday morning of sport, followed by an afternoon of Christmas crafting preparations.

Enjoy the rest of your weekend as it will be over all too quickly; I'll be back soon with another project; until then, happy stampin'!


Stampin' Up! Supplies Used:

Table built using Product Table Builder by The Crafty Owl - Independent Stampin' Up! Demonstrator.

Delicate Ornament Embossed Impression Christmas Card

by Joanne James24. November 2016 08:05

Today it's time for a new challenge over at Create With Connie and Mary and this week we have a colour combination for you:


So I toyed with going with a thank you card today, as it is Thanksgiving in the USA - happy Thanksgiving to my fellow team members and any other US followers today! In the end I decided to go with something a little different from me; I watched this video here by Jennifer McGuire recently and have been keen to try the embossed impressions technique; these colours were perfect for what I had in mind. Here's my card:


Here's the low-down on today's card:

Rich Red Watercolour - I created a watercolour background for my central panel using Delightful Dijon and Cherry Cobbler inks and my aquapainter. I also spritzed my card with a mix of alcohol and clear Wink of Stella to give an all-over subtle shimmer and allowed it to dry thoroughly before moving on the next step.

Embossed Impression - To create my ornament feature, I used the round bauble from my Delicate Ornament Thinlits, inked it with Versamark then placed the thinlit onto the watercolour paper and rolled it carefully through my Big Shot. The Big Shot sandwich here is key: multi purpose platform open to Tab 2, acrylic plate, silicon mat, watercolour paper, thinlit die then lastly the final acrylic plate. This allows the die to create an inked impression on the watercolour paper, without it cutting. I then heat embossed this with gold embossing powder to give a fine line of gold detailing. I then used my gold Wink of Stella pen to highlight each of the detailed sections on the bauble for added sparkle - the close up below does show some of the detail, but I can assure you in real life it's gorgeous (even if I say so myself!):


Touches of Gold - I finished my card with a gold foil mat and a gold foil bauble hook, hung by a piece of gold thread with bow detail along with a gold foil 'merry' sentiment cut with my Christmas Greetings Thinlits and mounted on a few additional layers to add some depth. As for the kraft - I used it for my cardbase; the neutral tone really allowed my watercoloured shimmery panel to take centre stage.

Here is the visual summary of the key products used on today's project for you to pin for easy reference:


I did manage to get myself very inky making this card, however I'm quite pleased with the results and am looking forward to trying this technique with other thinlits dies.

You can see all of my 'How To' summaries on my 'How To - Tips and Techniques' Pinterest board in case you've missed any. 

Do visit the other Design Team members to see what they did with this week's colours; there's lots of inspiration over on their blogs too! This will be my last week as a designer on the Connie and Mary Thursday team; family demands have led me to have to scale back my commitments and as such I am stepping down. I have enjoyed my time with the team; this has always been one of my favourite challenges and will still play along when I can.

That's all from me; I'll be back tomorrow with another project. Until then, happy stampin'!


Stampin' Up! Supplies Used:

Table built using Product Table Builder by The Crafty Owl - Independent Stampin' Up! Demonstrator.

Clean and Simple Christmas Joy

by Joanne James20. November 2016 09:00

It's Sunday and time for a new challenge over at The Paper Players! It's the turn of my sweet friend Claire to host this week and she has a fun clean and simple challenge for you to work with:


I was inspired by a few other challenges too for my cards today - yes, not one, not two but three cards to share with you! The challenge over at Fusion has a great inspiration photo (you can see it below as the card that I am entering for this challenge is further down the post) that led me to use the 'Joyful Nativity' Christmas set from the annual catalogue and with the Addicted to CAS challenge codeword is ombre and CAS Colours and Sketches calling for monochromatic blues, I dug out my Marina Mist, Dapper Denim and Night of Navy ink pads and set to work.

The genre of 'clean and simple' tends to be rather subjective and whilst my general style is definitely 'clean' it tends toward 'clean and layered' rather than 'clean and simple'. So today I decided to take the same basic idea and create both a clean and simple and a clean and layered card to illustrate the difference! So here's my first card, a simple one layer affair stamped on extra thick Whisper White cardstock:


I stamped the angel in the centre of my 'o', brushed the stamped areas with my clear Wink of Stella brush and added a metallic shape to the star to finish my card. Super clean and simple! I also made a second version of this card, this time adding in the secondary sentiment, stamped in Night of Navy:


For my final card, I created a clean yet layered card, using this week's sketch over at the Global Design Project:


I used a cardbase of Marina Mist and switched out the angel for the Bethlehem skyline, added a piece of in-colour envelope paper for my background layer and heat embossed my sentiment in silver onto a strip of Night of Navy cardstock:


All three of the cards have a beautiful shimmer as a result of the careful brushing with my Clear Wink of Stella which adds a gorgeous subtle sparkle in real life. So which one do you prefer? Do leave me a comment below - I'd love to hear your thoughts!

Here is the visual summary of the key products used on today's project for you to pin for easy reference:


You can see all of my 'How To' summaries on my 'How To - Tips and Techniques' Pinterest board in case you've missed any. 

Before you reach for your ink and papers, check out what our amazing team has created to inspire you this week:

The Paper Players Design Team
 
 
Here's a quick recap of our challenge rules:
 
1.  Create a new paper project
2.  Upload your creation to your blog with a link back to us and provide a direct link to the post featuring your challenge submission.
3.  Please link your card to no more than four challenges, TOTAL.
4.  Have FUN! 


I look forward to seeing your clean and simple cards this week. We are off for our usual Sunday morning of sport assuming the hockey pitch hasn't frozen with the sub-zero temperatures we've been having for the last couple of days, followed by lunch, some baking for a school bake sale this week and then a birthday party to attend for the youngest of the James Juniors, so another full-on Sunday!

Enjoy the rest of your weekend as it will be over all too quickly; I'll be back tomorrow with another project and news of an exciting new promotion for next week only; until then, happy stampin'!


Stampin' Up! Supplies Used:

Table built using Product Table Builder by The Crafty Owl - Independent Stampin' Up! Demonstrator.

Petals and Paisleys Thank You

by Joanne James19. November 2016 20:00

Good evening everyone! I have been making some last minute samples for my Petals and Paisleys class next week and I decided to make a quick card to share with you using this week's Mojo Monday sketch:


This card is also perfect for the current colour challenge over at Fab Friday, since their trio of colours all feature in the Petals and Paisleys Specialty Designer Series Paper and the thankful challenge over at CAS-ual Fridays. Here's my card:


Here's the low-down on today's card:

Petals and Paisleys -  I covered the lower portion of my card with a piece of patterned paper from the Petals and Paisleys DSP which features all three of the challenge colours. I used the two least dominant colours, the Rich Razzleberry and Mint Macaron, for my topper and ribbon detail for added emphasis.

Paisley Framelits - The leaf that features in the paper pattern also has a corresponding framelit, so I cut one out in Mint Macaron as the perfect co-ordinating embellishment. I backed it with a fold of purple ribbon and anchored it using a Razzleberry enamel shape. Perfect!

Stitched Thinlit Dies - My sentiment from the 'Tin of Cards' stamp set is one of my 'go to' stamps for squares, as the font and size fits perfectly. What makes this one stand out is the layering with the stitched border,cut with the new Stitched Shape Thinlits. I've been using these a lot this week and love how they add interest to an otherwise plain shape.

Here is the visual summary of the key products used on today's project for you to pin for easy reference:


You can see all of my 'How To' summaries on my 'How To - Tips and Techniques' Pinterest board in case you've missed any. 

Do visit the other Design Team members to see what they did with this week's colours; there's lots of inspiration over on their blogs too!

Enjoy your day and I'll be back tomorrow with this week's new challenge over at The Paper Players. Until then, happy stampin'!


Stampin' Up! Supplies Used:

Table built using Product Table Builder by The Crafty Owl - Independent Stampin' Up! Demonstrator.

Noel, Noel - Hang Your Christmas Stocking!

by Joanne James17. November 2016 08:05

Today it's time for a new challenge over at Create With Connie and Mary and this week we have a sketch for you:


I decided this sketch was perfect to hang my stocking - literally! Take a look:


Here's the low-down on today's card:

Hang Your Stocking - My diecut stocking is cut using the Christmas Stocking Thinlits Dies. This set has lots of fun pieces to create stockings in three different sizes and add decorative trims - so many creative possibilities! It also comes with this great Noel diecut - perfect for edging a mantlepiece or adding a border trim to patterned paper, as I've done on my card today.

A Trio of Stamp Sets For Less - The diecut stocking is the clear winner on today's card, but this creation is by no means stamp-free; in fact, I used three stamps from three different stamp sets on my holiday card, all of them available this month at 25% off - what a bargain! You can read about the offer in full here along with the details of our new stitched framelit dies (these have been incredibly popular and will only now be orderable until 21st November before orders are put on hold whilst stocks are replenished - so you need to order them in the next few days to be assured of a timely delivery); in the meantime, did you spot them all? They are the stocking heel, toe and cuff detail and mini snowflakes from Hang Your Stocking, the large snowflake from Tin of Tags and the snowflake splatter from Christmas Pines. My stamping is subtle, yet each stamp contributes to the finished card.

Sparkle and Shine - I used Heat and Shine and Dazzling Diamonds along with the snowflake splatter stamp in the Christmas Pines set to add sparkle to the white section of my card. Difficult to photograph, but in real life so pretty! My Noel is also cut from a piece of red foil cardstock that I found in my scrapbox for a little extra shine and I added a sprinkle of rhinestones to finish. I love this festive colour combination, inspired by the Presents and Pinecones Designer Series Paper set - feel free to save it if it's one you like too:

Here is the visual summary of the key products used on today's project for you to pin for easy reference:


You can see all of my 'How To' summaries on my 'How To - Tips and Techniques' Pinterest board in case you've missed any. 

Do visit the other Design Team members to see what they did with this week's sketch; there's lots of inspiration over on their blogs too!

Enjoy your day and I'll be back soon with another project; until then, happy stampin'!


Stampin' Up! Supplies Used:

Table built using Product Table Builder by The Crafty Owl - Independent Stampin' Up! Demonstrator.

Pretty Pines Christmas Home Decor Frame

by Joanne James13. November 2016 09:00

It's Sunday and time for a new challenge over at The Paper Players! It's my turn to host this week and I have a colour challenge for you to work with:


I have another Pretty Pines project for you today, but a 3D project for a change as opposed to a card. I made this home decor frame to showcase these fabulous dies - and adorn my home during the festive season of course! Take a look:


Here's the low-down on today's project:

Pretty Pines - I love these dies and they are perfect to create festive embellishments for cards, gift packaging or a home decor project such as this one. I focused on the pine needles, berries and mistletoe pieces to make my wreath - not a pinecone in sight - as I wanted to stick to my red, green and white colour scheme. Using the Big Shot Precision Base Plate and the die brush also made light work of removing the pieces from the framelits. I added a bow in Real Red stitched edge ribbon as a finishing touch:

A Joyful Christmas and a Wonderful Year - I chose the Joyful Christmas sentiment from the 'Wonderful Year' stamp set as the focal point for my frame. This is the perfect sentiment for this frame, which I am intending to display in my hallway to welcome guests over the festive season.

Ombre, Ombre - I stamped my focal sentiment in Emerald Envy using the ombre stamping pad for added interest. I love the gradation of colour you get with these stamp pads and they really are so easy to use.

Here is the visual summary of the key products used on today's project for you to pin for easy reference:


You can see all of my 'How To' summaries on my 'How To - Tips and Techniques' Pinterest board in case you've missed any. 

Before you reach for your ink and papers, check out what our amazing team has created to inspire you this week:

The Paper Players Design Team
 
 
Here's a quick recap of our challenge rules:
 
1.  Create a new paper project
2.  Upload your creation to your blog with a link back to us and provide a direct link to the post featuring your challenge submission.
3.  Please link your card to no more than four challenges, TOTAL.
4.  Have FUN! 

I look forward to seeing what you create with my colour choices this week. We are doing something a little different in terms of sporting pursuits today: Ben is off for his usual session of basketball, however Rebecca is going to be at the swimming pool bright and early as she is participating in a sponsored swim in aid of For Zachary, a charity set up in memory of a little boy who lived for only 69 days before dying from a rare neonatal lung disease. The swimmers are aiming to cover a distance of 69km in total, one kilometre for each day of young Zachary's life - and Rebecca is aiming to swim just over 3km herself. That will be no mean feat! She is still collecting sponsorship, so if you're reading this and you would like to sponsor her, here is the event's JustGiving page - many thanks and I''l let you know how she gets on.

Enjoy the rest of your weekend as it will be over all too quickly; I'll be back tomorrow with another project; until then, happy stampin'!


Stampin' Up! Supplies Used:

Table built using Product Table Builder by The Crafty Owl - Independent Stampin' Up! Demonstrator.

Mini Catalogue

BROWSE THE CATALOGUE

The mini catalogue is now live! Read and download your copy here.

Shop Online

Access my online shop 24 x 7, 365 days of the year:

Current April hostess code:

VDKNV7BH

Shop Online

Join My Team

It's always a great time to join Stampin’ Up! New team members can get £130 worth of products for only £99 + free business supplies + free shipping + all the fun being a part of Stampin’ Up! Stampin' Up! has something for everyone: join my growing team and benefit from my support to enjoy Stampin' Up! however you choose.

If you're interested, call me for a chat to understand how I can help you realise your goals. Alternatively, if you have already decided to sign up and you just can't wait, please click here for the link to the online form where you can sign up and order your starter kit right away! 

Latest Kit!

Stampin Cut and Emboss

The Rock Legend Kit has all you need to make 8 cards with coordinating envelopes. Along with the new Panda Friends Kit, both are available from January 4th for just £14 each - get yours here!

2023-24 Annual Catalogue

BROWSE THE CATALOGUE

Click on the catalogue for a full list of current SU! supplies - if you would like to order any of the items featured, please drop me a line at [email protected] or give me a call on 07773 421446 - I'd be happy to help.

New Online Exclusives

There are new products available exclusively in the online store from 5 March - check them out here.

About Me

Hi I'm Joanne and live in Northampton and when I'm not looking after my husband and two beautiful children, am an avid crafter with a passion for all things Stampin' Up!

I must confess that I have never been a big rubber stamper - until I discovered Stampin' Up! that is. I love the fact that I can get such great results with co-ordinating stamps, inks, papers and punches - the possibilities are endless! Join me on my stamping journey as I share the things I love and be inspired to create amazing things yourself!

Follow Me

Monthly Newsletter

Box Builder

Click the button above to use Box Buster to create your custom box design using the Envelope Punch Board!

Kits Collection Now Available!

Stampin Cut and Emboss

The new Kits Collection from Stampin' Up! is now available!

Click here to see the current kits available and order yours online today.

I Design For


Stampin' Up Stuff

This is my personal blog and is not endorsed by Stampin’ Up! I hope you find it a plentiful source of ideas and personal inspiration but please don't copy my designs for contest submission or use for classes, publication or sale without express permission.