by Joanne James4. February 2015 09:01Today I'm sharing a card I made for this week's challenge over at CAS Colours and Sketches, where they have a double week and we are challenged to work with both colours and sketch:
Now no-one is more surprised than me that I took on this week's challenge; the colour palette isn't a combination that I usually use, however I found myself strangely drawn to it - along with the sketch, although I must confess those two dots in the middle did get the better of me! Take a look at what I came up with:
I decided to make a notelet using Very Vanilla cardstock, and starting with my central panel where I stamped the linked image from the 'Choose Happiness' set in each of the challenge colours, I worked out from there. Some simple layering with panels in each of the challenge colours and the sentiment form the same set, finished with a bird stamped in Baked Brown Sugar, fussy cut and popped on a dimension in the centre of the main panel. I even decorated my Crumb Cake envelope to match. There are minimal supplies required to re-create today's card; you could change out the colours for whatever you have in your stash to create something similar. Don't you just love that sentiment though? Perfect to tell someone just how much they mean to you.
I bought this stamp set a while ago thinking it would be good to explore more collage-style papercraft - whenever I use it though, my cards still look clean and simple! There may be something in there about teaching an old dog new tricks ... oh well! I hope you like today's card regardless. Back tomorrow with a fun birthday card; until then, happy stampin'!
Stampin' Up! Supplies Used:
by Joanne James15. December 2014 19:46I know I've been MIA for a few days - last week was one of the busiest in the James household, with music recitals, discos, school productions and carol concerts galore with the end of the school term, so blogging did go somewhat by the wayside. I spent the morning at the pantomime watching 'The Wizard of Oz' and this afternoon managed to squeeze in a little creative time to craft the following card for this week's sketch over at Freshly Made Sketches, although I'm too late to link up this week:
I wanted to create a card using a piece of the All Abloom DSP stack - there are some great bold floral patterns in there that suit such a large background. Here is my card:
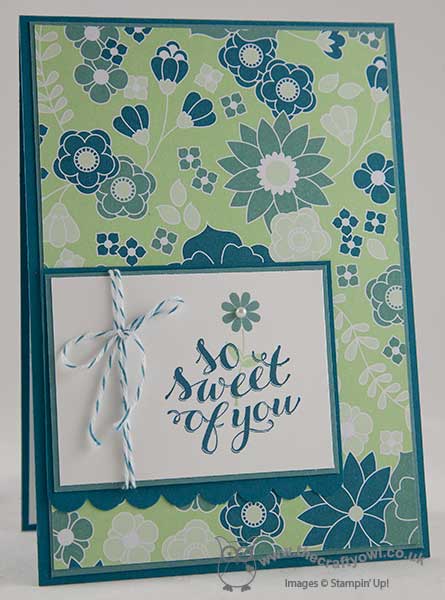
I used a sentiment from the 'Hello There' hostess set on the main panel and overlaid a single flower from the same set, along with some retired Island Indigo baker's twine and a single pearl to finish.
So a quick post from me today with a card for all you lovely readers who pop by and comment and bear with me when the odd blog post goes awry - so sweet of you! We are officially on school holidays now - I'm not sure whether that means more or less time to craft though (I know really - definitely less!!) Back soon with another project; until then, happy stampin'!
Stampin' Up! Supplies Used:
by Joanne James22. August 2014 08:00Yay - it's Friday and a two-post day! If you haven't seen my earlier post about this week's enhanced sign up offer, please scroll back or click here for more information. Valid for one week only, it's worth checking out!
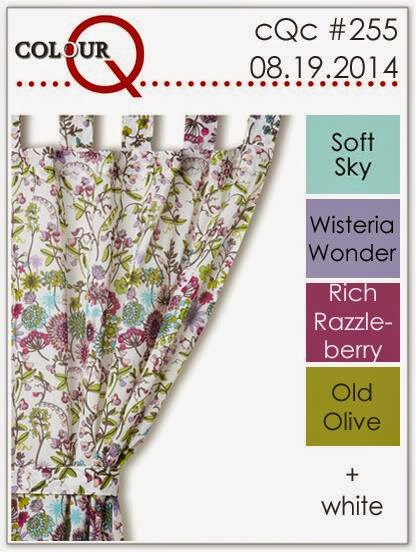
So for today's creative post, I was inspired by the beautiful colours and inspiration photo over at Colour Q this week:
So here's the thing - I love the colour purple. If you asked me my favourite colour, I wouldn't say purple (I'd say blue or yellow, in case you were wondering!) however as one of my downlines pointed out to me once, I must like purple - lots of my clothes are shades of purple and I do find myself drawn to it as a colour. All that said, it's not a colour I often use in my cardmaking either, so when I saw this challenge, I thought I should at least remedy that in part - here's my entry to this week's challenge:
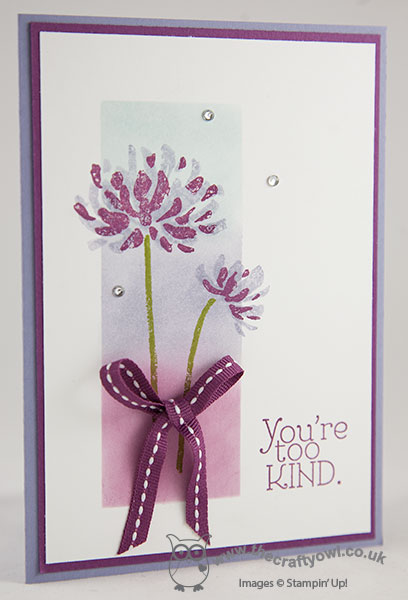
I used the Old Olive for the flower stems, then focused my card around the other three colours. I created a mask and sponged a panel blending the remaining three colours, then stamped the flower stems over the top, stamping off the Wisteria Wonder flowerhead once first to give a paler flower and then stamping the second layer in Rich Razzleberry, using my stamp-a-ma-jig to ensure perfect placement. Lastly, I added a sentiment and a bow using some retired stitched grosgrain ribbon (you could substitute the new cotton ribbon in the same colour) and a few rhinestones to finish. The result? I love it - maybe I should make purple cards more often!
That's me done for today - it's a Bank Holiday weekend here in the UK, the last one before the kiddies go back to school in just over a week's time, so we have some family activities planned (more on that next week).
Enjoy your weekend; back tomorrow with another project, until then, happy stampin'!
Stampin' Up! Supplies Used:
by Joanne James4. August 2014 21:12Considering that today is Monday, I feel like I've lived half my week already! So a quick post from me to share one of the cards made in today's Blendabilties class.
We made a variety of cards with everyone using different colour pens so we ended up with a complete mix of finished pieces. This is one of the samples I made using the Daffodil Delight Blendabilities set - I think the yellows are my favourite! Here's my card:
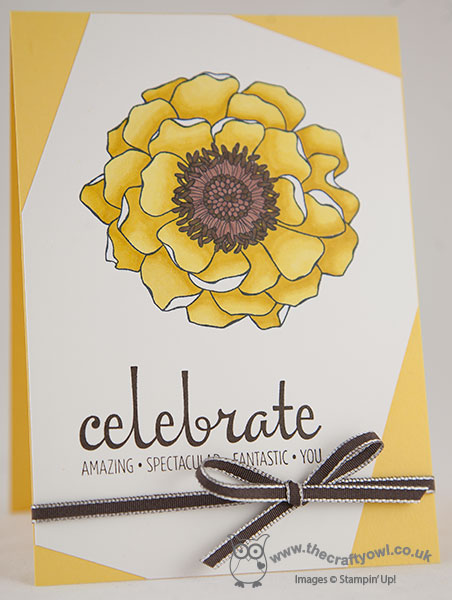
All of the cards in this month's classes featured the Blended Bloom stamp and were quite simple in design, since the focus was on colouring the images and practising different blending techniques. For this card, we simply stamped the Blended Bloom flower onto an offset panel of Whisper White, coloured using Daffodil Delight and Skin tone (for the centre) Blendabilities and added the 'celebrate' sentiment from the Fabulous Four stamp set in Early Espresso and a taffeta ribbon bow in the same colour (this colour is now retired in this ribbon type but you could easily substitute with the new 1/4" cotton ribbon in the same colour).
That's all from me today; back tomorrow with another project. Until then, happy stampin'!
Stampin' Up! Supplies Used:
by Joanne James20. July 2014 08:00Good morning blog readers! Today I'm sharing my card for The Paper Players challenge, where Sandy has chosen monochromatic CAS as the theme this week:

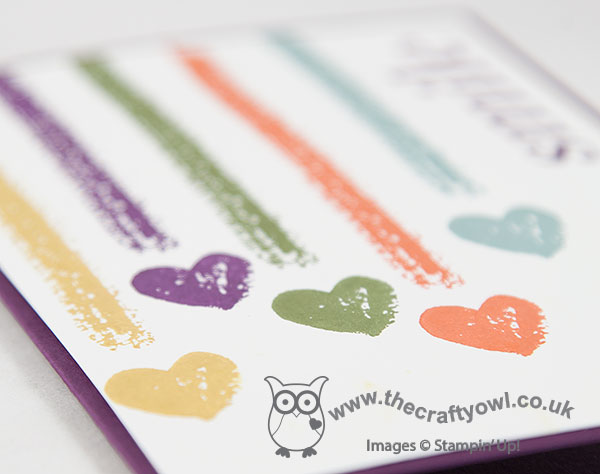
I decided on yellow as the colour for my card this week, with a touch of gold for glamour - here's my card:
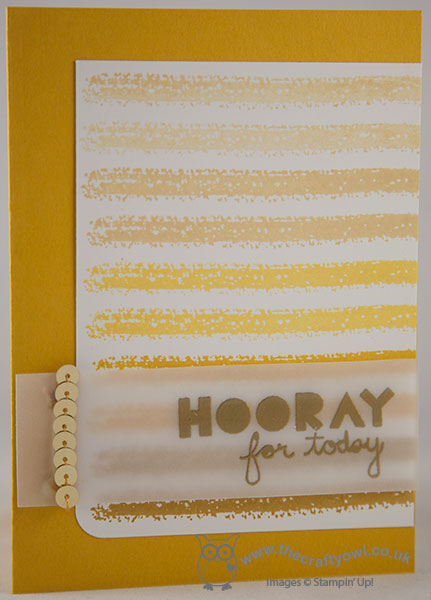
I often choose blues or greens for this type of card, simply because you need a few tonal shades of the same colour for an ombre pattern to be effective, but with the addition of Hello Honey to the Stampin' Up! colour palette, I thought I would have a go with yellows. Yellow is one of my favourite colours and I love how this card turned out. I used Crushed Curry for my card base, then simply cut a panel of Whisper White and stamped the stripe from 'Work of Art' in rows down the length of the panel, starting with So Saffron, then following with Daffodil Delight, Crushed Curry and lastly Hello Honey. I finished with a simple 'Hooray for Today' sentiment stamped in Versamark and heat embossed in gold and popped this up on dimensionals, which are hidden from view under the letters and the strip of gold sequins that finishes this panel.
So there you have it - my clean and simple monochromatic card. I hope you like my card today and that it inspires you to hop on over to the Paper Players challenge blog to check out the other wonderful cards created by the talented design team and join in and upload your challenge creations. The Paper Player challenge takes place weekly, opening on a Sunday at 8am (PST) and closes at noon on Friday (PST). Here's a quick recap of our challenge rules:
1. Create a new paper project
2. Upload your creation to your blog with a link back to us and provide a direct link to the post featuring your challenge submission.
3. Please link your card to no more than three challenges, TOTAL.
4. Have FUN!
We look forward to seeing your colourful creations! Right I'm off to team training for the day today - looking forward to a day of uninterrupted crafting with my team. Back tomorrow with another project; until then, happy stampin'!
Stampin' Up! Supplies Used:
by Joanne James18. July 2014 15:53Apologies for my blog absence yesterday - I spent most of the day icing biscuits for teacher thank you gifts as today is the last day of the academic year for my James Juniors. I promise my self I'll start earlier every year, but what always seems to happen is I squeeze in a few more commissions and then also a few extra names get surrepticiously added to the list of thank yous by the children which means even more baking and icing!
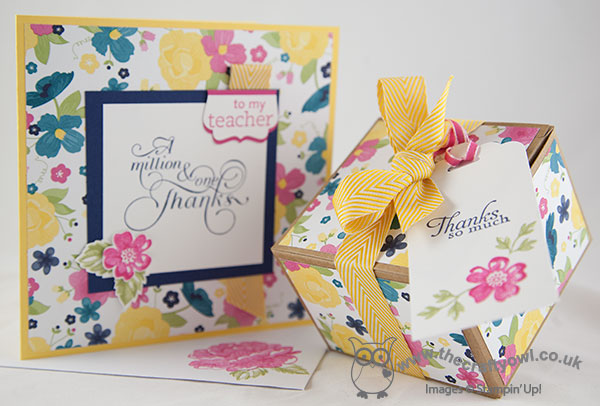
I've shared my teachers gifts on my blog previously - you can check them out here if you would like to be reminded - so today I thought I would share a matching card and gift box commission that I made for someone else to give to their teacher. So here is my card:
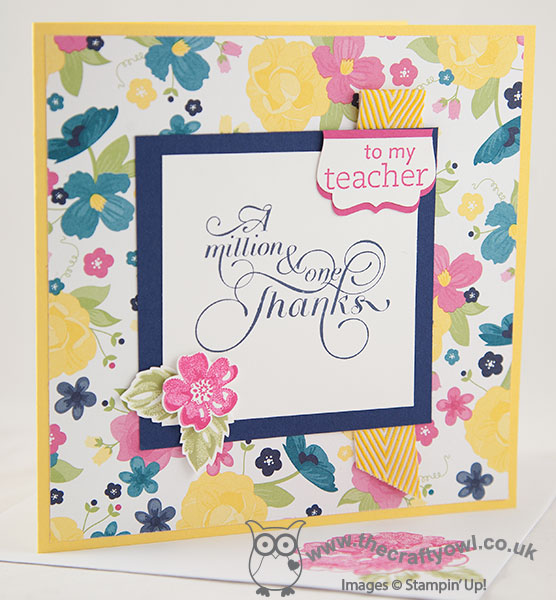
For my card I used the retired Gingham Garden DSP (this was requested - lucky I still have a pack!) however most of the other product is current and you could easily create this set in an alternative paper without the teacher tag as a thank you gift for someone special. The star of the show is definitely the 'Million and One' sentiment stamp - perfect to show your appreciation of someone special.
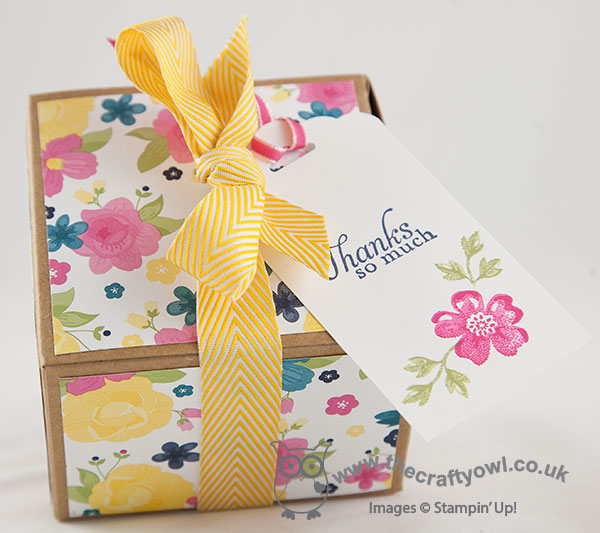
Here is the matching gift box - I love these kraft boxes, they are so useful and very sturdy, and at £2.75 for 4 represent great value. I'm doubly pleased that the Extra-Large Gift Boxes have returned and made it into the annual catalogue as a stock item - these are great for larger gifts.
Right, I've a few more jobs to do before I go and pack a picnic - we're off to see an outdoor theatre production of Peter Pan and The Lost Boys this evening. I've seen this theatre company perform the Railway Children previously, so I'm expecting great things - I'll report back tomorrow! Until then, happy stampin'!
Stampin' Up! Supplies Used:
b2c764e4-ee3d-4662-a516-9667d67d1b95|1|5.0|96d5b379-7e1d-4dac-a6ba-1e50db561b04
Tags: boxes, Gingham Garden, Million & One, Kraft Gift Boxes, Decorative Label Punch, For My Family, Scalloped Tag Topper Punch, Shop online, Stampin' Up, Stampin' Up Card, Stampin' Up Card ideas, Stampin' Up Supplies, Stamp-a-ma-jig, Stippled Blossoms
Boxes | Cards | Stamping
by Joanne James16. July 2014 08:00Good morning blog readers - it's Wednesday so today I am definitely prepared and 'on the ball'! Today I'm sharing my Design Team card for this week's challenge over at Colour Me...!, where this week's colour palette is Subtles, featuring Lost Lagoon, Smoky Slate and Island Indigo:
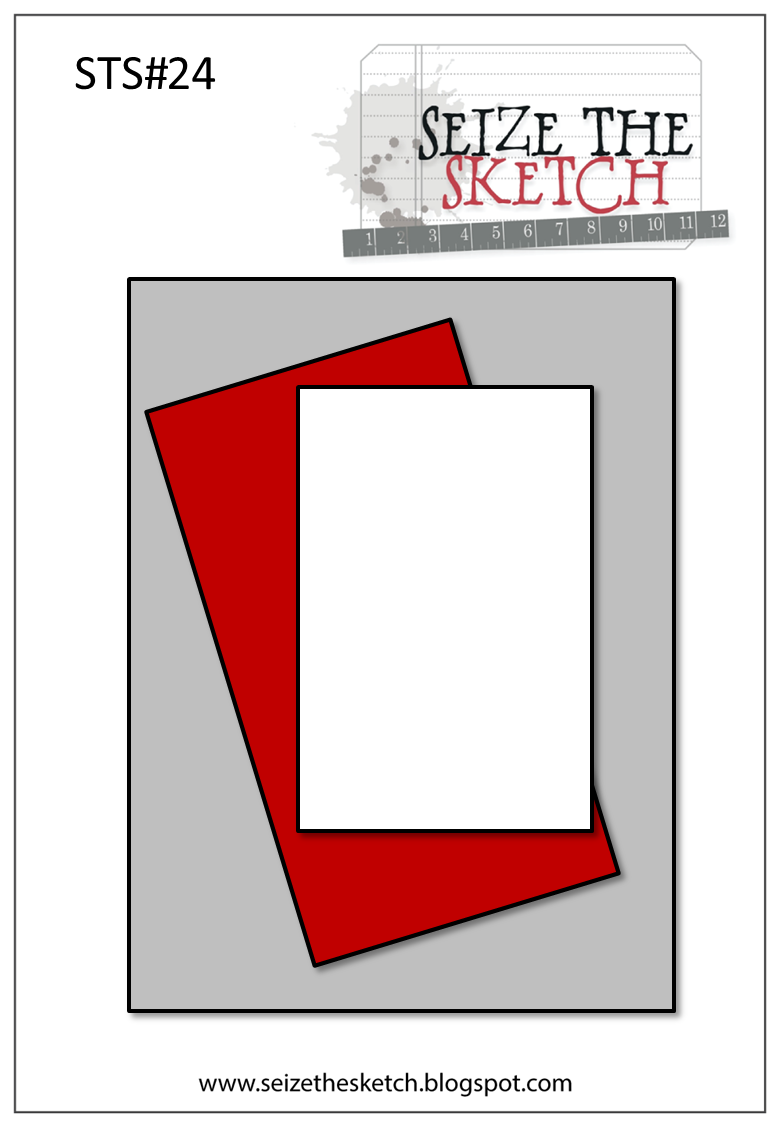
I decided these colours would make a nice baby card, as they are quite masculine and a change from traditional powder blue and got to work with my Zoo Babies stamp set and the above sketch layout from Seize the Sketch:
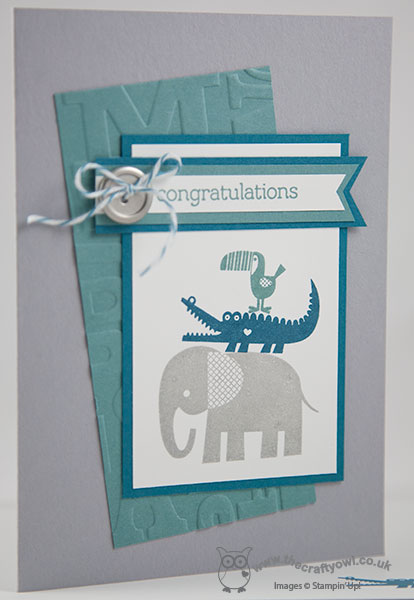
I used Smoky Slate for my card base and having stamped my animals on Whisper White in each of the challenge colours (I love how you can build little towers with them!) I mounted my animal panel on Island Indigo and for my offset layer I used a piece of Lost Lagoon cardstock which I embossed with the Alphabet Press embossing folder. Lastly, I stamped 'congratulations' from the Zoo Babies stamp set in island Indigo onto Whisper White and created a layered banner flag, finished off with a Basic Metal Buttton tied with retired Island Indigo baker's twine.
So that's what I chose to do with the colours. Why not pop over to the Colour Me...! blog for more colour inspiration and see what Hayley, Tara, Sherrie, Claire, Julia and Anja have done with these colours.
Back later with this week's Wednesday Weekly Deals; until then, happy stampin'!
Stampin' Up! Supplies Used:
by Joanne James8. July 2014 21:21I've had a fun day today with my monthly card class. Classes take a lot of thought and preparation, but I can honestly say I laugh so much with this fun bunch of ladies it so makes it all worthwhile! Today's class was all about getting to know new stamp sets, colours and tools from the new catalogue and I thought I would share one of the cards we made using the Work of Art stamp set and the new 2014-16 in-colours. Here is the card in question:
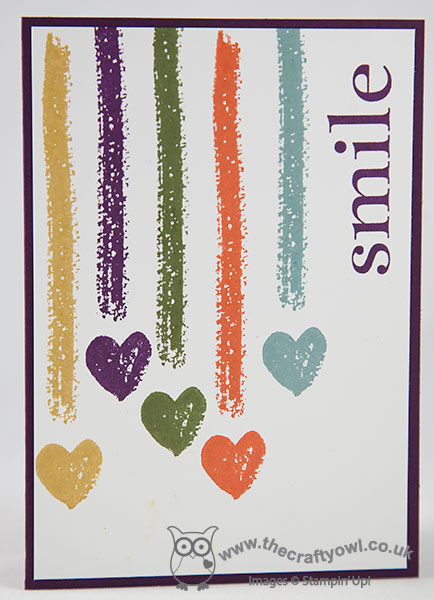
I based the design for my card on one I'd seen on Pinterest using the Gorgeous Grunge stamp set (I didn't pin it though and now can't find the link - apologies!) and coupled the stripe and heart from the Work of Art set with one of my favourite vintage 'Happy Day' stamps (I have a new catalogue 'replacement' for this on order, but I'm not ready to part with this one yet!) Quite a simple design but tricky to line up and make everything look even without loosing the natural 'swiped' look; the main reason I'm sharing it though is because of all the cards we made today, this one not only raised a smile - it had us in stitches! I wish I had taken my camera as there were some lovely variations on the basic idea and everyone using a different colour of base card.
If you live in or around Northampton and would like to join my monthly classes, do get in touch. I am currently looking at expanding my class schedule further, so would love to hear from you if this is something that interests you.
Back tomorrow with this week's Colour Me...! design team card and the Wednesday Weekly Deals; until then, happy stampin'!
Stampin' Up! Supplies Used:
by Joanne James6. July 2014 08:00 
Today is a very exciting day - my first official post as a Guest Designer with The Paper Players! I am very pleased to be joining this talented group of ladies for the next three months, along with the other amazing guest designers: Claire Broadwater, Yapha Mason, Andrea Whisman and Mike Funke - I'm really looking forward to working with you all. So today's challenge is from Nance and requires projects with a beach theme:
When I think 'beach' I immediately am drawn to the bold and bright colours of the Caribbean, where, as a keen scuba diver I've spent some of my best beach holidays. However, for today's card I decided to opt for something that shows a more traditional British beach scene and took the opportunity to use one of the new in-colours, Lost Lagoon. I also used this week's Freshly Make Sketches layout (turned through 90 degrees) for my card - take a look:
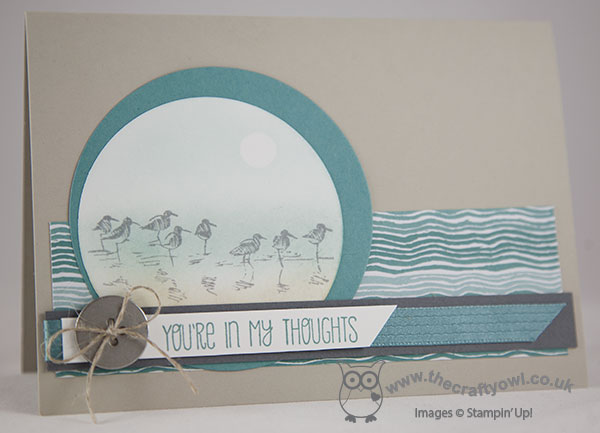
I took out the seagulls from my recently acquired 'Wetlands' set and with a Sahara Sand card base, stamped them in Basic Grey on a circle of Whisper White cut out with my Big Shot and circles framelits and sponged in the background using Soft Sky, Lost Lagoon, Sahara Sand and a little So Saffron masking the sun using a little punched circle of spare cardstock. I mounted this circle slightly offset onto a larger circle cut from Lost Lagoon and used a piece off paper from the new Moonlight Designer Series paper stack as a partial background - this paper so reminds me of waves! The pattern actually runs across the short side of the stack, so to make it extend along the whole of the long side of my card I simply matched the pattern and created a join, that is hidden behind the circular focal point - clever, eh? I then finished with a strip of Basic Grey cardstock wrapped with a piece of Lost Lagoon stitched satin ribbon, my sentiment stamped on a narrow flag and a basic metal button tied with linen thread to add to the natural feel.
I love the circular elements on this card and the muted colour scheme - it takes me back to my childhood when I lived quite near to some of the best of the British coastline and would often spend warm sunny days building sandcastles and paddling in the sea. I currently live right in the centre of 'middle England' and couldn't be further from any stretch of coastline than anywhere else in the country; I'll have to make do with watching the barges and moorhens on the local canals instead!
I hope you like my card today and that it inspires you to hop on over to the Paper Players challenge blog to join in and upload your challenge creations. The Paper Player challenge takes place weekly, opening on a Sunday at 8am (PST) and closes at noon on Friday (PST). Here's a quick recap of our challenge rules:
1. Create a new paper project
2. Upload your creation to your blog with a link back to us and provide a direct link to the post featuring your challenge submission.
3. Please link your card to no more than three challenges, TOTAL.
4. Have FUN!
We look forward to seeing your seaside-themed creations! We are having a restful family day today, having had a busy day yesterday with a theatre visit and swimming gala and the next two weeks choc full of things going on as the end of the school term draws near. Back tomorrow with another project; until then, happy stampin'!
Stampin' Up! Supplies Used:
5665b1b2-9516-4b05-819d-53b292f1af3e|0|.0|96d5b379-7e1d-4dac-a6ba-1e50db561b04
Tags: Big Shot, Circles Framelits, A Dozen Thoughts, Wetlands, Shop online, Stamp-a-ma-jig, Stampin' Up, Stampin' Up Card, Stampin' Up Card ideas, Stampin' Up Supplies, Midnight DSP Stack
Cards | Stamping
by Joanne James18. June 2014 08:45Back so soon, I know - here is today's creative post! I'm sharing a card I made using the sketch over at Create with Connie and Mary this week:
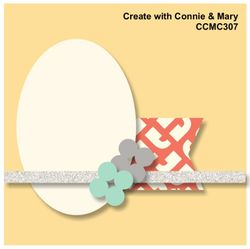
I decided to use some of my retiring stamps and papers for my card and started out making a birthday card because the cake reminded me of Rebecca's birthday cake at the weekend, but by the time I had everything laid out on my desk I decided that the card would make a nicer wedding card. Here's my finished card:
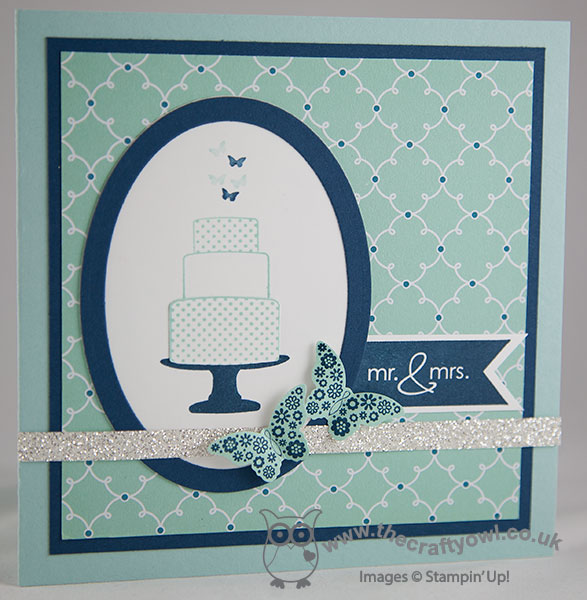
I made a 5" square card and matted a piece of Quatrefancy paper onto Midnight Muse and a Pool Party base (I know technically the dots on the paper are Island Indigo, but since the dots are so small the whole thing still works, even though I've not followed the colours exactly for the rest of the card - what a rule-breaker am I??!) I then stamped a three tier cake with butterfly decoration from the 'Make a Cake' stamp set, stamping the base section twice, once in Midnight Muse for the stand and then again in Pool Party. I fussy cut the Pool Party cake out and used it to create the base layer for my cake. I used my oval framelits to cut out my framed oval and finished with a Mr & Mrs banner flag from the 'Banner Greetings' stamp set, a couple of double-stamped and punched butterflies to echo those on top of the cake and a strip of silver glimmer paper for just the right amount of sparkle.
I really like this finished card but despite where my mind started out it looks absolutely nothing like Rebecca's kitkat cake that I made for her birthday this past weekend:

If that's not death by chocolate, then I don't know what is - it did taste delicious though!
Back tomorrow with another project; until then, happy stampin'!
Stampin' Up! Supplies Used:
93bcec03-573d-4108-ae97-7a7a62591318|0|.0|96d5b379-7e1d-4dac-a6ba-1e50db561b04
Tags: Banner Greetings, Big Shot, Ovals Framelits, Make a Cake, Papillon Potpourri, Shop online, Stampin' Up, Stamp-a-ma-jig, Stampin' Up Card, Stampin' Up Card ideas, Stampin' Up Supplies, Weddings
Cards | Stamping | Weddings