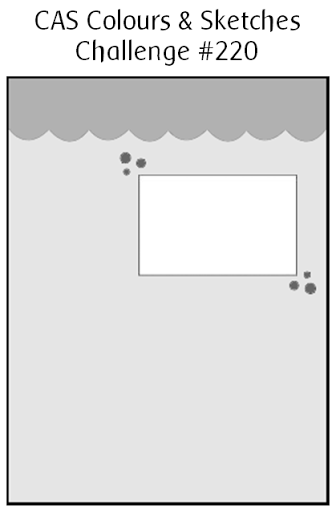
Today I'm sharing a card for this week's new challenge over at CAS Colours and Sketches where this is the last of my guest designer posts this month. This week it's a sketch challenge:

I also decided to use the inspiration photo over at Fusion as a starting point for my card today, which features another sneak peek of the forthcoming 'Bike Ride' stamp set and a few other new products besides - take a look:
Here's the low-down on today's card:
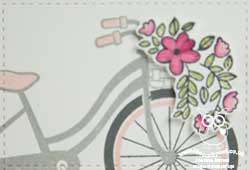
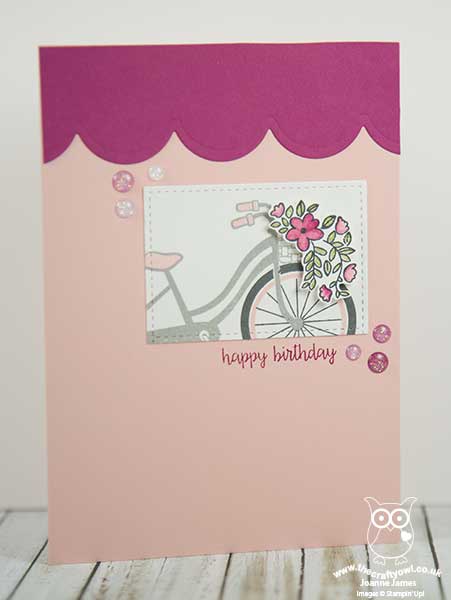
New Stamps - Not one, but two new stamps from the forthcoming new Stampin' Up! annual catalogue on my card today! The lovely Bike Ride bicycle, this time in Smoky Slate (not quite a truck, but still transport, right?) with a cascade of flowers in the front basket. I stamped and fussy cut these so that I could pop them onto a dimensional; not tricky, but I'm still looking forward to ordering my co-ordinating framelits! The sentiment is from a new set too called 'Happy Birthday Gorgeous' that has some wonderful sentiments in pretty scripts and fonts - more on this another day.
New In-Colours - Two new in-colours on my card today too: my cardbase and bicycle highlights are the new Powder Pink, a delicate soft pink that is almost a neutral, and Berry Burst - a rich, berry red with warm undertones, the colour that I used for my scalloped top border and enamel dots. Did you spot those lovely new accessories too? Glitter enamel dots, in various sizes and shades of Berry, with a wonderful glittery sparkle. I am going to need a TON of these!
New Tools - Wondering how I made that scalloped border? Yes, another something 'new' from the Seasonal Layers Thinlits is a scalloped border edge thinlit; I know this will be useful for all kinds of projects.
Isn't that a whole lot of new loveliness for a clean and simple card?!
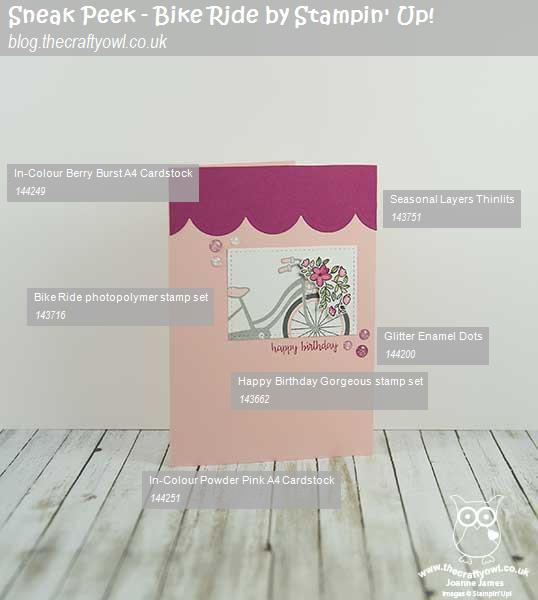
Here is the visual summary of the key products used on today's project for you to pin for easy reference:
You can see all of my 'How To' summaries on my 'How To - Tips and Techniques' Pinterest board in case you've missed any.
Be sure to check out the other DT cards over at CAS Colours and Sketches and look out for me in the gallery from next week onwards!
Enjoy the rest of your day; the James Juniors are (finally) back to school so today I am loooking to move mountains and get into the thick of my significant 'to do' list. I'll be back tomorrow with another project. Until then, happy stampin'!
Stampin' Up! Supplies Used: No product table today, as most of the items on today's card will not be available to purchase until the new catalogue launches. Item numbers are included on the visual above though, so why not add this to your Pinterest board and contact me when the catalogue is live to place your order?