by Joanne James1. May 2017 11:00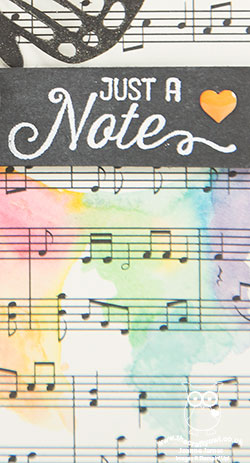
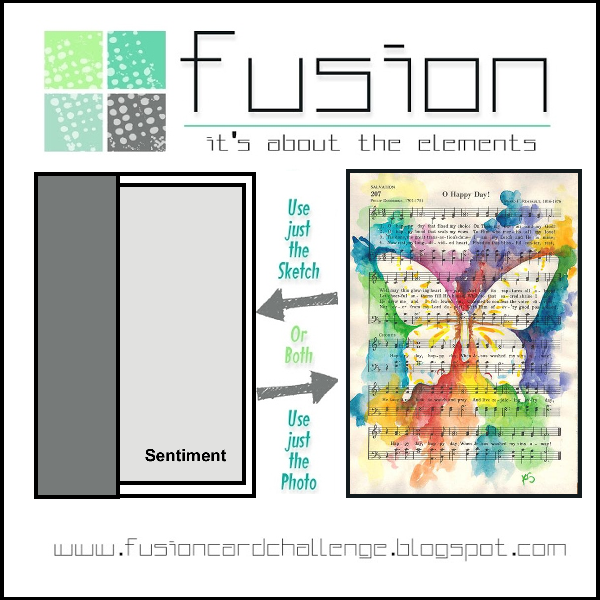
Happy Monday everyone, and for those of you in the UK a Bank Holiday too! Lots happening today - first things first, I'm sharing a card for the current Fusion challenge (photo inspiration) using this week's sketch over at Freshly Made Sketches:

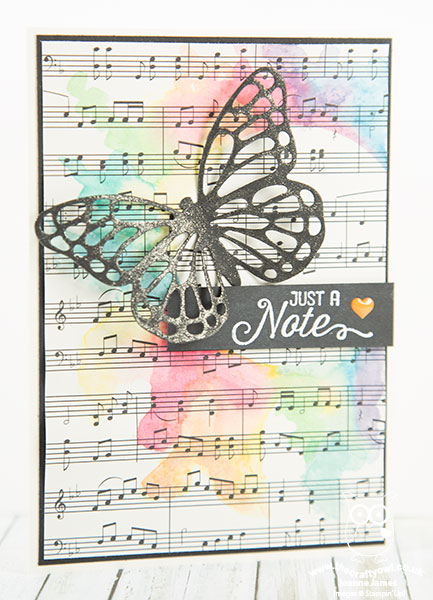
I loved the look of the rainbow watercolouring of the inspiration photo so thought I'd have a go at this fun technique - take a look at my finished card:
Here's the low-down on today's card:
Watercolour Rainbow - I masked off the circle shape in the sketch using a round post it on a piece of retired music note paper that I had in my stash and then using my aquapainter, allowed the colours to flow and bleed into one another and away from the masked area. It really wasn't tricky; the most important thing is to not over-blend the colours so that they remain true and don't end up all brown and muddy. The paper did warp a little, but I used Fast Fuse liberally to adhere it to my mat when dry and this seemed to do the trick.
A Sparkly Butterfly - I used my Butterfly Thinlits to cut out a simple butterfly in Basic Black cardstock and brushed it liberally with clear Wink of Stella. You can see a little of the shine in the photogragh, but believe me in real life this is super sparkly and looks great against the rainbow coloured background.
Just A Note - My sentiment is from the Flourishing Phrases stamp set - it seemed appropriate with the musical background paper! I added a Pumpkin Pie enamel shape heart for an added pop of colour against the black.
So a fun card that wasn't overly difficult to create and looks so very pretty in real life.
Here is the visual summary of the key products used on today's project for you to pin for easy reference:
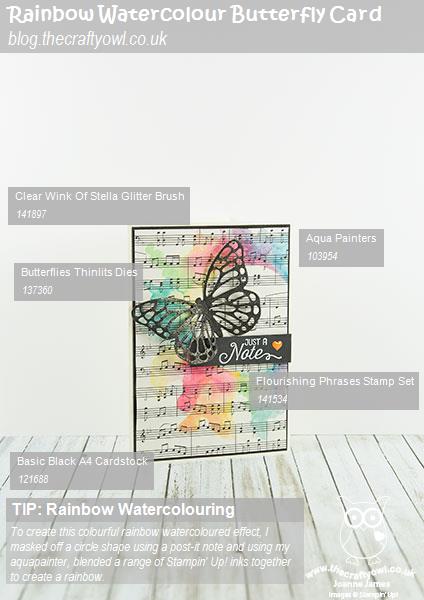
You can see all of my 'How To' summaries on my 'How To - Tips and Techniques' Pinterest board in case you've missed any.
This is one of two posts today - you can read my second post regarding the early release of some great new Annual Catalogue product - the Eastern Palace Suite - here.
Enjoy your day and I'll be back tomorrow with another project. Until then, happy stampin'!
Stampin' Up! Supplies Used:
by Joanne James26. July 2015 11:00It's Sunday and you know what that means: time for a new challenge over at The Paper Players! This week it is the tun of the super-talented Sandy to host and she has my favourite kind of a challenge for you - yes, it's a sketch:
This is a great sketch and gave me the opportunity to use some of my very favourite items from the annual catalogue: another Expressions Natural Element sentiment, some Pretty Petals DSP and a butterfly cut with the Bold Butterfly Framelits - take a look at my card today:
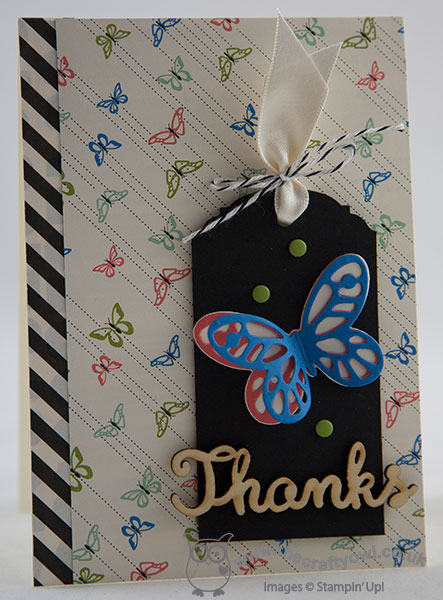
I used a cardbase of Very Vanilla for my card today, with a border strip of Typeset DSP to compliment the diagonal lines of the Pretty Petals paper that I used to cover the rest of my cardfront. I decided to use Basic Black for my tag, punched with the Ornate Tag Topper Punch, to give a strong contrast to the vanilla elsewhere and I created a layered butterfly that echoes the design of those in the paper pattern, with a solid vanilla base then two of the Bold Butterfly thinlit butterflies - one in Calypso Coral adhered directly to the base butterfly, and one in Pacific Point that I adhered in the middle only so that the layer beneath could be seen. I did reverse the positioning of the butterfly and sentiment on my tag to the sketch - I thought the sentiment was too heavy to put above the butterfly as I didn't want to overshadow it - what do you think, smart move or should I have stuck to the sketch more literally? A few Old Olive candy dots, some satin Very Vanilla ribbon and some black and white baker's twine finish my card. No stamping on this one - not on the outside, anyway! I'm also linking up with the ladies over at Just Add Ink this week where the theme is 'Butterflies'.
Before you reach for your ink and papers, check out what our amazing team has created to inspire you this week:
The Paper Players Design Team
Here's a quick recap of our challenge rules:
1. Create a new paper project
2. Upload your creation to your blog with a link back to us and provide a direct link to the post featuring your challenge submission.
3. Please link your card to no more than three challenges, TOTAL.
4. Have FUN!
The tag on this week's sketch is a real fun detail; I look forward to seeing how you interpret it and the rest of Sandy's sketch in the gallery this week. Time for me to return to my sunbed to top up my tan - enjoy the rest of your weekend, however you choose to spend it.
Back tomorrow with another project; until then, happy stampin'!
Stampin' Up! Supplies Used:
b92e8e70-3d4a-462d-abdd-c563b3044a1e|0|.0|96d5b379-7e1d-4dac-a6ba-1e50db561b04
Tags: Big Shot, Bold Butterfly Framelits, Butterfly Thinlits Dies, Expressions Natural Elements, Ornate Tag Topper Punch, Pretty Petals, Shop online, Shop Stampin' Up online, Stampin' Up, Stampin' Up Card, Stampin' Up Card ideas, Stampin' Up Supplies, The Paper Players, Typeset, Candy Dots
Cards | Stamping
by Joanne James23. June 2015 22:47I'm late today so a quick blog post from me, but none the less an important one; I finally made a card for the TGIF Challenge Throwdown that doesn't break any rules! It's similar to my first attempt (you can read all about that one here) albeit using a different thinlit and no contraband product from my pantry! Here's a reminder of the basket and pantry items:


Once again I managed to use all of the basket items for my card, along with some of the pantry items - here's my card:
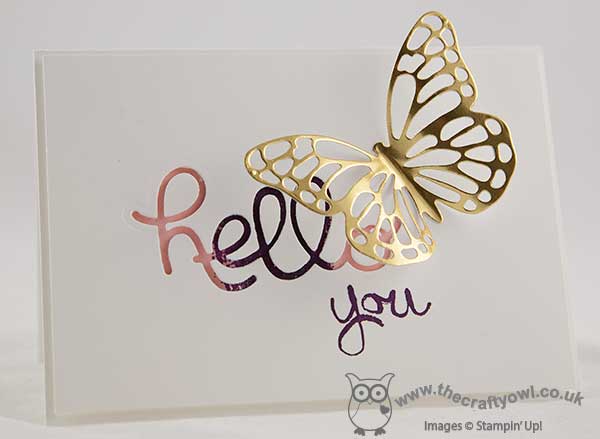
I went with a simple white card base, this time stamped with the smaller, squat Work of Art stamp three times across the middle, then die cut my 'hello' out of a top layer of Whisper White and used the negative space so that the colour swatches show through. I finished my sentiment with the 'you' from Work of Art, and added a larger than life, rather over the top gold thinlit butterfly to finish.
I love using the negative space of thinlits as much as the positive and this sentiment combination reminds me of a particular friend of mine who always says this to me by way of greeting and it never fails to make me smile. The butterfly is such a statement against the clean lines of the rest of the card, yet it looks as if it has just flown in and landed there over the greeting.
Simple, yet not without considerable thought! If you would like to see lots of other ways to use the above product combinations, do pop over to the #TGIFCTD01 page and check out the work of both the design team and the other gallery entrants - there is some great inspiration to be had.
That's me done for today; back tomorrow with another project. Until then, happy stampin'!
Stampin' Up! Supplies Used:
by Joanne James17. June 2015 09:51Mid-week is here - hurrah! Today I'm sharing a card that I set out to make for the TGIF Throwdown Challenge - an intriguing concept where you have to use at least 4 things from a basket of items to make your card whilst also being allowed to use items from the pantry - just like some of the cooking programmes you see on TV! Here is the challenge badge and the basket list:

You have a month to enter so when I sat down at the weekend I thought I would have a go - here's what I came up with using this eclectic mix of products:
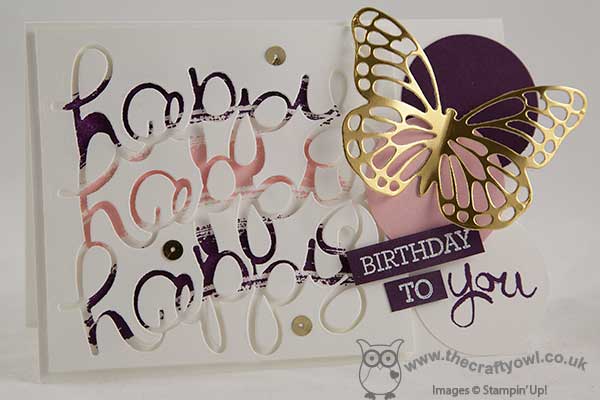
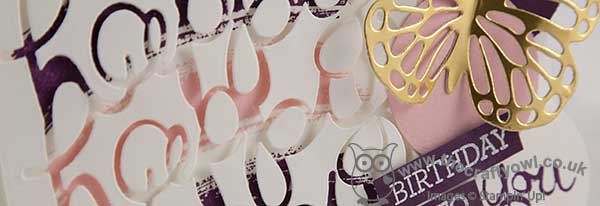
I needed a birthday card for my sister-in-law who celebrated her birthday yesterday so thought these colours would make for a lovely feminine card. You know how much I love the 'Hello You' Thinlit dies and decided to go for a rather ambitious paper-pieced affair, using the negative space of the multiple die cut 'happy' to show the wash of colour from the Work of Art stamp set. I merrily stamped, paper pieced, punched and coloured, adding my showcase gold foil butterfly and finishing my sentiment with the two words from the 'Crazy About You' stamp set and the 'you' from Work of Art, the last of which I punched out with my 1 3/4" circle punch and added a couple of solid colour circles beneath my butterfly to balance the design and finishing with a few gold sequins. My overhanging elements necessitated a bespoke envelope - not troubled by that, as Envelope Expert enabled me to make one of those from some co-ordinating DSP in a jiffy.
So I was feeling suitably pleased with my card and the fact that I'd used not only four but all of the #TGIFCTD01 basket items, when I read yesterday's TGIF blog post and realised I had overlooked one small but important thing when I read the initial challenge post - the pantry items!! Not only do you need to use the basket items, you are restricted in terms of pantry items .... and when I checked before writing this post, I realised my use of the 1 3/4" circle punch, the 'Crazy About you' stamp set to complete my sentiment, white ink and my sequins causes me to step outside the pantry and fall foul of the TGIF challenge rules - oh bother!
As someone who designs for two challenge teams, you would think I would know better!! I won't therefore be linking up with TGIF for the Throwdown Challenge - those guys and gals are strict enforcers of their challenge rules! - but wanted to share my card with you anyway, as I rather like it! I thought it worth sharing the story behind today's card though for the moral of 'if you are going to enter a challenge, make sure you read and understand ALL of the rules before you start' - if any of you reading this have found your card deleted from a challenge gallery without notification, it's probably because you didn't follow the rules :-) I say this as someone who moderates boards, so trust me - I know what I'm talking about! Maybe I'll try and squeeze in another rule-abiding attempt before next week's deadline - watch this space...
Back tomorrow with our new challenge over at Create With Connie and Mary; until then, happy stampin'!
Stampin' Up! Supplies Used:
by Joanne James14. March 2015 21:10It's the weekend but no signs of my week slowing down yet! I had a great Stampin' Up! party hosted by the lovely Lucy yesterday and today we visited a science fair and Ben played basketball on his school team at the county quarter finals this evening. So just time for a quick post with a card I made for this week's Mojo Monday challenge:
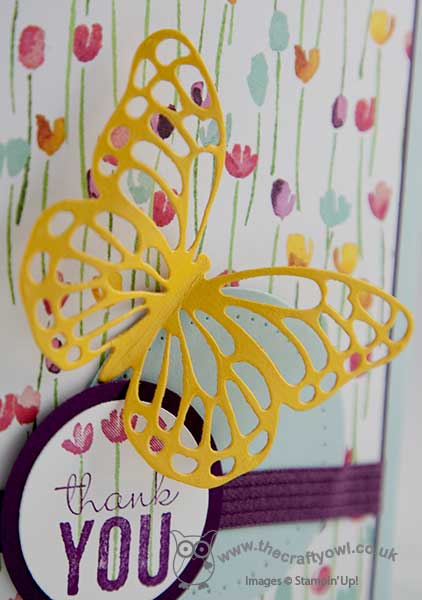
This is the first sketch designed by Wanda Cullen and I think it's great (go Wanda!) I decided it was the perfect layout for me to cut into one of my favourite pieces of paper in my Painted Blooms DSP pack - here is my card:
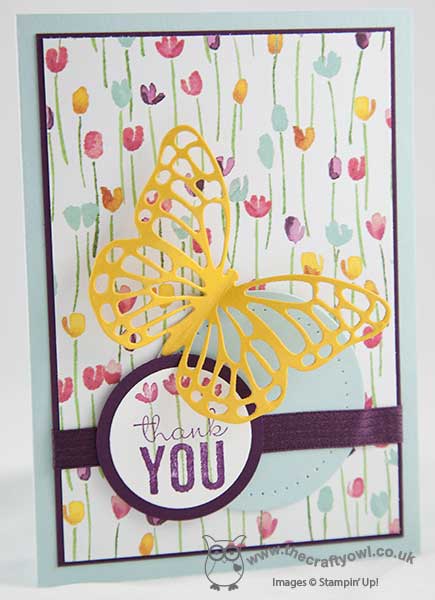
I used Soft Sky for my base and matted my paper on a piece of Blackberry Bliss to give a thin border, then layered a paper pierced circle, a piece of Blackberry Bliss satin ribbon and my layered sentiment circle, where I over-stamped the tulips with my thank you, before finally adding my Crushed Curry thinlit butterfly. I just love the detail of the sentiment and the dramatic bright yellow butterfly on this card - here's a close up:
Love it! That's all from me today; back tomorrow with this week's card for our new challenge over at The Paper Players. Until then, happy stampin'!
Stampin' Up! Supplies Used:
421f25bd-a649-4dc9-a3f6-f3f8488735e3|0|.0|96d5b379-7e1d-4dac-a6ba-1e50db561b04
Tags: Painted Blooms, Painted Petals, Big Shot, Butterfly Thinlits Dies, circle punch, Circles Framelits, Paper Piercing, Shop online, Stampin' Up, Stampin' Up Card, Stampin' Up Card ideas, Stampin' Up Supplies
Cards | Stamping
by Joanne James28. February 2015 22:26Good evening blog readers! A busy couple of days so a later blog post today. Just time to share with you another card using the Butterfly Thinlits, this time including the largest of the trio:
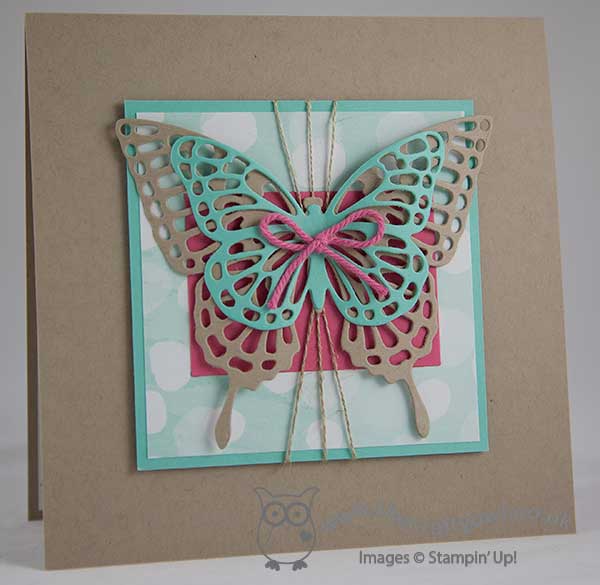
This is a larger than usual card at 6" x 6", as I wanted to allow enough cardstock to frame this rather large butterfly and set if off to true effect. The base of my card is Crumb Cake cardstock, onto which I added a raised mat panel consisting of a piece of the current Sale-A-Bration 'Best Year Ever' Designer Series Paper onto a piece of Coastal Cabana cardstock. I love this bokeh-inspired patterned paper - it saves the time of creating your own and makes for a lovely background effect. |Even better still, it can be yours free with an order of £45! I then added a piece of Strawberry Slush cardstock, and wrapped some linen thread around the panel before adhering to my card. I then added my layered butterfly - the largest butterfly cut from Crumb Cake and the smallest butterfly cut from Coastal Cabana - and finished with a bow of Strawberry Slush thick baker's twine. A no-stamping card, that really shows these delicate butterflies off to great effect.
I'm linking today's card with the sketch challenge over at Fab Friday (I turned the sketch through 90 degrees and used my linen thread in place of the flagged banner in the sketch).
Back tomorrow with my card for this week's new challenge over at The Paper Players and news of some new Sale-A-Bration goodies that you can earn during the month of March. Until then, happy stampin'!
Stampin' Up! Supplies Used:
7d0c4645-663d-45e6-9247-f22b986a2f7a|0|.0|96d5b379-7e1d-4dac-a6ba-1e50db561b04
Tags: Best year Ever, Butterfly Thinlits Dies, Big Shot, Sale-A-Bration 2015, Promotions, Shop online, Stampin' Up, Stampin' Up Card, Stampin' Up Card ideas, Stampin' Up Supplies, Bokeh
Cards | Punch Art
by Joanne James26. February 2015 20:35Thank you for all the lovely comments I've received on my 'Guy Greetings' cards these past couple of days - I'm so glad you are enjoying them. I have more of these to share, some of which I made with my lovely stamp-a-stack ladies at our class earlier today, but instead I'm having a break to share one of the cards I designed for my recent technique class featuring the Butterfly Basics stamp set and co-ordinating framelits:
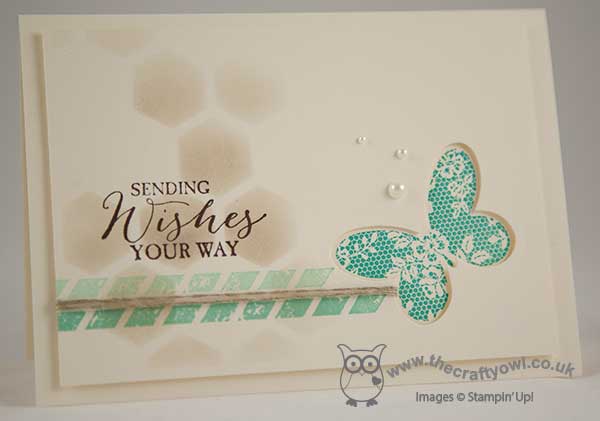
I stamped the lacy butterfly onto my Very Vanilla base in Bermuda Bay ink, then used the co-ordinating framelit to cut the shape out of the top mat layer. I then added some Crumb Cake, sponged through a stencil made with my Hexagon Hive thinlit, the border stamp, a simple sentiment and some linen thread and a scattering of pearls as a final simple embellishment. I love the versatility of thinlits and how they can be used in so many ways; using the negative space gives a different look to simply using the thinlit to cut out the butterfly and attach on top.
I'm linking today's card up with this week's challenge over at Less Is More where the theme is 'wings', which suits my butterfly perfectly.
Back tomorrow with another project; until then, happy stampin'!
Stampin' Up! Supplies Used:
by Joanne James14. February 2015 09:00I hope you all received lots of Valentine's cards today - I certainly sent plenty! Today I'm sharing a card that I made using the Butterfly Basics stamp set to share with the ladies that attended my technique class earlier this week. In addition to the cards that I design for us to make in the class, I produce a selection of alternative samples to provide further ideas and ways in which they can use the stamp set and practise the techniques that we have covered. There are times when one of these cards produces so many 'oohs' and 'aahs' that it makes me wonder if I should have included the card as the class card - this is one of those cards!! The ladies made me promise I would blog it share with all of you, so here it is:
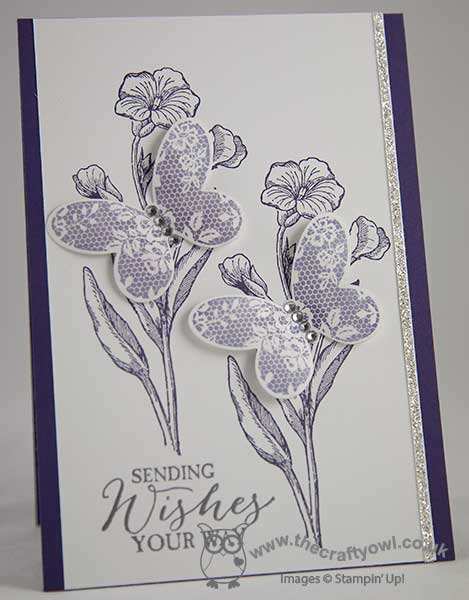
A monochromatic purple card on a base of Elegant Eggplant, featuring the lovely outlined bloom in the stamp set along with the lacy butterfly. There are lots of touches of sparkle on this card which in real life really add a touch of luxury: the thin strip of silver glimmer paper, the silver heat-embossed sentiment, the sparkling rhinetones and the vanilla smooch spritz sprayed onto the Wisteria Wonder butterflies that adds a subtle pearlescent finish.
I hope you like today's card; back tomorrow with this week's card for our new challenge over at The Paper Players - and it's my first one!
Until then, happy stampin'!
Stampin' Up! Supplies Used:
by Joanne James9. February 2015 09:00Today is a busy day for me: I have my monthly technique class this morning and this afternoon I'm heading to Ikea to stock up on picture frames for a party at the weekend. This month's technique class features the 'Butterfly Basics' stamp set and co-ordinating Butterfly Thinlit Dies, so I have been using them to make lots of samples recently. Today's card is one of the ones I made to show the ladies that are attending my class and works wonderfully with the palette over at Colour Q this week:
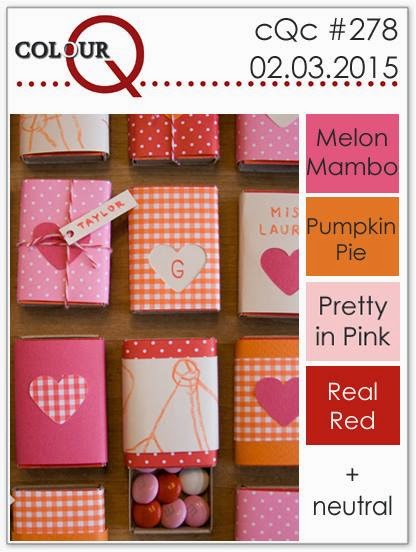
The butterflies can be used in a number of ways to incorporate colour into them - having seen some interesting samples using vellum and also colouring with Blendabilites, I decided to have a go at paper-piecing a solid butterfly image. Here is my card:
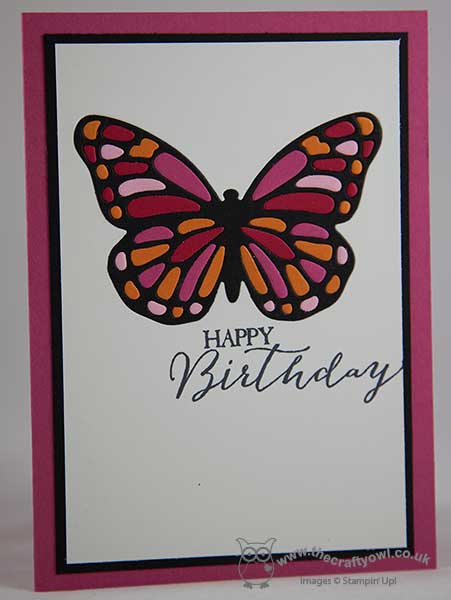
Whilst this card looks deceptively simple, with its inlaid black butterfly outline and coloured wings, I can assure you it isn't altogether quick to put together! Keeping track of all the tiny pieces from the insides of the four coloured butterflies I cut was something of a challenge, but was well worth it - I love the effect of the solid, brightly coloured paper-pieced butterfly. Here's a close up of the detail:
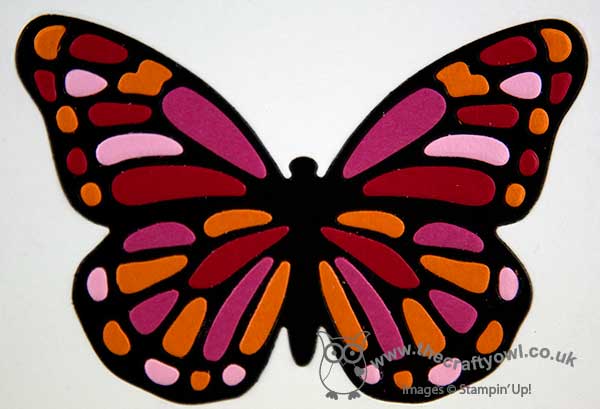
In addition, I also have the four coloured butterflies to use for other projects - bonus!
That's all from me today. check out my Facebook page if you would like to see the fun that the ladies are getting up to in my class and what this week's cakes look like! Better still, get in touch with me and join me for next month's technique class on 9th March, when we will be using Blendabilities and the lovely Easter stamp set, 'Indescribable Gift'. You can find more details on my class schedule here. Back tomorrow with another project; until then happy stampin'!
Stampin' Up! Supplies Used:
* Pretty In Pink cardstock - retired
by Joanne James7. February 2015 14:00Today I'm sharing a card that I designed for my class next week using the Butterfly Basics stamp set and the co-ordinating Butterfly Thinlit Dies and this week's Freshly Made Sketch as my inspiration:
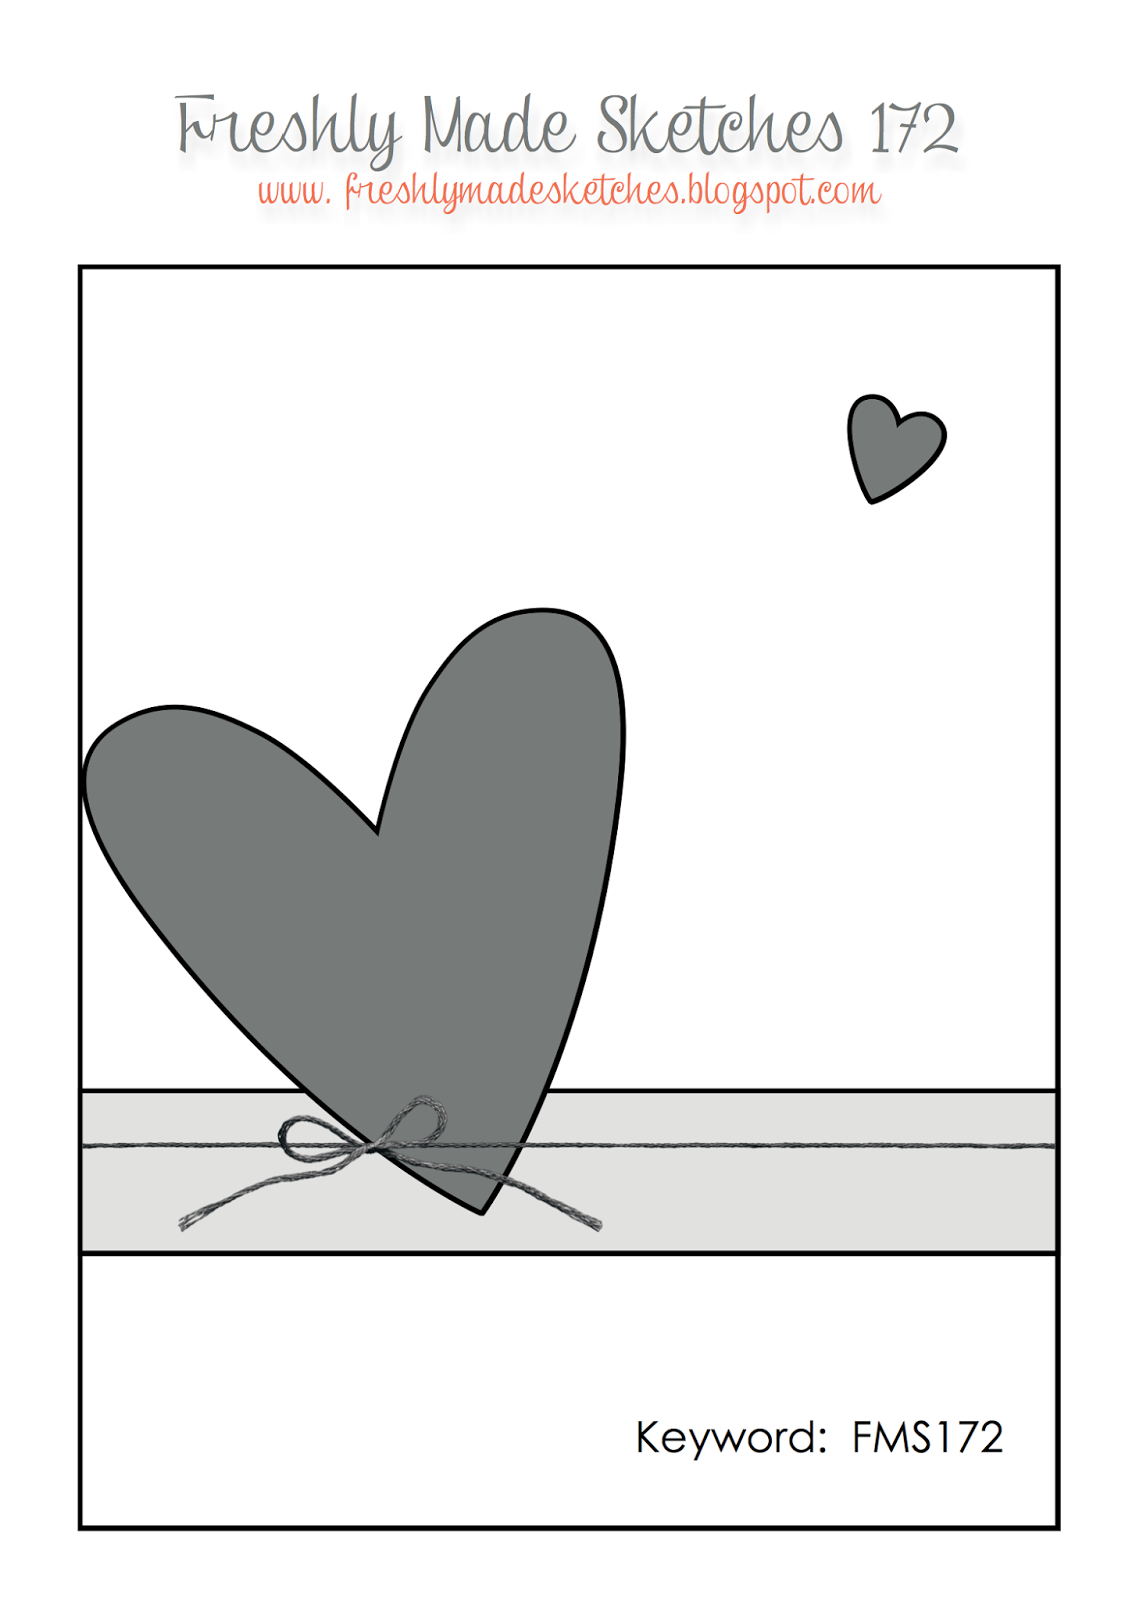
I created my card in the vertical mirror image as I wanted my ferns to lean into the centre of my card - take a look:

I used Naturals Ivory for my card today - I love the natural feel of this cardstock and it works so well when used in conjunction with nature images. I inked the fern stamp in Baked Brown Sugar and stamped it three times, without re-inking in between to create a graduated effect and some depth to the background. I layered my stamped sentiment banner on a piece of Baked Brown Sugar that I edged with the Large Scallop Edgelit and used the rope stamp for the horizontal element, then added a butterfly, stamped in Bermuda Bay, cut out with the smallest of the butterfly thinlits and finished with a small gold button and a strand of burlap tied in a bow. For the final element of the sketch I added the post mark stamp in Crisp Cantaloupe.
I hope you like today's card, especially the ladies who are coming to class on Monday and for whom this constitutes a 'sneak peek'! Back tomorrow with our new challenge over at The Paper Players; until then, happy stampin'!
Stampin' Up! Supplies Used: