Before I get into my creative post today, I just wanted to remind you that we are nearing the end of the month so you have just two more days to take advantage of this month's offers: a free bonus coupon for every £45 spend, redeemable against next month's purchases, and also the limited time Blended Seasons bundle and the second colour assortment pack of watercolor pencils. You can read more about both of these offers here and here.
Check out this post with details on my Creative Escapes Luxury Weekend Retreats too - you have until the end of the week to take advantage of my Bank Holiday booking offer for my next weekend in October!
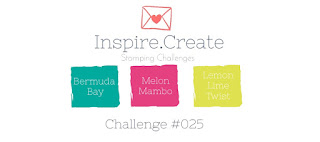
A day off yesterday as we had a family day out at the Black Country Museum (a fun visit if you're in the UK and never been - lots of fun interactive history) and I needed to give the first episode of the Great British Bake Off my undivided attention yesterday evening (more on that later!) but I'm back with you today and I'm sharing a card using this week's CAS(E) This Sketch and the current bright colour palette over at Inspire.Create for a fun Christmas card:
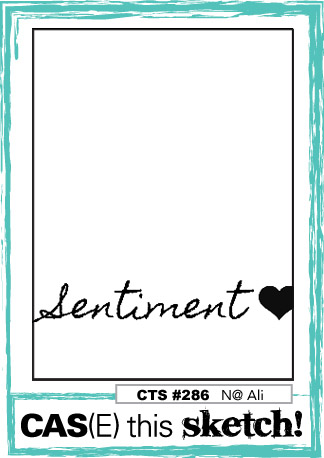
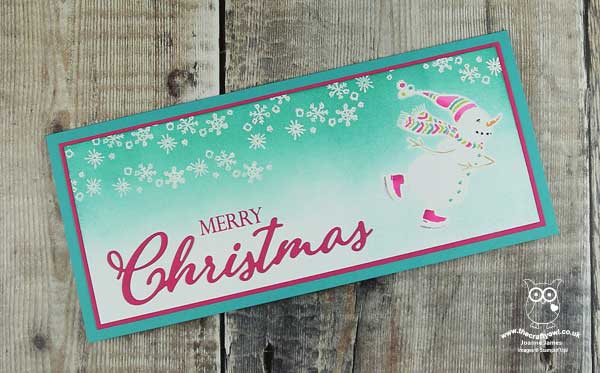
This another of those great sketches that can be used in lots of different ways with the sentiment diecuts that I love - although I did need to rotate my card base through 90 degrees and go 'long and thin' to fit everything in! Take a look:
Here's the low-down on today's card:
Merry Christmas Thinlits - Today is the turn of the 'Christmas' thinlit to feature, stamped with a 'merry' for good measure; these dies are going to get a full work out this season, I think they are just great! I love that with the co-ordinating bundled stamp set, there are so many sentiment combinations you can make; this is absolutely a 'go-to' set for me this Christmas.
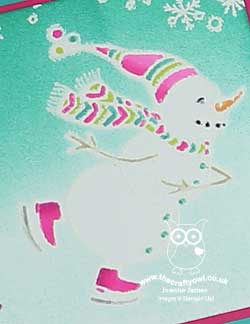
Spirited Snowman - I liked the 'object' at the end of the sentiment on the sketch and thought the little skating snowman from the new Spirited Snowmen set would fit perfectly and look as if he was almost skating the sentiment into the ice. I decided to heat emboss the snowman and an array of snowflakes from the same set across the top of my card, so that the white elements, i.e. the snow, would be white against my sponged background. I must confess whilst this looks great in white in real life, especially with the sparkle of the Wink of Stella on the snowman, the snowman loses some of his definition in white when photographed. In hindsight silver might have been a better choice - or maybe a little added definition to the body of the snowman with my Blends; something to play around with on version 2!
Unconventional Brights For Christmas - You could have looked at the Inspire.Create colour challenge colours this week and be forgiven for thinking that a Christmas card would not come immediately to mind with these bright colours; I actually thought they would be perfect for a sponge-brayered sky and his bright woollen scarf and hat combo. Once I'd stamped the snowman onto my cardfront, I stamped him again onto a post-it note and cut it out to create a mask so that I could brayer my Bermuda Bay sky, whilst keeping my snowman white. I then coloured the rest of my Snowman with my Blends/Blendabilities/Stampin' Write Markers. I did stick to the colour palette along with a smidge of black and grey neutrals, save one exception - I used orange for the snowman's carrot nose. I'm not sure any other colour would do so I hope I'll be forgiven this departure! Lastly, I painted my snowman liberally with Clear Wink of Stella; difficult to see on the photo, but so pretty in real life.
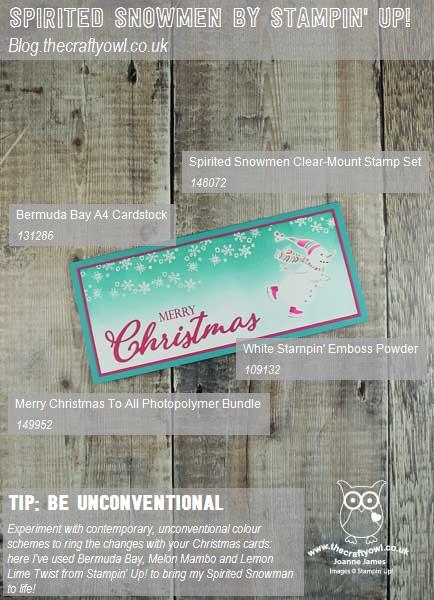
Here is the visual summary of the key products used on today's project for you to pin for easy reference:
You can see all of my 'How To' summaries on my 'How To - Tips and Techniques' Pinterest board in case you've missed any.
So what do you think - do these unconventional brights work on today's Christmas card? Do leave me a comment below - I would love to hear your thoughts.
Enjoy the rest of your day; the James Juniors are currently in the kitchen baking homemade wagon wheel biscuits, having been inspired by the technical challenge on last night's Great British Bake Off - I'll let you know tomorrow how they turned out when I'll be back with another project! Until then, happy stampin'!
I typed this post up last night but am finally going live this morning - I will share the wagon wheels tomorrow!
Stampin' Up! Supplies Used: