Brother Birthday Basketball Card

by Joanne James12. August 2013 21:35

As promised, today I'm back with the other of Ben's birthday cards, this time from his big sister. Ben's biggest birthday surprise was his very own basketball hoop. He has been mad keen on ball bouncing for a while and he was thrilled to receive a basketball from one of his little school friends at his party. he wasn't at all expecting a hoop and his little face positively lit up when he opened up the box. So I used the new much loved basketball for the inspiration for his card:

A simple design of a jumble of bright orange basketballs, with a special one popped up on a couple of dimensionals to replace the 'O' in 'Brother'. I must confess this card was somewhat bourn out of being rather short on time too, but once I had the idea it didn't take long to execute at all (which was definitely a good thing!) That said, I'm really pleased with how it turned out.

Back tomorrow with another card; until then, happy stampin'!


Stampin' Up Supplies:

Stamps: Great Sport

Cardstock: Pumpkin Pie, Basic Black, Whisper White

Ink: Pumpkin Pie, Basic Black

Tools: Typeset Alphabet Die, 1 1/4" Circle Punch, Simply Scored

Tags: , , , , , ,

Cards | Stamping

Pop Up Lego City Fireman Birthday Card

by Joanne James11. August 2013 21:36

A busy weekend of birthday celebrations in the James family this weekend: yesterday my brother-in-law celebrated his 40th birthday (I was back too late and had drunk too many cocktails to blog when I arrived home yesterday evening; I will share his cards later in the week!) and today was my 'baby' the not-so-little Benjamin's 6th birthday.

I had something of a quandary when trying to decide what kind of card to make Ben; I needed something special but this birthday featured so many of the things that he loves that choosing was difficult. One of the things that he really wanted for his birthday was a Lego City Coastguard Patrol boat - he loves all kinds of Lego, but his first and enduring love is for the fire brigade - the only reason this wasn't on the wishlist is because I think he must own every mortal piece of the Fire Department and then some! His big sister bought him a Lego City Fire Chief alarm clock for his birthday and this ultimately became the inspiration for my pop-up card. This is the card from the outside:

A Lego brick number 6 (lots of glue dots used to get the pins on the bricks just right!). Then on the inside, this cheery little fellow:

I used my Pop 'n' Cuts base and modified my dress form insert to accommodate my fire chief mini figure in front of his desk. I am very pleased with how he turned out and doubly so when Ben opened it this morning and deemed his card 'totally awesome - the best card you've ever made!' Praise indeed!!

Back tomorrow with another of Ben's birthday cards - from his big sister. Until then, happy stampin'!


Stampin' Up Supplies:

Stamps: Make a Wish

Cardstock: Real Red, Basic Black, Daffodil Delight, Whisper White, Basic Grey, Crumb Cake

Ink: Real Red

Tools: Pop 'n' Cuts Base, Pop 'n' Cuts Dress Form, Big Shot, Stamp-a-ma-jig, Small Oval Punch, 1 1/4" Circle Punch, 1 3/4" Circle Punch, Itty Bitty Shapes Punch (circle), Corner Punch


Christmas Ornament and Decorated Box

by Joanne James9. August 2013 22:13

Today I'm sharing the last of the projects we made at last weekend's Christmas workshop: a stamped clay ornament and a decorated kraft gift box to put it in. Here's a photograph of the ornament:

These clay ornaments have a natural finish and can be stamped straight onto the surface, without any additional preparation. As we were going all out for Christmas, once we had stamped our design onto the ornament we stamped the pattern again with Versamark, sprinkled with Heat and Stick Powder and heated with the heat gun, then sprinkled with Iridescent Ice glitter and heated once more. This gives the finished item a more muted colour and a lovely sparkle that catches the light.

We also decorated one of the lovely ready-made kraft boxes from the catalogue to go with it - here's the top of mine:

Together they would make a lovely gift for someone, if you could bear to part with them of course! I will be using mine to decorate my tree during the festive season, but I'm sure I can make another one or something else to go in the box! I hope you liked my first Christmas projects of the season - there will be lots more where this came from. If you would like to join any of my classes, do get in touch for more details; my September card classes will be featuring the Mosaic Madness stamp set and then from October we will be doing Christmas cards all the way through until the end of the year.

Back tomorrow with the first of the weekend birthday cards: my brother-in-law is celebrating his 'big 40' with a party tomorrow and then my own 'Baby James' will be 6 on Sunday, so I've a few birthday cards to share. Until then, happy stampin'!

Stampin' Up Supplies:

Stamps: Sweet Essentials, Four Seasons (hostess - retired)

Cardstock: Cherry Cobbler, Be of Good Cheer Designer Series Paper (retired)

Ink/Stampin' Write Markers: Real Red

Tools: Simply Scored, Big Shot, 1 1/4" Circle Punch, 7/8" and 1 3/4" Scallop Circle Punches, Merry Minis (star)

Finishing Touches: Champagne Glimmer Paper, 3/4" Cherry Cobbler Chevron Ribbon,  Cherry Cobbler 1/2" Scallop Dots Ribbon (retired)


Christmas Tea Lights

by Joanne James8. August 2013 09:44

Another week, another late post - I'm loving the summer holidays but when school's out it sure is tricky to keep everything else on track! So today I'm posting nice and early, so that I don't run out of time again!

Today I'm sharing another of the makes from my Christmas workshop that I held last weekend: a lovely set of four tea lights in a handmade box. This workshop was less about the stamping and much more about the scoring - if my ladies weren't proficient with their Simply Scored scoreboard beforehand, they sure are now! So here is our finished box:


We made a box with a sliding sleeve cover, from which we cut out an oval aperture with the Oval Framelits and backed with a window sheet, to allow a glimpse of our lovely hand-stamped candles inside. Here's a picture of the open box, with a peek at our 'dressed up' tea lights:

We edged each of them with a strip of DSP; I'll be making more of these when my festive washi tape arrives, as this is perfect for this kind of project. The candle stamping was really easy to achieve and as none of the ladies present had done this before, was a real 'wow' moment for them. I suspect lots of their friends and neighbours will be receiving stamped tea light gift sets for Christmas now that they've learned this clever technique!

I love this spotted star/snowflake paper from the retired 'Be of Good Cheer' paper set; with so many designs to choose from, we all made different ones though - here's one of the other finished sets made by Kathy during the workshop:

These papers are just so lovely, but don't be too sad that they are now retired; I have had a 'sneak peek' of the new Autumn-Winter seasonal catalogue and can honestly say, you will not be disappointed with this year's offerings!

All being well, I will be back tomorrow with the last of my Christmas workshop projects. I'm off to have a quick spot of making before meeting friends in the park for a picnic - lovely! Until then, happy stampin'!


Stampin' Up Supplies:

Stamps: Four Seasons (hostess - retired)

Cardstock: Cherry Cobbler, Be of Good Cheer Designer Series Paper (retired)

Ink/Stampin' Write Markers: Cherry Cobbler

Tools: Simply Scored, Big Shot, 1 1/4" Circle Punch, 1 3/4" Scallop Circle Punches, Oval Framelits

Finishing Touches: Creped Filter Paper, Window Sheet,  Cherry Cobbler 1/2" Scallop Dots Ribbon (retired)

Best of Flowers - Double Embossed Vintage Class Card

by Joanne James21. July 2013 20:07

So I have a confession: I don't like all the stamps that Stampin' Up! has to offer! I like modern, clean and unfussy design and don't really go in much for the vintage, distressed look. So whilst I loved three of the four stamps in June's 'Best of Flowers' set, I struggled with the fourth one. The bouquet of roses had a real 'old fashioned' look I thought and I would probably have left it in the box uninked. I could happily spend endless hours creating things with the other three stamps in the set, each of which I love, but for the fact that I had decided to use this set for this month's card class and therefore felt I should use each of the stamps equally. After much huffing and puffing, I came up with a couple of cards and this is one, of them:

This is something of a departure from my usual style, but I quite like the way it turned out. It was also a great opportunity to teach the ladies in my class the double embossing technique, which enabled me to make the stamp the focal point, without creating an overly fussy design. Some sponging of Crumb Cake ink over the surface and some ruched seam binding ribbon were all that I needed to finish it off.

I think maybe it's the kind of card that grows on you; the more you look at it, the more appeal it has - some 'olde worlde' charm, perhaps! if you would like to own the 'Best of Flowers' set, it is still available to purchase for £13.95 until 31st March 2014. Equally, if you would like to join one of my card classes, do get in touch for more details - our September class will feature the new 'Mosaic Madness' stamp set, along with the coordinating punch and embossing folder.

Back tomorrow with another card I made using this stamp; until then, happy stampin'!


Stampin' Up Supplies:

Stamps: Best of Flowers

Cardstock: Crumb Cake, Very Vanilla

Ink/Stampin' Write Markers: Crumb Cake

Tools: Stamp-a-ma-jig, Perfect Polka Dots Embossing Folder, Designer Frames Embossing Folder, Sponge Dauber

Finishing Touches: Crumb Cake `1/2" Seam Binding Ribbon


Elements of Style Mannequin Tri-Fold Card

by Joanne James30. June 2013 21:06

A busy day today with lots more swimming and family fun in the garden, making the most of the sunshine. Time for a little bit of crafting this evening, but today I'm going to share a card I made a little while ago when I was last playing with my Dress Up framelits that features two retiring products - the Elements of Style stamp set and the lovely Tea for Two DSP. This is a case of a card by Julie Kettlewell, who like me also seems to have had something of a love affair with the Dress Up framelits and has made some fabulous cards with this set: you can check out her card here and look at lots of other great examples of how to get the most from this versatile set. So here is my card:

As my regular blog followers will know, I don't really do 'fussy' and this card is about as vintage as I get! I really like the flower stamping over the newsprint though, and I think the Crumb Cake ribbon really finishes off this card. I used a Calypso Coral marker pen to colour the flowers to echo the colour of the flowers on the designer paper and used a blender pen to get some depth to the colour. The tri-fold design is also just a little different and yet the card still folds flat for postage.

That's all for today - tomorrow is the start of a very busy Stampin' Up! week: a new annual catalogue, a new monthly stamp set and lots of other great news and new products to share in the coming weeks, so lots of planning, making and fun to be had!

Back tomorrow with another project; until then, happy stampin'!


Stampin' Up Supplies:

Stamps: Elements of Style

Cardstock: Crumb Cake, Very Vanilla, Tea for Two DSP, First Edition Specialty DSP

Ink/Stampin' Write Markers: Early Espresso, Calypso Coral, Lucky Limeade

Tools: Dress Up Framelits, Blender Pen

Finishing Touches: Crumb Cake Seam Binding Ribbon

Mosaic Madness and Two New Colours

by Joanne James28. June 2013 21:24

All is well in the James household today, so it has been a day of catch-up crafting with the opportunity to tick a few things off my 'to do' list and also have another play with some new goodies! One of the best things about being a Stampin' Up! demonstrator is that we get the opportunity to purchase items before the new catalogue goes live and in some instances even receive new product free.

For today's 'sneak peak, I've made a card that showcases some fabulous new mosaic products - take a look:

The word 'mosaic' means 'to create images with a collection of small pieces of glass, stone or other materials' and the products I've used in today's card are great for paper ones. There is a patterned embossing folder, a stamp set and a co-ordinating punch that makes it so easy to create these mosaic shapes in super-quick time. For my card, I embossed the background and then stamped and punched a variety of patterned mosaic shapes, interspersing these with one of the smaller images from the stamp set stamped straight onto the background. I cut away the outer edge to show the profile of these tile pieces and anchored the banner with a final mosaic piece on dimensionals and finished with a coloured rhinestone. Here's a close up of the detail:

I also took the opportunity to play with two new colours: the card base is one of the new in colours, Coastal Cabana, and the yellow I used is the returning Regals colour Crushed Curry. I love this colour combo. I hope you like this card as I think the set is called 'Mosaic Madness' for a reason - I am brimming with ideas on how to use it, so there will be lots more where this came from. There is a co-ordinating set of designer series paper too - a blog post for another time though!

Back tomorrow with another project; until then, happy stampin'!


Stampin' Up Supplies:

Stamps: Mosaic Madness, Happy Day

Cardstock: Coastal Cabana, Night of Navy, Whisper White

Ink/Stampin' Write Markers: Coastal Cabana, Crushed Curry, Night of Navy

Tools: Mosaic Embossing Folder, Mosaic Punch

Finishing Touches: Basics Rhinestones


Tags: , , , , , , , ,

Cards | Stamping

Introducing 2013-15 'In Colours' and A Sneak Peek!

by Joanne James26. June 2013 22:00

My first day free of domestic chores this week and I was fully intending to begin madly creating with my new pre-order goodies that have been sitting in my craft room for over a week calling 'play with me' but alas, it was not to be - instead I've spent most of the day caring for my poorly boy who has (yet another!) tummy bug for the second time in as many months! He was feeling brighter this afternoon, so after an hour or so of sitting in the garden playing 'catch', I managed to get an hour or so to create a quick card set showcasing the new 2013-15 'In Colours'. For the uninitiated, 'In Colours' are introduced every year and remain current for 2 years before retiring. They compliment the standard colour families and I think I'm in love with this year's colours, which are quite different to the 2012-14 set. Without further ado, let me introduce to you:

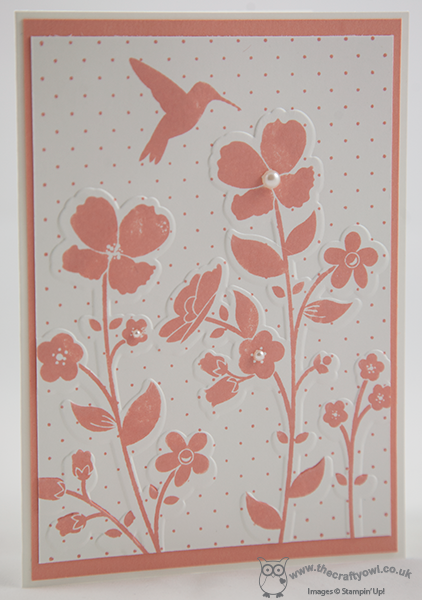
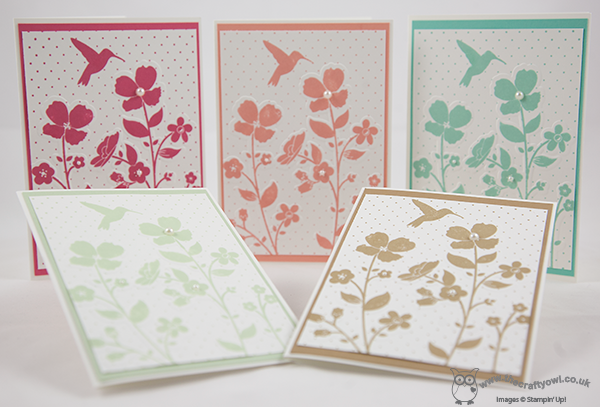
 Firstly, Crisp Cantaloupe - a lovely peachy, pink shade:

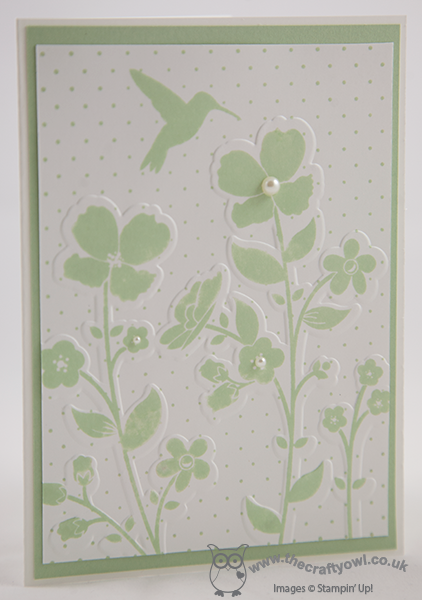
Secondly, Pistachio Pudding - a pale green with a lemony hue:

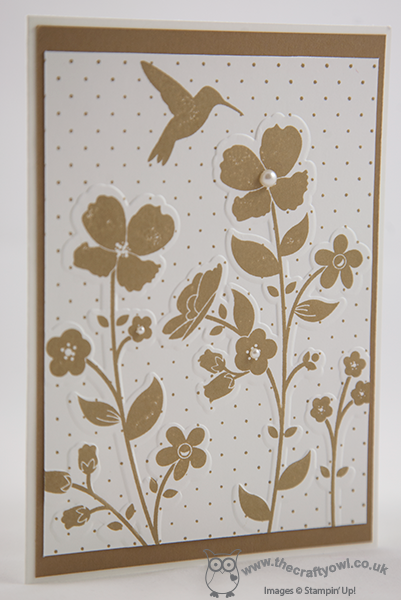
Thirdly, Baked Brown Sugar - a lovely shade of cinnamon brown:

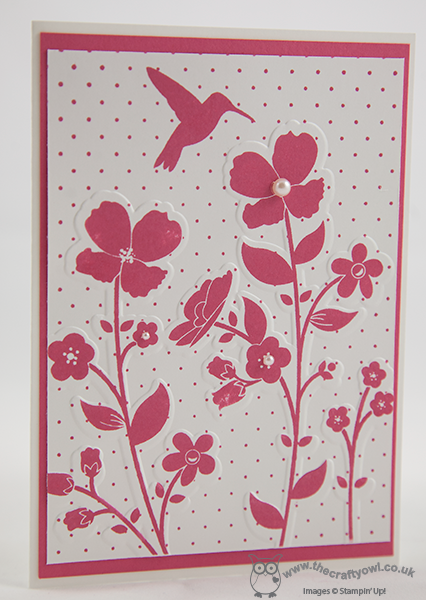
Fourthly, Strawberry Slush, a rich pink with red undertones:

And last but not least, Coastal Cabana - a lovely shade of watery blue-green:

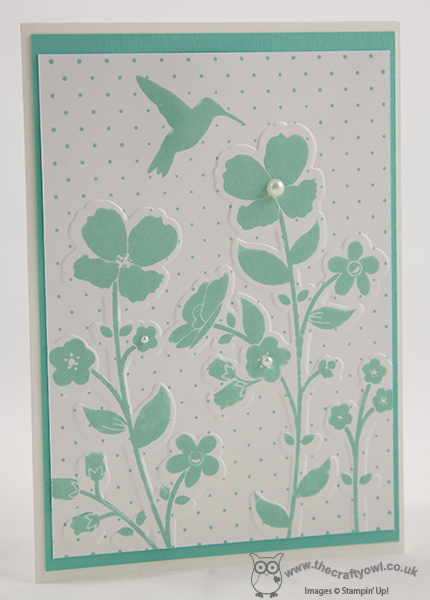
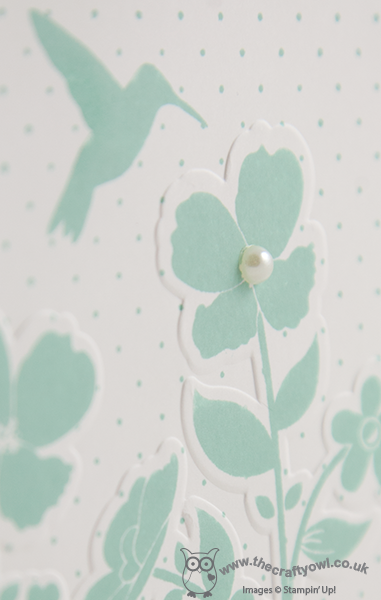
What do you think? These colours are so fresh I am already brimming with ideas and I can't wait to start using them in earnest. I kept these cards simple so that the colours take centre stage, with only a mat in the same colour and a few pearls. The eagle-eyed SU devotees amongst you might be wondering what the stamp is that I've used; this is a sneak-peek of a new stamp called 'Wildflower Meadow', which also has a matching embossing folder. You can see it in more detail on this close up shot:

Only another six days to go until you can own this stamp and matching embossing folder too; it's one of a number of great bundles on offer in the new Stampin' Up! Annual Catalogue, due to be released next Tuesday 2nd July. If you would like a copy of the new catalogue, they are available for £4.95 each including P&P; contact me to order yours today! Start writing your wish lists stampers - there are lots more great new items that I'm looking forward to sharing in the coming weeks and months.

One last picture of the whole in-colour card set, then I'm done for today; hopefully back tomorrow with another project, all being well. Until then, happy stampin'!

Stampin' Up Supplies:

Stamps: Wildflower Meadow

Cardstock: Crisp Cantaloupe, Pistachio Pudding, Baked Brown Sugar, Strawberry Crush, Coastal Cabana

Ink/Stampin' Write Markers: Crisp Cantaloupe, Pistachio Pudding, Baked Brown Sugar, Strawberry Crush, Coastal Cabana

Tools: Wildflower Meadow Embossing Folder

Finishing Touches: Basics Pearls

Tags: , , , , , ,

Cards | Catalogues | Stamping

Scallop Envelope Gift Card Holder Card

by Joanne James24. June 2013 20:11

It's Monday, the start of a new working week and so I thought it would be a great opportunity to remind all you dedicated crafters out there that there are only another 7 days left to order from the retiring stamp and accessories lists before these items are gone for good. Lots of items have gone already but you still have until July 1st to pick up a bargain or two.

With this in mind, I'm back on the retiring products theme today and I'm actually sharing a card that isn't mine but one that I received in a swap at the UK regional training day in Telford last month and which features three retiring products. It's always nice to see what others have created and I received a few swaps that I really loved in their own right and would like to share with you. The first of these is this card by Kerry Newton:

I don't believe Kerry has a blog (she didn't leave details on her swap and I can't find her on an internet search), but if anyone reading this knows different do let me know as I will then update this post with a link to it.

There are so many things I like about this card: the colours (vanilla, crumb cake and indigo), the background stamping and blended colouring on the First Edition DSP, the feature gift card holder made using the Scallop Envelope Die and the little sentiment band and butterfly that just bring the whole design together. I think the card has quite a unique design, but one that is very effective.

Did you spot the retiring products? Yes, it's the Scallop Envelope Bigz Die, the First Edition printed designer series paper and the Very Vanilla Taffeta Ribbon. If you don't own these and would like to recreate this card, you have one week left to place your order before they're gone for good! Back tomorrow with another project; until then, happy stampin'!


Stampin' Up Supplies:

Stamps: Creative Elements, Petite Pairs

Cardstock: Island Indigo, Crumb Cake, Very Vanilla, First Edition DSP

Ink/Stampin' Write Markers: Basic Black, Island Indigo, Crumb Cake

Tools: Elegant Butterfly Punch, Scallop Envelope Bigz Die, Big Shot, Blender Pen

Finishing Touches: Basics Pearls, 1/8" Very Vanilla Taffeta Ribbon

Best of Flowers - Something Old, Something New

by Joanne James21. June 2013 19:26

I've had a very busy day baking today and making last minute preparations for a school summer fete tomorrow, so am rewarding myself with a trip to the cinema later to see 'Man of Steel' (well, Henry as a superhero - what could be better?!) As a result, an early blog post from me - well, it's either early or not at all, so I'm giving the illusion of being more organised at least!

Today I'm sharing a couple of cards I made with another of the sets from this month's 25th anniversary 'Best of Flowers' stamp set. I shared a couple here previously using the miniature daisy stamp; this time it's the turn of the hydrangea. I made a couple of cards, one in pink and one in blue, and whilst the stamp is a new version of an old favourite, the colours I chose are really the 'something old' I'm referring to here; here's the first card I made:

I chose a simple design and having inked my stamp with markers, I then used a blender pen to achieve a graduated colour on the blossom and leaves. I inset the flower in a square that I masked off and sponged around the edges for definition, in the same colour. Here's a close-up of the flower itself: 


I then decided to add an Itty Bitty 'Happy Birthday' banner by way of sentiment, and cut this out and popped it up on a couple of dimensionals so that I was not completely a one layer card. Here's the blue version in the same design:


Very simple - like me! - and monochromatic. Did you guess the colours? Yes, it's Regal Rose and Bashful Blue, both colours that are leaving us at the end of this month to make way for some new additions to our colour families. They both reminded me of hydrangea colours though and seemed to justify one last use.

So that's all for today; I won't promise a post tomorrow, as our school fete has a reputation for going on long into the night with clearing up and counting of money. If I'm home at a reasonable hour, I'll be sure to share another card and the day's events with you; if not, I'll see you Sunday. Until then, happy stampin'!


Stampin' Up Supplies:

Stamps: Best of Flowers, Itty Bitty Banners

Cardstock: Whisper White

Ink/Stampin' Write Markers: Regal Rose, Bashful Blue, Old Olive

Tools: Itty Bitty Banners Framelits, Sponge

Mini Catalogue

BROWSE THE CATALOGUE

The mini catalogue is now live! Read and download your copy here.

Shop Online

Access my online shop 24 x 7, 365 days of the year:

Current April hostess code:

VDKNV7BH

Shop Online

Join My Team

It's always a great time to join Stampin’ Up! New team members can get £130 worth of products for only £99 + free business supplies + free shipping + all the fun being a part of Stampin’ Up! Stampin' Up! has something for everyone: join my growing team and benefit from my support to enjoy Stampin' Up! however you choose.

If you're interested, call me for a chat to understand how I can help you realise your goals. Alternatively, if you have already decided to sign up and you just can't wait, please click here for the link to the online form where you can sign up and order your starter kit right away! 

Latest Kit!

Stampin Cut and Emboss

The Rock Legend Kit has all you need to make 8 cards with coordinating envelopes. Along with the new Panda Friends Kit, both are available from January 4th for just £14 each - get yours here!

2023-24 Annual Catalogue

BROWSE THE CATALOGUE

Click on the catalogue for a full list of current SU! supplies - if you would like to order any of the items featured, please drop me a line at [email protected] or give me a call on 07773 421446 - I'd be happy to help.

New Online Exclusives

There are new products available exclusively in the online store from 5 March - check them out here.

About Me

Hi I'm Joanne and live in Northampton and when I'm not looking after my husband and two beautiful children, am an avid crafter with a passion for all things Stampin' Up!

I must confess that I have never been a big rubber stamper - until I discovered Stampin' Up! that is. I love the fact that I can get such great results with co-ordinating stamps, inks, papers and punches - the possibilities are endless! Join me on my stamping journey as I share the things I love and be inspired to create amazing things yourself!

Follow Me

Monthly Newsletter

Box Builder

Click the button above to use Box Buster to create your custom box design using the Envelope Punch Board!

Kits Collection Now Available!

Stampin Cut and Emboss

The new Kits Collection from Stampin' Up! is now available!

Click here to see the current kits available and order yours online today.

I Design For


Stampin' Up Stuff

This is my personal blog and is not endorsed by Stampin’ Up! I hope you find it a plentiful source of ideas and personal inspiration but please don't copy my designs for contest submission or use for classes, publication or sale without express permission.