Be The Star You Are Shaker Card

by Joanne James1. June 2015 11:49

Happy Monday everyone! I have a busy week ahead so I'm starting it with a quick post for this week's Freshly Made Sketches challenge that also features the current colours over at Fab Friday:


The FMS sketch has been designed by the super-talented Karren Johnson, currently guesting with us over at The Paper Players, so I just had to play along. I decided to make a little 'encouragement' card today - with a fun shaker twist too:

I used Marina Mist for the base of my card and created a frame of Night of Navy using my big Shot and Square Framelits, which I backed with a piece of acetate window sheet. I wanted a 'flat' shaker for this card, so having punched some stars in each of the challenge colours and some gold glimmer paper using my Confetti Stars Border Punch, I stamped my 'be the star' sentiment in navy onto Whisper White, laid the stars on top, then attached this to the back of the window. To finish, I added a trio of stars in Hello Honey, two stamped in Hello Honey and the larger one stamped in Night of Navy, from the 'Be The Star' stamp set, attaching the larger one with dimensionals for added lift and adding some gold glimmer stars to the star centres.

I chose to feature the blues primarily on my card, as Hello Honey is not a favourite of mine and is not a colour I am immediately drawn to, however I think the Fab Friday crew settled upon a great colour combo here as the yellow looks really quite nice with the blue; I may well use this colour combo again!

That's all from me today; I'm off to prepare more goodies for my Open House sessions later this week (you can read full details here). Back tomorrow with another project; until then, happy stampin'!


Stampin' Up! Supplies Used:

Table built using Product Table Builder by The Crafty Owl - Independent Stampin' Up! Demonstrator.


Tags: , , , , , , , ,

Cards | Stamping

Park Lane Thank You and Another Painted Petals Card

by Joanne James25. May 2015 19:20

Well the Bank Holiday didn't bring the sunshine I was hoping for, but it did stay nice and dry and we managed a bracing long bike ride this afternoon, so it's all good! Today I have not one but two cards for you! The first one is my card for the current Fab Friday Challenge where they have a sketch challenge this week:

Before I share my card, a big thank you to the team over at Fab Friday for choosing my In-Colour thank you card as their Fab Fave - I'm honoured! You can see that card here. Now onto today's card:


I'm still on my quest to use up more of my Designer Series Paper (I am such a DSP hoarder!) and this sketch was the perfect opportunity to showcase some. So no 'sneak peeks' today; instead a Daffodil Delight base with some mats in Soft Suede, and two of the patterns in the Park Lane pack. I used one of my favourite retiring thank you stamps, 'One in a Million', for my sentiment, stamped in Soft Suede onto Very Vanilla, and I chose to fussy cut one of the flowers for my accent. I liked the clean lines of this card so much, I made two identical ones - if you are one of my contactable online customers, you may find one winging its way to you to you this month!

My next card is for this week's TGIF challenge:

I saw the inspiration photo and I had my Painted Petals set out on my desk preparing for my technique class next month (this is the set we are going to be using) and I just knew the two would work together. Here's my card:


I used So Saffron for my card base and matted a strip of the already retired Gingham Garden DSP (I told you I was a DSP hoarder!) onto a strip of Pear Pizzazz and adhered this to the front of my card. I stamped the flowers on a large circle of Whisper White cut out using my Big Shot and Circles framelits, inking them with one of the new in-colours, Watermelon Wonder, and adding some Blackberry Bliss using my Stampin' Write marker to the flower centres before stamping. I stamped the sentiment in Blackberry Bliss too and to finish added a few So Saffron flowers, punched using one of the Itty Bitty Accent punches and centred with pearls. I popped this circle up on dimensionals to stand away from the card. 

Please do check out the design team inspiration for both of the above challenges; they are some amazing cards on both blogs this week. I'll be back tomorrow with another card; until then, happy stampin'!


Stampin' Up! Supplies Used (Card 1):

Table built using Product Table Builder by The Crafty Owl - Independent Stampin' Up! Demonstrator.


Stampin' Up! Supplies Used (Card 2):

Table built using Product Table Builder by The Crafty Owl - Independent Stampin' Up! Demonstrator.


Something Lacy Congratulations Card

by Joanne James12. May 2015 21:32

I've had a busy couple of days with this month's classes (hence no blog post yesterday - I'm sorry about that!) so today I thought I would share with you one of the cards we made. This month's technique class has focused on using background stamps and our chosen feature stamp set was the lovely 'Something Lacy'. The class also featured heat embossing and this card shows how coloured embossing powder adds a real touch of luxury to a card:

For our Blushing Bride monochromatic wedding card, we stamped the Something Lacy background stamp in Versamark and heat embossed with Blushing Bride embossing powder. This panel was wrapped with some White satin ribbon before adhering the Blushing Bridge cardstock base. A couple of layered labels cut with the Big Shot and Labels framelits were then added, with the sentiment chosen from the now retired 2015 Sale-A-Bration set 'Simply Wonderful', which was also heat embossed. A few pearls and punched flowers, along with a big bow, finish my card. This card has a lovely sheen in real life that really isn't captured in the photograph and the monochromatic colour scheme is so very pretty.

The 'Something Lacy' background stamp is available until the end of the current seasonal catalogue on the 2nd June and isn't carrying over into the annual catalogue, so if it's on your wish list, you only have a couple of weeks left to purchase. The Labels Framelits are retiring and have already sold out, however Blushing Bride embossing powder is still in stock and half price, so there's still time to snap up a bargain!

That's all from me today; back tomorrow with another project and this week's Wednesday Weekly Deals. Until then, happy stampin'!


Stampin' Up! Supplies Used:

Table built using Product Table Builder by The Crafty Owl - Independent Stampin' Up! Demonstrator.


World of Dreams Meets All Abloom

by Joanne James10. May 2015 10:00

It's Sunday - my favourite day of the week and time for a new challenge over at The Paper Players. I loved the variety of the transportation-themed cards in the gallery last week. This week, the lovely LeAnne has an interesting colour challenge for you to play along with: 


I'm also playing along with the TGIF Challenge this week as I've used their sketch as the inspiration for my layout this week. So I deliberately used the word 'interesting' for LeAnne's choice of colours this week - this colour combo had me stumped for a good long while! Then I remembered the piece of Lost Lagoon and Pistachio Pudding patterned DSP in the All Abloom paper stack; I think it's the only piece I've never used (and I've been through a few packs!) as I prefer the pattern on the reverse,so I decided to challenge myself to see if I could make it work on today's card. Here is my finished card:

I used Sahara Sand for my base and a mat of Lost Lagoon, then went all out and covered the entire card front with my DSP. This is such a busy pattern, I knew I would have to be careful what else I used on my card to avoid it looking too busy. For my focal point, I chose to stamp one of the silhouette flower stamps in Pistachio Pudding on a circle in the same colour - the paper pattern reminded me of this set - and stamp the sentiment over the top in Lost Lagoon. I mounted this on a slightly larger circle of Lost Lagoon and then a piece of Sahara Sand cut with my Big Shot and a Deco Label framelit. I mounted this on a banner of Sahara Sand that I added a little lace trim to in the same colour - something for a little texture and interest, but not wanting to clash with the strong pattern. Lastly, I added a piece of Lost Lagoon ribbon that I ruched across the front of the card. 

This isn't my usual type of card, but I quite like it. The Sahara Sand does a great job of toning down the pattern and also meant I didn't use any Whisper White cardstock at all, which is quite unusual, not even for my sentiment panel. The thing that pleases me most though - I actually managed to use the sheet of patterned paper effectively!

Before you reach for your paper and inks, check out what our amazing team has created to inspire you this week:

The Paper Players Design Team
 
Here's a quick recap of our challenge rules:
 
1.  Create a new paper project
2.  Upload your creation to your blog with a link back to us and provide a direct link to the post featuring your challenge submission.
3.  Please link your card to no more than three challenges, TOTAL.
4.  Have FUN! 

I look forward to seeing how you interpret this week's colour palette. I'm off to finish the preparation for my technique classes this week and enjoy the rest of the weekend.

Back tomorrow with another project; until then, happy stampin'!


Stampin' Up! Supplies Used:

Table built using Product Table Builder by The Crafty Owl - Independent Stampin' Up! Demonstrator.


Home Decor Spring Flower Wreath using Stampin' Up! Flower Frenzy Bigz L Die

by Joanne James6. May 2015 09:37

Good morning everyone - today I have something a little different for you! I ran a very successful class a little while ago to make a beautiful home decor Spring flower wreath. I am demonstrating how to make this wreath at a Spring Open Evening at Bell Of Northampton this evening so thought this was a good opportunity to share it with you too:

We started with a polystyrene wreath base and covered it with a roll of burlap, then decorated it with a selection of flowers made with a variety of dies and punches. The largest flower, leaves and the bases for the medium flowers were made using the Big Shot and Flower Frenzy Bigz L Die; the remaining flowers were made using a combination of the retiring Blossom punch, the Pansy punch and the Petite Petals punch. The Blossom punch and Flower Frenzy Bigz die are now out of stock, as is the patterend paper that I used, but you could make something similar with other punches and dies. We used a variety of buttons, brads and embellishments to decorate our flowers: I used Vintage Faceted Buttons, Something Borrowed Embellishments and some retired brads from my stash to decorate mine. I chose Elegant Eggplant, Smoky Slate and Pear Pizzazz as my colourway but each of the ladies tailored their colour choices and embellishments to their personal preferences. Here's a closeup of my flowers - I think they are gorgeous:


I created an album with pictures of their finished wreaths on my Facebook page here - you really should go and check them out as there are some amazing pieces and they all look so very different in the various colourways. If you haven't already, perhaps you could give me a 'like' whilst you're there - I'm only 10 away from my next milestone!

If you live in or around Northampton and would like to see me demonstrate how to make these flowers, do pop along to Bell's between 6-9pm this evening:

I hope you like today's project - it's one of my favourites! Back tomorrow with a card for this week's new challenge over at Create With Connie and Mary. Until then, happy stampin'!Full details via the link above and on my Facebook Page. There are lots of other demonstrations taking place - there will be someone fabulous chefs in residence cooking up delicious treats, a little pampering as well as other in-store delights that will all make for a pleasant browsing experience.


Stampin' Up! Supplies Used:

Table built using Product Table Builder by The Crafty Owl - Independent Stampin' Up! Demonstrator.


Yee Haw Cowboy Birthday Card

by Joanne James30. April 2015 08:05

It's Thursday and time for a new challenge over at Create With Connie And Mary and this week we have a great sketch challenge for you:


My post today is a treat for all my international readers, as I'm using one of the photopolymer sets that is available in the USA and unfortunately not for sale by Stampin' Up! in the UK. Whilst we are moving ever closer together in terms of catalogues, timesales and product ranges with our US colleagues, there are some things that remain USA-specific, such as the special issue sets, Paper Pumpkin and of course their clearance rack and shipping offers are country-specific. I absolutely love the Yee-Haw stamp set though and have been lucky enough to acquire one through one of my US stamping colleagues (thank you LeAnne!) and I decided it was perfect for today's sketch layout - take a look:

I took my colour palette directly from the Colour Coach (such a useful tool!) and on a base of Early Espresso, I matted a piece of Sahara Sand that I had run through my Woodgrain embossing folder and adhered flat side up. For the vertical lines of the sketch, I used three pieces of barbed wire - stamped in Basic Grey onto Basic Grey cardstock and fussy cut out - then topped this with a panel of Pacific Point, stamped in the circle star image in the set. I stamped my main sentiment in Early Espresso onto Whisper White, then topped this with the lasso rope stamped in Cajun Craze onto the same colour cardstock having cut out the middle and fussy cut around the edge. I finished with a 'birthday' banner and a paper-pieced cowboy hat. So lots of fussy cutting on my card today, but so worth it - what a fun card for a Rootin' Tootin' birthday boy!

I'm looking forward to seeing what you come up with using this week's sketch - do check out how the other members of the design team have used it for some great inspiration. I'll be back tomorrow with another project for Friday; until then, happy stampin'!


Stampin' Up! Supplies Used:

  • Woodgrain Textured Impressions Embossing Folder
  • Big Shot Die-Cut Machine
  • Paper Snips
  • Pacific Point Classic Stampin' Pad
  • Pacific Point A4 Card Stock
  • Cajun Craze Classic Stampin' Pad
  • Cajun Craze A4 Card Stock
  • Early Espresso Classic Stampin' Pad
  • Early Espresso A4 Card Stock
  • Sahara Sand A4 Card Stock
  • Whisper White A4 Card Stock
  • Basic Gray Classic Stampin' Pad
  • Basic Gray A4 Card Stock


Tags: , , , , , , , ,

Cards | Stamping

You're My Anchor Masculine Monochromatic Card

by Joanne James28. April 2015 09:00

So today I'm sharing a card that I made for this week's Pals Paper Arts challenge, where they have a great sketch for us this week:


The minute I saw this sketch, I knew exactly what I wanted to do with it. In my quest to use up some of my retiring DSP, I knew that the anchor stamp in the 'Guy Greetings' stamp set would work perfectly with some of the papers in the Maritime DSP set, specifically the navy rope and red anchor paper. I decided upon a 5 1/2" square card and I set to work, although my card didn't quite work out as I initially planned. Let me show you my card and then I'll share the story:

My initial intention had been to use the rope paper as you see above, but flip it for the second section and use the red anchor pattern on the reverse. But after much flipping, trimming and trading of circle mounts for my anchor, I ended up unable to make the patterns work together. They just didn't look right to me and the sentiment banner I had cut interfered with my anchor too much, so I decided to ditch the red and use a plain panel of Night of Navy and heat emboss my sentiment onto it directly in white, leaving my embossed anchor uncluttered and the rope pattern beautifully showcased. As I stood back to admire my handiwork and did a check back to the sketch, I realised that my card is a virtual case of Brian King's Design Team card for the challenge which you can see here - oh dear! This wasn't conscious, although I've shared my love of Brian's work on my blog here before and I am so drawn to his clean and uncluttered style. So I'm hoping he will take it as a compliment and the Pals will allow my linkup as an example of a card truly inspired by a member of their DT this week!

Back tomorrow with a new set of Wednesday Weekly Deals and another project. Until then, happy stampin'!


Stampin' Up! Supplies Used:

Table built using Product Table Builder by The Crafty Owl - Independent Stampin' Up! Demonstrator.
 

Tags: , , , , , , , , ,

Cards

Well Worded Birthday Girl

by Joanne James26. April 2015 10:00

Yay! It's Sunday and time for a new challenge over at The Paper Players. We loved your watercoloured creations last week; today the lovely Ann is hosting and she has a sketch challenge for us - and you know how I love a good sketch! This is the sketch layout:

So many possibilities for this great sketch, but I decided that today I had to go with a birthday card for 2 reasons: I have lots of birthdays coming up in the next month, so I need to get into a birthday groove, but more importantly, today the lovely Ann is also celebrating her birthday, so it seemed entirely appropriate. I have sent a card (not this one!) in the post, but I'm not sure she will have received it in time for the big day so I'm playing safe with a virtual one too! I decided to use a piece of Birthday Bash paper as the inspiration for my colour scheme, and paired this with a retiring stamp set, Well Worded:


I used Tangelo Twist for my base and a mat of Bermuda Bay, then used a split layer with Birthday Bash DSP across the top and Whisper White along the bottom. I covered the join with pennants in co-ordinating colours, then stamped my birthday cake in Tangelo Twist with Bermuda Bay candles and cut this out with my Big Shot and Oval framelits, matting it onto a slightly larger oval that I paper pierced using my piercing template. To finish, I added a final sentiment to the bottom corner using the 'birthday girl' stamp from the 'Hooray It's Your Day' set - this set co-ordinates with the project kit of the same name, but is useful for lots of cards and can be used for some fun personalisation - this card could equally be tailored to a 'birthday boy' and you wouldn't even need to change the colours. I stamped a trio of stars from the same set in co-ordinating colours to finish my fun birthday card. 

So before you reach for your paper and inks, check out what our amazing team has created to inspire you this week:

The Paper Players Design Team
 
Here's a quick recap of our challenge rules:
 
1.  Create a new paper project
2.  Upload your creation to your blog with a link back to us and provide a direct link to the post featuring your challenge submission.
3.  Please link your card to no more than three challenges, TOTAL.
4.  Have FUN! 

I hope my birthday card puts you in a celebratory mood today - best wishes to Ann for a super day and I look forward to seeing what you make with our sketch this week.

Back tomorrow with another project; until then, happy stampin'!


Stampin' Up! Supplies Used:

Table built using Product Table Builder by The Crafty Owl - Independent Stampin' Up! Demonstrator.


2013-15 In Colour Hey There Buds Card for The Paper Players

by Joanne James12. April 2015 10:00

It's Sunday and time for a new challenge over at The Paper Players and this week we have a colour challenge for you and I am the hostess! Stampin' Up!'s 2013-15 In Colours will soon retire on the 2nd June, to make way for five new In-Colours in the new annual catalogue. Whilst we still have them though, I thought this week we would showcase three of my personal favourites:
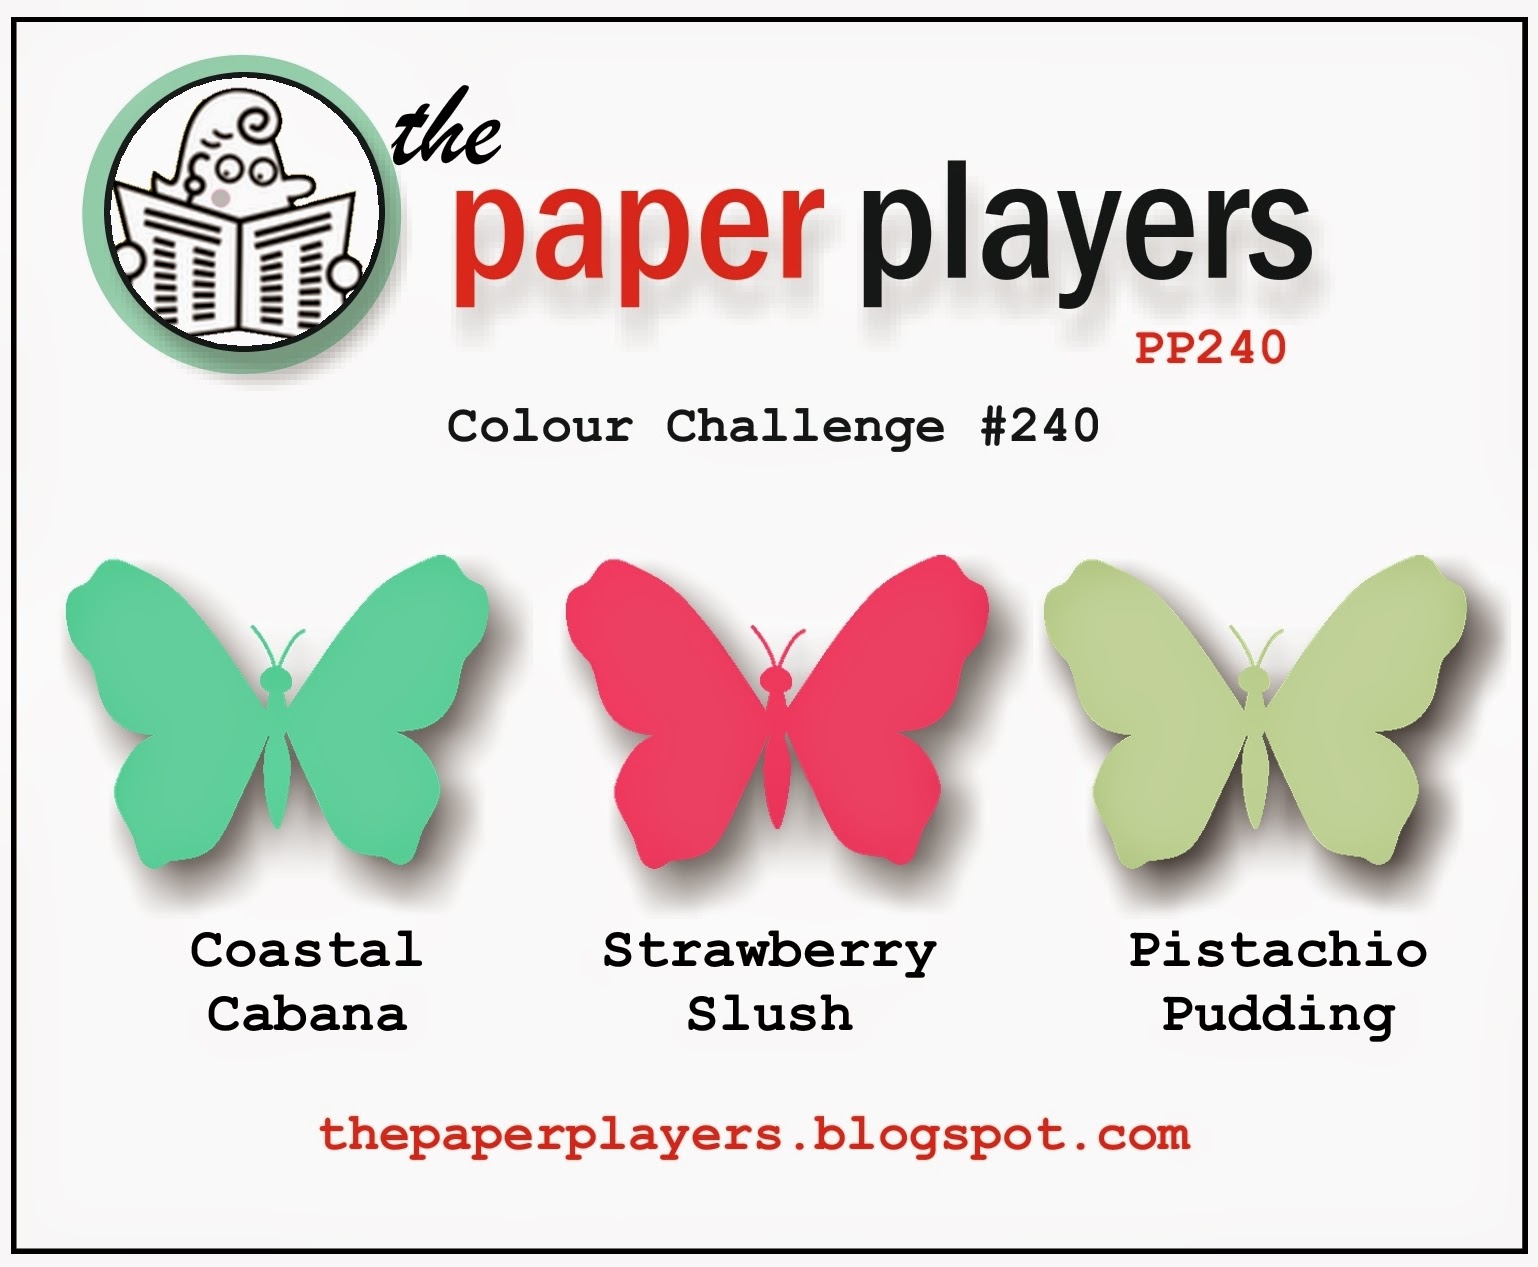
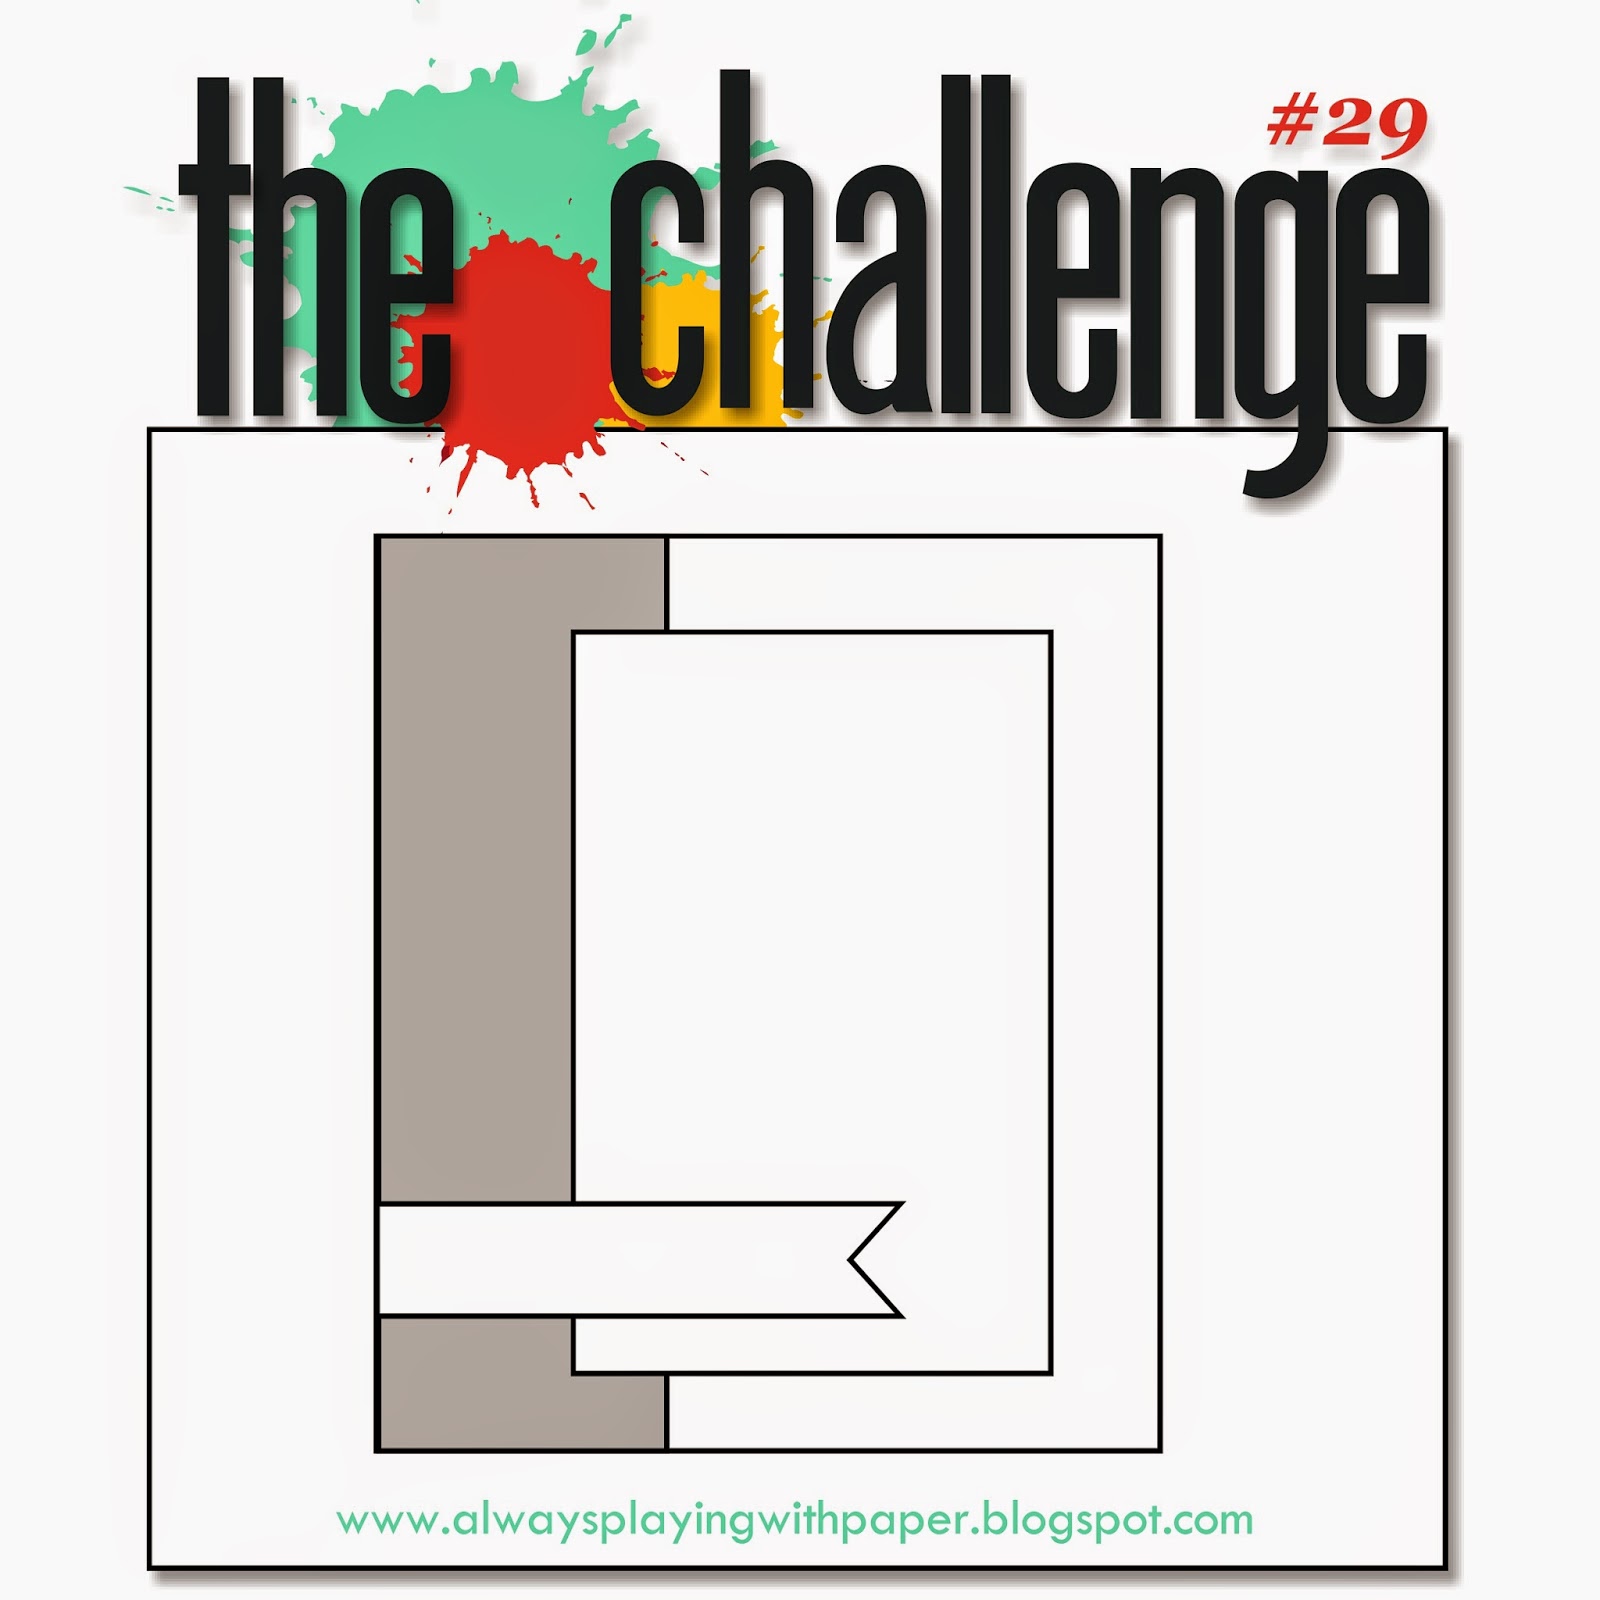
   

I'd like to take this opportunity to give a big shout-out to the fabulous Nance Leedy, who makes all of our challenge badges and does so much to ensure our weekly challenges run smoothly - Nance, you rock! - didn't she do a great job on my challenge badge this week? I used the sketch layout over at The Challenge for the layout of my card this week, and decided to go floral with my chosen colours - here's my card:
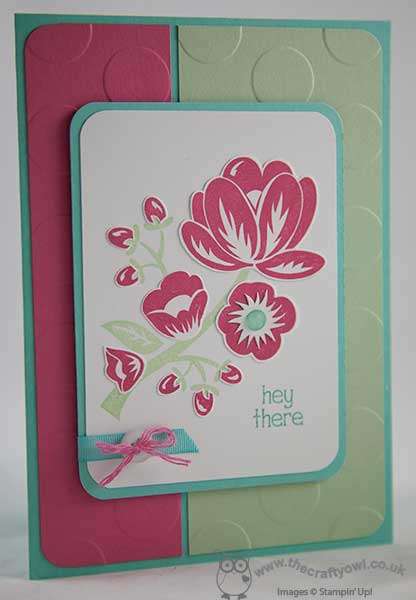
I have had the 'Hey There Buds' stamp set for edges and been dying to ink it up, so decided that today was the day! I used Coastal Cabana for my card base, then created a split mat panel of Strawberry Slush and Coastal Cabana, which I embossed with the large polka dot embossing folder. I matted my central panel of Whisper White on Coastal Cabana too (having rounded the corners of both pieces with my Project Life corner rounder), then on my piece of white I stamped the whole image in Pistachio Pudding, with the exception of the sentiment which I inked up separately with my Coastal Cabana Stampin' Write marker. I then stamped the whole image again on scrap cardstock in Strawberry Slush and fussy cut each of the blooms and stuck these onto the focal panel. I also stamped the central section of the open flower on a scrap of white in Coastal Cabana, and fussy cut around the spiky white section before adhering to the main image. I then added a blob of Crystal Effects to the blue flower centre for some extra dimension. I added a piece of Coastal Cabana ribbon (from the Sale-A-Bration Best Year Ever accessory set) and a white button tied with some split Strawberry Slush thick baker's twine to finish, before popping this panel onto the base using dimensionals.

So a little fussy cutting required, but it enabled me to get a more solid image than selectively colouring the image using markers and I think it was worth it. So before you reach for your paper and inks, check out what our amazing team has created to inspire you this week:

The Paper Players Design Team
 
Here's a quick recap of our challenge rules:
 
1.  Create a new paper project
2.  Upload your creation to your blog with a link back to us and provide a direct link to the post featuring your challenge submission.
3.  Please link your card to no more than three challenges, TOTAL.
4.  Have FUN! 

I hope you like today's project - I'm so looking forward to see what you create with my chosen colour palette - I look forward to seeing your cards and projects in our gallery this week.

I'm off on an all day team training day today, which promises to be fun. I then have two days of classes to look forward to. The James juniors are back to school on Tuesday after the Easter holiday and whilst I will be sorry to see them go, it should at least mean that normal blogging will resume shortly thereafter. This week the call of the warmer weather here in the UK was simply too much and we spent our week outdoors; with the exception of making the samples for next week's classes, my ink pads have remained firmly shut!

Back tomorrow with another project; until then, happy stampin'!


Stampin' Up! Supplies Used:

Table built using Product Table Builder by The Crafty Owl - Independent Stampin' Up! Demonstrator.


Hey I Remembered Your Birthday!

by Joanne James9. April 2015 08:05

It's Thursday and time for another challenge over at Create With Connie and Mary, where this week we have a great colour combination for you:

This colour combination appears in the Birthday Bash DSP and I couldn't resist using a piece of it on a fun-fold card for a humorous birthday greeting:

I used Night of Navy for my card base and created a fun-fold card using my Deco Labels framelits. I used Calypso Coral for my mats. I used a piece of the party hat paper for the front section beneath my main sentiment, a lovely curly script from the 'Age Awareness' stampset. I backed my sentiment panel with a circle cut with my circle framelits and popped this up on dimensionals, so that I could attach my Calypso Coral pompom trim and gold sequins to the front with a mini gold peg to add to the party feel. I continued the stamping inside my card, which today I remembered to photograph:

This card is for a good friend whose birthday I not only forgot last year, but worse still bumped into on the day and not even that triggered my extremely poor memory into remembering! Luckily the friend was gracious enough to forgive me, although he has ribbed me mercilessly about it ever since. Needless to say, his birthday isn't until next month but the card is ready and I will be making an extra effort this time around!

The Design Team has some amazing projects to share with you this week, with lots of great inspiration so do pop by their blogs and take a look. So grab your paper and inks and we look forward to seeing you in the gallery this week!

I'll be back tomorrow with another project hopefully; I have my monthly stamp-a-stack class in the morning and the Easter holidays mean I am getting a little less creative time than usual, but I'll do my best. until then, happy stampin'!


Stampin' Up! Supplies Used:

  • Age Awareness Photopolymer Stamp Set
  • Birthday Bash Specialty Designer Series Paper
  • Calypso Coral Pompom Trim `
  • Gold Sequin Trim
  • Mini Metallic Clothespins
  • Deco Labels Collection Framelits Dies
  • Circles Collection Framelits Dies
  • Big Shot Die-Cut Machine
  • Whisper White A4 Card Stock
  • Night Of Navy Classic Stampin' Pad
  • Night Of Navy A4 Card Stock
  • Calypso Coral A4 Card Stock
  • Crushed Curry Classic Stampin' Pad


Mini Catalogue

BROWSE THE CATALOGUE

The mini catalogue is now live! Read and download your copy here.

Shop Online

Access my online shop 24 x 7, 365 days of the year:

Current April hostess code:

VDKNV7BH

Shop Online

Join My Team

It's always a great time to join Stampin’ Up! New team members can get £130 worth of products for only £99 + free business supplies + free shipping + all the fun being a part of Stampin’ Up! Stampin' Up! has something for everyone: join my growing team and benefit from my support to enjoy Stampin' Up! however you choose.

If you're interested, call me for a chat to understand how I can help you realise your goals. Alternatively, if you have already decided to sign up and you just can't wait, please click here for the link to the online form where you can sign up and order your starter kit right away! 

Latest Kit!

Stampin Cut and Emboss

The Rock Legend Kit has all you need to make 8 cards with coordinating envelopes. Along with the new Panda Friends Kit, both are available from January 4th for just £14 each - get yours here!

2023-24 Annual Catalogue

BROWSE THE CATALOGUE

Click on the catalogue for a full list of current SU! supplies - if you would like to order any of the items featured, please drop me a line at [email protected] or give me a call on 07773 421446 - I'd be happy to help.

New Online Exclusives

There are new products available exclusively in the online store from 5 March - check them out here.

About Me

Hi I'm Joanne and live in Northampton and when I'm not looking after my husband and two beautiful children, am an avid crafter with a passion for all things Stampin' Up!

I must confess that I have never been a big rubber stamper - until I discovered Stampin' Up! that is. I love the fact that I can get such great results with co-ordinating stamps, inks, papers and punches - the possibilities are endless! Join me on my stamping journey as I share the things I love and be inspired to create amazing things yourself!

Follow Me

Monthly Newsletter

Box Builder

Click the button above to use Box Buster to create your custom box design using the Envelope Punch Board!

Kits Collection Now Available!

Stampin Cut and Emboss

The new Kits Collection from Stampin' Up! is now available!

Click here to see the current kits available and order yours online today.

I Design For


Stampin' Up Stuff

This is my personal blog and is not endorsed by Stampin’ Up! I hope you find it a plentiful source of ideas and personal inspiration but please don't copy my designs for contest submission or use for classes, publication or sale without express permission.