by Joanne James27. September 2019 13:00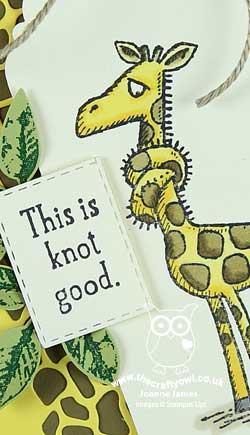
I've been a busy bee this week with not much opportunity for blogging, but never fear! Today I'm sharing my design team card for our new challenge over at As you See It where it's time for a recipe challenge:
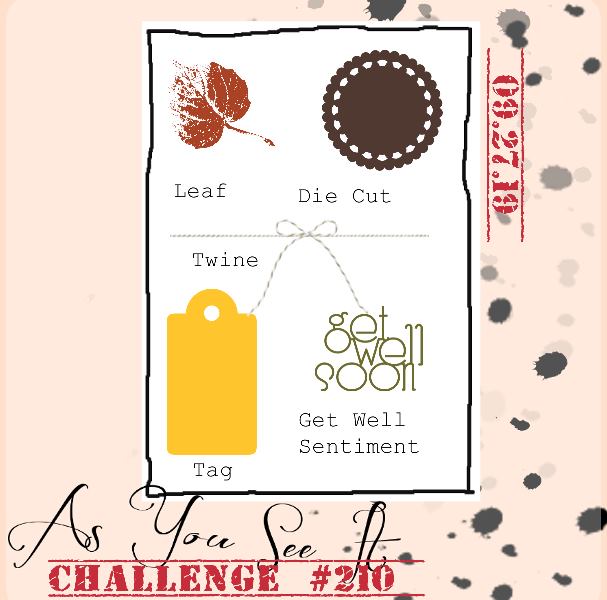
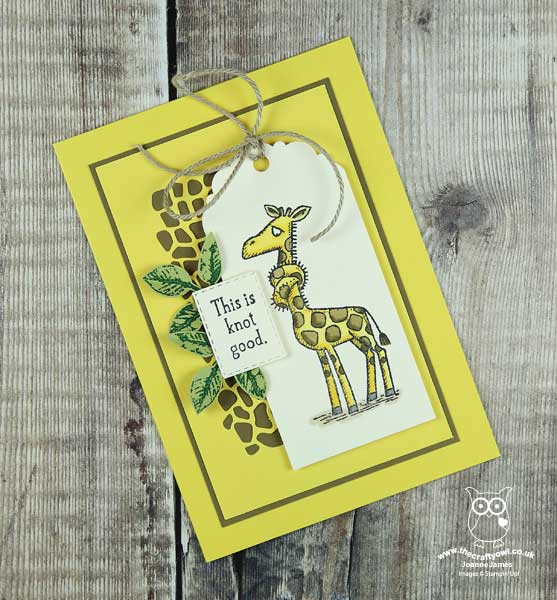
I went around the houses on this one for a while before I managed to come up with an idea that incorporated each of the elements, however I got there eventually with the help of the troubled giraffe from the 'Back On Your Feet' set - take a look:
Here's the low-down on today's card:
Back On Your Feet - I decided to feature the knotty giraffe from the 'Back On Your Feet' set on my card today. Perfect for a get well card, or even someone who's having a rough time of it, this comical giraffe and punny sentiment is sure to raise a smile. A simple stamp and colour with my Stampin' Blends and he was complete. The one thing that I was struggling to incorporate on this week's card was a diecut then I had a lightbulb moment (yes, sometimes it does happen!!) I used one of the dies from the Animal Friends Thinlits to create a giraffe-patterned background to tie in with my tag. Sorted!
A Delightful Tag - I used the new Delightful Tag Topper Punch to create the tag that features my giraffe today. My trusty Scalloped Tag Topper Punch is one of my most-used punches - great for gift wrapping, customer bag tags and cards alike. Don't worry, this punch hasn't been replaced - I just added to it with another, slightly more fancy-topped one. If you don't have a tag punch, you should really consider investing in one - they will make creating your Christmas tags super quick and easy.
And The Rest Makes Three - Some stamped and punched leaves, Crumb Cake Nature's Twine and my punny sentiment (one the inside of my card it says "Hope things get better soon.") cropped with a rectangle stitched shape finish off this week's recipe board - and my card!
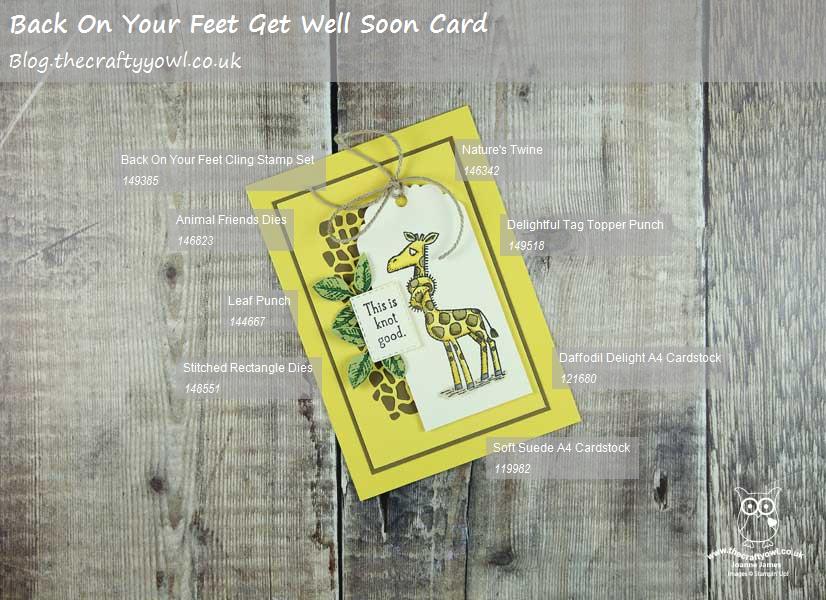
Here is the visual summary of the key products used on today's project for you to pin for easy reference:
You can see all of my 'How To' summaries on my 'How To - Tips and Techniques' Pinterest board in case you've missed any.
I do love giraffes and learned lots about them when I visited South Africa on safari many years ago. Did you know you can tell whether they are a girl or a boy by the amount of hair on the end of their horns? Females usually still have hair, whereas males' horns are usually bare from wrestling with each other for the affections of said females. I wonder if this is also the reason for premature balding in males?!
On that quizzical note I look forward to seeing what you make with this week's recipe challenge when I visit your blogs. Enjoy your day and I'll be back tomorrow with another project. Until then, happy stampin'!
Stampin' Up! Supplies Used:
9f62135a-b499-4cb2-b915-b816fd8e2030|0|.0|96d5b379-7e1d-4dac-a6ba-1e50db561b04
Tags: Stampin' Up, Stampin' Up Card, Stampin' Up Card ideas, Stampin' Up Supplies, Shop online, Shop Stampin' Up online, Shop Stampin' Up! Online, Blends, As You See It Challenge, Back On your Feet, Get Well Soon, Animal Friends Thinlits, Leaf Punch, Painted Harvest, Rectangle Stitched Framelits Dies, Delightful Tag Topper Punch
Cards | Shop Online | Shop Stampin' Up! Online | Stamping
by Joanne James18. March 2019 10:00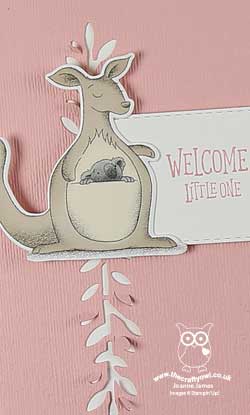
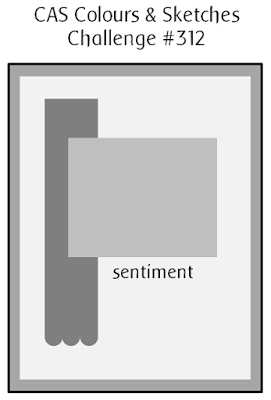
Another Monday and a new start to the week! Today I'm sharing a card a baby card using this week's sketch over at CAS Colours and Sketches that also fits this week's challenge over at Just Add Ink:

I still had my Animal Expedition papers out on my desk from the card that I will be sharing tomorrow so decided to make a quick new baby card - take a look:
Here's the low-down on today's card:
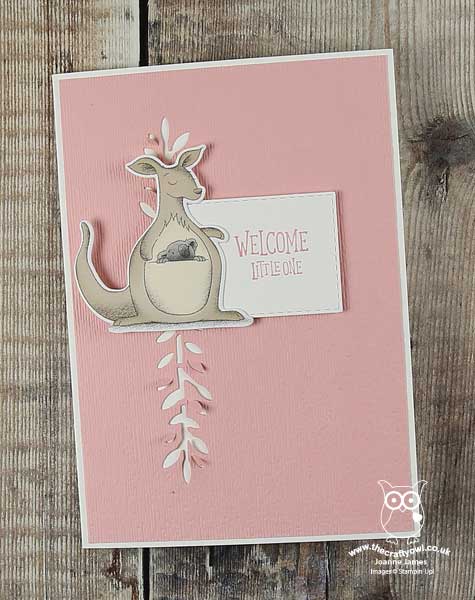
J is For Joey - So today's card features the cute koala/kangaroo combo that I cropped from the Animal Expedition papers using my Animal friends framelits. I was reminded when I read the post over at Just Add Ink that 'joey' is another name for a young kangaroo and that this would therefore work for their challenge this week. This is a bonus entry for me though, as I thought this little joey would be perfect for my baby card today - my scheduled Just Add Ink entry is coming up tomorrow and you are definitely going to want to pop by and see where my musings over the letter 'J' took me - it was just too easy to go with the Design Team's suggestions! Another tip from me when cropping these animals from your designer series paper: crop the identical shape out of extra thick white cardstock and adhere your DSP diecut to it for a more rigid element to prevent it getting squashed in the post.
A Hidden Gem - I used one of the other dies in the Animal Friends set for the vertical 'banner' element of the sketch - an inset vine that has some leaves that are remove completely and some that are attached, allowing them to be brushed up and add a little interest to the design. I genuinely hadn't noticed this die in the set before, hence my reference to it as a 'hidden gem'; I really like it and I can see me using it on lots of cards for added subtle detail.
Subtle Texture - After diecutting the vertical vine element, I ran my layer of Blushing Bride cardstock through the Big Shot with my Subtle embossing folder for a little extra texture and interest. It is indeed subtle, but I think it makes a nice addition before adding my sentiment and diecut animal pair on top.
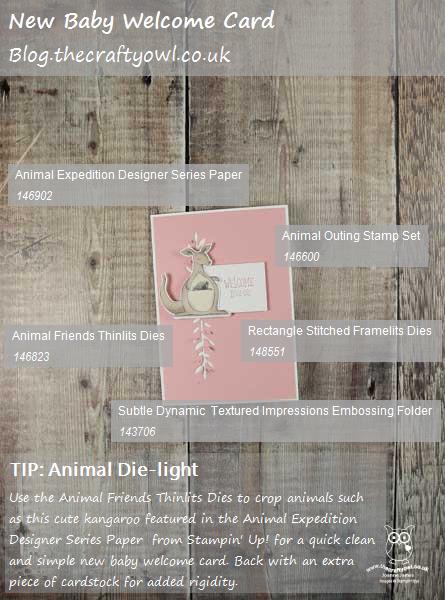
Here is the visual summary of the key products used on today's project for you to pin for easy reference:
You can see all of my 'How To' summaries on my 'How To - Tips and Techniques' Pinterest board in case you've missed any.
Enjoy your day and I'll be back tomorrow with another project. Until then, happy stampin'!
Stampin' Up! Supplies Used:
40c3623e-6325-4b8a-9e22-c926d28badf4|0|.0|96d5b379-7e1d-4dac-a6ba-1e50db561b04
Tags: Animal Expedition, Animal Friends Thinlits, Shop online, Shop Stampin' Up online, Shop Stampin' Up! Online, Stampin' Up, Stampin' Up Card, Stampin' Up Supplies, Rectangle Stitched Framelits Dies, Subtle Dynamic TIEF, Animal Outing
Cards | Shop Online | Shop Stampin' Up! Online | Stamping
by Joanne James16. March 2019 21:00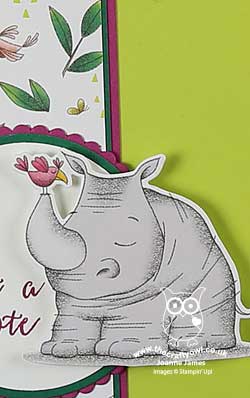
Today I'm sneaking in with another card that I made earlier with some leftover pieces from another project that I'm going to share with you on Tuesday - they were perfect for the current sketch over at Inspire.Create Challenge that finishes tomorrow:

This is a great card layout that would work with lots of papers and stamp sets. I had some offcuts of Animal Expedition designer series paper so used them to make a simple notecard - take a look:
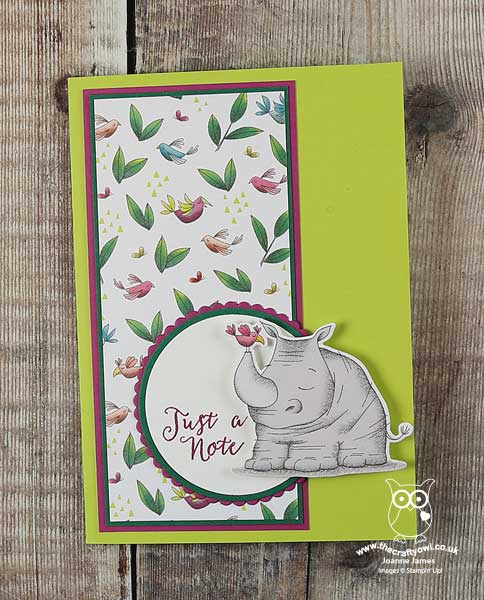
I diecut my rhino and birdie pair from a piece of my leftover paper and added to a sentiment on some layered circles and my card was done!
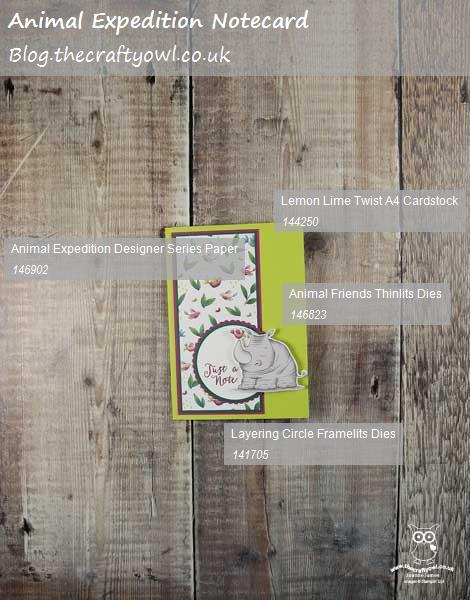
Here is the visual summary of the key products used on today's project for you to pin for easy reference:
You can see all of my 'How To' summaries on my 'How To - Tips and Techniques' Pinterest board in case you've missed any.
Enjoy your day and I'll be back tomorrow with my card for this week's challenge over at The Paper Players. Until then, happy stampin'!
Stampin' Up! Supplies Used: