by Joanne James5. March 2014 09:52Good morning blog readers and crafters! Back nice and early this morning with the second of my video tutorial posts showing you how to make any size box using your Envelope Punch Board and my new Box Buster tool. I've started early on my Easter treat boxes, so today's box shows you how to make this cute box:
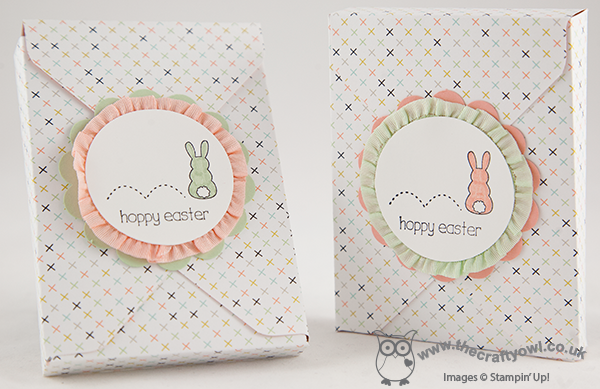
The finished dimensions of today's box are 100mm x 75mm x 15mm. It was designed to fit a specific Easter treat - but you'll have to watch the video below to find out what it was! My new Box Buster from The Crafty Owl tool is just great for that - you can easily create a box to fit your chosen contents, without any hassle or wasted paper - you just measure the thing you want to put in the box, input the dimensions into the Box Buster tool and it does all the hard work for you: it will tell you exactly what size paper you need and where to make your first and second punch markings.
Today's project was worked out in millimetres, but the Box Buster tool will let you construct your box in either millimetres or inches - you choose! Here's the link to today's video tutorial:
Wasn't that SOOO easy?! Keep following this week as there are more box tutorials to come, showcasing a variety of box types with handy hints and tips for making the most of your Envelope Punch Board and my new Box Buster tool.
Back soon with another project; until then, happy stampin' (and box making!)
Stampin' Up! Supplies Used:
184e6871-6a47-4103-a0a0-0c3eb90de4fd|0|.0|96d5b379-7e1d-4dac-a6ba-1e50db561b04
Tags: 3D Projects, boxes, circle punch, Eggstra Spectacular, Envelope Punch Board, Sale-a-bration, Sale-a-bration 2014, Stampin' Up Card, Stampin' Up, Shop online, scallop circle punch, Sweet Sorbet, video tutorial
3D Projects | Boxes | Envelope Punch Board | Sale-a-bration | Stamping | Video Tutorials
by Joanne James3. March 2014 22:26Good evening readers! Another busy day today with my first class of the month. The ladies in today's class made some great cards using their Happenings Simply Created Card Kits - pop by my Facebook page tomorrow if you would like to see what they created as I will be uploading some photos of their work.
Meanwhile, I promised you a special second blog post today that showed you how to make a box that can be used to hold four of the notelets created from part of the Happenings Simply Created Card Kit - so here it is! I've shot a few videos previously using the Envelope Punch Board, however this is the first box video. The reason I'm excited to share this particular video with you though is that I used a new tool of mine - Box Buster from The Crafty Owl - to work out the dimensions for my box and it was SO easy!!
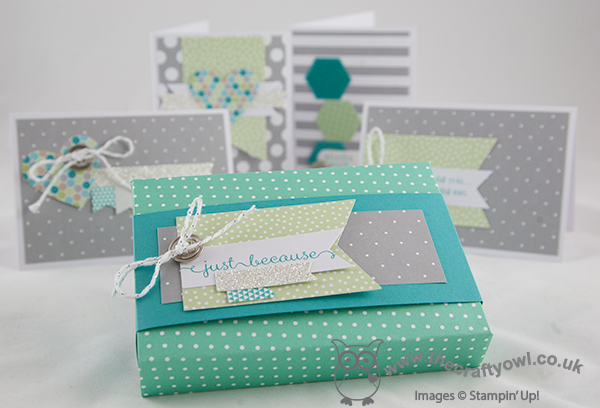
For any of you that have made boxes using your Envelope Punch Board previously, you will know that the trickiest thing is working out where to make your first and second punches in order to create a box of the correct dimensions. It's easy for a square-based box, as the dimensions simply need to be divisible by 3, but what about when you want to create rectangular boxes of different heights, widths and depths? Following many templates and a considerable amount of test paper, I have developed a tool that means you can input your three chosen dimensions, in either millimetres or inches, and the Box Buster will calculate the size of the paper that you require and where you need to make both your first and second punches.
Watch the video to see just how easy it is to use (you will need to make a volume adjustment for sound during the middle section of the video; the section that shows the Box Buster in action uses different recording software to my usual video recordings and the sound volume settings are not only different but I've been unable to edit post-production - I do now know for next time though!):
You can find Box Buster from The Crafty Owl on my website here or via the permanent link on the right hand side of my blog page. Box Buster is a free tool and will be permanently available for anyone to use - why not visit the page now and add it to your 'favourites' so that you can access it quickly and easily the next time you need to make a box using your Stampin' Up! Envelope Punch Board? Whilst you're there, why not also check out the Product Table Builder from The Crafty Owl - a great tool if you are a Stampin' Up! demonstrator with an online store. And if you haven't already got an Envelope Punch Board, what are you waiting for? Click on the link at the bottom of today's post and purchase one from my online store today!
I'll be making more video tutorials this week showing you how easy it is to make boxes in a variety of different shapes and sizes, in both metric and imperial measurements, using Box Buster from The Crafty Owl and The Stampin' Up! Envelope Punch Board; do come back and check them out or subscribe to my YouTube channel.
Back tomorrow with another project; until then, happy stampin'!
Stampin' Up! Supplies Used:
by Joanne James23. February 2014 21:11I've had quite the busy weekend and today I had my first weekend project class of the year. I love weekend project classes; they allow a little more time than we have at our monthly card class to do something a bit more involved. Today we made the Burlaps and Blooms Spring Wreath - such a lovely welcome nod to Spring after the cold of winter and the wet weather of late. So without further ado, here is my completed wreath:
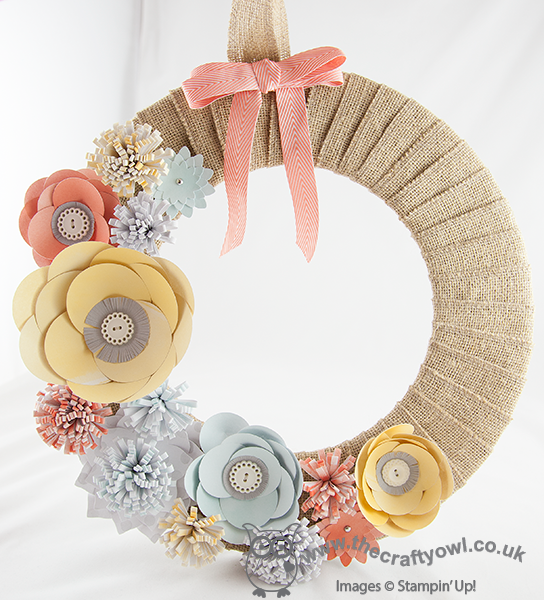
This wreath comes as a kit (minus the chevron ribbon) and with the aid of a hot glue gun contains everything you need to put it together. There are several different flower types that form part of the decoration. Here are some close up shots that show the detail - here's the large bloom made up of individual petals:
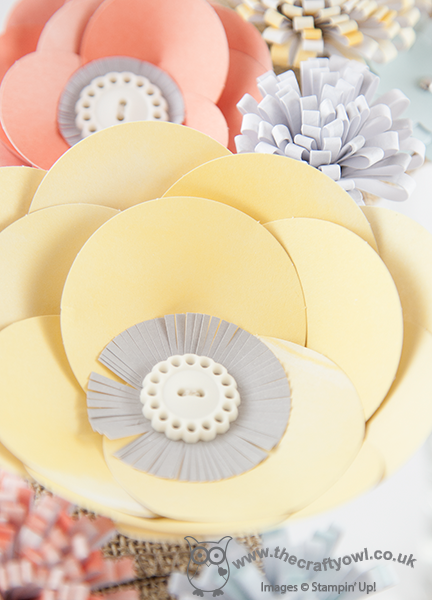
Here's one of the fringed flowers on a large flower base:
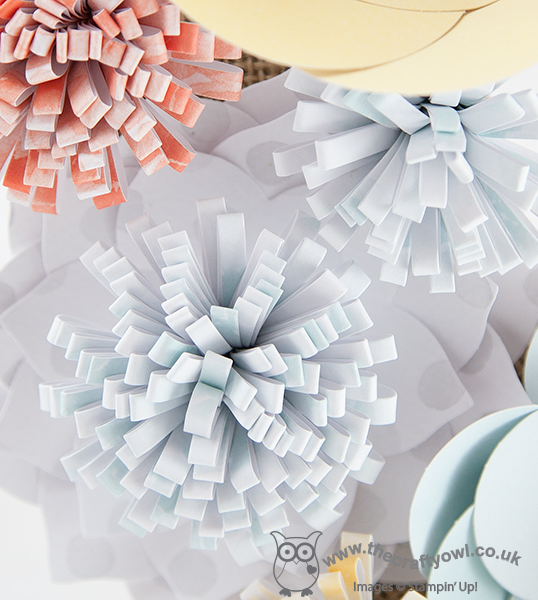
And lastly another fringed flower with a one of the layered flowers secured with a silver brad:
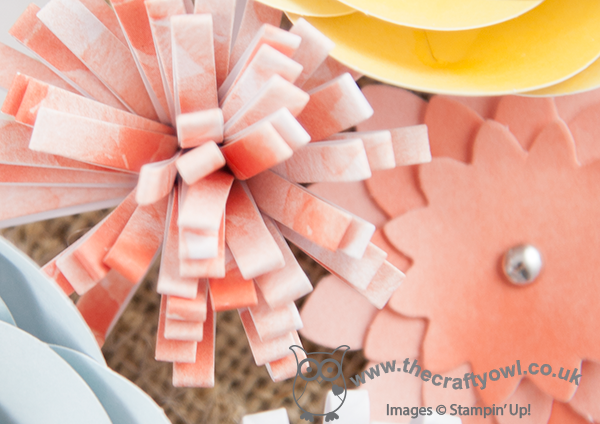
Isn't this wreath just so pretty? If you'd like to see the wreaths that the ladies at my class made today, do pop on over to my Facebook page to take a look (feel free to give me a 'like' at the same time!); they look similar to mine, but both have their individual touches that make their wreaths unique.
Half term is over so James Juniors are back to school tomorrow - normality (or at least, as 'normal' as it gets!) returns! I'll be here tomorrow with a fun card; until then, happy stampin'!
Stampin' Up! Supplies Used:
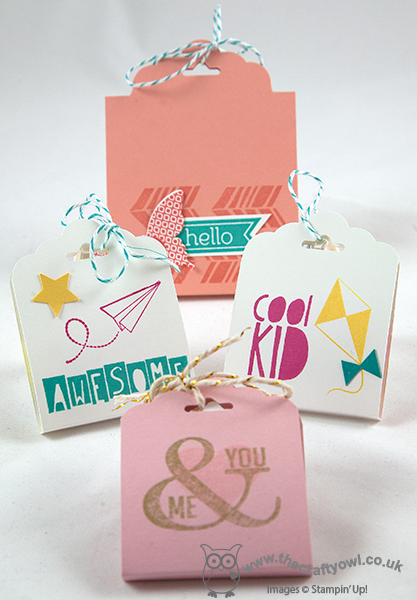
by Joanne James20. February 2014 21:28Good evening everyone! Today I have a video tutorial to share with you that I prepared a couple of weeks ago that shows you how to make an extra-wide pouch using the Scalloped Tag Topper Punch. Here's the finished extra-wide pouch:
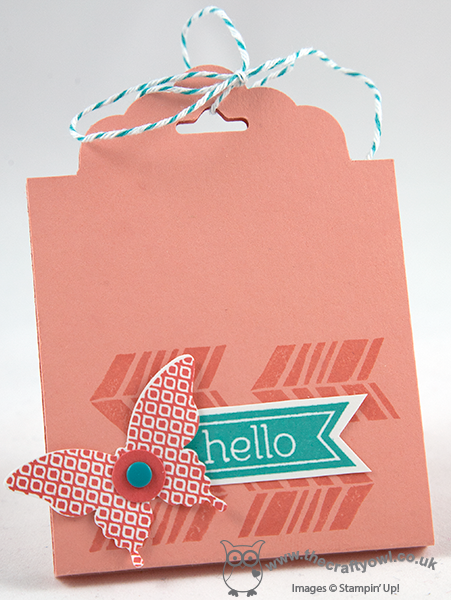
Here is a standard size treat pouch made with the Scalloped Tag Topper Punch - you can find my previous video tutorial on how to make this here:

As you can see, when compared to the standard-size punch, the extra-wide version is about 1" or 2.5cm wider and taller. The video tutorial shows you how to adapt your punch and shares my top tip for a smooth punch every time - go and take a look:
Here are the measurements I used in the video in case you didn't catch them:
Cardstock: 2 3/4" x 7 3/4" or 7cm x 19.5cm
Score at: 3 3/4" and 4" or 9.5cm and 10cm
I hope you found this video tutorial useful - this is such a versatile punch with so many uses beyond a standard tag. The treat pouches make great little wedding favours too.
Back tomorrow with another project; until then, happy stampin'!
Stampin' Up! Supplies Used:
9f056e18-8f7c-4028-927f-66d960295930|0|.0|96d5b379-7e1d-4dac-a6ba-1e50db561b04
Tags: 3D Projects, Papillon Potpourri, Perfect Pennants, Petal Parade, Scalloped Tag Topper Punch, Shop online, Stampin' Up, Stampin' Up Card, Stampin' Up Card ideas, Stampin' Up Supplies, video tutorial, Weddings
3D Projects | Stamping | Video Tutorials
by Joanne James16. February 2014 20:50I've had a busy but productive day today exhibiting at the Budget Bride Live Wedding Fair at Diana's Health and Fitness Club in Wellingborough. Thank you to all of the lovely brides to be that came to say 'hello' to me in the Ruby lounge today - it was lovely to meet you all and I'm really looking forward to chatting with you again soon to begin the process of turning your stationery dreams into reality. Today I'm sharing one of the table decorations that I made for my exhibition display that received lots of positive feedback today - a birdcage decorated with flowers made with the new Spiral Flower Die:
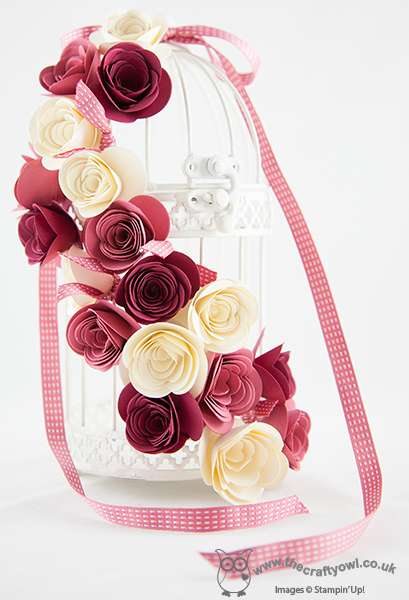
I made these flowers in three co-ordinating colours of cardstock and finished the centre of each flower with a pearl, then added some satin stitched ribbon to finish. You could make something similar in any colour to tie in with your chosen wedding colour scheme - it would make a lovely table centre.
That's all from me today; I am crafting at a children's birthday party tomorrow so will share one of the projects we are doing with you in tomorrow's post.
Until then, happy stampin'!
Stampin' Up! Supplies Used:
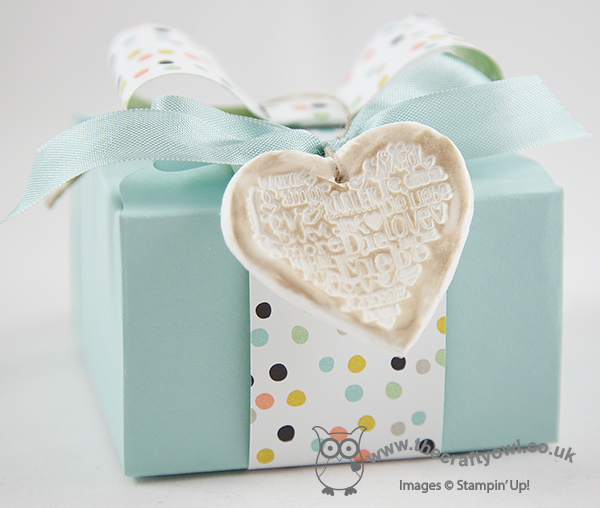
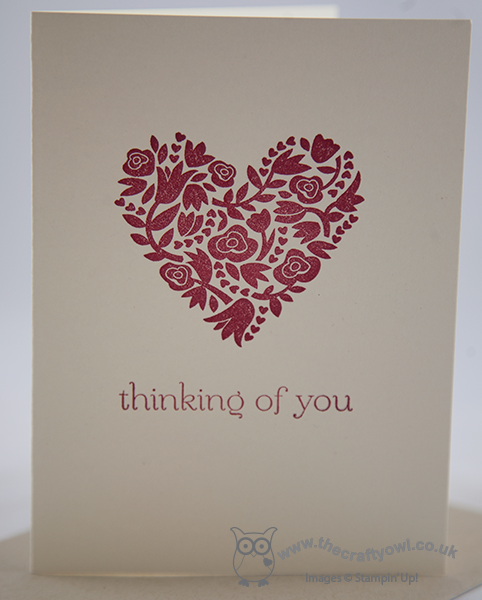
by Joanne James29. January 2014 20:50Today I have a little project to show you that is based on something I made using my Flowerfull Heart stamp at the beginning of January, but because I didn't have a voice I wasn't able to shoot a video to show you how to make it! Now that my beloved Flowerfull Heart stamp is no longer available to purchase, I decided to modify my original design and make it using one of the stamps in the new 'Language of Love' set that features in the Spring-Summer seasonal catalogue. I used Stampin' Up!'s Simply Pressed Clay to make an ornamental gift tag embellishment that you could use to decorate a card or package. Here's one on a box with a bow made out of some of the lovely Sale-A-Bration Sweet Sorbet DSP:
Here's a close-up of the tag, where you can really see the detail of the stamp:
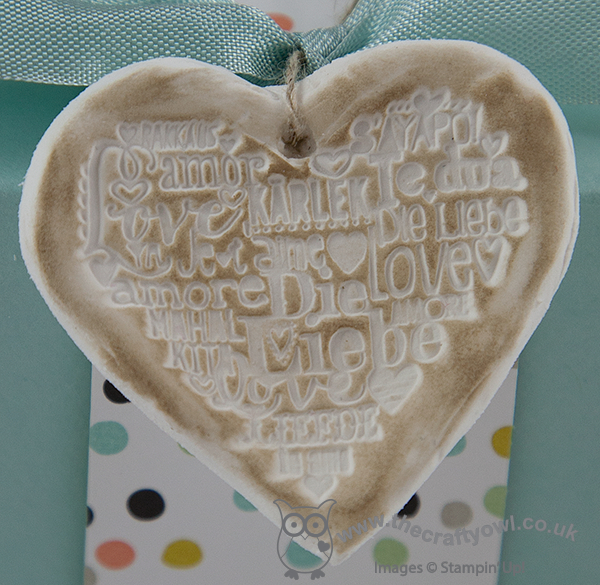
These tags really are quite easy to make, although you need to bear in mind it's a two stage process, as you will need to allow time for the clay to dry before you can colour and finish it. Here's a link to my video tutorial that shows you how it's done - it also includes some larger ornamental hearts made with my Flowerfull Heart (I couldn't resist!) - and some useful hints and tips for working with Simply Pressed Clay:
These tags would look beautiful attached to a wedding gift, or could even be an alternative wedding favour. I hope you found today's video tutorial useful and it inspires you to make interesting things with Stampin' Up!'s Simply Pressed Clay - leave me a comment and let me know what you come up with, or better still share a photo of your work on my Facebook Page!
Back tomorrow with another project; until then, happy stampin'!
Stampin' Up! Supplies Used:
9e5e4fa7-f4d4-4356-ad0b-61ab3a5b9bbc|0|.0|96d5b379-7e1d-4dac-a6ba-1e50db561b04
Tags: 3D Projects, Language of Love, Simply Pressed Clay, Stampin' Up, Stampin' Up Card, Stampin' Up Card ideas, Stampin' Up Supplies, video tutorial, Valentine's, Valentines, Weddings, Shop online
3D Projects | Stamping | Video Tutorials
by Joanne James10. January 2014 19:45Evening lovely blog readers! So big news of the day: my voice is (almost) back! Great news for me, not so great for my youngest when he announced he had lost his trainers following his PE lesson just 3 days into the new term - but that's a story for another time!
Today I'm going to share the last of this week's class projects: a gift card holder, once again made with the Envelope Punch Board. I've seen a few holders made in this way on the internet, but I adapted mine slightly to enable me to make it from half a sheet of A4, using metric measurements. So here is the finished gift card holder from the outside:

No apologies for once again using the Flowerfull Heart stamp (I still love it!), this time overlaid with 'love' cut from gold foil using the Expressions Thinlits die (don't forget these are only available to purchase until the 1st February). There's also another sneak peek of new product available in the Spring-Summer catalogue that launches on 28th January; did you spot it? Yes, it's the lovely gold washi tape which I paired here with Very Vanilla to make my pocket. There are lots of silver and gold items in the new catalogue, so if this is your thing, stay tuned - there will be more to come. The flap closure for the gift card holder is the bit you need the Envelope Punch Board for - it makes the two notches that enable the holder to stay closed and keep the gift card firmly in place.
When you unclasp the flap, this is what you see inside:
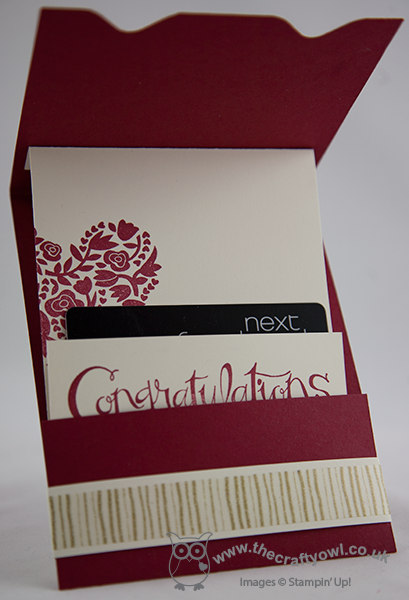
The insert is attached to the opening flap so that it slides out of the pocket as you open it and presents the gift card. I designed my gift card holder with a wedding or engagement gift in mind - vouchers or money seem very popular gifts these days, but you could easily adapt it for a birthday or other occasion. One thing is for sure - when it's as easy to make as this, there's really no excuse for a simply sticking a voucher in an envelope or worse still a carrier bag (believe me, it happens!!)
That's all the projects from my classes this week - I hope they've inspired you to go and be adventurous with your Envelope Punch Board. If you live local to me in Northampton and would like to attend any of my Stampin' Up! papercraft and card classes, you can find the current schedule of my card and project classes on my website here; please contact me for further information regarding location and any equipment you will need to bring. Classes must be booked at least 2 weeks in advance of the class date.
Back tomorrow with a Sale-A-Bration sneak peek; until then, happy stampin'!
Stampin' Up! Supplies Used:
2cbf2591-39f6-471a-9a05-7822cc150877|1|5.0|96d5b379-7e1d-4dac-a6ba-1e50db561b04
Tags: 3D Projects, Classes, Envelope Punch Board, Flowerfull Heart, Gift Voucher, Sassy Salutations, Shop online, Stampin' Up, Stampin' Up Card, Stampin' Up Card ideas, Stampin' Up Supplies, Weddings, Valentines
3D Projects | Cards | Classes | Envelope Punch Board | Stamping
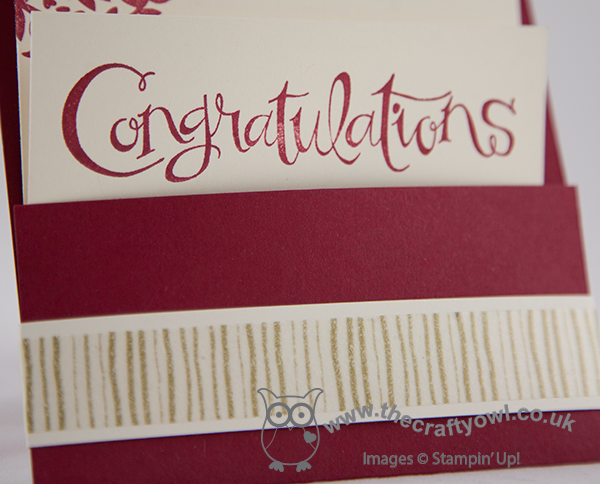
by Joanne James9. January 2014 21:37Today I've another of this month's Envelope Punch Board class projects to share with you - a rectangular box notecard holder and a set of notecards. So here is the box, complete with belly band:
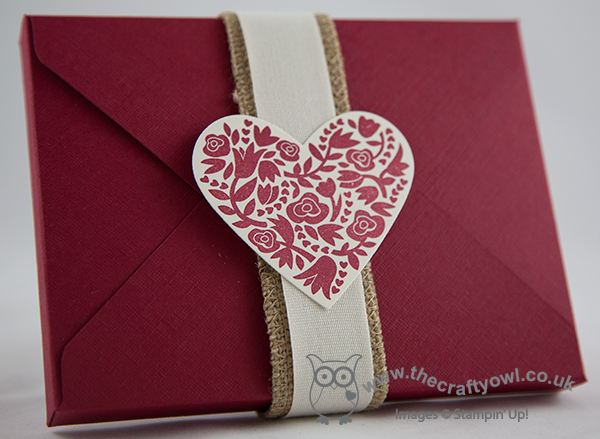
The box is made from Cherry Cobbler textured cardstock, which is great for boxes as it's really thick and has a lovely quality feel. In this photo I've finished with a belly band made from burlap and cotton ribbon; in class, we also made bows from Modern Medley paper using the Envelope Punch Board and created belly bands with bows on. Inside the box, we made a set of simple notelet cards, in co-ordinating vanilla and Cherry Cobbler and paired with Crumb Cake envelopes:
We used the Sweet Essentials sentiment stamps; this is a great set with sentiments to suit a variety of occasions. This set would make a lovely gift for someone and depending on the sentiment, it could be for a birthday or even created as a set of wedding thank you or acceptance cards.
The finished box base measures 5 3/4" x 4 3/8" and was made from a starter piece of 9" x 9" card stock. As with all boxes, whether square or rectangular, the piece of card you start with needs to be perfectly square; it's the points at which you punch and score that determine the finished dimensions of the box. To create this box, we punched and scored at 3 1/2" and 4 1/2".
Back tomorrow with another project; until then, happy stampin'!
Stampin' Up! Supplies Used:
7b96fc59-7eaf-47b6-9c78-2a8c064af419|2|5.0|96d5b379-7e1d-4dac-a6ba-1e50db561b04
Tags: 3D Projects, boxes, Envelope Punch Board, Flowerfull Heart, Hearts Framelits, Shop online, Stampin' Up, Stampin' Up Card, Stampin' Up Card ideas, Stampin' Up Supplies, Sweet Essentials
Boxes | Cards | Classes | Envelope Punch Board | Stamping
by Joanne James8. January 2014 15:26So for my second post today, I wanted to share with you one of the quick makes from my January classes, which are being held this week. This month we are featuring the Envelope Punch Board. Lots of my customers either purchased one or received one as a Christmas gift, but weren't really sure what to do with it other than make basic envelopes. They were truly inspired by my Easiest Ever Envelope Punch Board Cracker Video that I posted before Christmas, so I was keen to show them the full extent of their boards and just what they could do.
We started off by making square boxes - here's my version of the one we made:
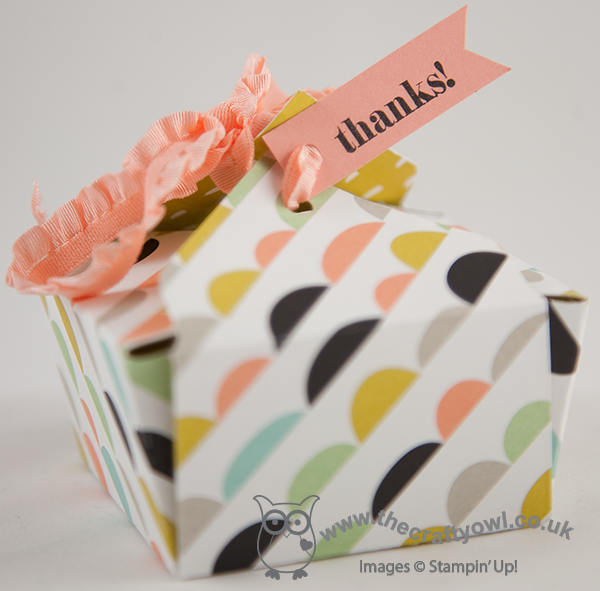
This is a simple 2" square box, made from a 6" x 6" square piece of paper, probably the easiest type of box to make. My class used the Modern Medley DSP for their boxes (there are some pictures over on my Facebook page if you would like to see them), but for my box here I thought I would give you another 'sneak peek' of product that will be available during this year's Sale-A-Bration promotion, starting 28th January. This is a sheet from the 'Sweet Sorbet' DSP collection - lovely fresh, spring colours with black (an unusual, but very workable colour combination). I finished my box with a small 'thanks' tag and some stretch ruffle trim in Crisp Cantaloupe to hold the box closed.
Back tomorrow with another of my class projects. until then, happy stampin'!
Stampin' Up! Supplies Used:
6aa5543d-b2e5-4d14-b8dc-304e99af2e39|0|.0|96d5b379-7e1d-4dac-a6ba-1e50db561b04
Tags: 3D Projects, boxes, Classes, Envelope Punch Board, Sale-a-bration 2014, Shop online, Stampin' Up, Stampin' Up Card, Stampin' Up Card ideas, Stampin' Up Supplies, Sweet Sorbet
3D Projects | Boxes | Envelope Punch Board
by Joanne James29. December 2013 13:00As you will have guessed if you read yesterday's post and saw my 'sneak peek', today's post features butterflies - quite a few, in fact! Ever since I saw this piece of wall art by Fiona Duthie on Pinterest I've wanted to have a go at creating a version of my own. Butterflies have a special meaning to one of my best and most dear friends and she is also someone who loves home décor, so I decided to create this piece as a Christmas gift for her. Here's my finished piece:
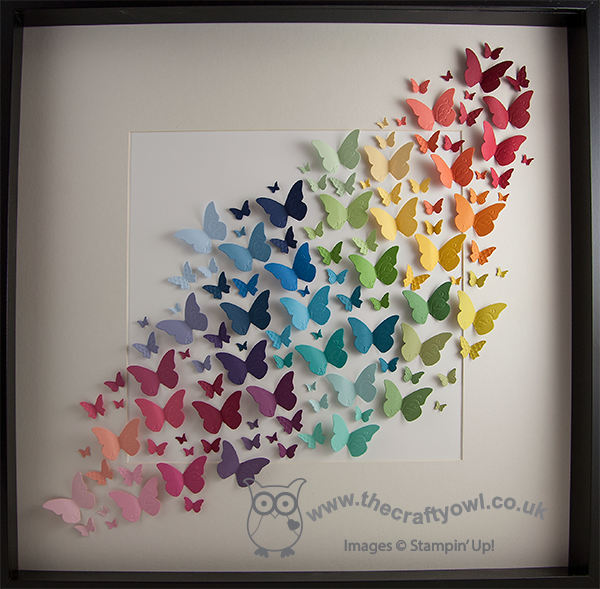
The finished piece measures 50cm x 50cm (approx. 20") so is a definite statement piece. I used a variety of colours across each of the Stampin' Up! colour families, including in-colours, along with one or two retired colours too. I wanted to give a full rainbow spectrum of colours, particularly given the size of the piece.
For the butterflies, I used the Beautiful Wings Embosslits to make the butterflies as opposed to a punch, as I wanted the texture that the embosslit provides - here's a closer look:
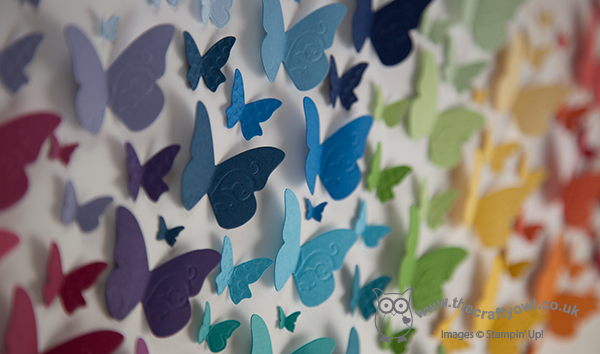
You could quite easily create a similar piece using one of the butterfly punches and it would be equally effective. I'm so pleased with the finished piece - it was quite tricky to photograph, but I hope you can get a sense of the movement it gives - it is so colourful and dramatic.
This is a nice early post from me today as I'm out with friends this evening on a cookery course, in an attempt to master the art of Indian cookery; it's the second one that hubby and I have attended (I'd like to say it's because we want to expand our repertoire, but it might just be that we need the practice - I'll have to get back to you on that!)
Back tomorrow with another project; until then, happy stampin'!
Stampin' Up! Supplies Used: