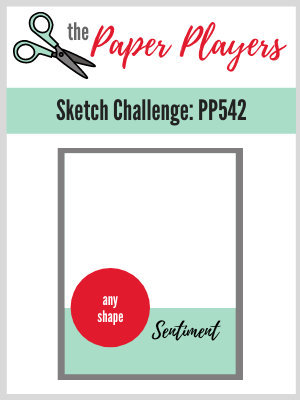
Today it's Sunday and time for this week's new challenge over at The Paper Players! It's the turn of the fabulous Jaydee to host this week and she has my favourite, a sketch challenge for you to work with:
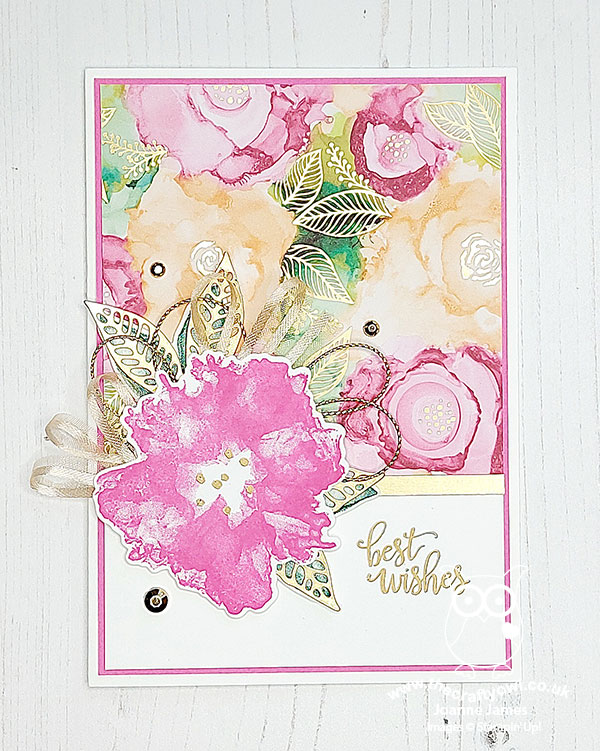
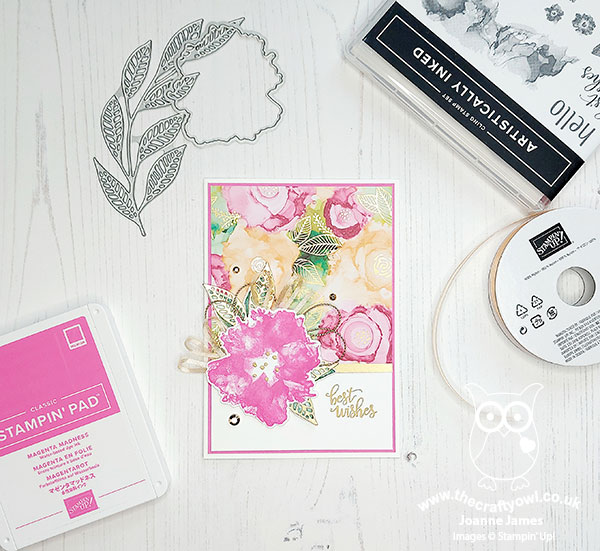
I decided that Jaydee's sketch was the perfect opportunity to get to work with my Expressions in Ink suite. As is often the way, the first card that I make when I open a new suite for the first time ends up including a bit of everything, and today's card is no exception - take a look:
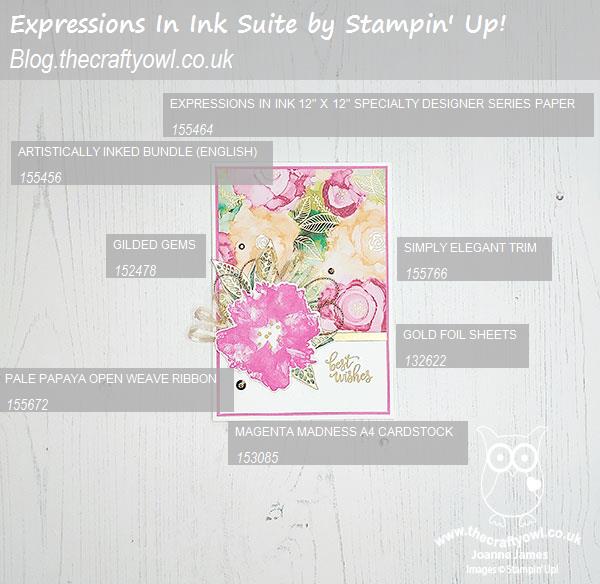
Here's the low-down on today's card:
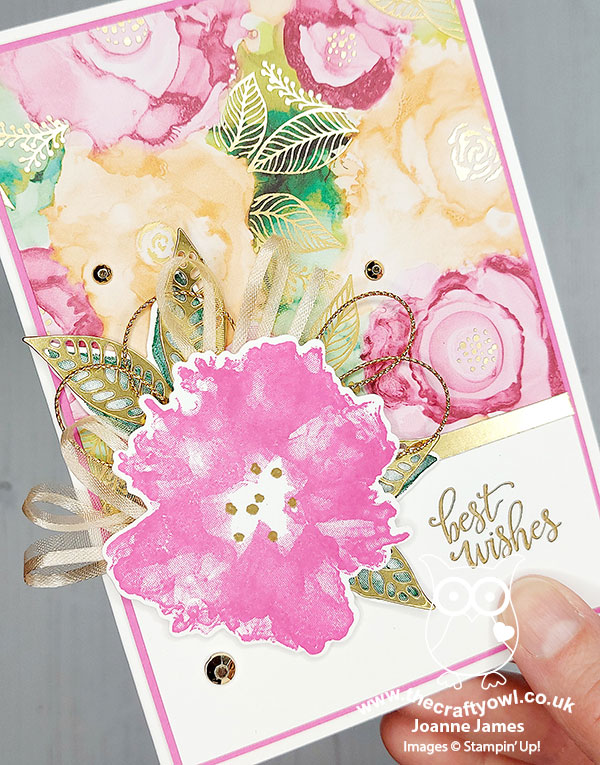
Expressions In Ink - The starting point for today's card was the beautiful 'Expressions In Ink' specialty designer series paper that is the cornerstone of the suite of the same name and that features on the front cover of the new annual catalogue. Full of patterns made from alcohol inked backgrounds with gold embossed detail, these papers are stunning! I chose a heavily patterned floral design with gold embossed detail and added it to the top portion of my card.
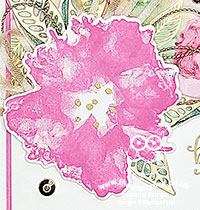
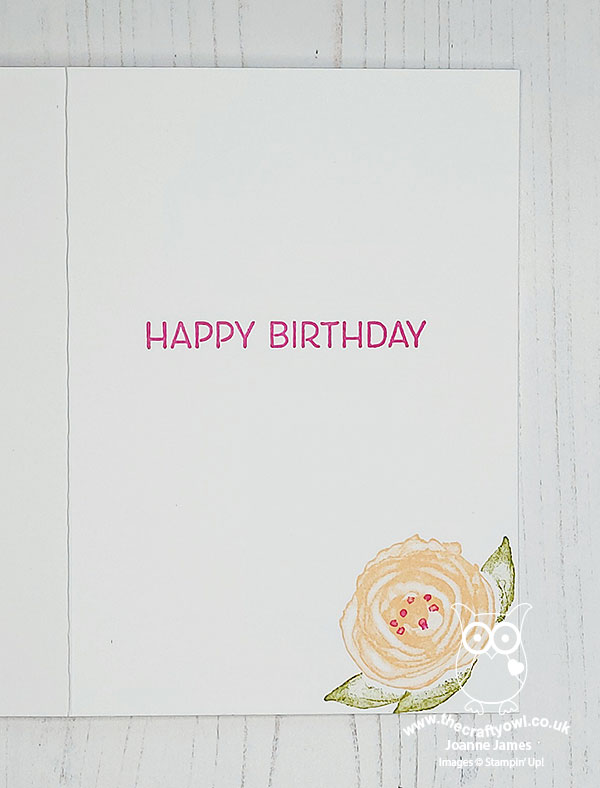
Artistically Inked - I used the 'Artistically Inked' stamp set to stamp a Magenta Madness flower and two pairs of leaves, along with a heat-embossed sentiment on the front of my card. These are distinktive stamps that also have that watercoloured or alcohol-inked effect. I die cut these elements with the co-ordinating Artistic Dies. I also added a sentiment and another stamped flower to the inside of my card:
Touches of Gold - I added lots of additional touches to my floral focal point to make this a rather special card - gold foil diecut leaves, Pale Papaya ribbon (cut in half lengthways), gold twine and gilded gems for an added touch of luxury:
I just adore this suite - I think it is my favourite of all of the new suites in the catalogue. If it's a favourite of yours too, you are going to want to come back again this week as I have made lots more cards that I will be sharing with you. So much so, I am already running out of this paper - I will be needing to order more of that this week!!
Here is the visual summary of the key products used on today's project for you to pin for easy reference:
You can see all of my Product and 'How To' summaries on my 'How To - Tips and Techniques' Pinterest board in case you've missed any.
Before you reach for your ink and papers, check out what our amazing team has created to inspire you this week:
The Paper Players Design Team
Here's a quick recap of our challenge rules:
1. Create a new paper project
2. Upload your creation to your blog with a link back to us and provide a direct link to the post featuring your challenge submission.
3. Please link your card to no more than four challenges, TOTAL.
4. Have FUN!
You can see all of my 'How To' summaries on my 'How To - Tips and Techniques' Pinterest board in case you've missed any.
Enjoy your day; mine is a going to be a busy one as Sundays go. There is swim squad training for both James Juniors and then Master James has a football-themed birthday party to attend in the afternoon too. I'm just hoping it stays dry - cricket was cancelled again yesterday - and for once not because it was raining, but this time because we have had so much rain so far this last week and in May as a whole that the cricket pitches were saturated. The poor boy has yet to wear his new cricket kit this year - at this rate he will have grown out of it before he gets the chance!
I'll be back tomorrow with another project. Until then, happy stampin'!
Stampin' Up! Supplies Used: