TahitianTide Pretty Pop Ups Dies Hello Friend Card TTT168

by Joanne James30. June 2022 16:00

It's Thursday and time for a new challenge over at TicTacToe! It's the turn of Team X to host this week and the lovely Felicita is our featured designer this week. This is the fun board that we are playing along with: 


I went down the first column with Friendship, Any Colour and Any Shaped Die and went with a tone-on-tone look using one of Stampin' Up!'s new 2022-24 in colours, Tahitian Tide - take a look:


Here's the low-down on today's card:

My card uses a simple white base with ink, ribbon and DSP in Tahitian Tide. Oh and did I mention the glimmer paper? This is the star of today's card - along with the Pretty Pop Up Dies that I used to create the detail for my focal point - check out the dimension and sparkle below:

The glimmer paper has a graduated ombre effect; difficult to see on this small area, but so pretty and along with the designer paper and metallic ribbon does a great job of showcasing the bright blue tones associated with this colour. I added some basic pearls to highlight the die detail. I have a top ribbon tip for you too: if you look closely, you can see I created a notch in the edge of my card which allows my ribbon to sit perfectly straight and be held neatly in place. This ribbon is lovely - so soft and ties beautiful bows. A simple card that is sure to bring a smile to a friend's face when received in the post. 

I liked this card so much, I made another one in Starry Sky which I thought I'd share - what do you think?


My favourite is still the first one, but I'm going to make a whole batch and include them in with this month's In-Colour Club packs as I think they do a great job of showcasing these lovely new in-colours.

Here is the visual summary of the key products used on today's project for you to pin for easy reference:


You can see all of my Product and 'How To' summaries on my 'How To - Tips and Techniques' Pinterest board in case you've missed any. 

A tictactoe board offers so many creative possibilities - how does this week's board inspire you? Why not have a go? We would love to see you in the gallery and who knows - you might be selected for Designer's Choice and be eligible to be a guest designer on a future challenge. 

Enjoy your day; I'll be back tomorrow with this week's card for the new challenge over at As You See It. Until then, happy stampin'!


Stampin' Up! Supplies Used: 

Table built using Product Table Builder by The Crafty Owl - Independent Stampin' Up! Demonstrator.

Sending Smiles In Lovely Linen PP597

by Joanne James26. June 2022 08:00

Today it's Sunday and time for this week's new challenge over at The Paper Players! It's my turn to host this week and I have my favourite, a sketch challenge for you to work with:


I chose a sketch with layers today that can be interpreted in lots of ways. I decided to use my main panel to showcase another pattern of a new designer series paper - take a look:


Here's the low-down on today's card:

I chose a colourful, floral paper from the Lovely Linen designer paper - this linen-effect paper is so pretty. I added a banner and sentiment from my favourite 'Sending Smiles' bundle and added a couple of layered flowers diecut using the Summer Shadows Dies as an anchor for my sentiment: 

These diecut florals aren't designed to co-ordinate with the Lovely in Linen Suite, which has it's own co-ordinating stamp set and punch, but I think the shapes work quite well, don't you? A sprinkling of pearls completes my card.

Here is the visual summary of the key products used on today's project for you to pin for easy reference:


You can see all of my Product and 'How To' summaries on my 'How To - Tips and Techniques' Pinterest board in case you've missed any. 

Before you reach for your ink and papers, check out what our amazing team has created to inspire you this week:

Here's a quick recap of our challenge rules:
 
1.  Create a new paper project
2.  Upload your creation to your blog with a link back to us and provide a direct link to the post featuring your challenge submission.
3.  Please link your card to no more than four challenges, TOTAL.
4.  Have FUN!

Enjoy your day; I'll be having a quiet one at home, catching up on the things that I've missed whilst I've been out on my travels. I'm looking forward to seeing how you interpret my sketch this week! I'll be back soon with another project. Until then, happy stampin'!


Stampin' Up! Supplies Used: 

Table built using Product Table Builder by The Crafty Owl - Independent Stampin' Up! Demonstrator.


Every Chapter Friendship Card FF112

by Joanne James24. June 2022 09:00

Today I have my card for the new challenge over at Festive Friday. 


The challenge that we are celebrating this week is 'Alice In Wonderland Day' which is on 4th July. Remember the fun thing is that at Festive Friday you do not need to actually celebrate the occasion; your goal is to simply use three or more items from the inspiration list on your project. This week I used hearts, teacup and book and this is what I came up with:


Here's the low-down on today's card:

I knew I wanted to use the 'Every Chapter' stamp set for my card today (teacup and book - check!) and decided I would CASE Krista's layout over at Global Design Project #GDP348 too, so went on the hunt for some teacup-patterned paper for my background. The patterns in the Tea Boutique papers were too uniform to look right either side of my central panel, so I opted for some retired teacup paper from my stash instead. This then led me to use a similar colour palette to Krista's card too - double inspiration! 

I did a partial stamp using only the top portion of my 'Every Chapter' stamp (masking out the words on the book spine), fussy cut it out and coloured it with my Stampin' Blends before popping onto a background made using one of the stamps from the new 'Cup Of Tea' set, where I separated each sentiment with a hand-drawn heart (hearts - check!) I added another heart to my teabag tag detail and a final sentiment from 'Lovely You' to complete my card.


Here is the visual summary of the key products used on today's project for you to pin for easy reference:


You can see all of my 'How To' summaries on my 'How To - Tips and Techniques' Pinterest board in case you've missed any. 

I'm also linking today's card up over at The Alphabet Challenge where they are on 'F is for Friendship' - this card will be headed to one of mine!

How does our board inspire you? I can’t wait to see what YOU create! For more inspiration, be sure to visit the rest of the  Festive Friday Challenge Design team:

Ann Schach
Beth McCullough
Sharon Hashimoto Burkert
Melanie Hungerford
Helen Jennings
Stephanie Lanzalotto
Melva Peters
Jaydee
Diane Evans
Joanne James

Enjoy your day; I'm back on the road and off to Nottingham and on to Newcastle tomorrow. I'll be back here on Sunday with my card for the new challenge over at The Paper Players. Until then, happy stampin'!


Stampin' Up! Supplies Used:

Table built using Product Table Builder by The Crafty Owl - Independent Stampin' Up! Demonstrator.

Nothing's Better Than Clean And Simple Glimmer Cocktails CCS45

by Joanne James21. June 2022 12:00

It's Tuesday and time for a new challenge over at CAS Colours & Sketches. Samantha is hosting this month and this week we have a colour challenge featuring three of the five new 2022-24 Stampin' Up! in colours: 


For my card today I made a colourful cocktail card using the 'Nothing's Better Than' stamp set - take a look: 


Here's the low-down on today's card:

Nothing's Better Than - I've used the 'Nothing's Better Than' for a colourful cocktail card previously (you can see that card here if you missed it) but this one is an altogether more clean and simple affair. 

Glimmer Shapes - I backed my stamped and die cut cocktail glass with a combination of in-colour glimmer stitched circles and backed the sentiment banner with another one in the third challenge colour - so much sparkle, yet concentrating it in a small area enables the clean and simple feel to be maintained:


I also added a trio of Tahitian Tide enamel dots to continue the circle theme.

Inside And Out - Another cocktail inside my card and a second one on the envelope completes my card - no naked envelopes or insides here!


Here is the visual summary of the key products used on today's project for you to pin for easy reference:


You can see all of my 'How To' summaries on my 'How To - Tips and Techniques' Pinterest board in case you've missed any. 

As a reminder, for our colour challenges, you must use all of the stated challenge colours. You may also use neutral colours; however, the challenge colours should be the most noticeable ones featured on your card. We use Stampin' Up! color names for reference, but you are welcome to use any other companies' products as long as you match the challenge colours as closely as possible.

Enjoy your day and I'll be back tomorrow with another project. Until then, happy stampin'!


Stampin' Up! Supplies Used:

Table built using Product Table Builder by The Crafty Owl - Independent Stampin' Up! Demonstrator.

Butterflies and Flowers Clean And Simple One Layer Birthday Card PP596

by Joanne James19. June 2022 08:00

Today it's Sunday and time for this week's new challenge over at The Paper Players! It's the turn of the fabulous Jaydee to host this week and she has a clean and simple challenge for us to work with:


I love one layer cards! had another go with a different colour combo from the palette over at Sunday Stamps (such a great colour palette!) and decided that today I would focus on creating the illusion of layers on my single layer creation using some clever diecut embossing, masking and stencilling - take a look:


Here's the low-down on today's card:

How Many Layers? - I love one layer cards as they are great for clean and simple designs. They can be as simple as a single image and a sentiment; for today's card though, I decided to create the illusion of layers. The first thing I did was use one of my Scalloped Contour Dies to partially emboss the outline of a label. I then stencilled a butterfly on the non-embossed section, then masked it off, along with a second mask to mask off the embossed area before using an alternative stencil to emboss a pattern around the remainder of the card. At this stage the card should look something like this:

When the masks are removed, the finished card front appears to have three separate layers: the butterfly uppermost, followed by the die-embossed label outline and finally the background floral-patterned layer. The photo below shows these in more detail: 


 Finally I added a sentiment to my faux-label to complete my card. I also stamped a sentiment on the inside, with some soft stencilling around the edges - I photographed the inside of the front of my card too so that you can see the partial die-embossed label outline more clearly:


By keeping my central label clear, I've tried to preserve some 'white space' on my one layer card. Along with the absence of embellishments of any kind and the one layer that is the crux of this challenge, I have managed to keep thing clean and simple too. I love these Butterflies & Flowers Layering Decorative Masks stencils and will be so sad when they retire at the end of the month. 

Here is the visual summary of the key products used on today's project for you to pin for easy reference:


You can see all of my Product and 'How To' summaries on my 'How To - Tips and Techniques' Pinterest board in case you've missed any. 

Before you reach for your ink and papers, check out what our amazing team has created to inspire you this week:

Here's a quick recap of our challenge rules:
 
1.  Create a new paper project
2.  Upload your creation to your blog with a link back to us and provide a direct link to the post featuring your challenge submission.
3.  Please link your card to no more than four challenges, TOTAL.
4.  Have FUN!

Enjoy your day; mine will be a quiet one, having been out and about for the past couple of days. I'll be back soon with another project. Until then, happy stampin'!


Stampin' Up! Supplies Used: 

Table built using Product Table Builder by The Crafty Owl - Independent Stampin' Up! Demonstrator.

Speedy Belated Birthday Wishes with Amazing Phrasing AYSI277

by Joanne James17. June 2022 12:00

Today I'm sharing my design team card for our new challenge over at As you See It where it's time for a fun speed stamping challenge:


I chose this theme; I can't be the only cardmaker who sometimes realises I'm late, late ... for a very important date, right?! Sometimes the realisation that you need a birthday card super quickly since it should have been received yesterday means speed is of the essence. I have several retired stamp sets that I've kept that are perfect for belated birthday cards; I thought I'd combine one of these with a trio of colours from the Sunday Stamps palette and a sneak peek of a brand new set that can be yours as part of the Sale-A-Bration promotion that runs from 1st July-31st August - take a look:


Here's the low-down on today's card:

The key to a speed challenge is preparation - here's all of my equipment gathered before I started, with my stamp pads open in front of me just out of shot:


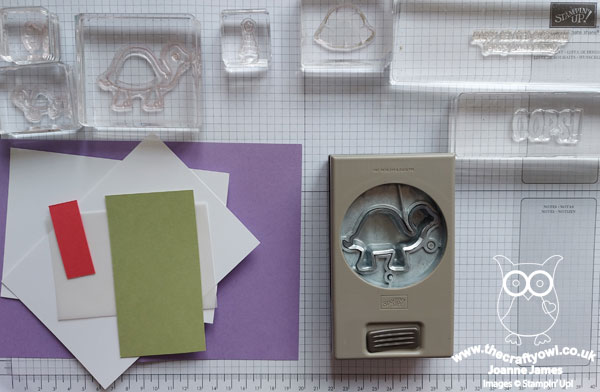
I used a combination of layer sizes that I always keep precut to save time and odd scraps from my card box.

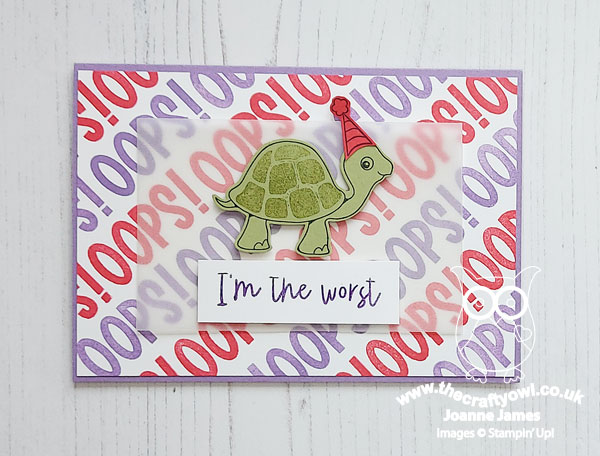
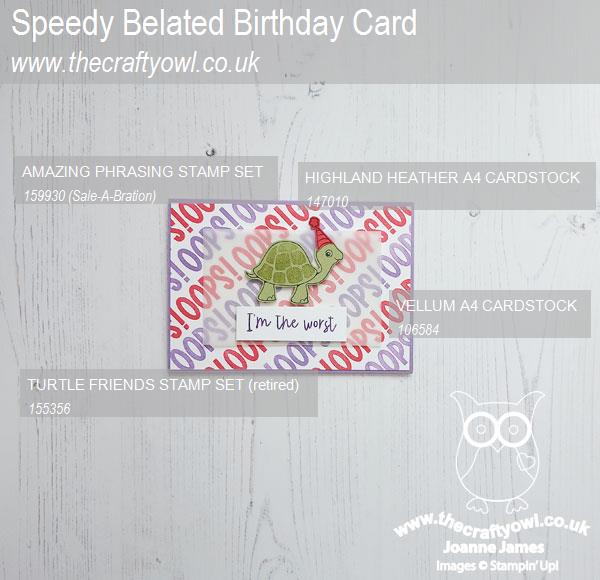
Oops! - The stamped sentiments on today's card are from a new set called 'Amazing Phrasing' - free with a £90 purchase during Sale-A-Bration. The set is photopolymer, so really easy to line up without a Stamparatus, which saves time - good when you don't have much of it! 

Simple Layout - My layout is actually cased from a similar card that features in the Sale-A-Bration brochure. Simple layers, cut with a trimmer - no dies required! An added layer of vellum helps soften the stamped background and create focus to the main image:


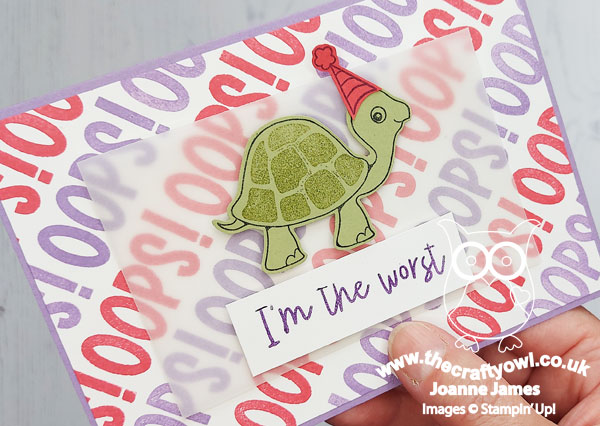
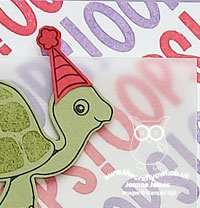
Slowly Does It - I combined this new set with my trusty retired 'Turtle Friends' set and added a simple stamped and punched turtle to the front of my card and carried through the belated theme to the inside of my card with another stamp from this set:


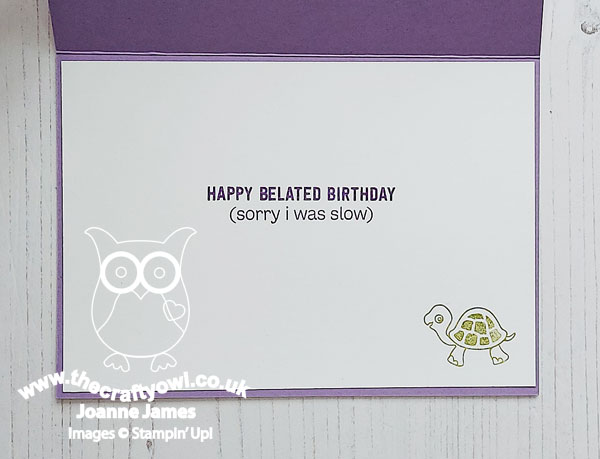
Is my stamping perfect? No; my turtle shell is a little smudged, but I didn't want to redo because of the time constraint but I think it's ok for a speed challenge. And done! How long did it take? I used all of my allotted 10 minutes - I was coming in at about 8 and a half minutes so decided to stamp and fussy cut a party hat for my turtle too!

Here is the visual summary of the key products used on today's project for you to pin for easy reference:


You can see all of my 'How To' summaries on my 'How To - Tips and Techniques' Pinterest board in case you've missed any. 

Here's a summary of our challenge rules:

  • Create any card, scrapbooking page, 3D project or packaging project that fits the challenge.
  • Please include the challenge graphic and link back to the challenge in your blog post. Turn off word verification so we can leave you lots of lovely comments. Make sure you link the post not the whole blog to the Linky. Use #AYSIXXX when uploading to a public gallery.
  • If you’re unsure about ‘the rules’, check the details under the Challenge Guidelines tab on the As You See It Challenge homepage.
  • In a speed stamping challenge, please time yourself and say in your post how long your card took to complete. 
We look forward to seeing your creations in the AYSI gallery.

Enjoy your day; I am spending the day in Bath today; no post from me tomorrow as I'm off to Warwick but I'll be back on Sunday with my project for our new challenge over at The Paper Players. Until then, happy stampin'!


Stampin' Up! Supplies Used:

Table built using Product Table Builder by The Crafty Owl - Independent Stampin' Up! Demonstrator.

He's The Man You're A Classic Masculine Card TTT166

by Joanne James16. June 2022 16:00

It's Thursday and time for a new challenge over at TicTacToe! It's the turn of Team X to host this week and the lovely LeAnne is our featured designer this week. This is the fun board that we are playing along with: 


I went down the first column with masculine, car/truck and brown and used the current Try Stamping on Tuesday sketch layout for another Father's Day card featuring the He's The Man specialty designer series paper - take a look:


Here's the low-down on today's card:

I combined a couple of different paper patterns and focused on the transport design to make my slightly larger than usual, A5 size card. The size seemed to give a better balance and allow the diecut car to take centre stage, whilst still allowing lots of the pattern to remain visible:


I combined it with a sentiment from the retired 'Geared Up Garage' set which seemed appropriate for the vintage automobile. A few more layers on this card compared to yesterday's, but not much more in the way of stamping - still all about the paper, He's The Man! This card is already in the post to my Dad in readiness for Father's Day this weekend - he is a classic, in more ways than one!!

Here is the visual summary of the key products used on today's project for you to pin for easy reference:


You can see all of my Product and 'How To' summaries on my 'How To - Tips and Techniques' Pinterest board in case you've missed any. 

A tictactoe board offers so many creative possibilities - how does this week's board inspire you? Why not have a go? We would love to see you in the gallery and who knows - you might be selected for Designer's Choice and be eligible to be a guest designer on a future challenge. 

Enjoy your day; I am driving to Bath this evening for the first of a number of university open day visits with the birthday girl that we have planned over the next few weeks. We are even spending the night in university accommodation to 'try it for size' - should be fun! I'll be back tomorrow with my card for this week's As you See It challenge. Until then, happy stampin'!


Stampin' Up! Supplies Used: 

Table built using Product Table Builder by The Crafty Owl - Independent Stampin' Up! Demonstrator.

He's The Man Flippin Awesome Masculine Card

by Joanne James15. June 2022 09:00

Today I'm sharing a card that uses the sketch layout over at Inspire.Create that was also inspired by the masculine theme and brown palette of browns over at The Card Concept:


This is a really simple clean and simple/layered card (well, there's not that much 'white space'!) that came together in no time thanks to the He's The Man designer series paper - take a look:


This is one of those rare, absolutely no stamping whatsoever cards that uses just three products! I simply added a strip of patterned paper to my base, layered another piece of DSP (this time cut with a Stitched Rectangle Die for a little added detail, but you could skip this step if you don't have one to hand) then used one of the diecuts from the paper pack as my focal point - flames, BBQ tools and sentiment all in one! 


This card will be one of the Father's Day cards for hubby from one of the James Juniors this coming weekend - he loves to BBQ so will definitely appreciate the punny sentiment! I did stamp a suitable greeting on the inside, but otherwise the He's The Man designer Series paper definitely did all of the heavy lifting on this one! If you'd like to see another masculine card using these papers, be sure to come back tomorrow as I have another Father's Day card to share for my TicTacToe card!

Here is the visual summary of the key products used on today's project for you to pin for easy reference:


You can see all of my 'How To' summaries on my 'How To - Tips and Techniques' Pinterest board in case you've missed any. 

Enjoy your day. We are celebrating in the James household today and the eldest of the Juniors turns 17 - although to be fair we started our celebrations earlier in the week, as tonight will be taken up with our first face-to-face parents evening since Covid for the other James Junior - we are hoping to squeeze in birthday dinner beforehand though. I'll be back tomorrow with another couple of projects. Until then, happy stampin'!


Stampin' Up! Supplies Used:

Table built using Product Table Builder by The Crafty Owl - Independent Stampin' Up! Demonstrator.

Abstract Beauty Clean and Simple Hello CCS 474

by Joanne James14. June 2022 12:00

It's Tuesday and time for a new challenge over at CAS Colours & SketchesThis week's challenge is a sketch challenge and Samantha has asked that we frame a sentiment as the focal point and decorate with two additional elements. Feel free to flip or rotate the sketch when making your card.


For my card today I also took my inspiration from the deep blue of the sofas in the Time Out inspiration photo, along with the touches of gold and collections of things in twos - take a look:


Here's the low-down on today's card:

For today's card I reached for my Abstract Beauty Cards and the co-ordinating Abstract Beauty Ephemera pack - these are so great for quick cards and I knew I had everything there that I needed. My card base is pre-printed with a Night of Navy watercolour-effect background (and the envelope co-ordinates too - see the photo at the bottom of the post!) I cut a hexagon shape using my Beautiful Shapes Dies and partially inked one of the stamps in the new 'Simply Fabulous' stamp set so that I could isolate and stamp the word 'hello'. I popped this up on dimensionals, decorated with a couple of the flowers and leaves from the ephemera pack and added some (retired) gold gilded gems and Pumpkin Pie sequins from my stash to complete my card: 


Quick and easy! Sometimes this kind of card making feels a little like cheating, when it all comes together so smoothly - but these kinds of cards are great when you are pressed for time and still allow for creativity, so no complaints from me! The Abstract Beauty Cards and Envelopes and the Ephemera Pack are currently on sale, reduced by 50% and 30% respectively until the end of the month when they retire - double bargain! The perfect time to stock up - just click on the links at the bottom of the post to go straight to the online store.

Here is the visual summary of the key products used on today's project for you to pin for easy reference:


You can see all of my 'How To' summaries on my 'How To - Tips and Techniques' Pinterest board in case you've missed any. 

Enjoy your day; mine will be a busy one, with a considerable amount of baking going on in readiness for tomorrow's birthday celebrations - we are treating the whole of Sixth Form at school! I'll be back tomorrow with another project. Until then, happy stampin'!


Stampin' Up! Supplies Used:

Table built using Product Table Builder by The Crafty Owl - Independent Stampin' Up! Demonstrator.

Artfully Composed Suite All The Hugs Birthday Card

by Joanne James13. June 2022 09:45

Happy Monday everyone! I had a little extra crafty time yesterday so decided to make a quick card using the current Freshly Made Sketches layout by Jen T, which I love:

Those stems were a great opportunity to make another card using the skeleton leaves in the Tropical Layers Dies combined with the Artfully Layered stamp set and a sliver of Artfully Composed designer series paper  - take a look:


I added a little hatched diecut detail to my mat layer and used the colours from the paper for my leaves and sentiment, finishing with a sprinkling of retired enamel dots for a little extra pop of colour: 


I am so sad this bundle is retiring at the end of this month - the Tropical Layers Dies are just fabulous and the sentiments in the co-ordinating stamp set so useful. If this bundle is still on your wishlist, grab it now before it's too late - it's currently on sale, links to the online store are below!

Here is the visual summary of the key products used on today's project for you to pin for easy reference:


You can see all of my 'How To' summaries on my 'How To - Tips and Techniques' Pinterest board in case you've missed any. 

Enjoy your day - mine is all stamping an admin today! I'll be back tomorrow with another project for our new challenge over at CAS Colours & Sketches. Until then, happy stampin'!


Stampin' Up! Supplies Used:

Table built using Product Table Builder by The Crafty Owl - Independent Stampin' Up! Demonstrator.

Mini Catalogue

BROWSE THE CATALOGUE

The mini catalogue is now live! Read and download your copy here.

Shop Online

Access my online shop 24 x 7, 365 days of the year:

Current April hostess code:

VDKNV7BH

Shop Online

Join My Team

It's always a great time to join Stampin’ Up! New team members can get £130 worth of products for only £99 + free business supplies + free shipping + all the fun being a part of Stampin’ Up! Stampin' Up! has something for everyone: join my growing team and benefit from my support to enjoy Stampin' Up! however you choose.

If you're interested, call me for a chat to understand how I can help you realise your goals. Alternatively, if you have already decided to sign up and you just can't wait, please click here for the link to the online form where you can sign up and order your starter kit right away! 

Latest Kit!

Stampin Cut and Emboss

The Rock Legend Kit has all you need to make 8 cards with coordinating envelopes. Along with the new Panda Friends Kit, both are available from January 4th for just £14 each - get yours here!

2023-24 Annual Catalogue

BROWSE THE CATALOGUE

Click on the catalogue for a full list of current SU! supplies - if you would like to order any of the items featured, please drop me a line at [email protected] or give me a call on 07773 421446 - I'd be happy to help.

New Online Exclusives

There are new products available exclusively in the online store from 5 March - check them out here.

About Me

Hi I'm Joanne and live in Northampton and when I'm not looking after my husband and two beautiful children, am an avid crafter with a passion for all things Stampin' Up!

I must confess that I have never been a big rubber stamper - until I discovered Stampin' Up! that is. I love the fact that I can get such great results with co-ordinating stamps, inks, papers and punches - the possibilities are endless! Join me on my stamping journey as I share the things I love and be inspired to create amazing things yourself!

Follow Me

Monthly Newsletter

Box Builder

Click the button above to use Box Buster to create your custom box design using the Envelope Punch Board!

Kits Collection Now Available!

Stampin Cut and Emboss

The new Kits Collection from Stampin' Up! is now available!

Click here to see the current kits available and order yours online today.

I Design For


Stampin' Up Stuff

This is my personal blog and is not endorsed by Stampin’ Up! I hope you find it a plentiful source of ideas and personal inspiration but please don't copy my designs for contest submission or use for classes, publication or sale without express permission.