It's All About The Shoes!

by Joanne James26. March 2020 11:12


Hi all! Apologies for the lack of posting (again!) I have been rather under the weather for a week or so and have just not managed to muster enthusiasm for crafting (I know - shocker!) - it has been all I could do to keep the James Juniors 'on task'. I was feeling a little better yesterday though so decided to spend a few hours giving my craft room a much-needed spring clean and then I sat down and made a card for this week's CAS(E) This Sketch challenge - a retro sketch of their first ever sketch! I didn't play then but I can just squeeze in under the wire if I'm quick! Here's the sketch:


I had a few ideas as to how I could use this sketch (love this sketch - it's so versatile!) and I debated whether or not to use the circles literally. I decided not and came up with this using what has turned out to be my favourite sets and sentiments in the Spring catalogue  - take a look:


Here's the low-down on today's card:

I must confess I had a little packet of shoes and handbags that I had fussy cut previously from the Best Dressed DSP, with a view to CASEing the card on page 54 of the catalogue, but I hadn't got around to it (please tell me I'm not the only one who does that!) The sketch was perfect to create my little shelf of purses, handbags and shoes; I used a piece of DSP for some 'wallpaper' backing on my white cardbase, then added my shelf (I used the die in the set but shortened it to fit my card) and added my bags and purses, popping my pink shoes up on dimensionals since they are the item I wanted to highlight. I finished with my sentiment stamped below in Blackberry Bliss - I also rather inadvertently created an entry for Color Throwdown this week too, where they are featuring pink, purple and white as their colours of choice this week. I'm also linking up with TGIF Challenges as they are featuring the Best Dressed Suite this week; I actually have another project to share with those lovely ladies too, so come back later if you would like to see that.

Here is the visual summary of the key products used on today's project for you to pin for easy reference:


You can see all of my 'How To' summaries on my 'How To - Tips and Techniques' Pinterest board in case you've missed any. 

This card actually uses very little in the way of supplies - all it requires is a little patience for the fussy cutting!

How are you finding your days of lockdown and social isolation? The James Juniors have adapted quite well with their distance learning and only seeing their friends online. I count myself lucky at times like this that they remain each other's best friends so at least can enjoy each other's company and make their own fun. Enjoy your day and I'll be back later with a Sale-Bration update and another project. Until then, happy stampin'!


Stampin' Up! Supplies Used:

Table built using Product Table Builder by The Crafty Owl - Independent Stampin' Up! Demonstrator.
 

Pressed Petals Spring Florals For PP483

by Joanne James22. March 2020 09:00

Today it's Sunday and time for this week's new challenge over at The Paper Players! It's the turn of the fabulous Claire to host this week and she has my favourite, a sketch challenge for you to work with:


I had an idea in my head as to what I was going to do with this sketch until I pulled my DSP box off the shelf and saw something that inspired me to go in a completely different direction! I ended up making three cards in one go, two using Claire's sketch. They are all different but do have one thing in common - Pressed Petals Specialty Designer Series Paper. Here's my first card:


The Pressed Petals Specialty Designer Series Paper has photographic images of real pressed petals on one side and one of the sheets in the pack has distinct sectional designs to cut out and use on card fronts, and two of the sections feature floral ovals which I thought would work for Claire's sketch. They also reminded me of Laurel's pretty Inspired By badge this week which comprised of pressed florals so I'm linking my first card up there. I stamped my sentiment in the centre of the wreath (I needed a get well card so used this one from the 'Dandelion Wishes' stampset) and fussy cut it out, mounted it on a panel of Mossy Meadow wrapped with the Magnolia Lane linen ribbon and twine and paired this with a Rococco Rose card base and added a trio of faceted dots to finish.

I decided to make another card using another of the sections, this time switching out the ribbon and adding a stamped and diecut sentiment combo to make an Easter card that is great for the current Just Us Girls challenge where the challenge is to feature shades of blue, green and yellow on your card:


I'm also linking my Easter card up to SUO Challenges where the current theme is Spring.

I created one last card to use up the strip of daisies. I inset it within a split Rococco Rose panel that I popped up on dimensionals and paired it with a sentiment from 'Peaceful Moments', this time using the current InspireCreate sketch rather than Claire's - it was ideal to save this piece from wallowing in my snippets box:


Here is the visual summary of the key products used on today's projects for you to pin for easy reference:


You can see all of my Product and 'How To' summaries on my 'How To - Tips and Techniques' Pinterest board in case you've missed any. 

Before you reach for your ink and papers, check out what our amazing team has created to inspire you this week:

Here's a quick recap of our challenge rules:
 
1.  Create a new paper project
2.  Upload your creation to your blog with a link back to us and provide a direct link to the post featuring your challenge submission.
3.  Please link your card to no more than four challenges, TOTAL.
4.  Have FUN!

Enjoy your day; it's Mother's Day here in the UK but due to our social distancing everyone will be at home in their own houses, which will feel strange. I'm looking forward to being waited on by the James Juniors and Skype calls with the other Mums in our extended family, maybe with some quality jigsaw time too! I'll be back tomorrow with another project. Until then, happy stampin'!


Stampin' Up! Supplies Used: 

Table built using Product Table Builder by The Crafty Owl - Independent Stampin' Up! Demonstrator.

Little Kindness Elephant For TTT 56

by Joanne James19. March 2020 11:00

Apologies for my blog-free days so far this week; as I'm sure is the same for you, things have been anything but normal this past couple of weeks and I seem to have been pulled every which way and not once in the direction of my craft room. Far from being excited at the prospect of no school until September, both of the James Juniors are finding that an unwelcome concept and combined with the enforced closure of all of their sporting activities, they have needed much encouragement to find an upside to the current state we find ourselves in. I'm sure we will work it all out; meanwhile it's Thursday and time for a new challenge over at TicTacToe! It's the turn of Team X to host this week and the lovely LeAnne is our featured designer this week. This is the fun board that we are playing along with: 


I went down the middle with Blue-Umbrella-Designer Paper but my card also works for the diagonal Yellow-Umbrella-Bow. I used the current Fab Friday sketch for my layout (although I inadvertently centred my squares - I was distracted by the gingham!) along with an 'oldie but goodie' stamp set from the annual catalogue - take a look:


Here's the low-down on today's card:

Little Elephant - When I was considering what to work with today, I pulled out both the 'Under My Umbrella' set and the 'Little Elephant' stamp set as both feature umbrellas. I made a card with each, but preferred this one - such a long time since I've used this set! - and I don't think I've ever used the little umbrella before, so this was a good opportunity. I did a little masking on the front to make it look as if the elephant was holding the umbrella over the bluebird and also stamped the larger elephant with some hearts on the inside too:

In Stitches - I used both a stitched square for my main image and a stitched rectangle for my heat embossed sentiment panel for a little subtle extra detail. I wouldn't be without my Stitched Shapes Framelits and love that extra something they add to a shape.

Raindrops Keep Falling On My Head - I decided to add a few raindrops from the 'Under My Umbrella' set above the umbrella to add to my little scene and some white twine tied in a bow completes my card. 

A sweet and cheery little card with all that yellow and a sentiment that seems so appropriate given the unprecedented times we find ourselves in at the moment. I encourage you to show someone a little kindness today, because yes, it is a big thing and for some can make all the difference.

Here is the visual summary of the key products used on today's project for you to pin for easy reference:


You can see all of my Product and 'How To' summaries on my 'How To - Tips and Techniques' Pinterest board in case you've missed any. 

A tictactoe board offers so many creative possibilities - how does this week's board inspire you? Why not have a go? We would love to see you in the gallery and who knows - you might be selected for Designer's Choice and be eligible to be a guest designer on a future challenge. 

Enjoy your day; I am hoping to regain my creative mojo and spend some time crafting once I've tackled my ironing pile, since it will be all too soon before I am home-schooling the James Juniors from next week, when I suspect my crafting time might be further squeezed. I'll definitely be back tomorrow with another project - I might even share my alternative umbrella project! Until then, happy stampin'!


Stampin' Up! Supplies Used: 

Table built using Product Table Builder by The Crafty Owl - Independent Stampin' Up! Demonstrator.

Clean and Simple Timeless Tulips for PP482

by Joanne James15. March 2020 10:00

Today it's Sunday and time for this week's new challenge over at The Paper Players! I am the hostess this week and I have a clean and simple challenge for you to work with:


The daffodils are blooming in my garden and after an extremely wet and windy winter here in the UK, I am so ready for Spring! In addition to that, and the current battoning down the hatches in light of the Corona virus worldwide, I think we could all do with a little colour in our lives, so I hope you will play along with my challenge this week!

Remember in addition to the theme of "Spring Flowers", this week is a Clean-and-Simple (CAS) challenge!  What do we mean by CAS?

  • Minimal layers and embellishments
  • Plenty of open space, aka "white" space
  • Simple and uncluttered

I've made lots of projects using the Timeless Tulips bundle but haven't shared many of any on my blog so thought that today would be a good opportunity to remedy this! I grabbed the fabulous sketch over at CAS(E) This Sketch this week and set to work - take a look:


I deliberated for ages over my card, as I so often do when it's clean-and-simple week, but in the end came up with something that was so easy to create. I added a strip of gingham check to the edge of my card, stamped my sentiment in Basic Grey then added a trio of short stemmed tulips stamped in Flirty Flamingo pink, one in each size that is included in the set, and either fussy cut them or used the co-ordinating Tulip Builder punch. I adhered them at the base so that they had a slight lift and added some small epoxy dots to symbolise raindrops to the petals to finish. As easy as that - another #SimpleStamping card this week, we all need some of those!

Just 6 items is all it took to create this sweet tulip card; here is the visual summary of the key products used on today's project for you to pin for easy reference:


You can see all of my Product and 'How To' summaries on my 'How To - Tips and Techniques' Pinterest board in case you've missed any. 

I'm also linking up with the lovely ladies over at Festive Friday where they are celebrating spring - my choices from the inspo list are flowers, green, pastels (and raindrops!)

Before you reach for your ink and papers, check out what our amazing team has created to inspire you this week:

Here's a quick recap of our challenge rules:
 
1.  Create a new paper project
2.  Upload your creation to your blog with a link back to us and provide a direct link to the post featuring your challenge submission.
3.  Please link your card to no more than four challenges, TOTAL.
4.  Have FUN!

Enjoy your day; it's wet and miserable here today and I was hoping to hibernate to my craft room, but against all my better judgements I might have to venture out to the supermarket, since all of the panic buying has resulted in my regular weekly shop being delivered minus much of what I ordered so I'm not quite sure how I am going to feed the James family this week! I'll be back tomorrow with another project. Until then, happy stampin'!


Stampin' Up! Supplies Used: 

Table built using Product Table Builder by The Crafty Owl - Independent Stampin' Up! Demonstrator.

Happy Birthday To You Card and Gift Voucher Set AYSI221

by Joanne James13. March 2020 12:00

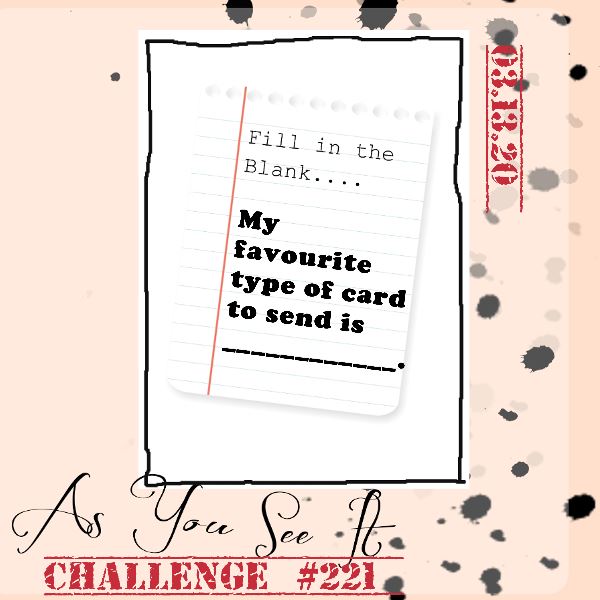
Today I'm sharing my design team card for our new challenge over at As you See It where it's time for a 'fill in the blank' challenge designed by me:


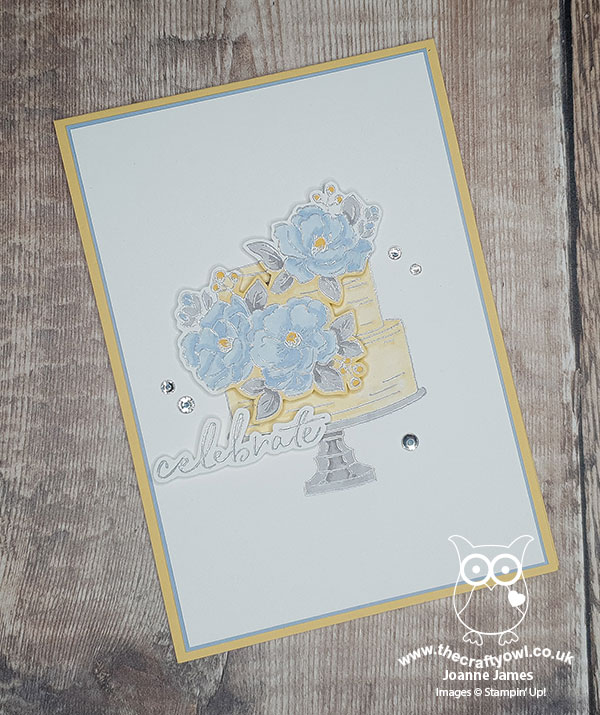
As a cardmaker I like to send all kinds of cards but my favourite type of card to send is a birthday card - I love to let people know I'm thinking of them on their special day. Here's one I made recently for a sweet friend of mine:


Here's the low-down on today's card:

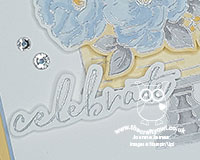
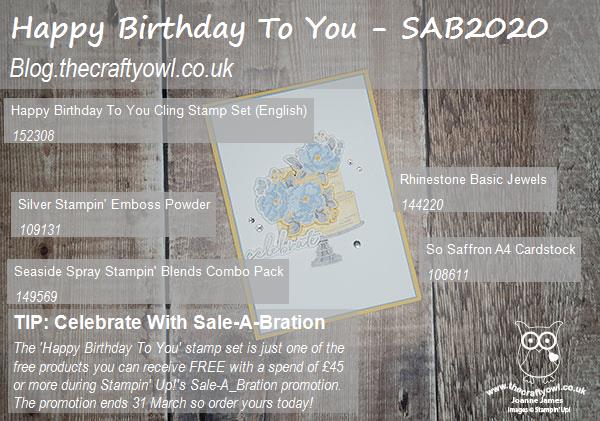
Celebrate with Sale-A-Bration - I used a single stamp set on today's card - the 'Happy Birthday To You' stamp set is one of the sets that can be yours free with a £45 purchase during Sale-A-Bration and is perfect for celebratory cards, including birthdays. It includes this gorgeous floral cake and a few sentiments and makes a great one-layer card - perfect for #SimpleStamping. I heat embossed my cake and sentiment in silver and coloured with my Blends markers in So Saffron and Seaside Spray - a little fussy cutting and some mats and layers in my feature colours, along with a few rhinestones for extra sparkle add a touch of glamour to this #SimpleStamping card and help to make it a real standout, yet it really is just stamps, ink and paper. 

Not Into Fussy Cutting? - I fussy cut the flowers and sentiment on my card today and it really was quite straight forward, but if fussy cutting isn't your thing, there is a set of co-ordinating Birthday Dies available as part of the Co-ordination Product Release (you can read more about that in my earlier post here)  that are useful for cutting out the cake and flowers. The dies would be especially useful if you wanted to make a batch in one go and save yourself some valuable time. 

Stampin' Up! Gift Vouchers - The Perfect Gift - My card was actually the second thing I created to share with you today. I designed it to co-ordinate with a gift voucher wallet, which is a replica of one I made recently for one of my lovely customers who was celebrating a milestone birthday. Did you know that I provide Stampin' Up! gift vouchers (for any amount) that you can purchase for yourself or a friend or loved one - there's nothing nicer to give a stamper as a gift!! When I have a request for gift vouchers, I love to create a fancy wallet for them - after all, they are a gift in themselves. The one below is a pared-down version of the one that I designed for the lovely Jane, as hers included big silver glimmer numbers too. I liked it so much I thought I would make another one - I find myself using gift wallets more and more, especially for my growing niece and nephew who appreciate money above most other things these days and it's nice to at least be able to make it look more like a gift than to just tuck a few bank notes into a card. For my gift wallet I fussy cut the cake too, and added the whole thing to a belly band of Seaside Spray DSP covered in some (retired) silver polka dot acetate and decorated with a ribbon bow, this time putting the 'Happy Birthday' sentiment front and centre:

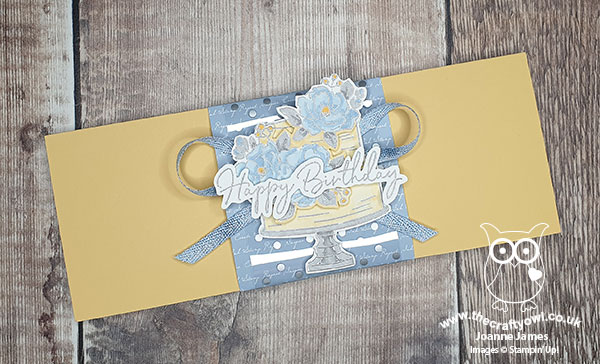
So pretty, even if I say so myself! Here's a photo of both the card and co-ordinating gift voucher together:


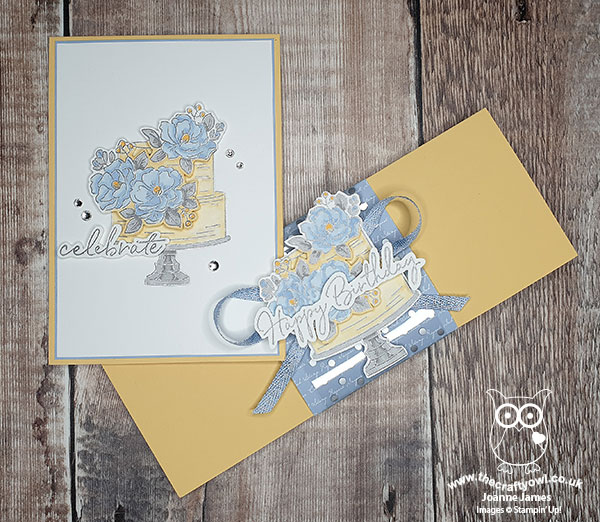
I, for one, would be thrilled to receive this little combo for my birthday - or Mother's Day ... or pretty much any day really!! I'm also linking today's card up with the peeps over at Time Out Challenges who are celebrating their 6th birthday - congratulations! - since my project is for birthdays and includes the option of fussy cutting. Here is the visual summary of the key products used on today's project for you to pin for easy reference:


You can see all of my 'How To' summaries on my 'How To - Tips and Techniques' Pinterest board in case you've missed any. 

Before you put your creative thinking caps on, why not check out the blogs of the other As You See It team members:

Amy Jasper

Heather Cooper

Jan Clothier

Jane Knudsen

LeAnne Pugliese

Here's a summary of our challenge rules:

  • Create any card, scrapbooking page, 3D project or packaging project that fits the challenge.
  • Fill in the blanks with the words that are right for you and then create your project with those words in mind. Tell us, in your blog or on your site, what words you used.
  • Please include the challenge graphic and link back to the challenge in your blog post. Turn off word verification so we can leave you lots of lovely comments. Make sure you link the post not the whole blog to the Linky. Use #AYSIXXX when uploading to a public gallery.
  • If you’re unsure about ‘the rules’, check the details under the Challenge Guidelines tab on the As You See It Challenge homepage.
  • In a Fill in the Blank challenge, complete the sentence in the Challenge Banner with the phrase that is true for you and create your project using the words you used. Tell us what you said in your blog or on your site.

We look forward to seeing your creations in the AYSI gallery.

Enjoy your day and I'll be back tomorrow with another project and an update reading last weekend's successful craft retreat now that I'm (almost!) recovered! Until then, happy stampin'!


Stampin' Up! Supplies Used:


Table built using Product Table Builder by The Crafty Owl - Independent Stampin' Up! Demonstrator.

On To Adventure Holidaymaker for PP481

by Joanne James8. March 2020 10:00

Today it's Sunday and time for this week's new challenge over at The Paper Players! It's the turn of the fabulous Laurie to host this week and she has a vibrant colour challenge for you to work with:


I spent much of this week undertaking last-minute preparations for my weekend craft retreat, so was short on time to create and lacking my creative mojo. Anyway, I had to keep it quick and this is what I came up with - take a look:


I stamped my lady from the 'On to Adventure' stamp set and coloured her with my Stampin' Blends, then mounted her on a layered circle and stamped my sentiment onto a Coastal Cabana scalloped rectangle. A sprinkling of champagne rhinestones finish my card.

Super simple this week!

Here is the visual summary of the key products used on today's project for you to pin for easy reference:


You can see all of my Product and 'How To' summaries on my 'How To - Tips and Techniques' Pinterest board in case you've missed any. 

Before you reach for your ink and papers, check out what our amazing team has created to inspire you this week:

Here's a quick recap of our challenge rules:
 
1.  Create a new paper project
2.  Upload your creation to your blog with a link back to us and provide a direct link to the post featuring your challenge submission.
3.  Please link your card to no more than four challenges, TOTAL.
4.  Have FUN!

Enjoy your day; I will be on day two of my weekend craft retreat. Yesterday we had a ball, so I'm sure today will be just as much fun! More about that later in the week. I'll be back in a couple of days with another project. Until then, happy stampin'!


Stampin' Up! Supplies Used: 

Table built using Product Table Builder by The Crafty Owl - Independent Stampin' Up! Demonstrator.

Pleased As Punch To Be Under My Umbrella TTT 54

by Joanne James5. March 2020 09:00

It's Thursday and time for a new challenge over at TicTacToe! It's the turn of Team X to host this week and I have the honour of being our featured designer this week. This is the fun board that I designed for your inspiration: 


I took the first column and used the sketch at CAS(E) This Sketch layout - this time for a much better attempt at clean and simple than my card earlier this week - take a look:


Here's the low-down on today's card:

I paired some retired sunny yellow gingham check paper with a raindrop background and a bright umbrella punched from the Pleased As Punch designer series paper - I do love a paper that can be punched into lots of bits and pieces with a co-ordinating punch - and a sentiment from the 'Under My Umbrella' stamp set on a stitched rectangle. The weather here is mostly rain of late, but occasionally we get a glimpse of spring sunshine so it was nice to capture that in today's card! 

Here is the visual summary of the key products used on today's project for you to pin for easy reference:


You can see all of my Product and 'How To' summaries on my 'How To - Tips and Techniques' Pinterest board in case you've missed any. 

A tictactoe board offers so many creative possibilities - how does this week's board inspire you? Why not have a go? We would love to see you in the gallery and who knows - you might be selected for Designer's Choice and be eligible to be a guest designer on a future challenge. 

Enjoy your day; I'll be back tomorrow with another project. Until then, happy stampin'!


Stampin' Up! Supplies Used: 

Table built using Product Table Builder by The Crafty Owl - Independent Stampin' Up! Demonstrator.
 

A Trio Of Honey Bees

by Joanne James4. March 2020 09:00

I've been working lots with the honey bee bundle lately as it's one of the sets that will feature at my luxury residential craft retreat this weekend and whilst it was out on my desk I made a quick card for the current theme challenge over at Addicted to CAS that also uses this great sketch from the Inkspire-Me team (they have an optional colour element too but I opted out):


I thought this bee would be a good thing to use for the code word of 'symmetry' since it is pretty symmetrical and the trio of bees as per the sketch further emphasises this I think - take a look:


No real explanation required on this one, other than I stamped and diecut three bees, added some yellow to them with my Daffodil Delight Blends markers and then finished with some clear Wink of Stella on their wings - which looks so sparkly in real life, but try as I might I could not capture in my photo. A simple sentiment and bee-inspired base and mat complete my card.

Here is the visual summary of the key products used on today's project for you to pin for easy reference:


You can see all of my 'How To' summaries on my 'How To - Tips and Techniques' Pinterest board in case you've missed any. 

Enjoy your day and I'll be back tomorrow with another project. Until then, happy stampin'!


Stampin' Up! Supplies Used:

Table built using Product Table Builder by The Crafty Owl - Independent Stampin' Up! Demonstrator.

Sale-A-Bration 2020 Second Release - New Items Added!

by Joanne James3. March 2020 08:00

As promised, today I have Sale-A-Bration news for you! I know how much you've all been enjoying the benefits of the Sale-A-Bration promotion; as if it couldn't get any better I just wanted to let you know that from today there are some new items being added to the selection of products that can be earned free, both with a £45 order and two stamp sets that can be yours with a purchase of £90 or more. You can click on the image below to download the flyer:


So what's new? There is the silver and rose-gold foiled Flowering Foils Specialty papers - you can check them out in this video here from the Stampin' Up! Home Office:

 Aren't they gorgeous? These papers are sure to be popular!

 There is a great masculine stamp set called 'Well Dressed', perfect for easy masculine projects:


There is some coloured and embossed vellum 'So Very Vellum' that is perfect for dressing up your projects:

Each of the above products can be yours FREE with a £45 product purchase.

In addition, there are two stamp sets that are available with a £90 spend. The first is a stamp that coordinates with the Label Me Fancy and Label Me Lovely punches called 'Tags in Bloom':


Finally, there is the 'Rise and Shine' stamp set that co-ordinates with the carryover Cup of Cheer Dies:


As with the other items in the Sale-A-Bration catalogue (with the exception of the Kerchief Card Kit which is now sold out), these items will be available from now until the end of the Sale-A-Bration period, 31st March whilst stocks last. You can see full details for each of the new product on the new Sale-A-Bration flyer via the link above and there will be more samples made with each of them over on my Facebook page today.

If you would like more information or to place an order, either go here to purchase from my online store (don't forget to add this month's hostess code C3HMK9CP) or click on the links below. Alternatively or you can email me or telephone me if you would prefer. Back shortly with a new creative project; until then, happy shopping!


Links to the new Sale-A-Bration items in the online store: 

Table built using Product Table Builder by The Crafty Owl - Independent Stampin' Up! Demonstrator.

Welcome Bunny Pastel New Baby Card

by Joanne James2. March 2020 20:30

Happy Monday everyone! I need to have a productive week this week - my to-do list is long! - this week's post maybe a little short and sweet - so let's go!


I still had the 'Welcome Easter' stamp set out on my desk having made this card last week, so decided to use the colours over at Just Add Ink where I haven't managed to play along in a while (hello lovely JAI ladies!) and this week's CAS(E) This Sketch layout from the lovely Brian King and an altogether different look to create a sweet baby card - take a look:


Here's the low-down on today's card:

I grabbed a piece of Pleased As Punch DSP for the pink check layer and added a horizontal piece with a stitched diecut border detail before anchoring with my bunny. I stamped him on Shimmery White cardstock in Smoky Slate, then used my aquapainter to colour him in, keeping the colours soft and muted and layered on a scalloped circle.

Now whilst I used the CAS(E) This Sketch layout, I may well get thrown out with this card as I broke my own clean and simple rule here - not only did I add a sprinkle of adhesive-backed sequins, but I also tied the Soft Sea Foam panel with a piece of Whisper White crinkle seam binding ribbon! In my defence, this ribbon is so soft and lightweight, it squishes to nothing (good for cards that need to be mailed!) and I kind of figured since it was a new baby card, a little embellishment makes it special. Not much of a defence to Brian and the CTS design team - if it helps, I used this sketch for another card that I'm going to share later in the week that is perfectly CAS in everyway, as Mary Poppins would say. 

So what do you think - is that little guy sweet or what?! He reminds me of Thumper from the Disney classic 'Bambi', (another Disney reference - not that I'm counting down to a special vacation to the happiest place on earth or anything...) but I digress...! 

Here is the visual summary of the key products used on today's project for you to pin for easy reference:


You can see all of my 'How To' summaries on my 'How To - Tips and Techniques' Pinterest board in case you've missed any. 

Enjoy your evening and I'll be back tomorrow with some exciting Sale-A-Bration news so do come back to find out more. Until then, happy stampin'!


Stampin' Up! Supplies Used:

Table built using Product Table Builder by The Crafty Owl - Independent Stampin' Up! Demonstrator.


Mini Catalogue

BROWSE THE CATALOGUE

The mini catalogue is now live! Read and download your copy here.

Shop Online

Access my online shop 24 x 7, 365 days of the year:

Current April hostess code:

VDKNV7BH

Shop Online

Join My Team

It's always a great time to join Stampin’ Up! New team members can get £130 worth of products for only £99 + free business supplies + free shipping + all the fun being a part of Stampin’ Up! Stampin' Up! has something for everyone: join my growing team and benefit from my support to enjoy Stampin' Up! however you choose.

If you're interested, call me for a chat to understand how I can help you realise your goals. Alternatively, if you have already decided to sign up and you just can't wait, please click here for the link to the online form where you can sign up and order your starter kit right away! 

Latest Kit!

Stampin Cut and Emboss

The Rock Legend Kit has all you need to make 8 cards with coordinating envelopes. Along with the new Panda Friends Kit, both are available from January 4th for just £14 each - get yours here!

2023-24 Annual Catalogue

BROWSE THE CATALOGUE

Click on the catalogue for a full list of current SU! supplies - if you would like to order any of the items featured, please drop me a line at [email protected] or give me a call on 07773 421446 - I'd be happy to help.

New Online Exclusives

There are new products available exclusively in the online store from 5 March - check them out here.

About Me

Hi I'm Joanne and live in Northampton and when I'm not looking after my husband and two beautiful children, am an avid crafter with a passion for all things Stampin' Up!

I must confess that I have never been a big rubber stamper - until I discovered Stampin' Up! that is. I love the fact that I can get such great results with co-ordinating stamps, inks, papers and punches - the possibilities are endless! Join me on my stamping journey as I share the things I love and be inspired to create amazing things yourself!

Follow Me

Monthly Newsletter

Box Builder

Click the button above to use Box Buster to create your custom box design using the Envelope Punch Board!

Kits Collection Now Available!

Stampin Cut and Emboss

The new Kits Collection from Stampin' Up! is now available!

Click here to see the current kits available and order yours online today.

I Design For


Stampin' Up Stuff

This is my personal blog and is not endorsed by Stampin’ Up! I hope you find it a plentiful source of ideas and personal inspiration but please don't copy my designs for contest submission or use for classes, publication or sale without express permission.