Today it's Sunday and time for this week's new challenge over at The Paper Players! It's my turn to host this week and I have a timely theme challenge for you to work with:
19 days to go and yes - it's beginning to feel a lot like Christmas, so that is my theme this week! You can share your gifts, cards, packaging - we would love to see your festive makes! I love to make co-ordinating cards and gift packaging at this time of year so I have one such set to share with you today. My post is photo-heavy as I'm going to share both a Christmas card and a rather fancy matching gift box using products from the Snowflake Splendor Suite. I even have a video tutorial for you!
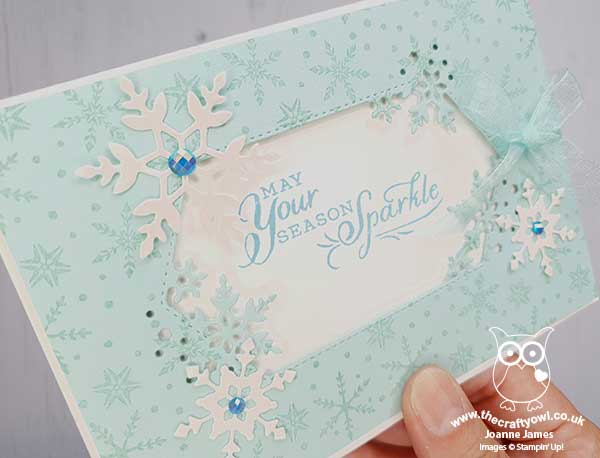
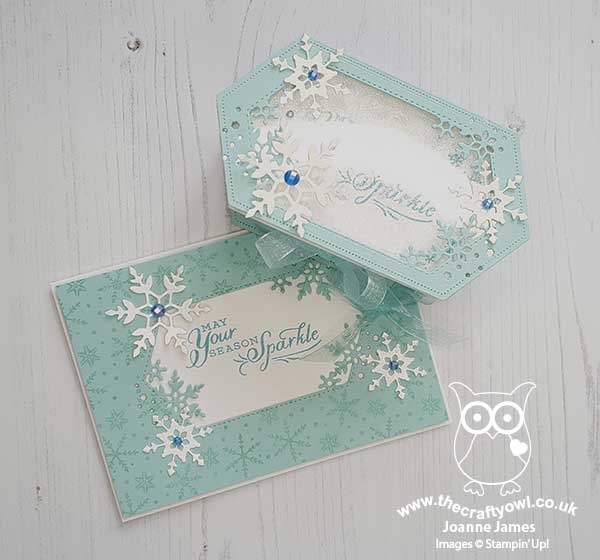
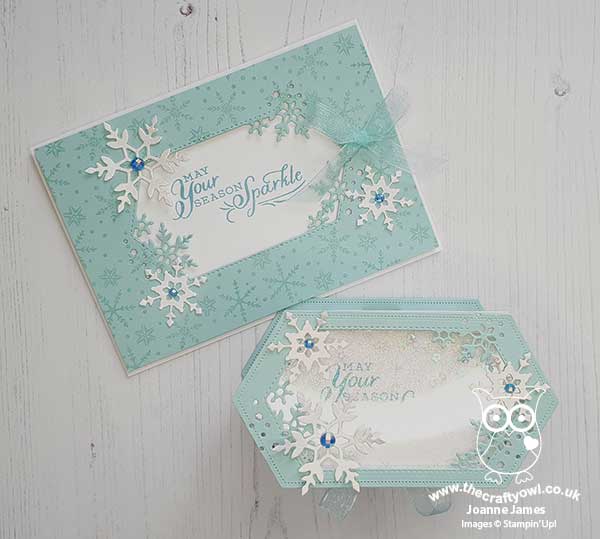
First up - here's my Christmas card, with the hexagonal aperture cut using the So Many Snowflake dies:
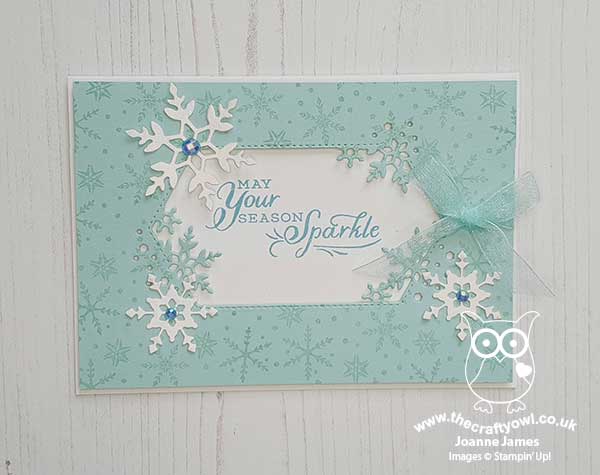
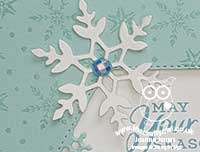
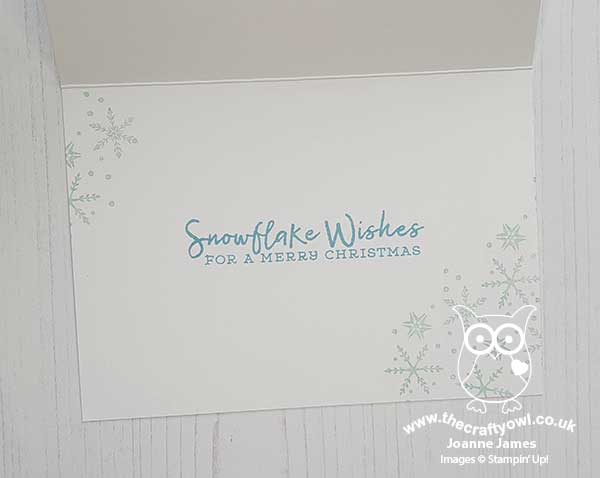
I added some diecut snowflakes painted with Frosted White shimmer paint and finished with those pretty Balmy Blue adhesive-backed gems and a pretty Pool Party sheer ribbon bow, with a simple sentiment and snowflake decoration on the inside of my card:
Check out the effect of those faceted gems - so sparkly!
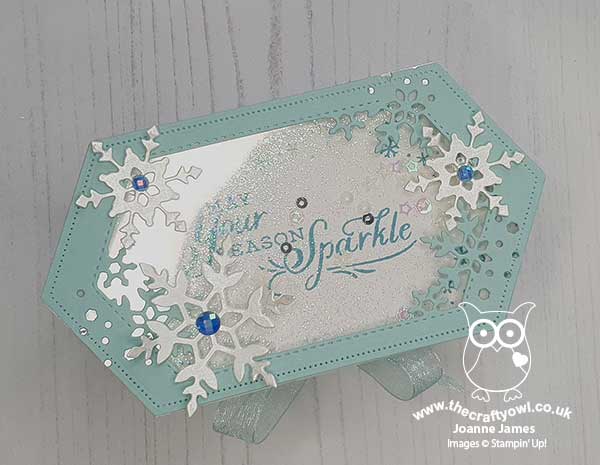
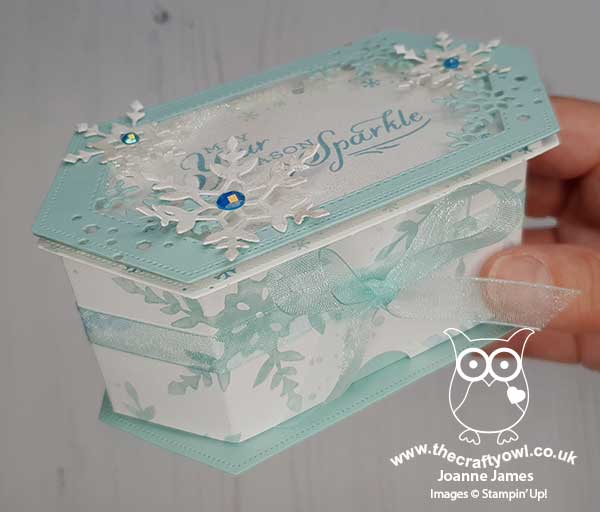
This card was a variation on one I made in my monthly card class featuring the Snowflake Wishes bundle a few months ago. I liked the card so much, I decided to make a matching box, using the same hexagonal aperture and the Stitched Nested Label Dies from the annual catalogue. I made a simple birthday gift box using these dies previously (you can see that box here if you missed it) and have been wanting to make a video tutorial to show how it was done, so this seemed like the perfect opportunity. Here is my finished box closed:
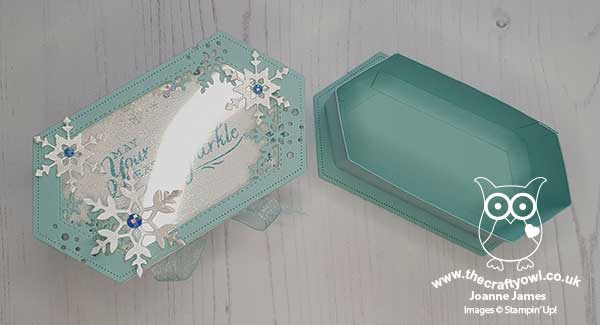
And this is what it looks like open - the lid and base extend beyond the sides of the box and the top slides off to reveal the inside:
I wanted to step up my box so instead of simply creating an open aperture on the lid, I added some acetate and created a shaker, filled with snowflake sequins and glitter - check out this out - it's not only the sentiment that's full of sparkle:
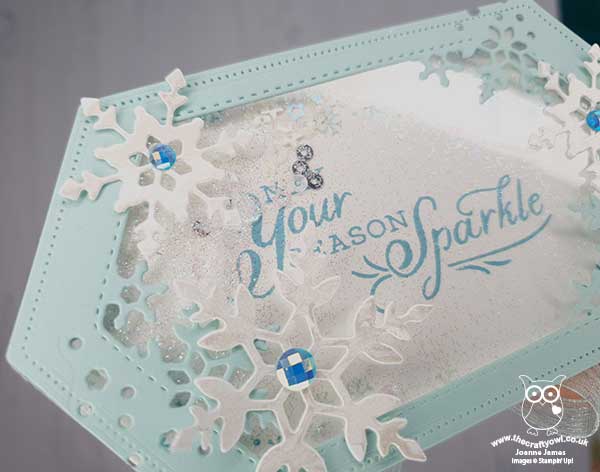
I added some Snowflake Splendor designer paper to the sides of my box lid and wrapped and tied it with more of the Pool Party sheer ribbon, to tie it in with the detail on my card - you can see that better below:
Rather than detail exactly how I made this project in words, I thought I would make a video tutorial should you wish to have a go at making one yourself - so here it is:
I am just in love with this set; the box isn't huge, but will hold small gifts such as chocolates, jewellery, a scented candle - lots of options! Here's a final photo of my projects together:
I would love to know what you thought of my video tutorial too; was it useful? Would you like to see more of this type of content. Do let me know - I would love to hear your thoughts!
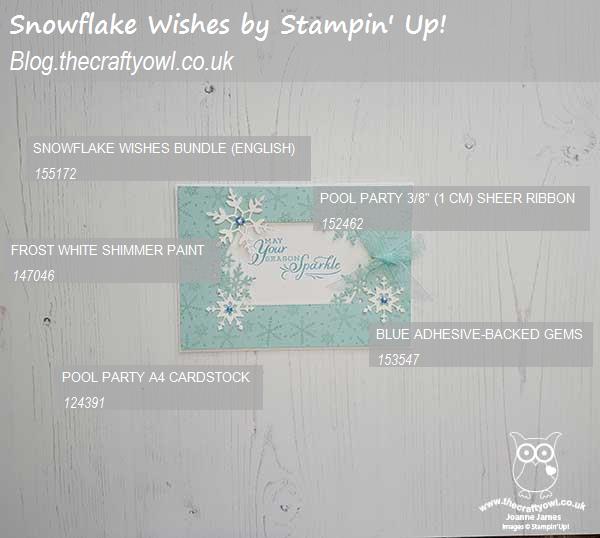
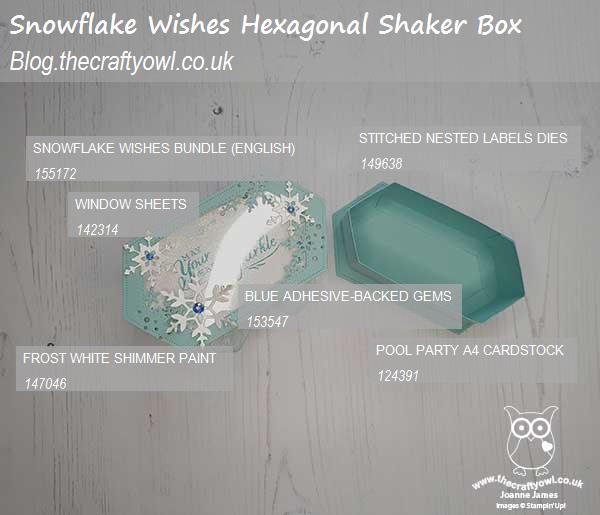
Here is the visual summary of the key products used on today's project for you to pin for easy reference:
You can see all of my Product and 'How To' summaries on my 'How To - Tips and Techniques' Pinterest board in case you've missed any.
Before you reach for your ink and papers, check out what our amazing team has created to inspire you this week:
The Paper Players Design Team
Here's a quick recap of our challenge rules:
1. Create a new paper project
2. Upload your creation to your blog with a link back to us and provide a direct link to the post featuring your challenge submission.
3. Please link your card to no more than four challenges, TOTAL.
4. Have FUN!
You can see all of my 'How To' summaries on my 'How To - Tips and Techniques' Pinterest board in case you've missed any.
Enjoy your day; I started writing Christmas cards whilst at hockey yesterday and am hoping to crack on with those this afternoon to get them in the post tomorrow, which will be a huge achievement! I'll be back tomorrow with another project. Until then, happy stampin'!
Stampin' Up! Supplies Used: