It's Sunday, I'm back after my two week vacation and excited to be back with my lovely team over at The Paper Players! This week we are all about team here at The Paper Players: the lovely Laurie was due to host this week but has unfortunately had to deal with a family bereavement and needed some time out so I am lending a helping hand. Laurie has done all the hard work and has designed a fun tic-tac-toe board to challenge us all as it's the fifth week of the month; I am picking up with the comments and visits to your blogs and get the honour of choosing this week's top pick. So, without further ado, here is this week's challenge board:
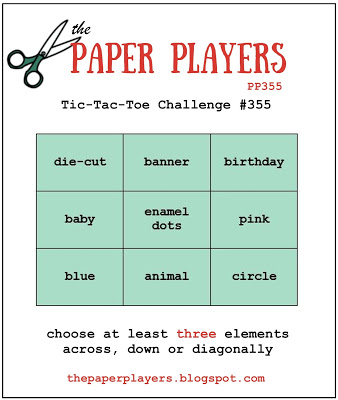
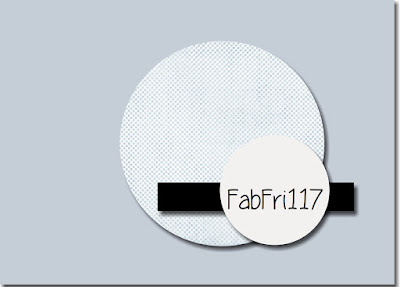
When considering my make for today, I just knew I would have to include the option of 'diecut' since I consider Laurie to be the absolute queen when it comes to diecutting, her creativity knows no bounds. I decided to go down the first vertical column and took the opportunity to make a baby card using the current sketch over at Fab Friday - it turns out I also fulfilled the bottom horizontal row too - take a look:
Here's the low-down on today's card:
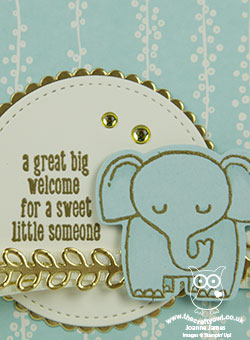
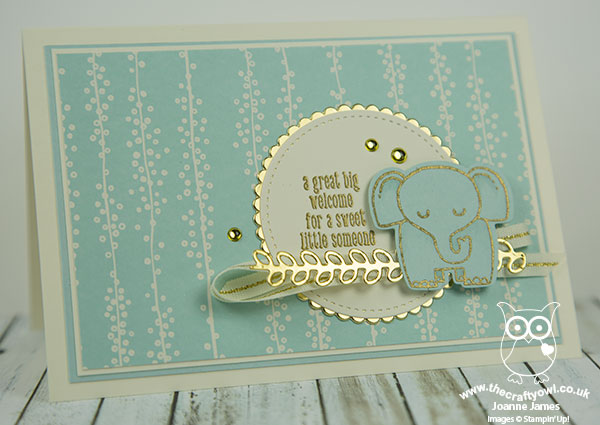
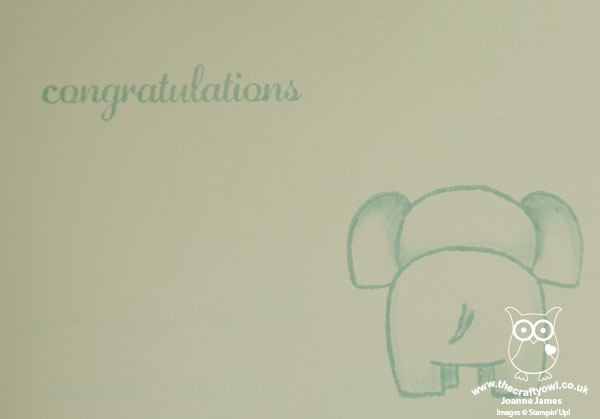
A Little Wild - So how adorable is that little elephant?! I know - he is off the cuteness scale, for sure! He comes from the stamp set 'A Little Wild' and is part of a trio that includes a sweet bear and a lion too that is perfect for baby makes. The best part though? He is actually double-sided; each animal comes with a front and back and the co-ordinating Little Loves Framelits Dies will cut both pieces out as one, enabling them to be used as a gift tag too. I actually cut my elephant away here as I just wanted to the front, but I couldn't resist adding the reverse to the inside of my card:
Blue For A Boy - I decided to use a piece of the Bundle of Love Specialty Designer Series Paper for the blue for my card; it was tough not to use the gorgeous gold embossed foil pattern on the reverse, however I did use the Soft Sky/Very Vanilla/Gold colour combination to bring the elements of my card together. I added some subtle Soft Sky shading to my elephant using ink and a blender pen just to give him a little more depth and dimension.
Touches Of Gold - I wanted to add a touch of luxury to my card, the birth of a baby is a special occasion after all, and inspired by the designer series paper, added in a few gold elements - a die cut, layered scalloped circle, gold natural trim ribbon, some gold heat embossing and metallic enamel dots - to finish.
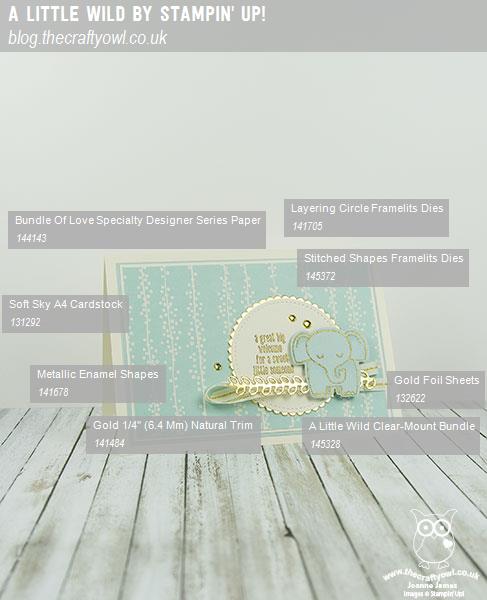
Here is the visual summary of the key products used on today's project for you to pin for easy reference:
You can see all of my Product and 'How To' summaries on my 'How To - Tips and Techniques' Pinterest board in case you've missed any.
I just love this card and can't wait to make a pink one for a girl and some co-ordinating packaging adorned with little elephant tags too!
Before you reach for your ink and papers, check out what our amazing team has created to inspire you this week:
The Paper Players Design Team
Here's a quick recap of our challenge rules:
1. Create a new paper project
2. Upload your creation to your blog with a link back to us and provide a direct link to the post featuring your challenge submission.
3. Please link your card to no more than four challenges, TOTAL.
4. Have FUN!
I look forward to seeing what you create with our board this week. All of the Design Team love it when your return our visits and leave a friendly blog comment or two, however this week more than most it would be great if you could pop by Laurie's blog at Stampin' Up North and leave her a little Paper Players love - I know she would appreciate it.
Enjoy the rest of your weekend; I have some trampolining to attend to (watching not bouncing thankfully!) and some preparation for the first of this month's technique classes on Tuesday.
I'll be back tomorrow with another project; until then, happy stampin'!
Stampin' Up! Supplies Used: