by Joanne James11. July 2015 18:04I've been busy creating today and just have time for a quick post before I head out this evening for dinner with friends. Today's card uses this week's sketch over at Mojo Monday and showcases some of the the new Farmer's Market DSP so is perfect for linking up with SUO Challenges too where the theme is 'designer papers':
Here is my card - check out how perfectly these two paper designs from the Farmer's Market range co-ordinate with each other:
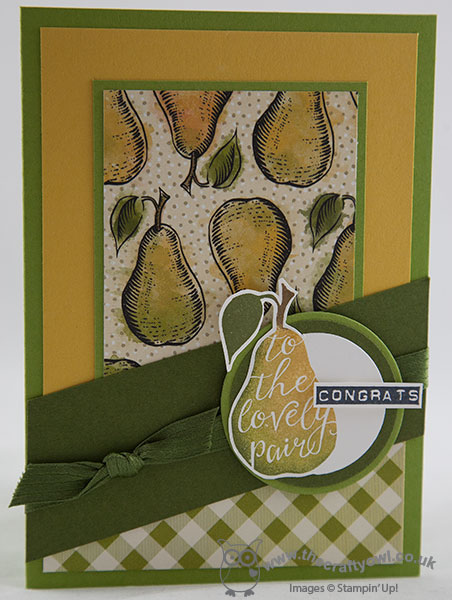
I used Old Olive for my base with a mat of Hello Honey - a colour I'm not overly fond of it has to be said, yet I think it takes on a lovely hue next to the greens on this card. The pear paper design is definitely the one on show here, yet the gingham across the bottom adds interest without overwhelming. I used a piece of Mossy Meadow for my diagonal, tied with some retired satin ribbon in the same colour then for my focal point I stamped the pear from the 'Silhouettes and Script' hostess set onto Whisper white, inking up with my sponge daubers to give the lovely shading effect then fussy cut one side and cut to other with my circle framelits. To finish I added a 'Congrats' from the same set in black and popped up on dimensionals. I just love the blended colouring on the pear - I'm going to have to do this with the other stamps in the set too!! What a fun alternative take for a wedding or anniversary card!
That's all from me today; I need to go and wash my hair and get ready for my night out! Back tomorrow with a new challenge over at The Paper Players. Until then, happy stampin'!
Stampin' Up! Supplies Used:
53623b0e-f9fd-4b6e-979f-90d422b6b86f|0|.0|96d5b379-7e1d-4dac-a6ba-1e50db561b04
Tags: Anniversary, Host a Party, Farmer's Market, Silhouettes and Script, Weddings, Circles Framelits, Big Shot, Shop online, Shop Stampin' Up online, Stampin' Up, Stampin' Up Card, Stampin' Up Card ideas, Stampin' Up Supplies
Cards | Stamping
by Joanne James22. June 2015 09:09Good morning everyone - it's Monday! I am saying that with more optimism than I feel, but as usual there is lots to achieve this week so I'd best get on! Today I'm here with a card that I made for the challenge over at TGIF Challenge! this week, however firstly a big thank you to James Weber and the TGIF Team for choosing me as their TGIF Fave for my Build a Birthday card last week:

If you missed it, you can see my winning card here. I am honoured to be a fave pick of this talented bunch of designers; I also got a shout out for my rule-breaking card for the TGIF Throwdown challenge; you can see my card here. There is still the rest of the month to enter this one, so watch this space for my bona fide entry which is still to come! Meanwhile onto today's card which is as mentioned for this week's TGIF Challenge where the theme is 'Togetherness', so weddings, anniversaries and the like; I also used this week's Colour Q colour palette and the sketch over at Pals Paper Arts as inspiration for my card:


Without further ado, let me get to today's card:
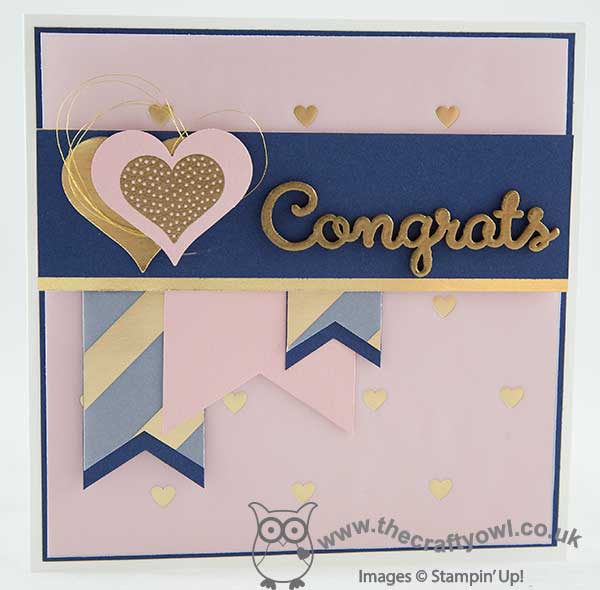
I saw the Colour Q colours this week and thought they would work really well for a wedding or engagement card and I was particularly inspired by the inspiration photo of those patterned straws, which immediately took me to my gold Fancy Foil Designer Vellum. I used the new Whisper White Thick cardstock for my base (p. 149 of the catalogue with the speciality cardstocks in case you missed it) - did I tell you already how much I LOVE this cardstock? It makes such great card bases and is beautifully thick for one layer cards. I used a mat of Night of Navy and another of Blushing Bride, before adhering a layer of heart-embossed gold foil vellum over the top. This mutes the pink slightly and creates a real feeling of luxury, which I think is important for a wedding or celebratory card. I layered my banners, all punched with the new triple banner punch, again layering vellum over the navy ones, this time in gold stripes and leaving the bottoms visible for contrast. My cross panel is Night of Navy layered on a piece of Gold Foil Sheet, with two offset layered hearts - one gold foil, one Blushing Bride with one of the heart stamps from the 'Hello Life' set embossed in gold in the centre and some of the lovely new gold metallic thread wound in between. To finish, I added my sentiment which is the thing I probably love most on this card: it's one of the new Expressions Natural Elements wooden diecuts, which I decided to double heat-emboss in gold to tie in with the rest of my card. I love these in their natural wood finish, but they are fun to jazz up too!
This is one of those cards that I didn't have a clear idea about when I started work and it sort of evolved as I went along. I love it though - I just need someone to announce their engagement or get married so that I can send it now!
I hope you like today's card' I'll be back tomorrow with another project, so stay tuned. Until then, happy stampin'!
Stampin' Up! Supplies Used:
by Joanne James4. May 2015 18:54It's a Bank Holiday here in the UK today and whilst I made today's card this morning, I have spent a pleasant afternoon gardening so am late with my blog post today! I used this week's sketch over at Freshly Made Sketches for today's card and I am squeezing in just under the wire for a link-up (hopefully!) Here is the sketch:
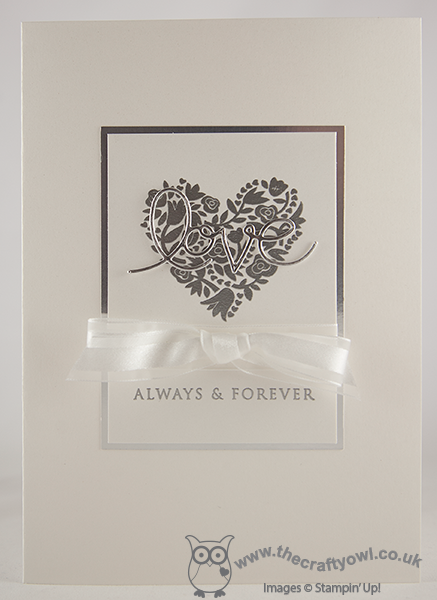
I decided to use one of my retiring and not-yet-inked-up (shock, horror!) sets to make a wedding card today - here it is:
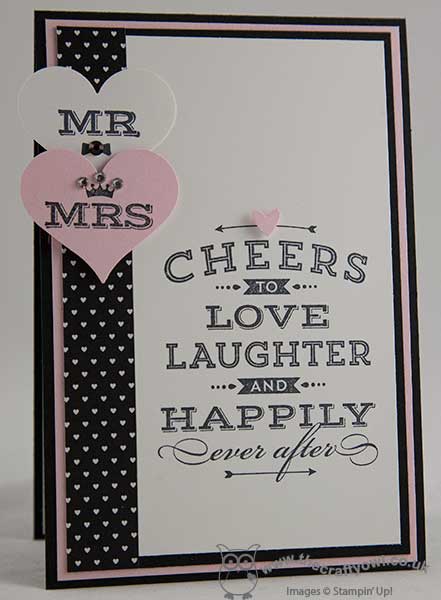
I went with a 'black and white and hint of pink' colour scheme today, using a base of Basic Black with mats in Pink Pirouette and Basic Black and a strip of 'Stacked With Love' DSP for my patterned edge. I made my card slightly narrower than usual to allow for the overhanging element and still fit into a standard envelope. I stamped the main stamp from the 'Cheers To Love' stamp set in Memento Black onto my right hand panel of Whisper White and then for my 'over the edge' element I chose a couple of stacked hearts, stamped with the 'Mr' and 'Mrs' stamps from the same set and punched with my Sweetheart punch. Lastly I added a tiny pink heart punched with my trusty Owl Builder Punch to the main sentiment and a few rhinestones to the hearts for a little sparkle.
I really love this set and it has everything you need to create beautifully co-ordinated wedding stationery, not just wedding cards. So it might be retiring, but for me it's a keeper (best make extra room on my shelf...)
I hope you like today's card; back tomorrow with another project. Until then, happy stampin'!
Stampin' Up! Supplies Used:
by Joanne James25. April 2015 20:41I've had a week of haphazard blogging this week and not much time for making, but today I managed to get a couple of cards made so hopefully that will put me back on track. Today I'm sharing a card I made using this week's sketch over at Freshly Made Sketches, the first time I've managed to play along in a few weeks:
That long vertical panel offered so many possibilities - I decided it was time to use the wedding cake for the Your Perfect Day stamp set and more of the Something Borrowed DSP for a wedding card:
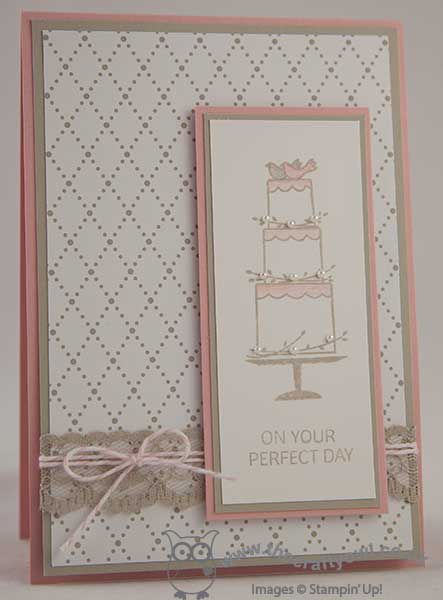
I went with a base of Blushing Bride, then matted my DSP on a piece of Sahara Sand cardstock, wrapped with some lace trim and Blushing Bride baker's twine. The wedding cake was stamped in Sahara Sand onto Whisper White and matted in the same way. I used a blender pen to add some Blushing Bride and Sahara Sand ink to the image and I split the sentiment into two parts so that it would sit more neatly on my panel. I thought my card still needed a little something, so I added a few tiny pearls - still clean, but just the right finishing touch.
That's all from me today; I'll be back tomorrow with this week's new challenge over at The Paper Players where Ann has a great sketch for us to work with. Until then, happy stampin'!
Stampin' Up! Supplies Used:
by Joanne James17. March 2015 10:29Today I'm sharing a card that I'm entering in a couple of challenges:

.jpg)
I'm not normally one for such pastel colours unless it's a baby card, however I thought I would combine this week's colour palette over at Pals Paper Arts with the great sketch over at CAS(E) This Sketch this week and create a card suitable for a wedding or engagement. Take a look:
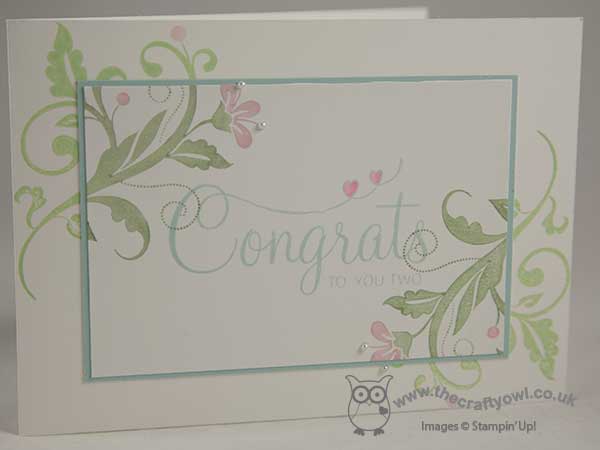
I decided to feature the Congratulations sentiment from 'Your Perfect Day' as the centrepiece for my card, adorned with a couple of the floral flourishes from the 'Flowering Flourishes' set in each corner. I turned the sketch on its side as I needed my card to be landscape in order to fit my sentiment on. I stamped the sentiment in Soft Sky and coloured the flourishes with my Stampin' Write markers in each of the challenge colours, adding a few tiny pearls to the flower stamens. I used a piece of Soft Sky for my mat and stamped the whole card on Whisper White; this card looks more vibrant in real life - I find predominantly white cards so tricky to photograph.
Short and sweet from me today - lots to do before attending an Easter Concert this afternoon where both James Juniors are singing and performing piano recitals. I will be back shortly with news of some additional Sale-A-Bration items that will be available free with a £45 spend until the end of the month. until then, happy stampin'!
Stampin' Up! Supplies Used:
by Joanne James5. March 2015 08:05Today in addition to my card I have some exciting news for you! I was recently asked by the lovely Connie and Mary to join their Thursday Challenge Team so it's official - I am officially a Create With Connie and Mary Designer:

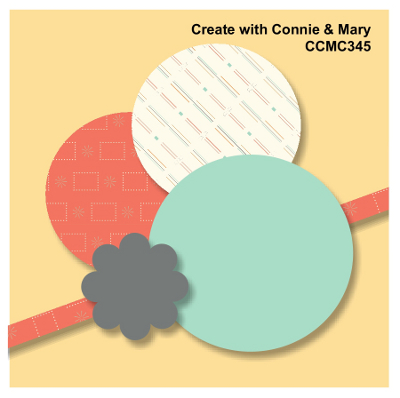
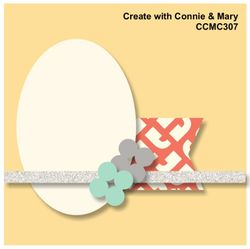
As my regular readers know, I often play along with the CCMC challenges, so I'm excited to be sharing my first card as designer with you for this week's new challenge, which is a sketch challenge using the following sketch as inspiration:
I decided with Spring on the way and since we are just about to officially embark on 'wedding season', I would break out my 'Something Borrowed' Designer Series Paper and create my first wedding card this year:
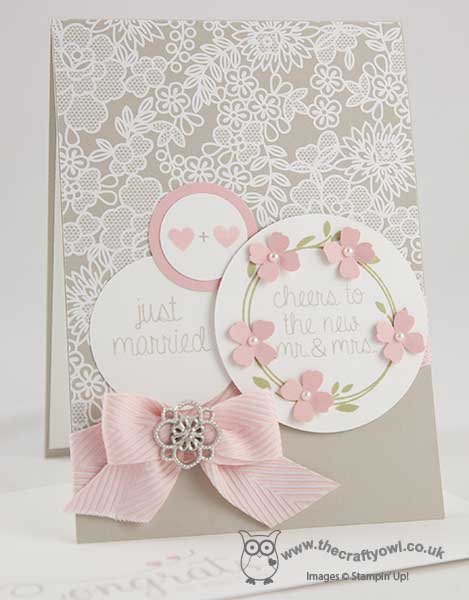
I used Sahara Sand for my card base and overlaid this with a piece of 'Something Borrowed' DSP which I cut at an angle, following the line of the sketch, and covered the join with a piece of Blushing Bride Chevron Ribbon. I punched the circles from Whisper White using a variety of circle punches, one of which I matted on circle of Blushing Bride, and I stamped a variety of stamps from the new 'Your Perfect Day' stamp set in Sahara Sand. I used a Blushing Bride marker to highlight the hearts on one of the circles and on the main circle, I also stamped the wreath shape in Pear Pizzazz around my sentiment in Sahara Sand, then added my Blushing Bride flowers punched out with the Itty Bitty Accents flower punch, finished with a pearl in the centre of each. To finish, I added a bow from Blushing Bride chevron ribbon and finished the centre of this with one of the gorgeous new Something Borrowed Embellishments - this really adds a touch of luxury to the finished card I think. I even stamped a co-ordinating envelope - of all the cards that I send, I like wedding cards to be special.
I hope you like today's card - do pop over to the Create With Connie And Mary website to check out the creations of the other members of the design team. There are a few other new designers joining the team too, so go take a look! we look forward to seeing your creations in the gallery this week.
I'll be back tomorrow with a new project; until then, happy stampin'!
by Joanne James16. August 2014 21:54I've spent a pleasant afternoon today with the ladies at my local hair and beauty salon celebrating their 3rd anniversary since opening (Pamper Me Hair & Beauty in Northampton - if you're local look them up, they're a lovely bunch). So another quick share today - I'm linking up with The Card Concept where the theme is to make a wedding card:
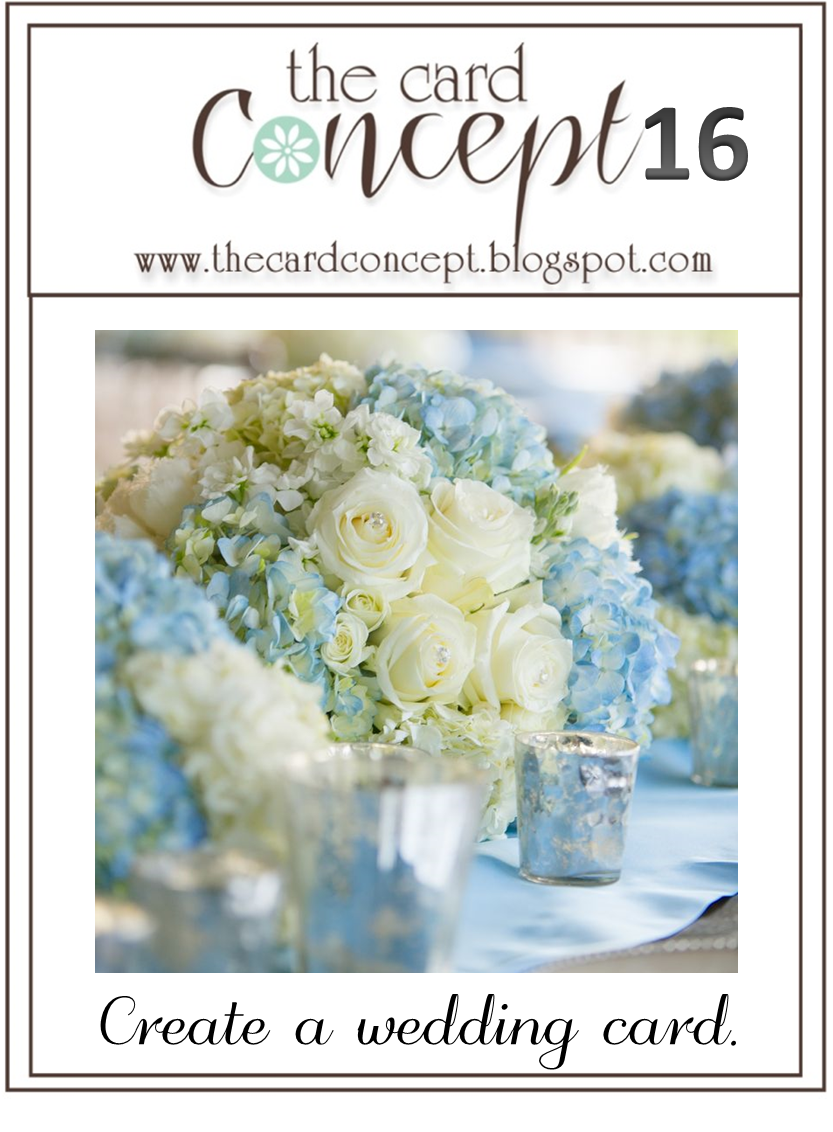
As much as I loved the photo inspiration for this challenge, I wanted to use Shimmery White and silver for my card - I had a clear idea in mind of what I wanted to create. Here's my card:
This card uses some of my favourite 'vintage' stamps and tools of all time - Expressions Thinlits and that beautiful Flowerfull Heart stamp. The card is still my usual clean and layered style, but I do think the silver elements and the bow give a real 'classy and elegant' feel. This is one of those cards that looks so much better in real life - so very opulent, even with a relatively simple design.
That's all from me today - back tomorrow with my Design Team post this week for The Paper Players - and it's a fun one!
Until then, happy stampin'!

Stampin' Up! Supplies Used:
by Joanne James18. June 2014 08:45Back so soon, I know - here is today's creative post! I'm sharing a card I made using the sketch over at Create with Connie and Mary this week:
I decided to use some of my retiring stamps and papers for my card and started out making a birthday card because the cake reminded me of Rebecca's birthday cake at the weekend, but by the time I had everything laid out on my desk I decided that the card would make a nicer wedding card. Here's my finished card:
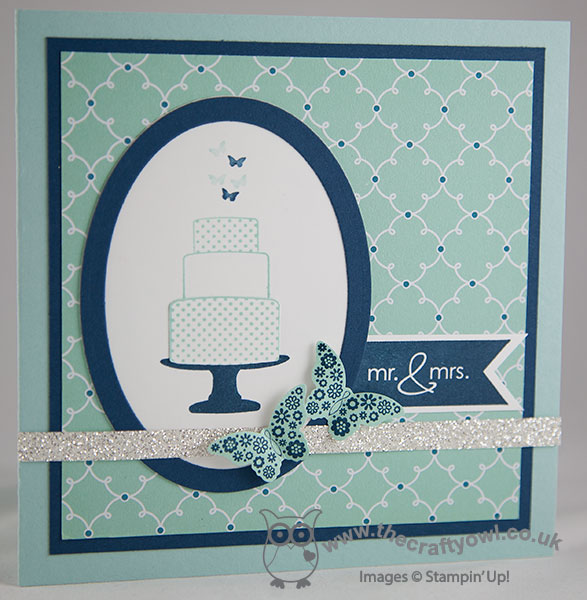
I made a 5" square card and matted a piece of Quatrefancy paper onto Midnight Muse and a Pool Party base (I know technically the dots on the paper are Island Indigo, but since the dots are so small the whole thing still works, even though I've not followed the colours exactly for the rest of the card - what a rule-breaker am I??!) I then stamped a three tier cake with butterfly decoration from the 'Make a Cake' stamp set, stamping the base section twice, once in Midnight Muse for the stand and then again in Pool Party. I fussy cut the Pool Party cake out and used it to create the base layer for my cake. I used my oval framelits to cut out my framed oval and finished with a Mr & Mrs banner flag from the 'Banner Greetings' stamp set, a couple of double-stamped and punched butterflies to echo those on top of the cake and a strip of silver glimmer paper for just the right amount of sparkle.
I really like this finished card but despite where my mind started out it looks absolutely nothing like Rebecca's kitkat cake that I made for her birthday this past weekend:
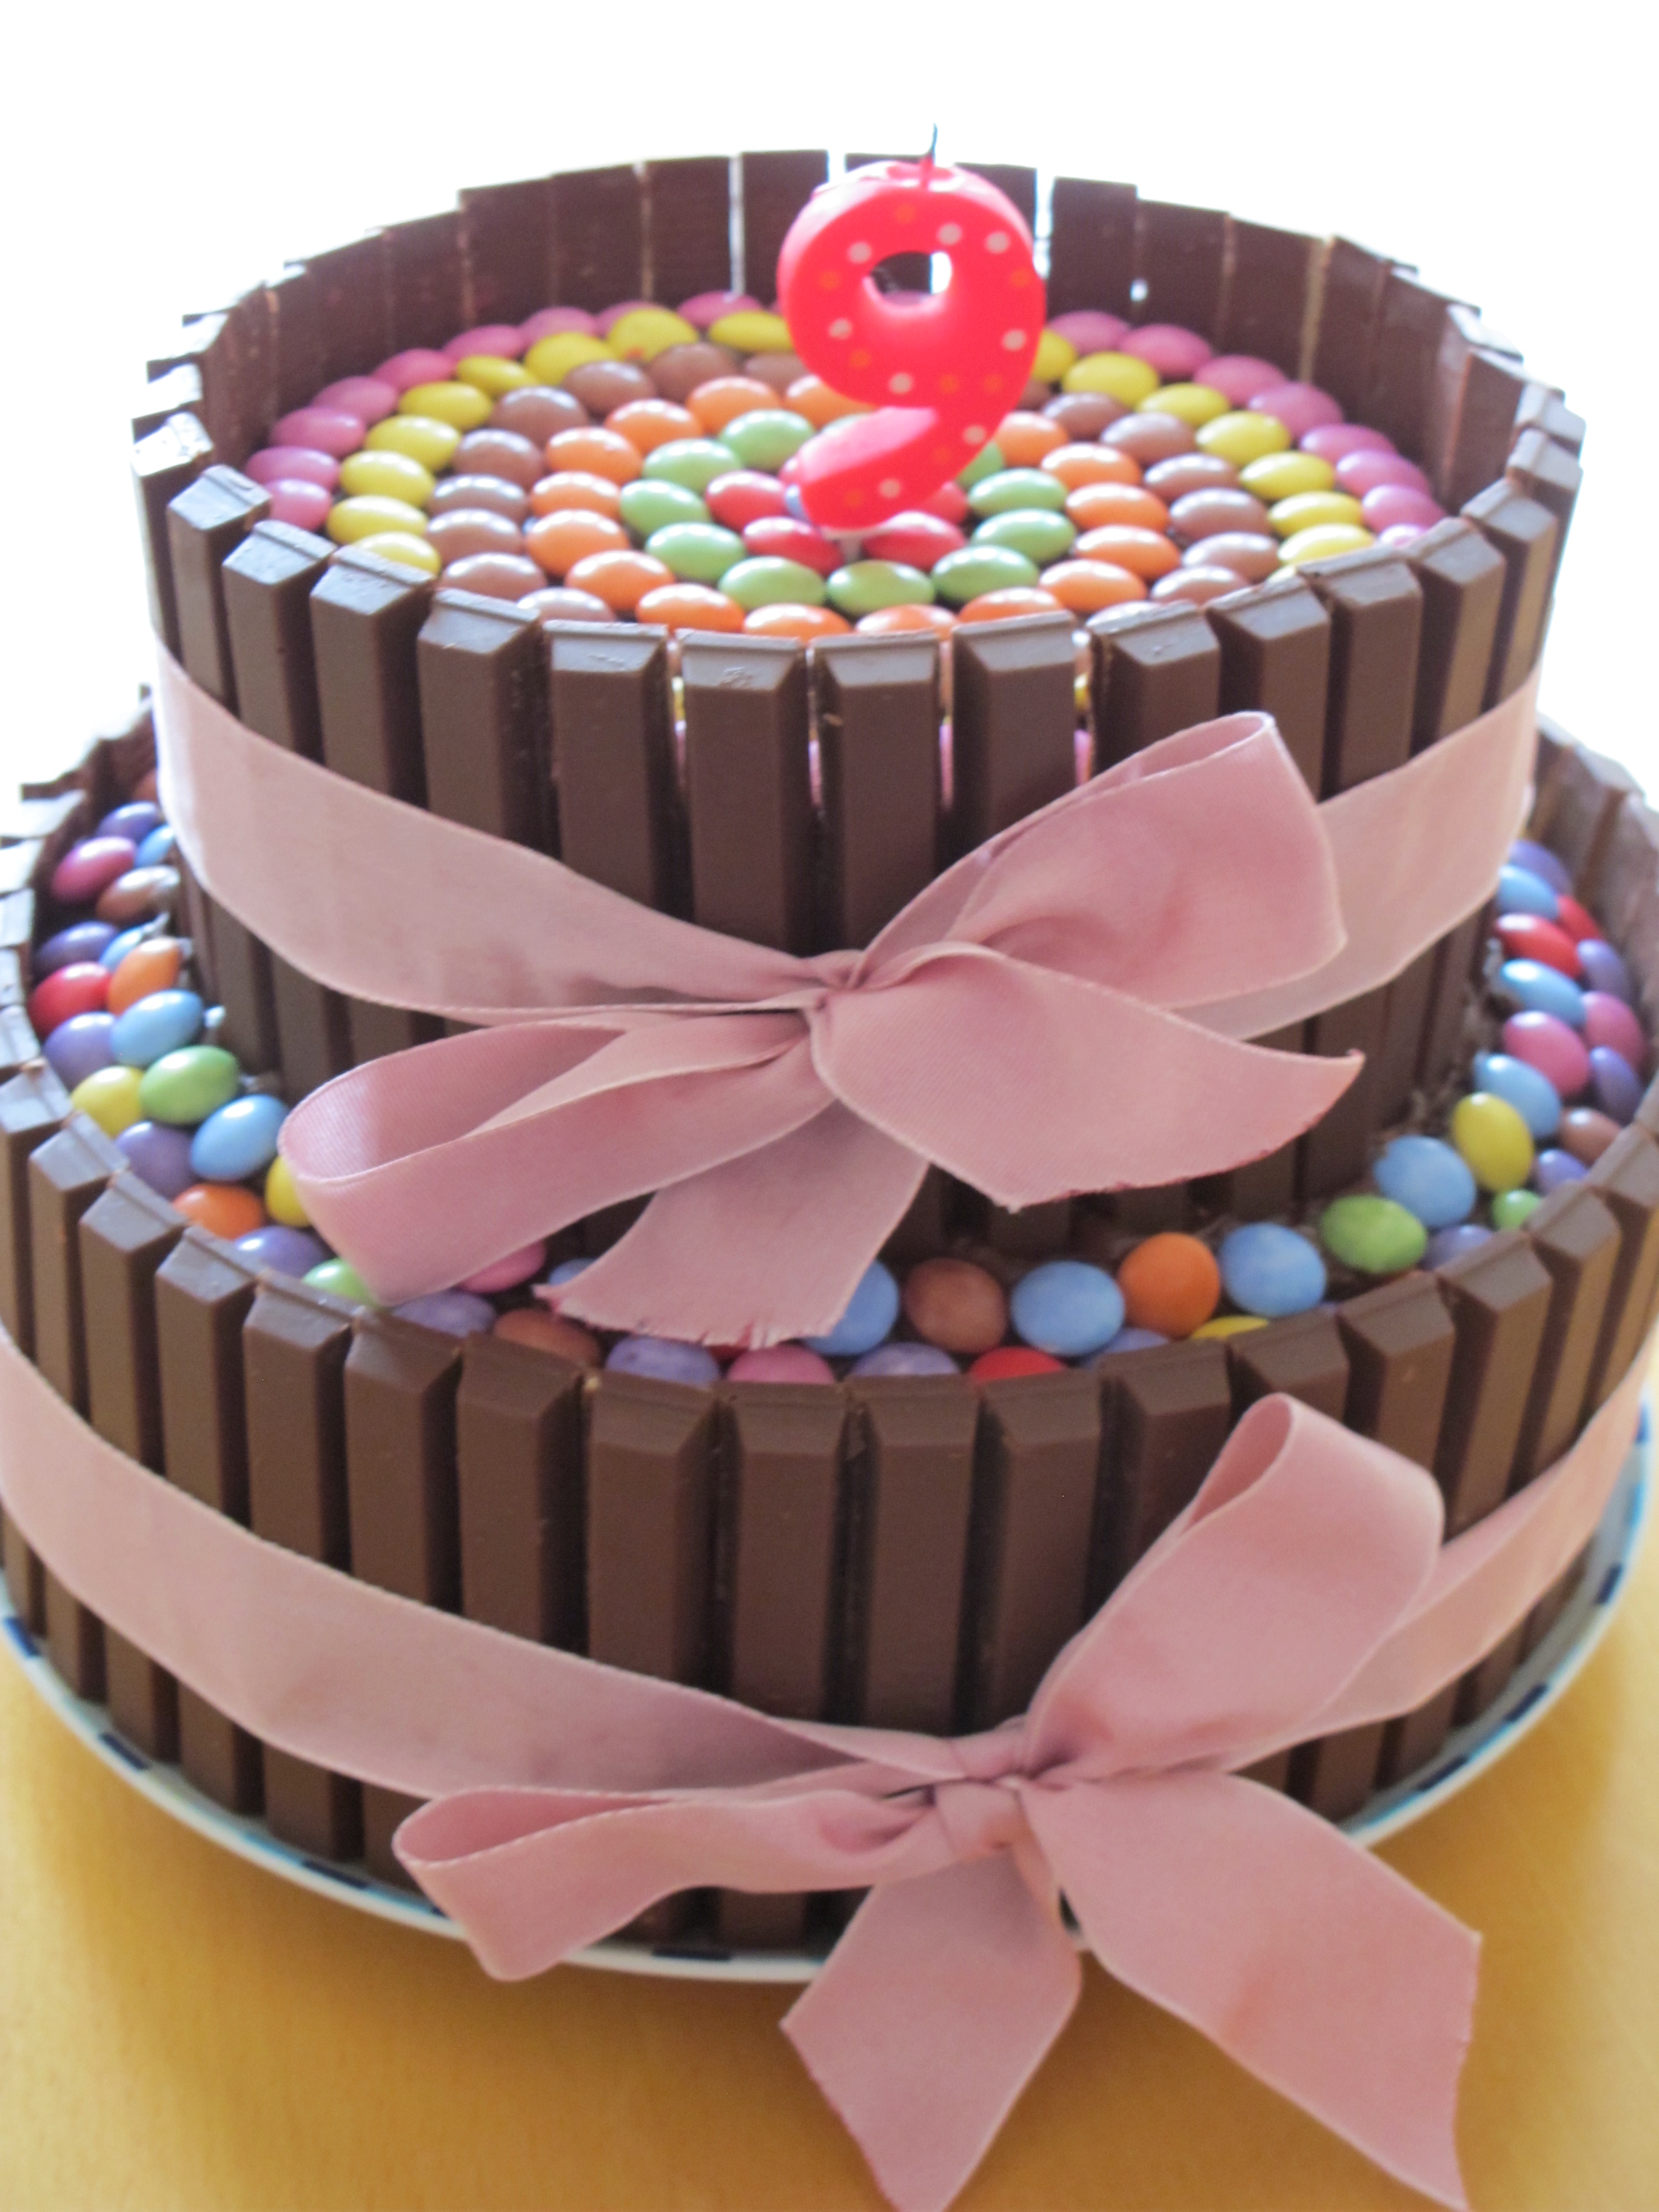
If that's not death by chocolate, then I don't know what is - it did taste delicious though!
Back tomorrow with another project; until then, happy stampin'!
Stampin' Up! Supplies Used:
93bcec03-573d-4108-ae97-7a7a62591318|0|.0|96d5b379-7e1d-4dac-a6ba-1e50db561b04
Tags: Banner Greetings, Big Shot, Ovals Framelits, Make a Cake, Papillon Potpourri, Shop online, Stampin' Up, Stamp-a-ma-jig, Stampin' Up Card, Stampin' Up Card ideas, Stampin' Up Supplies, Weddings
Cards | Stamping | Weddings
by Joanne James4. May 2014 20:57I have a few wedding cards to make for a number of forthcoming nuptials and when I saw the sketch over at Create with Connie and Mary this week I knew it would be perfect for one of the cards I had in mind. Here is this week's sketch:
My wedding card needed to be Whisper White, Marina Mist and silver as I wanted it to reflect the wedding stationery which had been made by the mother of the bride a good friend and customer of mine. Here is my card:
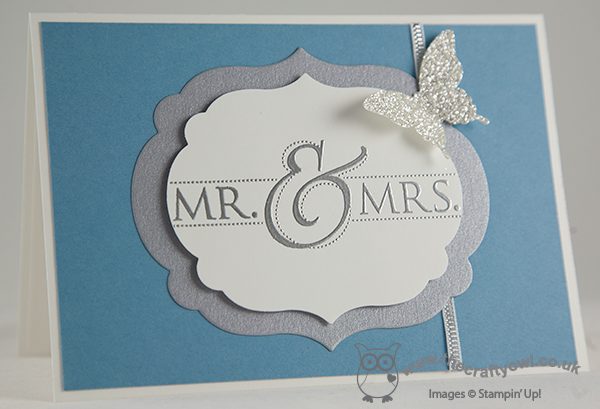
It is very simple as I wanted my silver heat-embossed 'Mr & Mrs' to take centre stage and I layered my centre panel on dimensionals on a piece of brushed silver cardstock, both of which were cut out using the labels framelits. I turned the sketch around through 180 degrees, as I wanted my embellishment to be a silver glimmer butterfly and it looked better top right than bottom left and I used a piece of silver taffeta ribbon to create a band around my Marina Mist mat. Very simple but like the original wedding stationery, very elegant and with just a hint of sparkle.
If you'd like to see more great design inspiration for this sketch, check out what the CCMC design team have been up to - there are some great interpretations over there this week.
Back tomorrow with another card;; until then, happy stampin'!
Stampin' Up! Supplies Used:
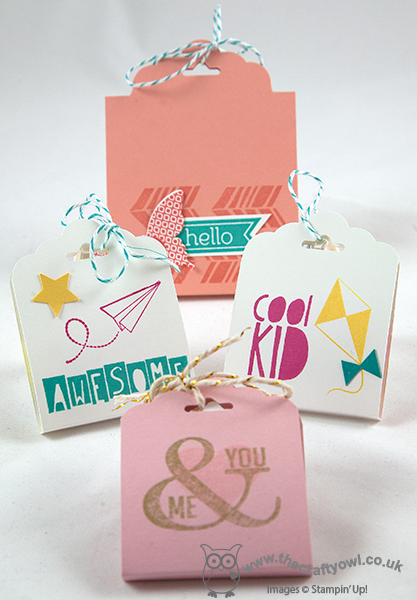
by Joanne James20. February 2014 21:28Good evening everyone! Today I have a video tutorial to share with you that I prepared a couple of weeks ago that shows you how to make an extra-wide pouch using the Scalloped Tag Topper Punch. Here's the finished extra-wide pouch:
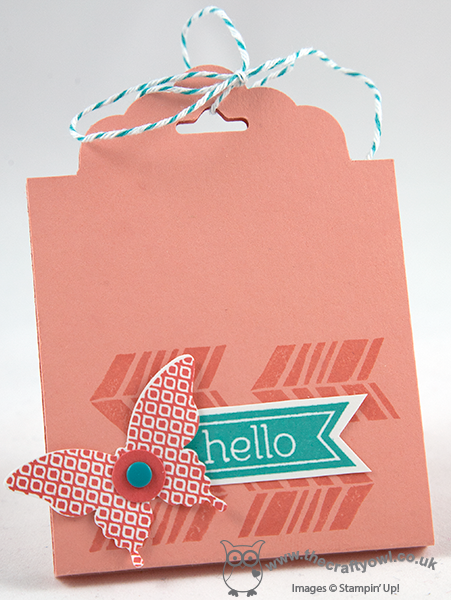
Here is a standard size treat pouch made with the Scalloped Tag Topper Punch - you can find my previous video tutorial on how to make this here:

As you can see, when compared to the standard-size punch, the extra-wide version is about 1" or 2.5cm wider and taller. The video tutorial shows you how to adapt your punch and shares my top tip for a smooth punch every time - go and take a look:
Here are the measurements I used in the video in case you didn't catch them:
Cardstock: 2 3/4" x 7 3/4" or 7cm x 19.5cm
Score at: 3 3/4" and 4" or 9.5cm and 10cm
I hope you found this video tutorial useful - this is such a versatile punch with so many uses beyond a standard tag. The treat pouches make great little wedding favours too.
Back tomorrow with another project; until then, happy stampin'!
Stampin' Up! Supplies Used:
9f056e18-8f7c-4028-927f-66d960295930|0|.0|96d5b379-7e1d-4dac-a6ba-1e50db561b04
Tags: 3D Projects, Papillon Potpourri, Perfect Pennants, Petal Parade, Scalloped Tag Topper Punch, Shop online, Stampin' Up, Stampin' Up Card, Stampin' Up Card ideas, Stampin' Up Supplies, video tutorial, Weddings
3D Projects | Stamping | Video Tutorials