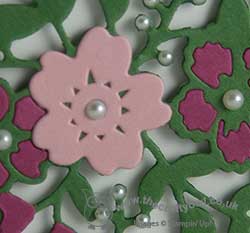
Love At First Sight

by Joanne James30. January 2016 20:00

I hope you are all enjoying your weekends. So far mine has been spent doing laundry, assisting the James Juniors with their homework (Ted Hughes poetry and an art project today!) and preparing for my technique classes next week. I did find time to finish a card that I started yesterday though: another Valentine's card, using this week's sketch over at Freshly Made Sketches and the top line of the tic-tac-toe board over at Stamps, Ink, Paper and fitting with the 'love' theme over at Paper Craft Crew too.

   SIP Tic Tac Toe 32 800    Love Theme Challenge 179 for the Paper Craft Crew.

In order to fit in my large sentiment, I went with an unusual 8 1/4" x 5 1/2" sized card - take a look:

I stamped the 'l v e' from the 'Larger Than Life Alphabet and Numbers' stamp set in Versamark and heat embossed them in black, then substituted the 'o' from my 'love' sentiment with the heart from the 'First Sight' set, which I stamped in Real Red on Real Red cardstock, then overstamped again in Versamark and heat embossed with clear embossing powder for additional shine. I used a piece of Everyday Chic designer series paper for my border panel and finished off my sentiment inside the card with one of the 'Hello You' thinlits and an outline stamped red heart:


I even created a custom envelope with some Real Red envelope paper and the help of my trusty Envelope Expert tool, which I also decorated with a stamped red heart.

I love the layers of this card and the letters shine beautifully; I think this may be one of my favourite Valentine's cards that I've ever made. Today's blog title comes from the combination of one of the stamp sets I've used today and the sentiment and it got me thinking - I remember meeting my now husband for the first time and thinking even then he would be the man I would one day marry; I do believe there is such a thing as love at first sight - do you? Do leave me a comment below today's post - I would love to know what you think.  

That's all from me today; back tomorrow with a new card for this week's challenge over at The Paper Players. Until then, happy stampin'!


Stampin' Up! Supplies Used: 

Table built using Product Table Builder by The Crafty Owl - Independent Stampin' Up! Demonstrator.

Love You Tilted CAS Card

by Joanne James29. January 2016 22:40

Happy Friday everyone! Firstly, I must say a big 'thank you' to everyone who came by to see yesterday's Mrs Potts and Chip card - I have received many wonderful comments on this card both here on my blog and wherever I've shared it, so thank you all so much! Whereas yesterday's card was a little more involved, today's card is almost as CAS as it get! I managed to snatch a quick 10 minutes at my desk this evening so made this Valentine's card for a few challenges:

SIP Tic Tac Toe 32 800      

I went with the top link of the tic-tac-toe board over at Stamp Ink Paper and red/punch or die cut/heart and also used the tilted sketch over at CAS Colours & Sketches to add a little more red to my sketch, which is the theme over at Addicted to CAS. Here's my card:

A Real Red base, a twisted panel of white and a simple sentiment; I used the heart-shaped 'steam' die from the Cups & Kettle Framelits Dies for my heart, which I cut out of red foil for a little dimension and shine. So clean, so simple - and I love it!

That's all from me today; back tomorrow with another project. Until then, happy stampin'!


Stampin' Up! Supplies Used:

Table built using Product Table Builder by The Crafty Owl - Independent Stampin' Up! Demonstrator.


Bloomin' Heart ... it's in the air!

by Joanne James14. January 2016 08:05

Today it's time for a new challenge over at Create With Connie and Mary and this week we have a great sketch for you:


This week's sketch is perfect to showcase the Bloomin' Heart thinlit die. Take a look:


For my card I added some of the co-ordinating stamped flowers, also cut with the flower thinlits that come with the heart, and a sentiment from the 'Bloomin' Love' stamp set that can be purchased with the dies in a bundle for 15% off - add in a Big Shot Die Brush and you could get a free Sale-A-Bration gift too - I love this time of year!! I took my Blushing Bride/Rose Red/Whisper White colour combo from the Love Blossoms designer series paper stack in the same product suite. I added a few pearls and a strip of the new Blushing Bride glimmer paper across the bottom of my card for an added touch of sparkle!

Do visit the other Design Team members to see how they interpreted this week's sketch; there's lots of inspiration over on their blogs too!

Enjoy your day; I'm hosting an open house with my customers today so that they can see and touch lots of lovely new product from the Sale-A-Bration and Spring-Summer catalogues. There will be tea and cake too of course!

I'll be back tomorrow with another project; until then, happy stampin'!


Stampin' Up! Supplies Used:

  • Bloomin' Love Photopolymer Bundle
  • Love Blossoms Designer Series Paper Stack
  • Blushing Bride Glimmer Paper
  • Love Blossoms Cardstock Pack
  • Whisper White A4 Cardstock
  • Rose Red Classic Stampin' Pad
  • Pearl Basic Jewels

Love Blossoms With The Bloomin' Heart Thinlit Die

by Joanne James2. January 2016 08:00

Today I have another 'sneak peek' card for you, featuring some beautiful new designer series paper and a most beautiful die. I used the sketch over at Freshly Made Sketches for the layout for today's card:

   SIP Challenge 28 - No Christmas 800

I'm also linking up with the team over at Stamps Ink Paper who are asking for anything so long as it's not Christmas! The 'Love Blossoms' suite on the new Spring-Summer catalogue includes a stamp set, papers, thinlit die, pink glimmer paper and an accessory kit and my card today uses each of the first three:
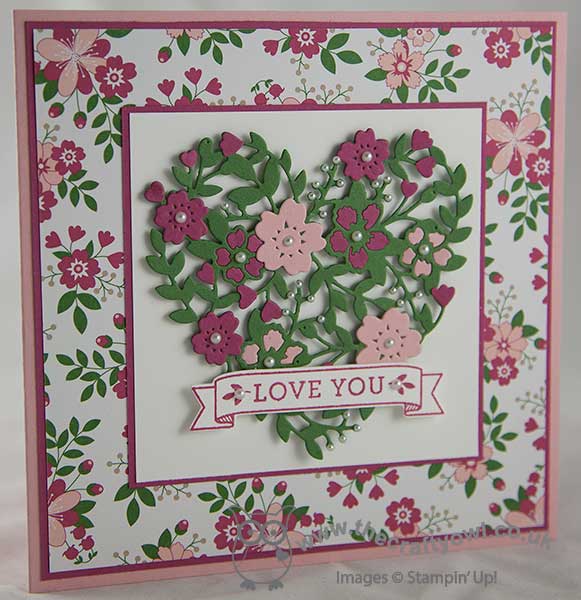
The thinlit die looks great in a single colour with or without the flowers highlighted, but for my card today I chose to cut out my heart in Garden Green, adding additional flowers in Rose Red and Blushing Bride that I cut with the other thinlits in the set and also paper-piecing some flowers into the negative spaces of the die. I highlighted the hearts in pink and added some tiny pearls to break up the green further. 

You can see the detail of the subtle layering and finish on the close-ups below: 
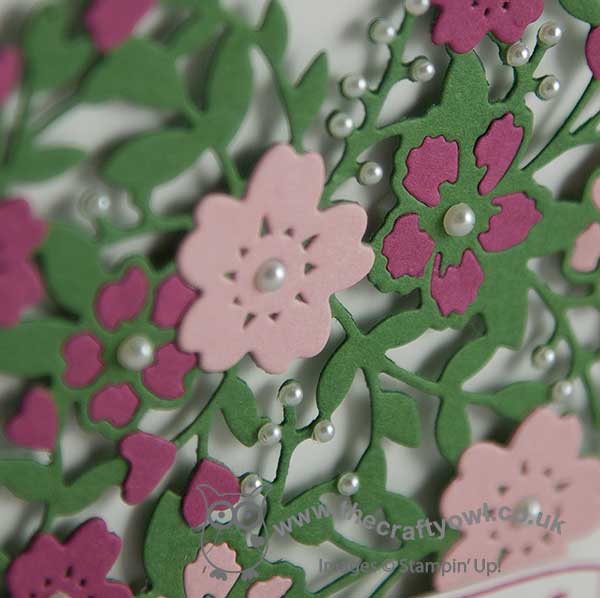
The die itself is so intricate, yet with another new tool available with the new catalogue, the Big Shot Die Brush, it is really easy to separate into its various parts - just look at the detail on the flowers themselves:
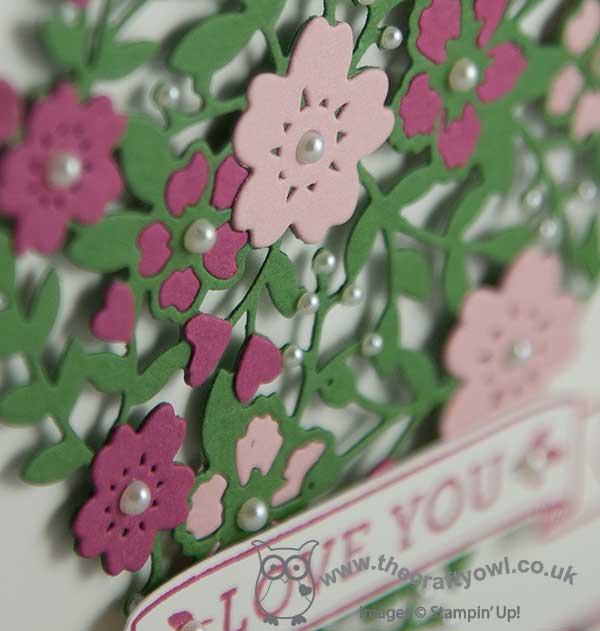
The sentiment is from the 'Bloomin' Love' set and the banner cut out with the co-ordinating framelit from the 'Large Numbers' framelits dies, also available in the new catalogue.

Whilst the Love Blossoms set and in particular the Bloomin' Heart thinlit die makes for beautiful Valentine's Day cards, it is versatile enough to be used for anniversaries, weddings, birthdays or even Mother's Day too. I paired my outer sentiment with one from another set, 'First Sight', on the inside of my card to make a very fitting tribute to a Mum - take a look:
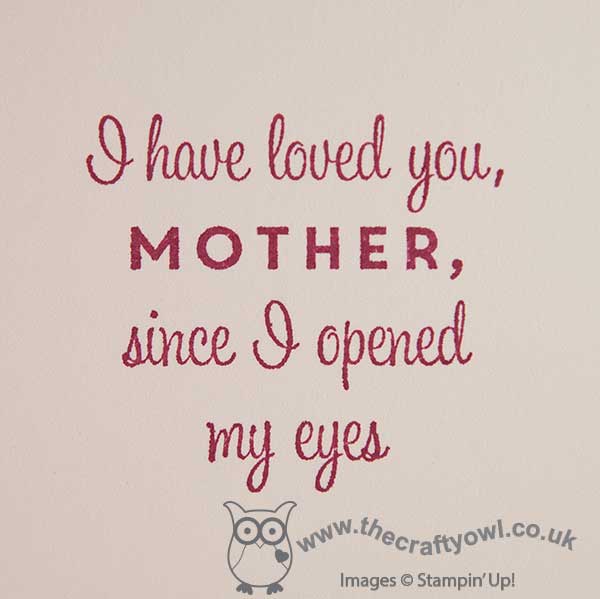
A beautiful sentiment for the prettiest of cards!

That's all from me today; I'll be back tomorrow with my card for this week's challenge over at The Paper Players. I am the hostess for our first challenge of the new year, so do pop back to see what I've chosen as the challenge this week. Until then, I have a few jobs to do today and we are back to the pool for our first swimming following the Christmas break. I'm almost envious that it's only the James Juniors getting in the water; I could do with losing a few post-Christmas pounds and this seems like it could be a good place to start! Happy stampin'!


Stampin' Up! Supplies Used:

Available 5th January:

140818 Bloom' Love Stamp Set and Bloomin' Hearts Thinlits Dies Bundle

140548 Love Blossoms Designer Series Paper Stack

140685 First Sight (clear mount) 

140603 Big Shot Die Brush

Table built using Product Table Builder by The Crafty Owl - Independent Stampin' Up! Demonstrator.


A Sweet Tweet For You!

by Joanne James13. February 2015 22:00

Yay it's Friday! It's been a long week and I'm glad the weekend is finally here. As it's Valentine's Day tomorrow, both James Juniors were keen to take some sweet treats into school to share with their class mates. I found these lovely heart-shaped jelly beans, that fitted perfectly into the thin cello bags:

This is just the first few - production became quite intense at one point and included boy- and girl themed packaging. You can see pictures of the total effort over on my Facebook page. These pretty pink ones were of course headed in the direction of the young ladies; we were stamping the tab top from the 'Hey, Valentine' set in a variety of pinks and colouring in with Blendabilities. Here's a close-up:

I definitely like the Melon Mambo one best (I'm such a 'brights' girl at heart) but they all look cute, especially with the addition of a heart-shaped Hodgepodge clip too. This little bag topper is a perfect fit for these cello bags and will work just as well at any other time of year too, not just Valentines. I also made a batch for a children's birthday party that I am hosting tomorrow afternoon, in pinks and purples. Our cello bags are great value at 50 for £2.25 and make such a nice way to create beautifully decorated party favours.

I'm told that the treats were well received by everyone which is nice to know and provided the perfect start to our forthcoming week-long half-term break.

Back tomorrow with another project; until then happy stampin'!


Stampin' Up! Supplies Used:

Table built using Product Table Builder by The Crafty Owl - Independent Stampin' Up! Demonstrator.


Another Hugs and Kisses Valentine's Card!

by Joanne James12. February 2015 07:00

Another quick, clean and simple Valentine's card for you today - a second crack at the 'hugs and kisses' challenge over at Addicted to CAS and Can You Case It:


My card was inspired by Kylie's in the ATCAS Design Team - it reminded me of the little 'xoxo' framelit in the circle thinlits set, which was perfect for the fun little game I had in mind - here's my card:

I cut out a few of the 'xoxo' in both Real Red and Basic Black, then snipped them apart so that I could use them for my game of tic-tac-toe. I created my 'board' by piercing some holes in my Whisper White layer and threading them with black baker's twine - here's a close up so that you can see it in more detail:

I substituted my final 'x' with a little red heart, popped up on a dimensional - sweet! Another no stamping card too - that doesn't happen often!!

Today's post is short and sweet too - I have a very busy day ahead so I'm off to get started. Back with another project tomorrow - until then, happy stampin'!


Stampin' Up! Supplies Used:

Table built using Product Table Builder by The Crafty Owl - Independent Stampin' Up! Demonstrator.


Tags: , , , , , , , ,

Cards | Punch Art | Stamping

Love, Hugs and Kisses Valentines Card

by Joanne James11. February 2015 09:15

I still have a couple more Valentine's cards to share with you this week, all of them quick and easy to execute though if you are making a last-minute card for your loved one! Today's card has been made using this week's sketch over at CAS(E) This Sketch and I am also entering it into the 'Hugs and Kisses' challenge over at Addicted to CAS and the colour challenge at Can You CASE IT:


This is one of those 'go to' sketch layouts for clean and simple cards and is also great for showcasing designer series paper, as I've done here with the hugs & kisses pattern from the 'Stacked With Love' DSP stack. Take a look: 

For the other half of my base layer, I used another of the black and white patterns in the stack, and used a heart framelit to create a die cut in my top red layer that allowed an element of the paper design to show through. I finished my card with a 'vintage' love die cut with my now retired Expressions thinlits - these are still available on the clearance rack and can be picked up for a bargain £13.79 and lastly rounded the bottom right corner of my card. Not a stamp in sight either - no risk of inky fingers with this one!

Simple but effective I hope you will agree! Back tomorrow with another Valentine's card to share with you; until then, happy stampin'!


Stampin' Up! Supplies Used:

Table built using Product Table Builder by The Crafty Owl - Independent Stampin' Up! Demonstrator.


Roses are Pink...Two-for-One Valentine's Cards

by Joanne James10. February 2015 08:00

Today I have not one but two cards for you! Both cards fit this week's colour challenge over at Pals Paper Arts, where there is a gorgeous colour palette to work with this week:

I absolutely love this colour combination and couldn't wait to create something pink and pretty with it. Here is my first card:

I layered the colours in two sections and in the central section used one of the lovely rose die cut panels from the Artisan Embellishment kit as a stencil and stencilled the roses in the two shades of pink, adding in touches of Basic Grey for the flower leaves. These die cuts are so beautiful - it's a shame there are only two in the kit! Here's a close up of the sponged area:


The form of the roses is just so pretty I think and looks really beautiful. I added a bow in luxurious silver satin ribbon and stamped my sentiment on the wide mat layer of Pink Pirouette, stamped in Versamark and heat embossed in pewter. This card is full of romance, but I think it would work equally well as a birthday card.

My second card today uses exactly the same colour palette, but is altogether a more clean and simple affair. This week the team over at Less is More is celebrating its 4th birthday and have a colour challenge of 'pink and grey'. Here is my card for this week's challenge:

My card started out as a two-tone pink and grey affair, with an inlaid split sentiment - I die cut the word 'love' using my Little Letters thinlits, then did the same with the cardstock the other way around top and bottom in order that I could paper-piece the reverse colours into the negative space. The more I looked at it though, the more it needed a little something else - I toyed with a scrap of Rose Red that sat on my desk leftover from the first card and the addition of the tiny heart with a tiny sparkle was just what it needed. You can see the detail of the die cut and inlaid letters below:

Congratulations to Chrissie and the team on their 4th birthday - you are an awesome bunch who run a most successful weekly challenge and are truly an inspiration. 

I'll be back tomorrow with another card; until then, happy stampin'!


Stampin' Up! Supplies Used:

Card 1: 

Table built using Product Table Builder by The Crafty Owl - Independent Stampin' Up! Demonstrator.
 
Card 2:
 
Table built using Product Table Builder by The Crafty Owl - Independent Stampin' Up! Demonstrator.

'I Do Love You' Valentine's Card

by Joanne James8. February 2015 08:00

Good morning lovely blog readers! Today it's Sunday and time for a new challenge over at The Paper Players, where this week the lovely Nance has this great colour combination for us:


I also used this week's sketch over at Mojo Monday for the layout of today's card. I was tempted to use the florals in the inspiration photo as the starting point for my card - isn't the badge great? Nance creates all our blog challenge badges and does such a fantastic job, thank you Nance! - but in the end the lure of my 'Stacked with Love' DSP paper stack was too strong and I decided to make another Valentine's card! Come and take a look:


I used one of the large sentiments from the 'Big on You' stamp set as the focal point for my card and stamped it in Versamark on blackboard paper and heat embossed in white. I rubbed a little white kraft ink around the edges to add to the chalkboard look and feel of this panel. The large sentiment allowed me to use a number of the other DSP patterns for the background layers to my card. Red and black are clearly taking centre stage on my card, but there are a couple of pops of Calypso Coral - both the flag banner behind the strip of punched hearts and in the popped-up heart, finished with a Real Red bow cut with one of the Mini Treat Bag Thinlit accessory dies and a rhinestone. I haven't made a card using these papers for over a week and I was clearly getting withdrawal symptoms; having got them back out on the desk I've been creating with them again and I have a few more cards to share that feature them this week, so stay tuned!

Before you reach for your ink pads, do visit the other design team members to see what interesting ideas they've had this week:

The Paper Players Design Team
 
Here's a quick recap of our challenge rules:
 
1.  Create a new paper project
2.  Upload your creation to your blog with a link back to us and provide a direct link to the post featuring your challenge submission.
3.  Please link your card to no more than three challenges, TOTAL.
4.  Have FUN! 

I look forward to seeing your projects in the gallery this week. I'm off to hockey this morning and looking forward to an afternoon with a spot of crafting and some fun with the rest of the family before the new week starts again in earnest.

Back tomorrow with another project; until then, happy stampin'!


Stampin' Up! Supplies Used:

Table built using Product Table Builder by The Crafty Owl - Independent Stampin' Up! Demonstrator.


Simply Scattered Love You Card

by Joanne James6. February 2015 21:19

I'm late posting today and am just in time to get my card for this week's 'Less is More' challenge in before the deadline. The challenge this week is 'little ones'; I had my card all planned out in my head since the start of this week but despite several attempts, I wasn't able to execute my idea well. So today, I took a break from my preparations for my next week's class and went back to the drawing board and came up with this ultra clean and simple card:


The theme of 'little ones' can be interpreted in so many ways and I had been working with the idea of lots of little things, rather than a new baby theme. On going back to the drawing board, I decided I would try and find the smallest stamped image I had and then I remembered: the Love stamp from the now retired 'Seasonally Scattered' set had some of the most perfect teeny-tiny hearts I ever did see, so decided this would be perfect for my card. I added a punched Itty Bitty Accents heart in Real Red and added the 'You' from the 'Crazy About You' set to complete my romantic sentiment.

That's all for today - short and sweet! Check out the Less is More page for more 'little ones' ideas - there is a ton of great inspiration from the designers and gallery alike. Back tomorrow with another project; until then, happy stampin'!


Stampin' Up! Supplies Used:

*Seasonally Scattered - retired

Table built using Product Table Builder by The Crafty Owl - Independent Stampin' Up! Demonstrator.


Mini Catalogue

BROWSE THE CATALOGUE

The mini catalogue is now live! Read and download your copy here.

Shop Online

Access my online shop 24 x 7, 365 days of the year:

Current April hostess code:

VDKNV7BH

Shop Online

Join My Team

It's always a great time to join Stampin’ Up! New team members can get £130 worth of products for only £99 + free business supplies + free shipping + all the fun being a part of Stampin’ Up! Stampin' Up! has something for everyone: join my growing team and benefit from my support to enjoy Stampin' Up! however you choose.

If you're interested, call me for a chat to understand how I can help you realise your goals. Alternatively, if you have already decided to sign up and you just can't wait, please click here for the link to the online form where you can sign up and order your starter kit right away! 

Latest Kit!

Stampin Cut and Emboss

The Rock Legend Kit has all you need to make 8 cards with coordinating envelopes. Along with the new Panda Friends Kit, both are available from January 4th for just £14 each - get yours here!

2023-24 Annual Catalogue

BROWSE THE CATALOGUE

Click on the catalogue for a full list of current SU! supplies - if you would like to order any of the items featured, please drop me a line at [email protected] or give me a call on 07773 421446 - I'd be happy to help.

New Online Exclusives

There are new products available exclusively in the online store from 5 March - check them out here.

About Me

Hi I'm Joanne and live in Northampton and when I'm not looking after my husband and two beautiful children, am an avid crafter with a passion for all things Stampin' Up!

I must confess that I have never been a big rubber stamper - until I discovered Stampin' Up! that is. I love the fact that I can get such great results with co-ordinating stamps, inks, papers and punches - the possibilities are endless! Join me on my stamping journey as I share the things I love and be inspired to create amazing things yourself!

Follow Me

Monthly Newsletter

Box Builder

Click the button above to use Box Buster to create your custom box design using the Envelope Punch Board!

Kits Collection Now Available!

Stampin Cut and Emboss

The new Kits Collection from Stampin' Up! is now available!

Click here to see the current kits available and order yours online today.

I Design For


Stampin' Up Stuff

This is my personal blog and is not endorsed by Stampin’ Up! I hope you find it a plentiful source of ideas and personal inspiration but please don't copy my designs for contest submission or use for classes, publication or sale without express permission.