Peaceful Poinsettia Christmas Card Two Ways PP422

by Joanne James9. December 2018 09:00


It's Sunday and time for this week's new challenge over at The Paper Players! It's my turn to host this week and for our final challenge this year I have a festive colour challenge for you to work with:


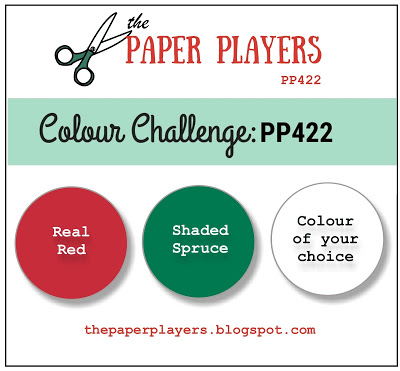
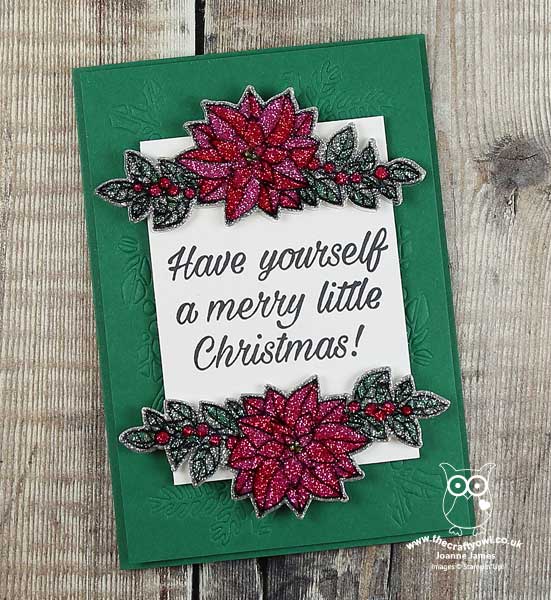
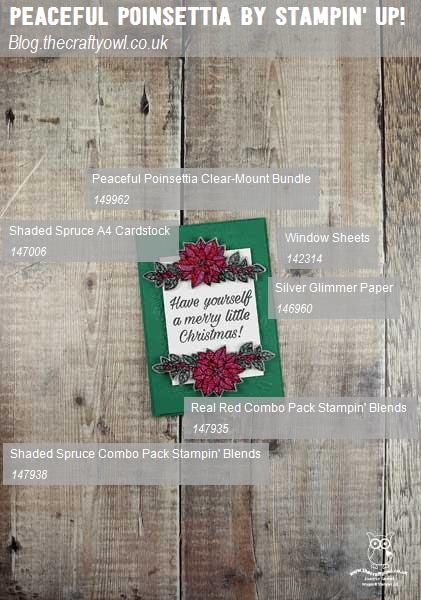
Red, green and a colour of your choice - to retain the festive theme! I have not one but two Christmas cards to share with you this week both of which feature a traditional flower for this time of year. My cards are identical, I simply used Shaded Spruce for the base of one and Real Red for the base of the other. Take a look at the first one on the base of Shaded Spruce:


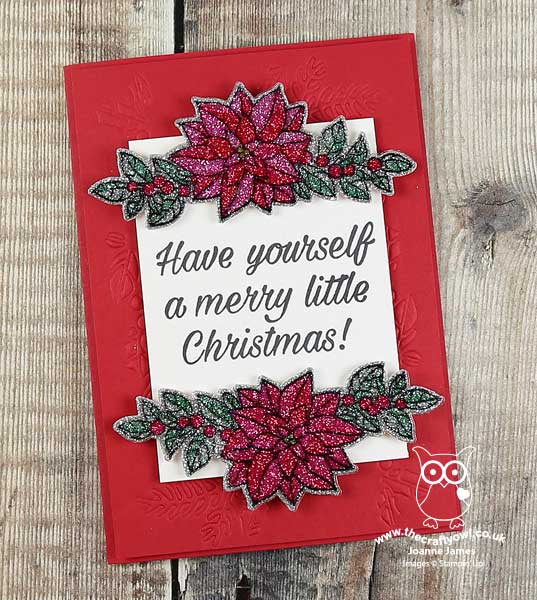
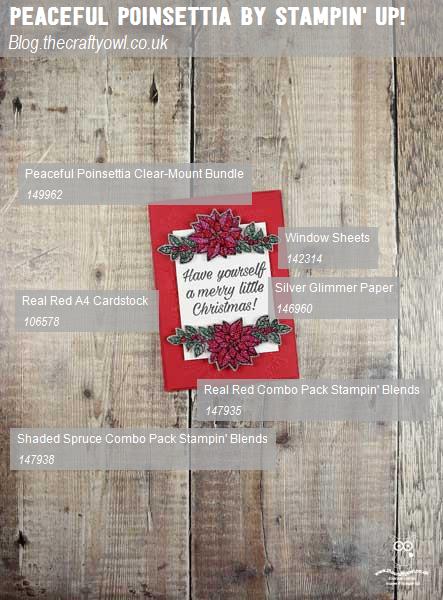
And here's the second one, on a Real Red base:


Here's the low-down on today's cards:

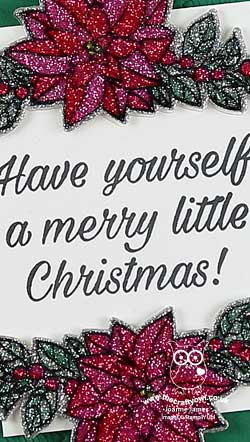
Peaceful Poinsettia - I'm not sure whether my colour scheme inspired my choice of poinsettia for today's card, or the other way around - maybe a bit of both! Either way I thought that the two were a perfect match, so used an inverted pair of the festive boughs from the Peaceful Poinsettia stamp set to frame this sentiment from the same set which seemed fitting for our final Paper Players challenge of the year. 

Detailed Poinsettia Embossing - I used the Detailed Poinsettia Thinlits Dies to cut out my floral boughs but also used the corner pieces and smaller detailed dies to create an embossed panel for the base of my card by using the Big Shot embossing mat to emboss using the thinlits rather than diecut with them. I love the effect this gives and the subtle detail it adds.

Added Floral Sparkle - For added sparkle to my poinsettias, I chose silver as my additional colour of choice and used the same technique that I used on this card here where you stamp onto a piece of acetate window sheet using Stazon ink and flip it over and colour the reverse with Stampin' Blends. This is then backed with silver glimmer paper for a sparkly coloured effect. This is such a fun technique and really very pretty in real life.

I'm not sure which of these cards I prefer - that's why I shared both; I'd love to know which one is your favourite. 

Here is the visual summary of the key products used on today's projects for you to pin for easy reference:


You can see all of my Product and 'How To' summaries on my 'How To - Tips and Techniques' Pinterest board in case you've missed any. 

Whilst I've included the link to the bundle below, the Peaceful Poinsettia  stamp set is currently available at 20% off and the dies at a whopping 30% off as part of the year-end closeouts, so if they are on your wish list, now is the time to snap them up at a bargain price before they retire for good. You can access the complete Year-End Closeouts list here

Before you reach for your ink and papers, check out what our amazing team has created to inspire you this week:

Here's a quick recap of our challenge rules:
 
1.  Create a new paper project
2.  Upload your creation to your blog with a link back to us and provide a direct link to the post featuring your challenge submission.
3.  Please link your card to no more than four challenges, TOTAL.
4.  Have FUN!

I can't wait to see what you create with this week's colours and look forward to visiting your blogs this week. This is our last challenge before we take a two-week break to celebrate the Christmas period with our families, so we hope you'll find the time to join us! We will be taking a two week break before returning with a fresh new set of challenges for 2019 starting on Sunday 6th January 2019. Thanks to everyone who plays along each week, to this year's guest designers Jan, Elizabeth and Annie, and everyone of you who visits our blogs and leaves us encouraging comments each week - it's great to know that you enjoy our creations! 

Enjoy the rest of your weekend as it will be over all too quickly. I am hoping to decorate the house for the holidays today and put the Christmas tree up. I made a wreath for the front door yesterday however at the moment due to family and sports commitments that is the extent of the decorations, so it's about time we rectified that! I'll be back tomorrow with another project; until then, happy stampin'!


Stampin' Up! Supplies Used: 

Table built using Product Table Builder by The Crafty Owl - Independent Stampin' Up! Demonstrator.

A Z-Fold Blizzard of Snowflakes for PP421

by Joanne James2. December 2018 09:00

Today it's Sunday and time for this week's new challenge over at The Paper Players - yay! It's the turn of the queen of florals, the lovely Jaydee,  to host this week and she has a festive theme challenge for you to work with:


Jaydee has been kind to us with a broad theme this week - pretty much anything festive goes! I decided that I would take my inspiration from the snow in our badge picture this week and share a card that I made at a recent technique class using the Beautiful Blizzard bundle - take a look:


Here's the low-down on today's card:

An Embossed Blizzard - On this card I used the Blizzard Thinlits Die to create an embossed (as opposed to a diecut) panel to add interest to the fold behind my sentiment panel. I then sponged this liberally with Frost White Shimmer Paint for a subtle snowy sparkle. I love that the Big Shot Embossing Mats make this really easy and make our dies go further, opening up a whole new range of creative possibilities.

A Fancy Fold - This card uses a fancy fold that is quite simple to recreate - a z-fold - it's a great way to allow for overhanging diecuts without having to increase the overall size of the card and shows just a hint of the decoration inside too. Here's a picture of my card opened out so that you can see the inside fully:


A Drop of Frost - The stamping on my card is a random combination of the stamps in this set, with a few of the snowflakes left over from this card added for dimension. I finished one of these with a frosted droplet - these make perfect centres for a wintery snowflake.

I'm a little pressed for time with all that is going on in the James household during the holiday season, so no the visual summary of the key products used on today's project today although the table at the bottom of this post will of course take you directly to my online store if you would like to purchase any of the items featured on today's card. 

Before you reach for your ink and papers, check out what our amazing team has created to inspire you this week:

Here's a quick recap of our challenge rules:
 
1.  Create a new paper project
2.  Upload your creation to your blog with a link back to us and provide a direct link to the post featuring your challenge submission.
3.  Please link your card to no more than four challenges, TOTAL.
4.  Have FUN!

You can see all of my 'How To' summaries on my 'How To - Tips and Techniques' Pinterest board in case you've missed any. 

Enjoy your day - I shall be recovering from my first Christmas party yesterday and tacking a mountain of ironing today but I'll be back tomorrow with another project. Until then, happy stampin'!


Stampin' Up! Supplies Used: 

Table built using Product Table Builder by The Crafty Owl - Independent Stampin' Up! Demonstrator.

Beautiful Blizzard Panel Card

by Joanne James1. December 2018 16:00

Today I'm sharing the first of three cards that I designed for a recent technique class using the Beautiful Blizzard bundle - take a look:


Here's the low-down on today's card:

A Snowflake Blizzard - On this card I used the Blizzard Thinlits Die to cut a full panel of snowflakes. I used a piece of Whisper White cardstock that I first covered with an adhesive sheet on the reverse, then sponged the whole of the front liberally with Frost White Shimmer Paint for a subtle snowy sparkle. The use of a multi-purpose adhesive sheet is key for making this an easy project, as it means that the snowflakes and the surround can be used by simply peeling them off the backing paper. No fiddling around trying to add liquid adhesives to the narrow snowflake stems! This card features the 'negative' of the diecut; I'll be sharing the other two cards that use the rest of the snowflakes tomorrow and later in the week.

A Stitched Label - The label that features the sentiment on the front of my card is from the Stitched Labels Framelits; so pretty and perfect for the first part of my sentiment, along with a few stamped snowflakes too. 

A Sweet Sentiment - I love the sentiment on this card, which carries over from the front of the card to complete on the inside:

Without the 'season's greetings', this sentiment would be lovely for someone celebrating a winter birthday too. 

I'm a little pressed for time with all that is going on in the James household during the holiday season, so no the visual summary of the key products used on today's project today although the table at the bottom of this post will of course take you directly to my online store if you would like to purchase any of the items featured on today's card. 

Enjoy your evening - I am out at my first Christmas party this evening but I'll be back tomorrow with my card for this week's Paper Players challenge which will also feature snowflakes! Until then, happy stampin'!


Stampin' Up! Supplies Used: 

Table built using Product Table Builder by The Crafty Owl - Independent Stampin' Up! Demonstrator.

Beautiful Baubles Gold Christmas Card PP420

by Joanne James25. November 2018 09:00

Today it's Sunday and time for this week's new challenge over at The Paper Players! It's the turn of the fabulous Sandy to host this week and she has my favourite, a sketch challenge, for you to work with:


I struggled a bit with Sandy's sketch this week - I've had a super busy week and not managed to get much time in my craft room; this is never good for the crafting mojo! Those panels were screaming out for some designer series paper and I was sorely tempted to break out my new Spring-Summer goodies, but as I'm still in need of Christmas cards I decided against it and instead challenged myself to use some of the paper that I had been hoarding - take a look:


Here's the low-down on today's card:

All Is Bright - I love this piece of paper featuring a photographic image of lots of baubles in shades of gold that features in the All Is Bright designer series paper pack but had been waiting for the right card on which to use it. I decided that today was the day and I went all in, covering the front of my card with it. Even with the vertical panels and diecut bauble, this paper shines through - so pretty.

A Beautiful Bauble - I used the Beautiful Bauble Thinlits to diecut a bauble from gold glimmer paper and I backed it with a circle of DSP with a subtle bokeh print that is also from the All Is Bright DSP pack, as I didn't want to lose the intricate details against the panels. I added a retired sentiment ot my banner and a bow cut using the Pretty Pines Thinlits to finish it off.

Shades of Gold - My card features lots of gold today so I'm also linking up with the team over at CAS-ual Fridays as this ties in with their theme perfectly: the baubles in my chosen paper are lots of shades of gold, along with a gold foil panel embossed with the Swirls and Curls Embossing Folder and a second panel of retired acetate that is patterned with gold polka dots, in addition to my gold glimmer border and gold heat embossed sentiment banner. You would be forgiven for thinking that I used one of the gold foil-edged cards for my base card today, although as I only have silver ones in the house I employed a neat trick to create my own: I simply sponged the edge of my card with Versamark and then heat embossed with gold embossing powder to create a similar effect.

Here is the visual summary of the key products used on today's project for you to pin for easy reference:


You can see all of my Product and 'How To' summaries on my 'How To - Tips and Techniques' Pinterest board in case you've missed any. 

Before you reach for your ink and papers, check out what our amazing team has created to inspire you this week:

Here's a quick recap of our challenge rules:
 
1.  Create a new paper project
2.  Upload your creation to your blog with a link back to us and provide a direct link to the post featuring your challenge submission.
3.  Please link your card to no more than four challenges, TOTAL.
4.  Have FUN!

You can see all of my 'How To' summaries on my 'How To - Tips and Techniques' Pinterest board in case you've missed any. 


In addition, a reminder that today also heralds the start of the second of Stampin' Up's three online extravaganzas. Today and tomorrow it's the turn of stamps and kits - you can read all about it in last week's blog post here and shop directly for everything that is included in the sale via the dedicated page in my online store. if ordering online please be sure to include the current hostess code BPCXMYGW. If you are local and would like to reduce your P&P costs, please get your order to me by 8pm tomorrow evening and I will add them to a collective order.

Enjoy your day; we are minus one James Junior, as Rebecca is spending the weekend in Bath playing in a school hockey tournament (all yesterday's matches were wins or draws, so let's hope the team is similarly successful today); I will be spending the day doing homework with the other one and then attending the first of the season's Christmas parties - ice skating with our swimming club. I'll be back tomorrow with another project. Until then, happy stampin'!


Stampin' Up! Supplies Used: 

Table built using Product Table Builder by The Crafty Owl - Independent Stampin' Up! Demonstrator.

Clean and Simple Candy Cane Christmas Card - Sweet Treats PP419

by Joanne James18. November 2018 09:00

Today it's Sunday and time for this week's new challenge over at The Paper Players - yay! It's the turn of my awesome friend LeAnne to host this week and she has a clean and simple challenge for you to work with:


Remember in addition to the theme of "sweet treats", this week is a Clean-and-Simple (CAS) challenge!  What do we mean by CAS?

  • Minimal layers and embellishments
  • Plenty of open space, aka "white" space
  • Simple and uncluttered

I was totally inspired by the red and white stripes and the candy cane in our wonderful inspiration photo for my card this week - take a look:


Here's the low-down on today's card:

Sweet Candy Canes - My card is all about candy canes - when it comes to sweet treats at this time of year, is there really anything sweeter? I reached for my favourite Santa's Workshop designer series papers again and paired them with a glittery candy cane embellishment from my Memories and More pack for a striped candy feast. 

Keep It Simple - My card really is super simple: a couple of well-chosen papers used sparingly, with a simple stitched circle and heat-embossed Christmas sentiment complete my card. Even the inside has a well-chosen but super simple sentiment detail:


A Delight in Red and White - Using just one colour with my white card base adds to the clean and simple feel of today's card. If you like this card, you might also want to check out this card that I posted earlier this week that used the same colour combination and products - and can also be made in under 10 minutes. Both of these cards are simple to create and would be great for mass production. Gotta love #SimpleStamping

Here is the visual summary of the key products used on today's project for you to pin for easy reference:


You can see all of my Product and 'How To' summaries on my 'How To - Tips and Techniques' Pinterest board in case you've missed any. 

Before you reach for your ink and papers, check out what our amazing team has created to inspire you this week:

Here's a quick recap of our challenge rules:
 
1.  Create a new paper project
2.  Upload your creation to your blog with a link back to us and provide a direct link to the post featuring your challenge submission.
3.  Please link your card to no more than four challenges, TOTAL.
4.  Have FUN!

You can see all of my 'How To' summaries on my 'How To - Tips and Techniques' Pinterest board in case you've missed any. 

Enjoy your day. We had a busy day yesterday with a scrapbooking class and a swimming gala so today is officially homework day in the James household with hopefully a movie afternoon thrown in. I'll be back tomorrow with another project. Until then, happy stampin'!


Stampin' Up! Supplies Used: 

Table built using Product Table Builder by The Crafty Owl - Independent Stampin' Up! Demonstrator.


Wishing You Well Thanksgiving Wreath PP417

by Joanne James4. November 2018 09:00

Today it's Sunday and time for this week's new challenge over at The Paper Players - yay! It's the turn of my wonderful friend Claire to host this week and she has a timely theme challenge for you to work with that I know she would love you to play along with:


I know that Claire loves Thanksgiving and whilst it isn't something we celebrate here in the UK, the underlying theme of being grateful and thankfulness is one we should all celebrate. I used both the sketch layout and photo inspiration over at Fusion and CASual Fridays as starting points for today's card: warm autumn leaves and wood textures feature heavily on my card this week - take a look:


Here's the low-down on today's card:

Textured Layers -  I wanted to create texture on my card and did something quite unusual for me: used not one, but two embossing folders on my background panels. To recreate the grey weatherboard effect, I used my Simple Stripes embossing folder on a panel of Smoky Slate. For my feature panel, I used a piece of Wood Textures Designer Series Paper and added further texture by running this through my Pinewood Planks embossing folder. I love the effect this gives - it adds so much interest and detail.

A Wreath of Twigs and Leaves - I stamped the wreath from the Wishing You Well stamp set in Early Espresso onto a stitched circle of Very Vanilla and punched out the middle using my 1 1/4"  circle punch, so that more of the textured wood panel could be seen. I coloured a selection of pearls in various sizes with my Pumpkin Pie, Daffodil Delight and Cajun Craze Blends markers to suggest leaves and then added a trio of actual leaves cut with my Seasonal Layers Thinlits to frame my sentiment (I sponged the edges of the leaves to add depth).

Something For The Thanksgiving Table - When I started my card, I wanted to create a wreath like the one in the Fusion inspiration photo. I made a wreath in autumnal colours using my sprig punch that I really loved, but when it came to adding it to my card, it was a little too bulky so I went back to the drawing board. I didn't want my punched wreath to go to waste though, so instead I attached it to a band of Very Vanilla stamped with my Buffalo Check stamp in Crushed Curry, added a banner sentiment and a braided linen twine bow and made a napkin ring - perfect for the Thanksgiving table. Here's a photo of my finished napkin ring:


I'm linking my napkin ring up with the ladies over at SUO Challenges where they are looking for home decor items for the Thanksgiving table. This was so easy to make yet really effective - you could make a while bunch of these to decorate the Thanksgiving table in a relatively short space of time. 

Here is the visual summary of the key products used on today's project for you to pin for easy reference:


You can see all of my Product and 'How To' summaries on my 'How To - Tips and Techniques' Pinterest board in case you've missed any. 

Before you reach for your ink and papers, check out what our amazing team has created to inspire you this week:

Here's a quick recap of our challenge rules:
 
1.  Create a new paper project
2.  Upload your creation to your blog with a link back to us and provide a direct link to the post featuring your challenge submission.
3.  Please link your card to no more than four challenges, TOTAL.
4.  Have FUN!

You can see all of my 'How To' summaries on my 'How To - Tips and Techniques' Pinterest board in case you've missed any. 

Enjoy your day; it is the last day of the James Juniors' half term and there is hockey to be played along with a little down time before the return to school tomorrow. I'll be back here tomorrow with another project. Until then, happy stampin'!


Stampin' Up! Supplies Used - For the card: 

Table built using Product Table Builder by The Crafty Owl - Independent Stampin' Up! Demonstrator.
 

Stampin' Up! Supplies Used - For the napkin ring: 

Table built using Product Table Builder by The Crafty Owl - Independent Stampin' Up! Demonstrator.

Santa's Workshop Card and Envelope Punch Board Gift Voucher Holder

by Joanne James29. October 2018 07:00

I so enjoyed making my cards for this week's challenge over at The Paper Players that I shared with you yesterday, that I just had to make more with those fabulous little elves. As such today I'm sharing another card that I made using products from the Santa's Workshop Suite, along with a gift voucher holder made using the Envelope Punch Board. Both of these use the current sketch over at Freshly Made Sketches as the basis for my layout:


First up is my card - full of busy elves! Take a look:


Here's the low-down on today's card:

More Santa's Workshop - I'm loving this elf patterned paper and whilst it's busy, it seemed the perfect background to accompany my sweet elf and his accompanying pile of Christmas presents. I love how the sentiment is in two halves and carries over neatly to the inside of my card:


Stitched Shapes and Layered Ovals - With all those elves, I wanted to keep the rest of my card fairly simple, so used a large stitched oval to create some additional white space around my sentiment, layered on a scallop-edged oval in Poppy Parade for definition. Whilst I don't often use ovals, preferring circles or squares generally, sometimes an oval is the shape that works best for balance. One thing I do use lots though are my Stitched Shapes Framelits - these are on my Top 5 Framelits Of All Time list (I must publish that list one of these days!) - a must have for adding subtle detail to your frames.

Envelope Punch Board Gift Card Holder - having made my card, I still had a couple of elves with flocked hats left that I had diecut from the Santa's Workshop DSP and decided that I would use the same basic layout but in a landscape orientation to get a headstart on my Christmas Gift Voucher holders. I created a simple wallet using my trusty Envelope Punch Board to create the closure; this is similar to ones I've created previously, only I decided to 'go large' this time and create a wallet large enough to hold £10 notes - I have growing nieces and nephews and these days, only cash will do so I am finding I need to come up with ever more creative ways to gift it! This wallet measures 6" x 6" square and again uses the sketch for the front layout (the stamp I used is from last year's retired Merry Little Labels set):


The wallet opens to reveal a sliding pocket insert, where the money sits in the pocket flap which opens to reveal Christmas wishes and with enough space above to include a personalised message: 


I love this style of wallet and make them often. If you would like the dimensions, then just leave a comment below - I'm thinking this might be worth another blog post in itself! 

This wallet would also be great to fill with Stampin' Up! gift vouchers for a crafty friend or even to treat yourself - if you would like to order Stampin' Up! gift vouchers for Christmas and receive them beautifully packaged in a wallet like this, then do get in touch and place your order.

Here is the visual summary of the key products used on today's project for you to pin for easy reference:


You can see all of my 'How To' summaries on my 'How To - Tips and Techniques' Pinterest board in case you've missed any. 

Enjoy your day and I'll be back tomorrow with another project. Until then, happy stampin'!


Stampin' Up! Supplies Used:

Table built using Product Table Builder by The Crafty Owl - Independent Stampin' Up! Demonstrator.

Santa's Workshop For The Paper Players PP416

by Joanne James28. October 2018 09:00

Today it's Sunday and time for this week's new challenge over at The Paper Players! It's the turn of the lovely Anne Marie to host this week and she has my favourite, a sketch challenge, for you to work with:


I decided that the sketch layers were perfect to showcase some designer series paper and since I am back creating for Christmas I knew exactly where to start - with a personal favourite this season. I ended up making not one, but two cards. Here's the first one: 


Here's the low-down on today's card:

Santa's Workshop - The Santa's Workshop Suite is my favourite in this year's seasonal  Stampin' Up! catalogue: with Santa, elves and Mrs Claus - what's not to love? The Santa's Workshop Specialty Designer Series Paper is the star of the suite - not only choc-full of cute designs, but four of the twelve sheets have a fabulous white flocking detail which adds great texture - it reminds me of the Fuzzy Felt of my childhood! I used three different sheets on my card: two for the panels (one with the diagonal flocked stripes, the other with Santa's elves diligently delivering everything on Santa's list) and a third for my Santa himself, complete with list.

Fun With Framelits - With the exception of the sentiment, there is no other stamping on the front of my card. Even the jolly Santa is cut from the designer paper; yes, this pack is another that has designs that can be cut with the Santa's Signpost Framelits that co-ordinate with the Signs of Santa stamp set. I could have stamped the Santa and coloured him, but then I wouldn't have had the flocking adorning his bobble hat and I just couldn't pass that up! 

A Little Colouring Too - I did a little stamping and colouring both inside my card and on the front of my envelope to complete my project; you can see the envelope on the main photos above and below; here's a peek at the inside:


How sweet is Mrs. Claus?! I actually liked this card I decided to create another one with the same design - this time, making more of the diagonal striped paper to really show off the flocking:


So which of these do you prefer? I think I actually like the second one better, but I suspect that is because it's a little less busy in terms of pattern and I just love the red and white with the felt flocked detail. Do leave me a comment and let me know what you think.

Here is the visual summary of the key products used on today's project for you to pin for easy reference:


You can see all of my Product and 'How To' summaries on my 'How To - Tips and Techniques' Pinterest board in case you've missed any. 

Before you reach for your ink and papers, check out what our amazing team has created to inspire you this week:

Here's a quick recap of our challenge rules:
 
1.  Create a new paper project
2.  Upload your creation to your blog with a link back to us and provide a direct link to the post featuring your challenge submission.
3.  Please link your card to no more than four challenges, TOTAL.
4.  Have FUN!

You can see all of my 'How To' summaries on my 'How To - Tips and Techniques' Pinterest board in case you've missed any. 

Enjoy your day and I'll be back tomorrow with another project. Until then, happy stampin'! 


Stampin' Up! Supplies Used: 

Table built using Product Table Builder by The Crafty Owl - Independent Stampin' Up! Demonstrator.

Bike Ride Apple Basket Thank You Cards PP415

by Joanne James21. October 2018 09:00

Today it's Sunday and time for this week's new challenge over at The Paper Players - yay! It's my turn to host this week and I have a clean and simple challenge for you to work with:


Remember in addition to including an apple on your card, this week is a Clean-and-Simple (CAS) challenge!  What do we mean by CAS?

  • Minimal layers and embellishments
  • Plenty of open space, aka "white" space
  • Simple and uncluttered

I decided that for my card this week I was going to pair a little of something old with something new and create a bunch of thank you cards - take a look:


Here's the low-down on today's card:

A Basket Of Apples - My little basket of apples comes from the Bike Ride set and is cut out with the Build A Bike framelits. This little image works in its own right - not a bike in sight on today's card! It is super quick and easy to stamp as the leaves and apples and basket all have solid images to be stamped to fill in the colour quickly and easily - great for clean and simple cards.

Thanks A Bunch - I layered my basket on a set of layered ovals, with a sentiment from the Beautiful Bouquet stamp set. Ok, so this stamp was designed to work with flowers, but I think it works for apples too!

Buffalo Check Background Made Easy - I know I'm using it again this week, but can you tell I'm loving the new Buffalo Check background stamp? I went with a straightforward single colour stamped image in Granny Apple Green to contrast with the apples - it reminds me of a picnic table cloth!

Here is the visual summary of the key products used on today's project for you to pin for easy reference:


Having completed my full-size card for today, I decided to run off a whole bunch of these using the same design, in both a red and green colourway, to use as my customer thank you cards this month - here are two of my finished cards:


I actually think I prefer the balance of the size/shape of the oval on the lightly smaller card - what do you think? Either way, I like this design so much I think I'll run off a set of co-ordinating bag tags too! 

Here is the visual summary of the key products used on today's project for you to pin for easy reference:


You can see all of my Product and 'How To' summaries on my 'How To - Tips and Techniques' Pinterest board in case you've missed any. 

Before you reach for your ink and papers, check out what our amazing team has created to inspire you this week:

Here's a quick recap of our challenge rules:
 
1.  Create a new paper project
2.  Upload your creation to your blog with a link back to us and provide a direct link to the post featuring your challenge submission.
3.  Please link your card to no more than four challenges, TOTAL.
4.  Have FUN!

You can see all of my 'How To' summaries on my 'How To - Tips and Techniques' Pinterest board in case you've missed any. 

Enjoy your day; I will be spending mine with a lovely group of ladies on the second day of our weekend residential craft retreat - more about that in tomorrow's post! Until then, happy stampin'!


Stampin' Up! Supplies Used: 

Table built using Product Table Builder by The Crafty Owl - Independent Stampin' Up! Demonstrator.

Painted Harvest For The Paper Players PP414

by Joanne James14. October 2018 09:00

Did you miss me? A whole week since I last blogged: having been nurse to the men of the James household the week before, they thoughtfully shared their bugs with the girls and for the latter part of this week Rebecca and I have been suffering and feeling decidedly under the weather with streaming colds. Combined with trying to make the final preparations for my residential craft weekend next week, it's left no time for blogging. Luckily for you it's Sunday, so I've put my box of Kleenex to one side and squeezed in a little creative time for this week's new challenge over at The Paper Players! It's the turn of the wonderful Jaydee to host this week and she has an autumnal colour challenge for you to work with:


I immediately thought of sunflowers when I saw Jaydee's colour palette and decided to combine with the challenge over at The Card Concept and use the sketch over at CAS Colours and Sketches and got my paper snips out to do a little fussy cutting - take a look:


Here's the low-down on today's card:

Painted Harvest Sunflower - Painted Harvest has been sat on my shelf and not been used for a long while, so today's card sets out to make amends. I used the mix of Crushed Curry, Cajun Craze and Mossy Meadow to create my layered bloom and double-stamped leaves and then fussy cut my flower to add dimension and interest, whilst using my leaf punch to make easy work of the leaves, adding some braided linen trim to finish. 

Customised Buffalo Check - This is my first outing for the fabulous Buffalo Check background stamp that I used for my features panel on the right, which I decided to customise from the off and having stamped it in Cajun Craze on Very Vanilla, I added a line of Mossy Meadow and a line of Crushed Curry either side of this with my Stampin' Write markers to create a more colourful plaid. I can see that this is a stamp that is going to get a lot of use - so many creative possibilities!

So Subtle Texture - After stamping on my sentiment, I ran my Crushed Curry card base through the Big Shot with my Subtles Dynamic Textured Impressions Embossing Folder for added texture. It is subtle, for sure, but I am loving the additional detail that this embossing folder gives to otherwise plain backgrounds. I also stamped this sentiment from the Painted Harvest set on the inside to complete my card:


Here is the visual summary of the key products used on today's project for you to pin for easy reference:


You can see all of my Product and 'How To' summaries on my 'How To - Tips and Techniques' Pinterest board in case you've missed any. 

Before you reach for your ink and papers, check out what our amazing team has created to inspire you this week:

Here's a quick recap of our challenge rules:
 
1.  Create a new paper project
2.  Upload your creation to your blog with a link back to us and provide a direct link to the post featuring your challenge submission.
3.  Please link your card to no more than four challenges, TOTAL.
4.  Have FUN!

I can't wait to see what you create with this week's colours and look forward to visiting your blogs this week! Enjoy the rest of your weekend as it will be over all too quickly. We will be focusing all our efforts on beating the lurgy that has descended upon us in the hope that next week is a slightly more productive one! I'll be back soon with another project; until then, happy stampin'!


Stampin' Up! Supplies Used: 

Table built using Product Table Builder by The Crafty Owl - Independent Stampin' Up! Demonstrator.

Mini Catalogue

BROWSE THE CATALOGUE

The mini catalogue is now live! Read and download your copy here.

Shop Online

Access my online shop 24 x 7, 365 days of the year:

Current April hostess code:

VDKNV7BH

Shop Online

Join My Team

It's always a great time to join Stampin’ Up! New team members can get £130 worth of products for only £99 + free business supplies + free shipping + all the fun being a part of Stampin’ Up! Stampin' Up! has something for everyone: join my growing team and benefit from my support to enjoy Stampin' Up! however you choose.

If you're interested, call me for a chat to understand how I can help you realise your goals. Alternatively, if you have already decided to sign up and you just can't wait, please click here for the link to the online form where you can sign up and order your starter kit right away! 

Latest Kit!

Stampin Cut and Emboss

The Rock Legend Kit has all you need to make 8 cards with coordinating envelopes. Along with the new Panda Friends Kit, both are available from January 4th for just £14 each - get yours here!

2023-24 Annual Catalogue

BROWSE THE CATALOGUE

Click on the catalogue for a full list of current SU! supplies - if you would like to order any of the items featured, please drop me a line at [email protected] or give me a call on 07773 421446 - I'd be happy to help.

New Online Exclusives

There are new products available exclusively in the online store from 5 March - check them out here.

About Me

Hi I'm Joanne and live in Northampton and when I'm not looking after my husband and two beautiful children, am an avid crafter with a passion for all things Stampin' Up!

I must confess that I have never been a big rubber stamper - until I discovered Stampin' Up! that is. I love the fact that I can get such great results with co-ordinating stamps, inks, papers and punches - the possibilities are endless! Join me on my stamping journey as I share the things I love and be inspired to create amazing things yourself!

Follow Me

Monthly Newsletter

Box Builder

Click the button above to use Box Buster to create your custom box design using the Envelope Punch Board!

Kits Collection Now Available!

Stampin Cut and Emboss

The new Kits Collection from Stampin' Up! is now available!

Click here to see the current kits available and order yours online today.

I Design For


Stampin' Up Stuff

This is my personal blog and is not endorsed by Stampin’ Up! I hope you find it a plentiful source of ideas and personal inspiration but please don't copy my designs for contest submission or use for classes, publication or sale without express permission.