Today it's Sunday and time for this week's new challenge over at The Paper Players! It's my turn to host this week and I've a colour challenge for you to work with:

I chose pastel colours for this week's challenge; I rarely choose pastels as a starting point, much preferring brights, so I thought this would both challenge me and also give me a gallery full of pastel design inspiration - a win-win I'd say! With the recent Stampin' Up! announcement of a full colour refresh, we are saying goodbye to not only the outgoing 2021-23 in-colours, but several from across the colour families too. I've used one of the retiring in-colours and three of the four retiring pastels from the subtles family on my cards today along with the layout over at Try Stamping on Tuesday - take a look at the first one:
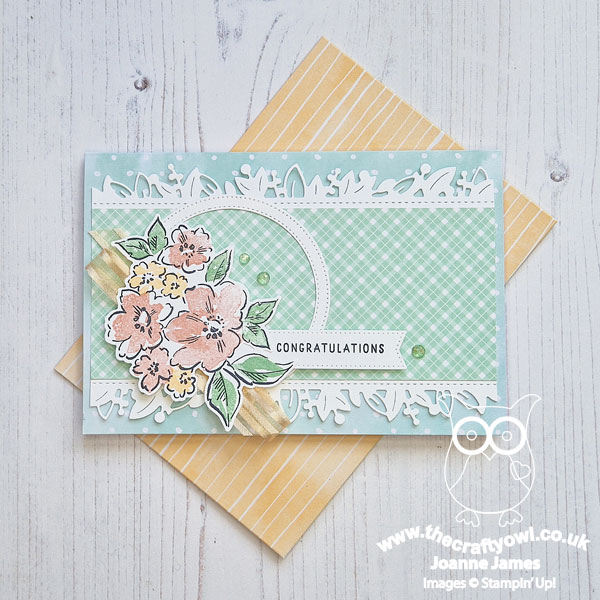
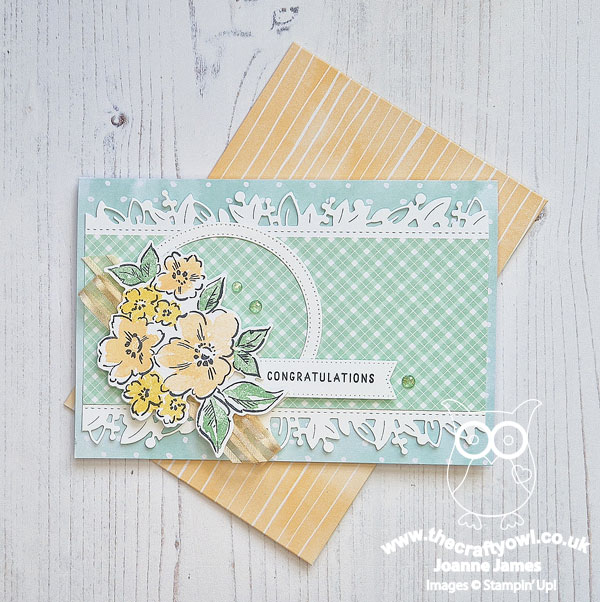
Here's the low-down on today's card:
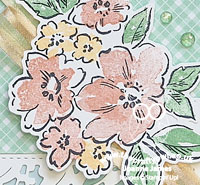
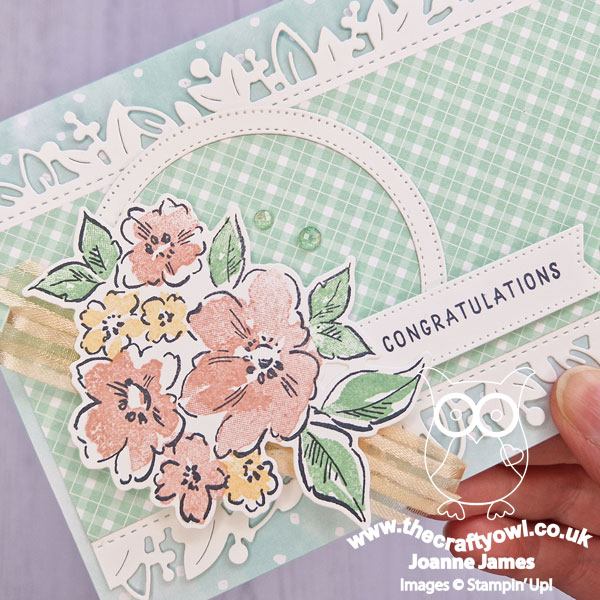
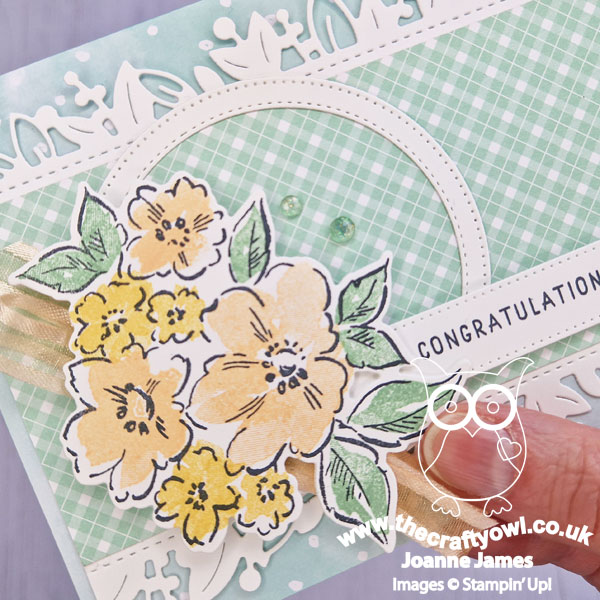
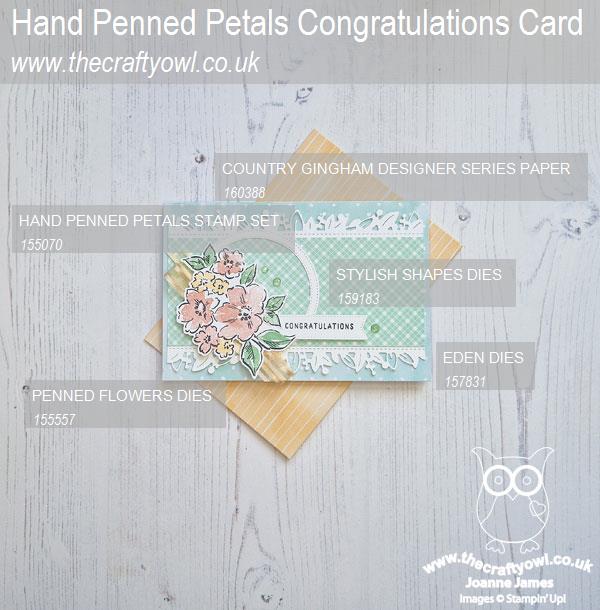
Farewell Hand Penned Petals - I used the retiring 'Hand Painted Petals' stamp set and coordinating Penned Flowers Dies on my car today, along with the border dies from the Eden Dies set, also retiring, to pick out the border edge of my Country Gingham panel. This is a great stamp set if you're new to stamping - it has both outline stamps and individual pieces to infill the various flowers and leaves with colour, but they intentionally don't line up with each other exactly. The easy, artsy look means that you don't have to align the stamps perfectly - yet they still look great, perfect for a beginner! Get your stamp set and dies from my online store here whilst stocks last.
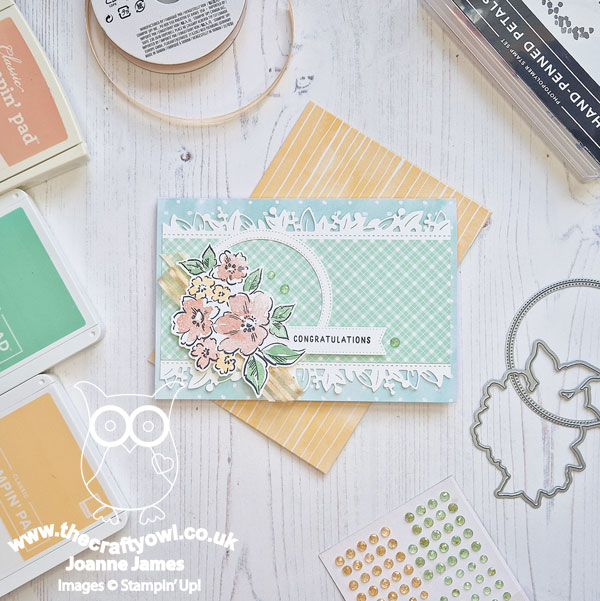
Bye, Bye Blushing Bride - This card features Blushing Bride and Mint Macaron, retiring pastels from the Subtles family, along with Pale Papaya, a retiring in-colour. I've never been a big fan of Blushing Bride (I find it a 'muddy' pink) but I do think it can be enhanced when paired with other colours. Paired with the peachy tones of Pale Papaya and the fresh green of Mint Macaron and some ribbon and gems in those colours too, it does look quite pretty - what do you think?
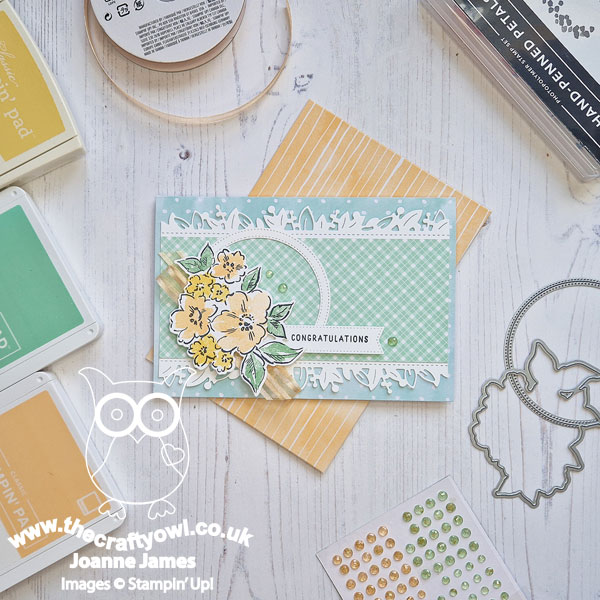
So Long, So Saffron - So Saffron is another of the departing Subtles, so I decided to make a variation on my first card using Pale Papaya for the larger flowers and the pale yellow of So Saffron for the smaller ones; all other details were the same.
I think I prefer this version, but I'll leave it for you to decide if you have a favourite!
So are you a fan of the Subtles colour family and pastel shades? If so, you should definitely consider entering our challenge this week!
Here is the visual summary of the key products used on today's projects for you to pin for easy reference:
And the second one:

You can see all of my Product and 'How To' summaries on my 'How To - Tips and Techniques' Pinterest board in case you've missed any.
Before you reach for your ink and papers, check out what our amazing team has created to inspire you this week:
The Paper Players Design Team
Here's a quick recap of our challenge rules:
1. Create a new paper project
2. Upload your creation to your blog with a link back to us and provide a direct link to the post featuring your challenge submission.
3. Please link your card to no more than four challenges, TOTAL.
4. Have FUN!
Enjoy your day; I'm off to set up my Easter egg hunt for the James Juniors - they might be in their teens now, but they still like to hunt for their chocolate, they are nothing if not sticklers for tradition! We have a roast turkey lunch planned then this afternoon will be spent consuming the fruit of their spoils and if the sun continues to shine, walking it off! I'll be back tomorrow with another project. Until then, happy stampin'!