Feathers And Frost Festive Leaf Triptych For The Paper Players PP413

by Joanne James7. October 2018 09:00

Today it's Sunday and time for this week's new challenge over at The Paper Players- yay! It's the turn of the super-talented Sandy to host this week and she has a timely theme challenge for you to work with:


Trees and leaves - perfect for autumn and fall, with so many colours at this time of year. I'm on a festive roll though, so decided to go for a Christmas card - still with leaves though as opposed to a tree or trees, as you might expect. I have another Feathers and Frost card for you, but this time using the leaves only - take a look:


Here's the low-down on today's card:

No Feathers ... - The Feathers and Frost stamp set features a pair of robins and poinsettia flower as centre pieces for this leaf pattern, but I decided on this card that I wanted the leaves themselves to take centre stage. Don't get me wrong, I love the pair of robins (and have another project that features them lined up for another day) and have featured the flower on this card previously, but for today it's all about the leaves!

A Leaf Triptych - I decided to create a repeating pattern with a triptych of leaves, creating a longer than usual card (my card measures 21cm in length and is 11cm wide) and joining 3 of the leafy squares into a seamless row. I stamped them in my favourite festive green, Shaded Spruce, onto watercolour paper and used an aquapainter to pull some of the outline colour in and give a light wash over each leaf. When this had dried, I them went back in with some extra ink and my aquapainter and added an additional swipe of colour on each leaf. This is a rather labour-intensive way of colouring, but I think it really adds to the loose brushstroke effect of the stamp set.

... But Plenty of Frost - Whilst there's an absence of feathers, my card has plenty of frost - of the sparkly gold kind at least! I used my retired gold Wink of Stella pen to colour the berries in between my green leaves (you could use the new Vegas Gold Shimmer Paint to achieve the same effect) and flicked some across the surface of my card, along with a sprinkling of gold sequins, some loops of gold thread, gold glimmer paper border and finally my sentiment, which I stamped in Versamark and heat embossed in gold on a vellum strip and wrapped it around the centre of my card. Vellum is a great base to add a sentiment to a card where you don't want it to overly obscure the pattern or stamping beneath. It also enables me to link up with the lovely ladies over at Just Add Ink who are challenging us to use vellum on our cards this week - do check them out, they've some great ideas and suggestions on other ways you can use it in your cardmaking too.

 I also did a little co-ordinated stamping on the inside of my card (and remembered to photograph it!):


Here is the visual summary of the key products used on today's project for you to pin for easy reference:


You can see all of my Product and 'How To' summaries on my 'How To - Tips and Techniques' Pinterest board in case you've missed any. 

Before you reach for your ink and papers, check out what our amazing team has created to inspire you this week:

Here's a quick recap of our challenge rules:
 
1.  Create a new paper project
2.  Upload your creation to your blog with a link back to us and provide a direct link to the post featuring your challenge submission.
3.  Please link your card to no more than four challenges, TOTAL.
4.  Have FUN!

You can see all of my 'How To' summaries on my 'How To - Tips and Techniques' Pinterest board in case you've missed any. 

So what do you think? Can you use leaves as the main focus and decoration on a Christmas card to good effect? I'd be interested to here your thoughts - do leave me a comment below. 

Enjoy your day and I'll be back tomorrow with another project. Until then, happy stampin'!


Stampin' Up! Supplies Used: 

Table built using Product Table Builder by The Crafty Owl - Independent Stampin' Up! Demonstrator.

A Country Lane Inspired Thank You For Tic Tac Toe PP412

by Joanne James30. September 2018 09:00

Today it's Sunday and time for this week's new challenge over at The Paper Players - yay! It's the turn of my sweet friend, the lovely LeAnne, to host this week and since it is the fifth week of the month she has a tic-tac-toe challenge for you to work with:


The fun thing about tic-tac-toe are the many creative possibilities the board offers and as you will see from the design team cards this week, there is a wealth of inspiration to choose from. 

I decided that I would go down the centre for my card this week - patterned paper, pumpkin, orange/rust (although by coincidence my card fulfils one of the diagonals of diecut, pumpkin, green too) for my card this week - take a look:


Here's the low-down on today's card:

Inspired By Country Lane - My card today was inspired by the bold repeating pattern on my sheet of Country Home Designer Series Paper. I used the Mint Macaron green to frame my card and colour my milk churn, and paired it with a small panel of Whisper White that has been embossed with the Softly Falling Textured Impressions Embossing Folder too; it's a little difficult to see in the photo but I wanted to keep the balance of colour light and the panel not too busy.

Blended Country Home - I stamped and partially diecut my filled milk churn using my Stitched Shapes circle thinlit, courtesy of the country Home stamp set, then coloured it with similar shades to the milk churns on the DSP using my Stampin' Blends. I'm really pleased that the seasonal catalogue includes additional shades of these marker pens; they give such a smooth finish. I added a small bow of braided linen trim to finish.

Pick A Pair of Pumpkins - To complete the picture, I added a pair of pumpkins from the retired 'Pick A Pumpkin' stamp set. I heat embossed them both in white onto Basic Grey cardstock, and coloured one of them with my Cajun Craze Blends markers - along with the berries in my milk churn and the thankful sentiment, these are my rust/orange contributions to the tic-tac-toe board.

Here is the visual summary of the key products used on today's project for you to pin for easy reference:


You can see all of my Product and 'How To' summaries on my 'How To - Tips and Techniques' Pinterest board in case you've missed any. I hope you like my Fall themed card today; I'm also linking up with the team over at SUO Challenges where the current theme is Nature/Fall. 

Before you reach for your ink and papers, check out what our amazing team has created to inspire you this week:

Here's a quick recap of our challenge rules:
 
1.  Create a new paper project
2.  Upload your creation to your blog with a link back to us and provide a direct link to the post featuring your challenge submission.
3.  Please link your card to no more than four challenges, TOTAL.
4.  Have FUN!

You can see all of my 'How To' summaries on my 'How To - Tips and Techniques' Pinterest board in case you've missed any. 

Enjoy your day; having spent yesterday dividing my time between hockey, a swimming gala and a fairly hefty jam making session (raspberry jam and chilli jam, in case you're wondering!) to use up the last of my own garden harvest, I'm hoping today will be slightly less hectic! I'll be back tomorrow with another project. Until then, happy stampin'!


Stampin' Up! Supplies Used: 

Table built using Product Table Builder by The Crafty Owl - Independent Stampin' Up! Demonstrator.

Copper and Merry Merlot Swirly Snowflakes Christmas Card and Triangular Gift Box

by Joanne James23. September 2018 09:00


Today it's Sunday and time for this week's new challenge over at The Paper Players! It's the turn of the fabulously creative Jaydee to host this week and she has my favourite, a sketch challenge, for you to work with:


I decided to continue getting a headstart on my Christmas card making preparations (so my projects are perfect for the challenge over at TGIF Challenges too this week) and spent a few hours making a more involved boxed Christmas card with a matching gift box too. First things first - here's my card:


Here's the low-down on today's card:

Diagonal Swirly Snowflake Border - Whilst I love a good sketch, I often struggle with the concept of a diagonal. I decided to alter the dimensions of Jaydee's sketch and create a horizontal fold out card as I wanted to use my Swirly Snowflakes Thinlits Dies to create a layered diagonal edge and I needed the extra width to balance my card and fit the entire border in (I'm sure she will allow me this liberty ;-) ). I snipped away the straight edge of my copper foil snowflakes and added a sentiment embossed in white, before adding my embellishment (more on that below). My card opens from the right to reveal a complete panel of my favourite copper-embossed Joyous Noel Specialty Designer Series Paper, then the left hand side lifts to reveal the sentiment inside, embellished with a narrow strip of copper washi tape:

Christmas Copper Snowflakes - I created a layered embellishment on the front of my card, using one of the copper snowflake wire elements as the centrepiece. I layered this with a Shimmery White diecut from the Eastern Medallions Thinlits set, with a centre of a clear epoxy droplet on a copper sequin, all layered up on a fancy double bow in the gorgeous Merry Merlot and Copper Reversible Ribbon. This showy embellishment adds a lot of dimension to the front of my card, so much so that it wouldn't fit in a standard envelope. Instead, I made a box with a co-ordinating belly band closure:

A Gift Box To Match - This kind of card takes a little while to make and is destined for someone who I know will appreciate the effort and time taken to create it. Whilst I was fully 'in the zone', I decided to create a co-ordinating gift box with a magnetic closure. The box measures approx. 15cm x 6cm x 5cm, so not huge but large enough for a small gift to accompany my card. I created a triangular box with a decorative flap created using the Swirly Snowflakes Thinlits for the border detail, based on this one I'd seen on Pinterest. I decorated the front panel of my box with more of that gorgeous Joyous Noel DSP too: 

And here's one last photo of all three of my project elements together - I hope you will agree, a lovely Christmas set in rich, festive colours:


Here is the visual summary of the key products used on today's project for you to pin for easy reference:


You can see all of my Product and 'How To' summaries on my 'How To - Tips and Techniques' Pinterest board in case you've missed any. 

Before you reach for your ink and papers, check out what our amazing team has created to inspire you this week:

Here's a quick recap of our challenge rules:
 
1.  Create a new paper project
2.  Upload your creation to your blog with a link back to us and provide a direct link to the post featuring your challenge submission.
3.  Please link your card to no more than four challenges, TOTAL.
4.  Have FUN!

You can see all of my 'How To' summaries on my 'How To - Tips and Techniques' Pinterest board in case you've missed any. 

Thank you Jaydee for a great sketch - who would have thought that it would have resulted in 3 projects in one go!

Enjoy your day; the weather has been dreadful here the past couple of days so I'm hoping I get the longer straw and get to stay home and craft whilst hubby takes the James Juniors to hockey trials this afternoon. I'll be back tomorrow with another project. Until then, happy stampin'!


Stampin' Up! Supplies Used: 

Table built using Product Table Builder by The Crafty Owl - Independent Stampin' Up! Demonstrator.

Northampton Saints-Inspired Clean and Simple Birthday Card

by Joanne James16. September 2018 09:00

Today it's Sunday and time for this week's new challenge over at The Paper Players - yay! It's the turn of my good friend Claire to host this week and she has a clean and simple challenge for you to work with:


Remember in addition to the theme of "sports/favourite team/team colours", this week is a Clean-and-Simple (CAS) challenge!  What do we mean by CAS?

  • Minimal layers and embellishments
  • Plenty of open space, aka "white" space
  • Simple and uncluttered

As my regular readers will now, the James household is big into sport: the James Juniors both swim competitively, Rebecca is a keen hockey player and also plays netball and cricket for her school teams, whilst Ben plays basketball, rugby football and cricket. We also enjoy sport as a family and are keen cyclists and scuba divers. Our weekends are often filled with one sporting activity or another and my life seems to revolve around fixtures, matches, galas and competitions. So I was rather spoilt for choice this week! In the end, as I needed something clean and simple I took my inspiration from a birthday gift that Ben received from one of his cousins recently - a drinks bottle bearing the colours and badge of our local town rugby team, the Northampton Saints. Here's a picture of the drink bottle: 


And here is the card it inspired that also works perfectly for this week's challenge over at Stamp Ink Paper which is all about large sentiments:


I used the stripes for my background and added a diecut sentiment in white - and that's it! Really not much explanation required for my card this week, no stamping and super clean and simple. I do have a tip for you though if you want to create a neat background using strips of cardstock: I cut my cardstock into 1cm strips that were longer than I needed, then glued them to a base piece of black cardstock that I then trimmed neatly to size before adhering to my white card base.

Here is the visual summary of the key products used on today's project for you to pin for easy reference:


You can see all of my Product and 'How To' summaries on my 'How To - Tips and Techniques' Pinterest board in case you've missed any. 

My 16 year-old nephew plays rugby for the Northampton Saints Junior Academy and is one of the official ball boys for the first team on match days, so it's fair to say is Saints-mad. Ben has already decided this card should be for William; given that his next birthday is in November and this card is made already, I suddenly appear to be very organised for once - it will never last!

Before you reach for your ink and papers, check out what our amazing team has created to inspire you this week:

Here's a quick recap of our challenge rules:
 
1.  Create a new paper project
2.  Upload your creation to your blog with a link back to us and provide a direct link to the post featuring your challenge submission.
3.  Please link your card to no more than four challenges, TOTAL.
4.  Have FUN!

You can see all of my 'How To' summaries on my 'How To - Tips and Techniques' Pinterest board in case you've missed any. 

Enjoy your day; we have a second day of hockey and a birthday party to look forward to. I'll be back tomorrow with another project. Until then, happy stampin'!


Stampin' Up! Supplies Used: 

Table built using Product Table Builder by The Crafty Owl - Independent Stampin' Up! Demonstrator.

Country Lane Happy Harvest Blessings PP409

by Joanne James9. September 2018 09:00

I took a few days away from my blog - call it a little birthday gift to myself as I was celebrating being another year older on Friday! It hasn't stopped me creating though and as it's Sunday you all know what that means: it's time for this week's new challenge over at The Paper Players! It's the turn of our returning Player, the lovely Anne Marie Hile, to host this week and she has a gorgeous colour challenge for you to work with:

    No automatic alt text available.

These colours were asking for something natural and autumnal and I decided to do another make using products from one of my current favourite suites, the Country Lane Suite, for my card today and I used the current sketch over at Inspire.Create for the layout of my card - take a look:


Here's the low-down on today's card:

My Colour Of Choice - I decided to use the Country Lane designer series paper that you see as the two outer vertical border strips as the starting point for my card today, so decided that my colour of choice in addition to the Mint Macaron, Crumb Cake and Blackberry Bliss chosen by Anne Marie would be Early Expresso - a rich, dark brown that outlines the cotton on the paper. I used it to heat emboss the outlines of my jug and floral stem arrangement, and to ink my Pinewood Planks embossing folder for my background stitched circle, then finally for my sentiment strip. Whilst there is a lot of white elsewhere on my card, I am counting this as a neutral rather than a colour in its own right.

Lots of Layers -  I couldn't resist adding lots of layers to my focal point; in addition to my fussy cut flower jug, I added an embossed stitched circle and a stitched label in Blackberry Bliss. Sometimes it just has to be the way to go!

An Embellishment or Two - I finished my card with some Blackberry Bliss natural twine and faceted jewels; this adds a bold pop of colour in addition to the purple berries in my floral jug. 

Here is the visual summary of the key products used on today's project for you to pin for easy reference:


You can see all of my Product and 'How To' summaries on my 'How To - Tips and Techniques' Pinterest board in case you've missed any. 

I really love this Country Lane set - it is so versatile and lends itself to lots of great autumn-inspired cards and the blooms are great for a spot of colouring with Blends too.

Before you reach for your ink and papers, check out what our amazing team has created to inspire you this week:

Here's a quick recap of our challenge rules:
 
1.  Create a new paper project
2.  Upload your creation to your blog with a link back to us and provide a direct link to the post featuring your challenge submission.
3.  Please link your card to no more than four challenges, TOTAL.
4.  Have FUN!

I can't wait to see what you create with this week's colours and look forward to visiting your blogs this week! Enjoy the rest of your weekend as it will be over all too quickly. I'll be back tomorrow with another project; until then, happy stampin'!


Stampin' Up! Supplies Used: 

Table built using Product Table Builder by The Crafty Owl - Independent Stampin' Up! Demonstrator.

Treehouse Adventure Lunchbox Love Note Trio PP408

by Joanne James2. September 2018 09:00

Today it's Sunday and time for this week's new challenge over at The Paper Players - yay! It's my turn to host this week and I have a fun theme challenge for you to work with:
 

This week is back-to-school week here in the UK and so it's the time that I start thinking about little notes to put in the lunchboxes and pencil cases of my James Juniors to let them know I'm thinking of them during the school day, hence my chosen theme this week.

When I think about lunchbox love note cards, I like to create something that is slightly smaller than usual that can be slipped into a pocket or pencil case (or lunchbox!) and 'discovered' during the day. One of the sets I couldn't wait to get my hands on when the new annual catalogue went live was 'Treehouse Adventure' - so perfect for these types of cards! So I decided to create a little trio of cards using this set for the challenge this week - take a look:
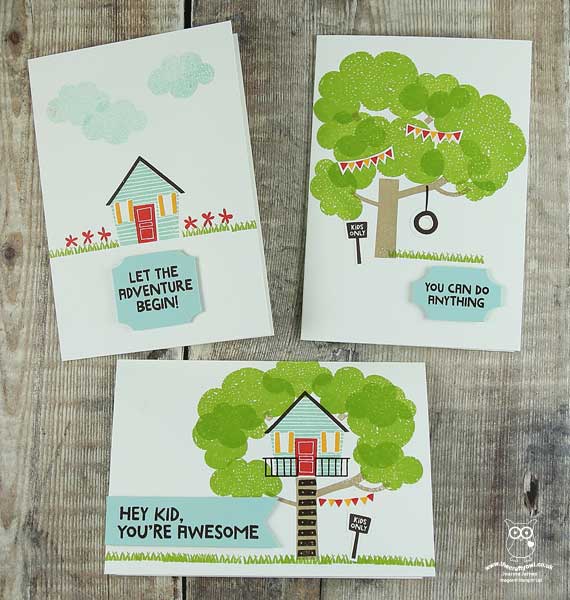
 

Here's the low-down on today's cards:

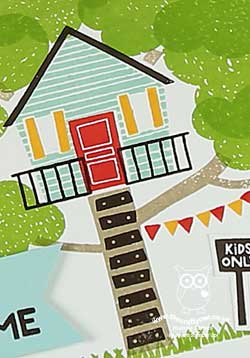
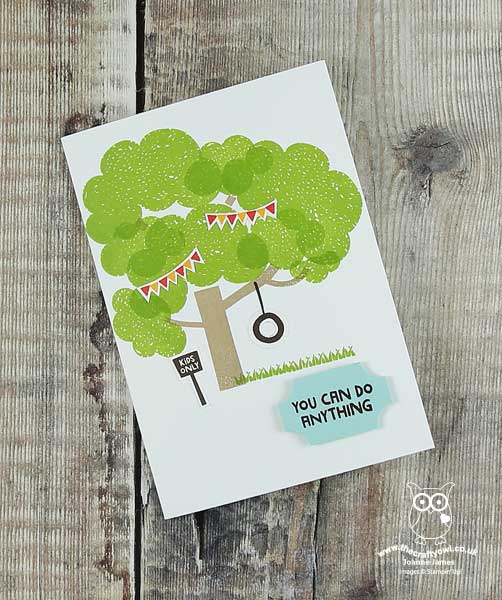
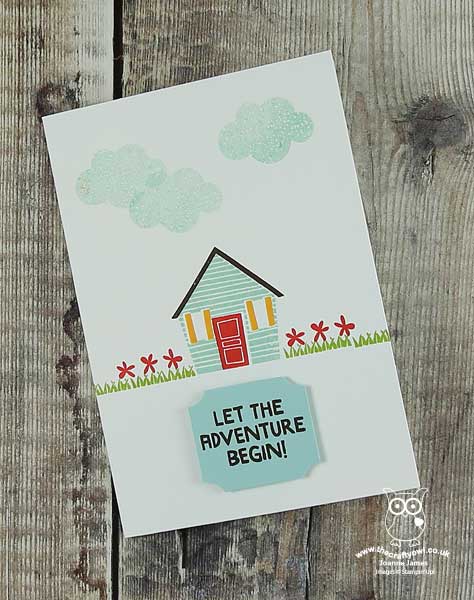
Take A Simple Notecard - If I am making lunchbox notes, I generally like them to be quick and easy to create and tend to make them smaller than a standard card as they are easier to slip into a lunchbox, blazer pocket or pencil case. At 5 1/4" x 3", Stampin' Up!'s notecards and envelopes are just perfect for this. I took a trio of notecards and stamped three simple designs, mostly one layer apart from the smallest amount of fussy cutting (the signs, flags and tyre swing) and some punched sentiments. Easy peasy!

Here are each of my cards individually:
 

I just love this card - what a great sentiment! This next one is a perfect uplifting phrase for the start of a new school year: 
 

And this final one is perfect for the start of a new year and all the changes that this brings:
 

Treehouse Adventure Colour Combo - I chose a bright and cheery colour combo for my child-friendly notecards - here it is if you would like to save it to use on your projects:


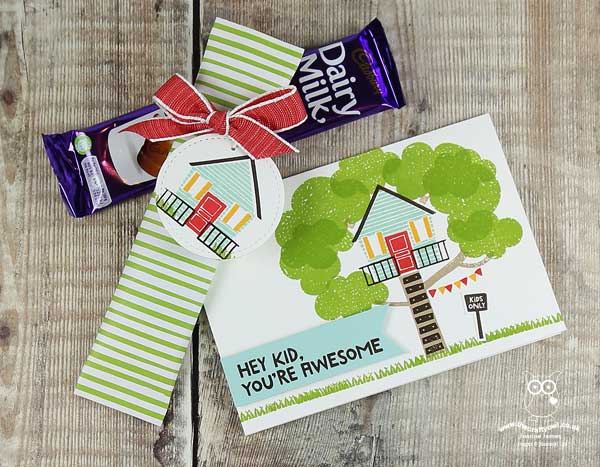
A Little Treat Too - In addition to my notecard trio, I decided to make a quick and easy co-ordinating treat too. I wrapped a small chocolate bar in a piece of Brights DSP and stuck it top and bottom and added a simple ribbon and tag - you can see the wrapped and an unwrapped version below:
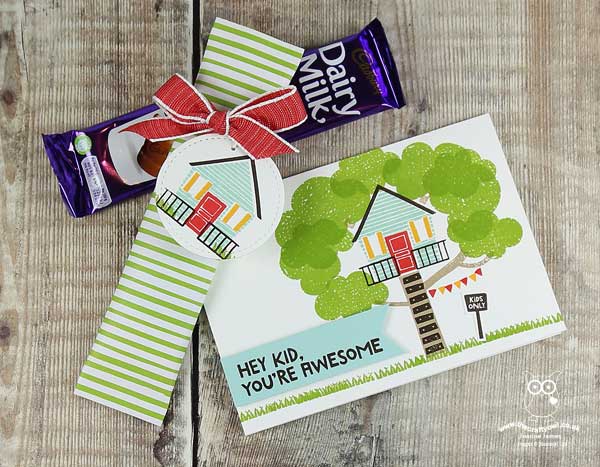
 

These cards will be for Ben and I often bring him a little treat on a Friday afternoon to celebrate the end of the school week and give him a little pick-me-up before his Friday evening swimming lesson. We often play a game of '10 questions', where he has 10 questions to try and guess what the treat inside the packaging is, by asking questions that can have only 'yes' or 'no' answers. If he guesses within the 10 questions, he gets his treat - I don't think he's never not managed it, but it has enabled him to develop some astute questioning skills, not to mention his knowledge of sweet treats, brands and packaging! It is one of the little games we play to make our car journey pass quickly - I can highly recommend it!

Here is the visual summary of the key products used on today's project for you to pin for easy reference:
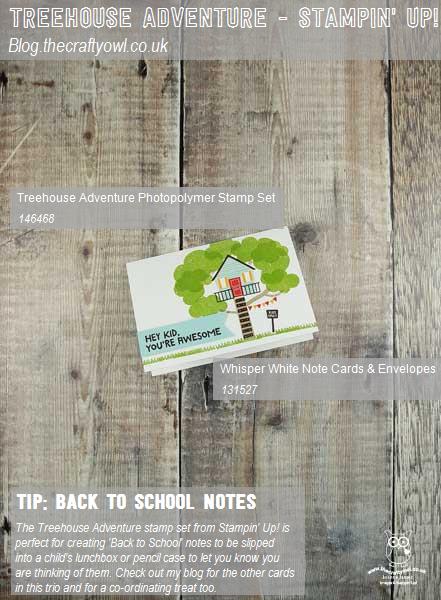
 

You can see all of my Product and 'How To' summaries on my 'How To - Tips and Techniques' Pinterest board in case you've missed any. 

I am also linking today's notecards up with the challenge over at SUO Challenges where the theme is 'Babies and Kids' this week. And just in case you think my older James Junior is missing out, not so - I made some slightly more sophisticated notes for her which were inspired by a rather unlikely object which I will share with you later this week!

Before you reach for your ink and papers, check out what our amazing team has created to inspire you this week - the lovely Ann Schach is back with us too as a permanent design team member again following an extended break, so be sure to pop by her blog and say hi:

Here's a quick recap of our challenge rules:
 
1.  Create a new paper project
2.  Upload your creation to your blog with a link back to us and provide a direct link to the post featuring your challenge submission.
3.  Please link your card to no more than four challenges, TOTAL.
4.  Have FUN!

You can see all of my 'How To' summaries on my 'How To - Tips and Techniques' Pinterest board in case you've missed any. 

Enjoy your day and I'll be back tomorrow with another project. Until then, happy stampin'!


Stampin' Up! Supplies Used:  

Table built using Product Table Builder by The Crafty Owl - Independent Stampin' Up! Demonstrator.

A Trio Of Festive Sneak Peeks For The Paper Players PP407

by Joanne James26. August 2018 09:00

Today it's Sunday and time for this week's new challenge over at The Paper Players! It's the turn of the fabulously creative Jaydee to host this week and she has my favourite, a sketch challenge, for you to work with:


I just love this sketch and could have used it a hundred times over (thanks Jaydee!) and in fact I actually used it to make 6 cards in one sitting, two sets of three cards each, all featuring fabulous new products from the forthcoming Autumn-Winter catalogue and I'm going to share one of those sets with you today.

My cards focus on some of the fabulous products in one of my favourite new festive suites; here are the three cards I'm sharing with you today:


Here's the low-down on today's cards:

Joyous Noel - I decided that the sketch layers lent themselves to a showcase of both the designer series paper and co-ordinating glimmer paper in the Joyous Noel Suite. The papers feature classic festive seasonal designs with copper foil accents on one side of each sheet and take it from me, they are beautiful! I co-ordinated each of my chosen patterns with a background of glimmer paper - these papers come in Copper, Merry Merlot and Tranquil Tide as on the close up of the card below:

A Wooden Sentiment - Each of my cards feature a wooden sentiment element, from another of the suites in the catalogue - the Festive Farmhouse Suite. These wooden accents come with a light grey finish (I've coloured mine - more on that below!) and contain 3 separate sentiments, along with a collection of stars and Christmas trees. There are a total of 32 pieces for just £3.75, so they represent great value - I know I'll be using lots of these! Each of my cards features a different sentiment and detail - the second of my cards is the set features the word 'joy' and a  couple of stars:


Shades of Copper - As I mentioned above, the wooden elements are grey in colour straight out of the packet. Ordinarily I would have heat embossed them in copper embossing powder, but there is a new product in the seasonal catalogue that does a much better job: shimmer paint. Yes, for those of you die-hard Stampin' Up! fans that go back as far as I do, you will remember we used to stock champagne shimmer paint previously; the new catalogue includes shimmer paint in 4 colours: champagne, white, gold and the copper that I used here. Simply apply with a sponge dauber to add subtle and shine to your projects - so easy! Here's a close-up of the detail so you can appreciate just how pretty it is:


And here's the full final card in my set - this card really is all about the copper:


Don't you just love all that shimmer and sparkle? I am going to be getting through a lot of this paper during the festive season; it will also be featuring in the projects at my two day Creative Escape Luxury Weekend Craft Retreat in October. You can read all about that in yesterday's post here, along with details of a Bank Holiday offer for those who would like to join me and fill the last few remaining spots - I hope you can join me for some festive creative fun!

Oh and I almost forgot - I decorated the insides of each of my cards too! Here's a peek inside:


Not long now until the new seasonal catalogue launches and you can purchase these products for yourselves; meanwhile, here is the visual summary of the key products used on today's projects for you to pin for easy reference:


You can see all of my Product and 'How To' summaries on my 'How To - Tips and Techniques' Pinterest board in case you've missed any. 

Before you reach for your ink and papers, check out what our amazing team has created to inspire you this week:

Here's a quick recap of our challenge rules:
 
1.  Create a new paper project
2.  Upload your creation to your blog with a link back to us and provide a direct link to the post featuring your challenge submission.
3.  Please link your card to no more than four challenges, TOTAL.
4.  Have FUN!

You can see all of my 'How To' summaries on my 'How To - Tips and Techniques' Pinterest board in case you've missed any. 

I will share my other set of three cards that I made with today's sketch later in the week. Until then, enjoy the rest of your weekend and I'll be back tomorrow with another project. Until then, happy stampin'!


Stampin' Up! Supplies Used: 


Table built using Product Table Builder by The Crafty Owl - Independent Stampin' Up! Demonstrator.

Fairies and Cherries For The Paper Players PP406

by Joanne James19. August 2018 09:00

Another week of school summer vacation in the James household this week! Today it's Sunday and time for this week's new challenge over at The Paper Players. It's the first challenge for our returning Paper Players designer, the lovely Anne-Marie Hile, this week so be sure to pop by her blog with a friendly 'hello'. It's the turn of the super-talented Sandy to host this week and she has a clean and simple challenge for us to work with:


Remember in addition to the theme of "fruits and vegetables", this week is a Clean-and-Simple (CAS) challenge!  What do we mean by CAS?

  • Minimal layers and embellishments
  • Plenty of open space, aka "white" space
  • Simple and uncluttered

Having trawled through my collection of current stamps, it turns out I have very few with fruit (or veg!) for that matter, so a little creative stamping was called for. I actually found some fruit 'hidden' in the Fairy Celebration stamp set - take a look:


Here's the low-down on today's card:

This little fairy happens to be hanging from a cherry tree, so a little watercolouring using my new watercolour pencils and an aquapainter (I am so happy that we have more of these now, the new colours in the second pack available exclusively this month extend the variety of colours and allow much greater flexibility - don't leave it too late to get yours!) was all I needed to create a focal point for my card. I added some clear Wink of Stella to the fairy wings and some fine tip glue to the cherries to give them a glossy finish - both of which are difficult to see from the photos, but add subtle detail in real life.

I decided to use the sketch over at CAS(E) This Sketch this week for my layout, and used a couple of pieces cut with my Stitched Labels Framelits then trimmed to add interest behind my main image. I have seen these Stitched Labels Framelits used on some fabulous cards elsewhere on the internet and hold my Paper Player team mate LeAnne responsible for me 'needing' to add them to my own collection (check out her blog for some great examples of how to use them!) so thought I would try something a little different with them. The two blocks of colour mirror the colouring on my cherries and leaves and add detail, without encroaching too much into my white space and maintaining my overall clean and simple feel.

And that's all there is to it: clean and simple - done!

Here is the visual summary of the key products used on today's project for you to pin for easy reference:


You can see all of my Product and 'How To' summaries on my 'How To - Tips and Techniques' Pinterest board in case you've missed any. 

Before you reach for your ink and papers, check out what our amazing team has created to inspire you this week:

Here's a quick recap of our challenge rules:
 
1.  Create a new paper project
2.  Upload your creation to your blog with a link back to us and provide a direct link to the post featuring your challenge submission.
3.  Please link your card to no more than four challenges, TOTAL.
4.  Have FUN!

You can see all of my 'How To' summaries on my 'How To - Tips and Techniques' Pinterest board in case you've missed any. 

Enjoy your day and I'll be back tomorrow with another project: a Christmas card featuring some sneak peeks of some great new products from the forthcoming seasonal catalogue. Do come back then, you won't want to miss it. Until then, happy stampin'!


Stampin' Up! Supplies Used: 

Table built using Product Table Builder by The Crafty Owl - Independent Stampin' Up! Demonstrator.

Enjoy Life And A Million Dollar Sunrise For The Paper Players PP405

by Joanne James12. August 2018 09:00

It's Sunday and time for this week's new challenge over at The Paper Players! It's the turn of my wonderful and talented friend LeAnne to host this week and she has a gorgeous colour challenge for us to work with:


I fell in love with this trio of orange/yellows that LeAnne chose and whilst I was tempted to go floral, I decided instead to use the sketch inspiration over at Fusion for my layout and create a pretty sunrise and silhouette scene using the Enjoy Life stamp set - take a look:


Here's the low-down on today's card:

A Million Dollar Stamp Set - I decided to use a combination of images from the 'Enjoy Life' stamp set on my card today. This stamp set, with its beautiful collection of silhouettes and inspirational sentiments, was designed by Connie Fitzgerald, one of Stampin' Up!'s Million Dollar Sales Achievers, as a celebration of this milestone achievement. I absolutely love this set and it was one of the first on my wishlist when the annual catalogue was launched - thank you Connie for such a great set!

Sunrise, Sunset Made Easy - I wanted to create a vertical panel with a sunrise that featured all three of the challenge colours, so I punched a 3/4" circle and masked off my sun and used a sponge brayer to build up a graduated sunrise, blending each of the colours in turn starting with the lightest colour at the top. Sponge brayers are so great for this; they make light work of the art of ink blending, and can be washed out when you're done. I also brayered the colours on the diagonal of the bottom corner of the inside panel too and added a little interior detail:


Blended Ombre Embossing - My card today is ultra-clean, with minimal layers and detail to allow my inked panel to really shine, but I'd also like to share another great tip with you; did you notice I created a blended ombre of colour on my sentiment that mimics my sunrise? Curious as to how I created it? With a Basic Black card base, I originally heat-embossed the sentiment in white, but this was too stark. I decided to use my Pumpkin Pie Blends to carefully colour the lettering and change its colour. Did you know you can use your Stampin' Blends alcohol markers in this way? This tones down the brightness of the white and adds a co-ordinating pop of colour that wouldn't have been possible with ink alone on such a dark background.

Here is the visual summary of the key products used on today's project for you to pin for easy reference:


You can see all of my Product and 'How To' summaries on my 'How To - Tips and Techniques' Pinterest board in case you've missed any. 

Before you reach for your ink and papers, check out what our amazing team has created to inspire you this week:

Here's a quick recap of our challenge rules:
 
1.  Create a new paper project
2.  Upload your creation to your blog with a link back to us and provide a direct link to the post featuring your challenge submission.
3.  Please link your card to no more than four challenges, TOTAL.
4.  Have FUN!

I usually struggle with colour challenges, but this bright, monotone pallet really spoke to me - so many creative possibilities! I can't wait to see what you create with this week's colours and look forward to visiting your blogs this week. Enjoy the rest of your weekend as it will be over all too quickly. I'll be back tomorrow with another project; until then, happy stampin'!


Stampin' Up! Supplies Used: 

Table built using Product Table Builder by The Crafty Owl - Independent Stampin' Up! Demonstrator.

I'm Dreaming of a White Christmas for PP404

by Joanne James5. August 2018 09:00

Today it's Sunday and time for this week's new challenge over at The Paper Players - yay! It's the turn of the lovely Laurie to host this week and she has a fun theme challenge for you to work with:


I decided to use this week's CAS(E) This Sketch for my layout and by complete coincidence have another card for you using the Half Full stamp set I featured last week, although this week's is decidedly more festive - take a look:


Here's the low-down on today's card:

I'm Dreaming of a White Christmas -  When I came to make my card for today's challenge, I realised I actually don't own that many overtly funny stamp sets - clearly something to be rectified another time! However the principle reason that I purchased the Half Full stamp set that I used on last week's card was for the sentiment that I used on today's card - what a fun play on words! Along with some fussy cut holly it makes for the perfect festive tipple.

Humour on the Inside - The real humour in this set comes when this sentiment on the front of the card is combined with the one I used on the inside. I actually made two of these cards at the same time (I wanted to make a dent in my Christmas card stash!) which made it easy to photograph both the inside and outside at the same time to get the full effect:


I just love that - makes me chuckle very time I read it! So perfect for my wine-loving besties, who I know will appreciate the sentiment too.

Under The Mistletoe Plaid - I wanted to add some festive colour to my card and settled on this warming plaid from the Under The Mistletoe designer series paper set. The warm colours were just what I was looking for to go with my glass of wine - here's the colour combination if you would like to save it for a future project:


Here is the visual summary of the key products used on today's project for you to pin for easy reference:


You can see all of my Product and 'How To' summaries on my 'How To - Tips and Techniques' Pinterest board in case you've missed any. 

Before you reach for your ink and papers, check out what our amazing team has created to inspire you this week:

Here's a quick recap of our challenge rules:
 
1.  Create a new paper project
2.  Upload your creation to your blog with a link back to us and provide a direct link to the post featuring your challenge submission.
3.  Please link your card to no more than four challenges, TOTAL.
4.  Have FUN!

You can see all of my 'How To' summaries on my 'How To - Tips and Techniques' Pinterest board in case you've missed any. 

Enjoy your day. I'm off for a day at the waterpark with a bunch of 11 year old boys to begin the birthday celebrations of the youngest of the James Juniors. To be followed by a BBQ, football and Nerf wars, so a fairly full-on day - wish me luck!

I'll be back tomorrow with another project. Until then, happy stampin'!


Stampin' Up! Supplies Used: 

Table built using Product Table Builder by The Crafty Owl - Independent Stampin' Up! Demonstrator.

Mini Catalogue

BROWSE THE CATALOGUE

The mini catalogue is now live! Read and download your copy here.

Shop Online

Access my online shop 24 x 7, 365 days of the year:

Current April hostess code:

VDKNV7BH

Shop Online

Join My Team

It's always a great time to join Stampin’ Up! New team members can get £130 worth of products for only £99 + free business supplies + free shipping + all the fun being a part of Stampin’ Up! Stampin' Up! has something for everyone: join my growing team and benefit from my support to enjoy Stampin' Up! however you choose.

If you're interested, call me for a chat to understand how I can help you realise your goals. Alternatively, if you have already decided to sign up and you just can't wait, please click here for the link to the online form where you can sign up and order your starter kit right away! 

Latest Kit!

Stampin Cut and Emboss

The Rock Legend Kit has all you need to make 8 cards with coordinating envelopes. Along with the new Panda Friends Kit, both are available from January 4th for just £14 each - get yours here!

2023-24 Annual Catalogue

BROWSE THE CATALOGUE

Click on the catalogue for a full list of current SU! supplies - if you would like to order any of the items featured, please drop me a line at [email protected] or give me a call on 07773 421446 - I'd be happy to help.

New Online Exclusives

There are new products available exclusively in the online store from 5 March - check them out here.

About Me

Hi I'm Joanne and live in Northampton and when I'm not looking after my husband and two beautiful children, am an avid crafter with a passion for all things Stampin' Up!

I must confess that I have never been a big rubber stamper - until I discovered Stampin' Up! that is. I love the fact that I can get such great results with co-ordinating stamps, inks, papers and punches - the possibilities are endless! Join me on my stamping journey as I share the things I love and be inspired to create amazing things yourself!

Follow Me

Monthly Newsletter

Box Builder

Click the button above to use Box Buster to create your custom box design using the Envelope Punch Board!

Kits Collection Now Available!

Stampin Cut and Emboss

The new Kits Collection from Stampin' Up! is now available!

Click here to see the current kits available and order yours online today.

I Design For


Stampin' Up Stuff

This is my personal blog and is not endorsed by Stampin’ Up! I hope you find it a plentiful source of ideas and personal inspiration but please don't copy my designs for contest submission or use for classes, publication or sale without express permission.