Oh So Ombre Snowman Season PP524

by Joanne James17. January 2021 09:00

Today it's Sunday and time for this week's new challenge over at The Paper Players! It's the turn of the lovely Claire to host this week and she has a seasonal clean and simple  challenge for us to work with:


I used the sketch over at Global Design Project for my layout (I rotated it through 180 degrees) and was also inspired by the snowman and the blue and white winter sentiment over at Hand Stamped Sentiments this week for my clean and simple snow card - take a look:


Here's the low-down on today's card:

I used the Oh So Ombre free Sale-A-Bration paper as the base for my card and heat-embossed the cute skyward-looking snowman onto the ombre paper in white, adding a little extra white with a chalk marker. I added my sentiment, finishing with the word 'snow' made out of the Playful Alphabet letters in white and replacing the 'o' with a glittery white glimmer paper snowflake. Finally I added a sprinkling of sequins from a selection of mixes in my stash amongst the falling snow:

I think I might add this card to next year's Christmas card stash - not that it ever snows here in the UK at Christmas, much to the disappointment of the James Juniors who continue to live in hope! We had the tiniest dusting yesterday morning first thing but it didn't hang around, and we are forecast a return to drizzle and grey skies by today! Hope my little snowman brings some cheer your way in lieu of some sunshine.

Here is the visual summary of the key products used on today's project for you to pin for easy reference:


You can see all of my Product and 'How To' summaries on my 'How To - Tips and Techniques' Pinterest board in case you've missed any. 

Before you reach for your ink and papers, check out what our amazing team has created to inspire you this week:

Here's a quick recap of our challenge rules:
 
1.  Create a new paper project
2.  Upload your creation to your blog with a link back to us and provide a direct link to the post featuring your challenge submission.
3.  Please link your card to no more than four challenges, TOTAL.
4.  Have FUN!

You can see all of my 'How To' summaries on my 'How To - Tips and Techniques' Pinterest board in case you've missed any. 

Enjoy your day; nothing much happening here this weekend as we continue to endure lockdown. I am enjoying having more time to read and build Lego and as a family we seem to have rediscovered chess this past week as we finished watching 'The Queen's Gambit' on Netflix. If you haven't seen it, I can highly recommend it. And you can't bit a game of chess for immersive distraction! I'll be back tomorrow with another project. Until then, happy stampin'!


Stampin' Up! Supplies Used: 

Table built using Product Table Builder by The Crafty Owl - Independent Stampin' Up! Demonstrator.

A Darling Donkey Triangle Trio For PP523

by Joanne James10. January 2021 09:00

Today it's Sunday and time for this week's new challenge over at The Paper Players! It's the turn of the fabulous Ann to host this week and she has an interesting colour challenge for us to work with:


Now I know I said Ann had an 'interesting' colour challenge for us this week ... what I really meant to say was 'incredibly difficult'!! Or at least, it was for me this week! Whilst I don't mind any of these colours in their own, or even paired, as a trio I struggled with them. All three are featured in the new Dandy Garden designer series paper, and usually DSP would be my first port of call for a colour challenge, but the truth is I am not a fan of this pack! Or at least, I should qualify that by saying I'm not a fan of the sides with mixed colours - the monochromatic patterns in this pack are just lovely! Anyway, I had to call in help for this one, both in the form of this week's Paper Craft Crew sketch and a certain James Junior - take a look at what we came up with:


Here's the low-down on today's card:

A Trio Of Triangles - I was drawn to this week's PCC sketch with its three triangles, as I had been having a team chat this week with one of my team who has been using her stitched triangles as part of an ongoing challenge and I mentioned that I had bought these before Christmas but not yet used them and I thought the sketch would be a good way to remedy that. The trio would also enable me to work in this week's colours, so provided a great starting point.

A Darling Donkey - I then needed to decide upon my neutral colour; this is where Rebecca, the self-confessed 'brains' behind today's card, suggested I go with grey and a donkey from the super cute 'Darling Donkeys' stamp set, one of the sets that can be yours free with a £45 spend during Sale-A-Bration. So I coloured one of the funny kicking donkeys and fussy cut it out - perfect!

Hinge-Step HeeHaw - Finally, I just had to work out what to do use for the horizontal background panel. I decided to go with a tri-colour sentiment block, made up of alternating colours of 'heehaw!', one of the sentiments in the Darling Donkeys set. I used my Stampuratus and moved the plates up and down the hinge to perfectly space my words to create a seamless flow across the page. The Stamparatus made light work of the stamping, although 'the hands' (Rebecca's reference to my contribution!) were definitely not working as quickly as 'the brain' (apparently, since it was all her idea!!) I finished my card with a birthday sentiment and a trio of enamel dots. 

Despite my initial reservations about this week's colours, I'm actually pretty pleased with the end result. What do you think? Did Team James pull it off?! Do leave me a comment below - I'd love to hear your thoughts. I'll be linking today's card up over at SUO Challenges too where they have 'Designer's Choice' themes this week.

Here is the visual summary of the key products used on today's project for you to pin for easy reference:


You can see all of my Product and 'How To' summaries on my 'How To - Tips and Techniques' Pinterest board in case you've missed any. 

Before you reach for your ink and papers, check out what our amazing team has created to inspire you this week:

Here's a quick recap of our challenge rules:
 
1.  Create a new paper project
2.  Upload your creation to your blog with a link back to us and provide a direct link to the post featuring your challenge submission.
3.  Please link your card to no more than four challenges, TOTAL.
4.  Have FUN!

You can see all of my 'How To' summaries on my 'How To - Tips and Techniques' Pinterest board in case you've missed any. 

Enjoy your day; I'm hoping to do a little crafting and maybe wrap up and brave the elements for a brisk walk - but I'll see what the temperatures are like first! I'll be back tomorrow with another project. Until then, happy stampin'!


Stampin' Up! Supplies Used: 

Table built using Product Table Builder by The Crafty Owl - Independent Stampin' Up! Demonstrator.

Always In My Heart Foiled Heart Anniversary Card PP522

by Joanne James3. January 2021 09:00

Today it's Sunday and time for the first challenge of the new year over at The Paper Players! We have a new trio of guest designers to welcome - hello to Debbie, Amanda and Nancy, and it's the turn of the fabulous LeAnne to host this week and she the perfect theme challenge for you to work with:


Something new - what a great theme to get our craft on into the new year! I have so many lovely new things that can't wait to share with you - I was truly spoilt for choice! I decided to use the current layout over at The Spot and use new papers, foils dies and stamps on today's card  - take a look:


Here's the low-down on today's card:

Floral Heart Centrepiece - Today's card features a number of new items from the Love You Always suite, which includes two stamp set and die bundles. On today's card I used the fancy floral heart as my centrepiece, cut from Rococco Rose foil to compliment the foiled specialty paper that I used for my panel piece and decorated it with some additional flowers and foliage cut from other dies in the set. Isn't it just so pretty?!

Love You Always Foils - There are both solid foils and specialty foiled paper in the suite. It's always difficult to show foil to full effect on a photograph, so you'll have to take my word for it how beautiful and shiny it is! Here's another view that hopefully captures some of it for you:

Always In My Heart - The Floral Heart Dies alone are fabulous, but it also had a lovely stamp set too. I decided to go with a white heart for the front of my card, stamped in Merry Merlot (I think this red compliments Rococco Rose beautifully) given that I had used Merry Merlot for my card base and finished with a little extra stamping on the inside of my card:


It is my wedding anniversary in February, so I might save this one and use it for my dear hubby - if that's not too organised of me! So what do you think? Is the 'Love You Always' Suite one you can see yourself falling in love with? Do leave me a comment below - I will be sharing more projects using new products from this suite in the coming weeks.

Here is the visual summary of the key products used on today's project for you to pin for easy reference:


You can see all of my Product and 'How To' summaries on my 'How To - Tips and Techniques' Pinterest board in case you've missed any. 

Before you reach for your ink and papers, check out what our amazing team has created to inspire you this week:

Here's a quick recap of our challenge rules:
 
1.  Create a new paper project
2.  Upload your creation to your blog with a link back to us and provide a direct link to the post featuring your challenge submission.
3.  Please link your card to no more than four challenges, TOTAL. 
4.  Have FUN!

You can see all of my 'How To' summaries on my 'How To - Tips and Techniques' Pinterest board in case you've missed any. No links to the online store today as these products are not available to purchase until 5th January; only another couple of days to wait though!

Enjoy your day; we will be taking our Christmas decorations down today as Jason is back to work tomorrow and this is definitely a two-person job. The Juniors have another week of Christmas vacation but if they had their way, we would have Christmas decorations up until April, so they can't be relied upon to help in a constructive way so it's not a job that can be left until Twelfth Night!! I'll be back tomorrow with another project. Until then, happy stampin'!

Stampin' Up! Supplies Used:

Table built using Product Table Builder by The Crafty Owl - Independent Stampin' Up! Demonstrator.

Christmas Gleaming Ornaments in Silver and Gold PP521

by Joanne James13. December 2020 09:00

Today it's Sunday and time for this week's new challenge over at The Paper Players! It's our last challenge of 2020 and the turn of the amazing Claire to host this week. She has a colour challenge for you to work with:


I've been super busy this week so have not been a frequent blogger I'm afraid. To make amends, I have two cards for you today! I'm still making Christmas cards and wanted to play along with challenge over at The Card Concept because I loved the textures in the inspiration photo so I decided to make two cards, both using the Fab Friday sketch layout: a silver, black and white one for my Paper Players card and then a gold, black and white version for The Card Concept. So first up - here's my Paper Players card:


Here's the low-down on today's cards:

Both cards feature a pair of ornaments from the Christmas Gleaming set, one heat embossed on Whisper White card and the other onto Basic Black, along with piece of foil embossed with the Parisian Flourish 3D embossing folder and wiped with black ink for a slightly more aged look, black and silver/gold glimmer paper, tassels, gem embellishments and mesh ribbon and twine bows. Just check out the texture and detail:


I switched out the background embossing folder and one or two other small details to recreate a gold, black and white version:


I'm going for a 'classy and elegant' look with my cards today: the polished, shiny finish, layered textures and sparkly embellishments are a definite change from my normal 'clean and layered' style, but I quite like them. I think the sparkle and shine balances all the black and the textures are just lovely:


Here is the visual summary of the key products used on today's projects for you to pin for easy reference:


You can see all of my Product and 'How To' summaries on my 'How To - Tips and Techniques' Pinterest board in case you've missed any. 

Before you reach for your ink and papers, check out what our amazing team has created to inspire you this week:

Here's a quick recap of our challenge rules:
 
1.  Create a new paper project
2.  Upload your creation to your blog with a link back to us and provide a direct link to the post featuring your challenge submission.
3.  Please link your card to no more than four challenges, TOTAL.
4.  Have FUN!

This is our last challenge of the year before we take a short break over Christmas. It is time to say thank you and goodbye to Stef, Allisa and Mary, our fabulous guest designers this year. They have all been fabulous and we will miss them lots! 

Enjoy your day; I am going to try and finish writing my Christmas cards today, whilst also squeezing in some festive baking and maybe just a little crafting too. I'll be back tomorrow with another project. Until then, happy stampin'!


Stampin' Up! Supplies Used: 

Table built using Product Table Builder by The Crafty Owl - Independent Stampin' Up! Demonstrator.
 
 
Table built using Product Table Builder by The Crafty Owl - Independent Stampin' Up! Demonstrator.

Snowflake Wishes Hexagonal Shaker Box and Matching Christmas Card PP520

by Joanne James6. December 2020 09:00

Today it's Sunday and time for this week's new challenge over at The Paper Players! It's my turn to host this week and I have a timely theme challenge for you to work with:
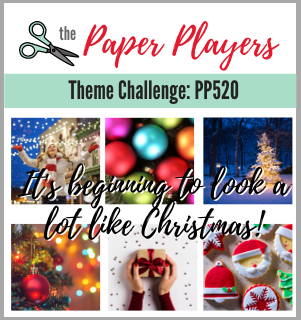
 

19 days to go and yes - it's beginning to feel a lot like Christmas, so that is my theme this week! You can share your gifts, cards, packaging - we would love to see your festive makes! I love to make co-ordinating cards and gift packaging at this time of year so I have one such set to share with you today. My post is photo-heavy as I'm going to share both a Christmas card and a rather fancy matching gift box using products from the Snowflake Splendor Suite. I even have a video tutorial for you!

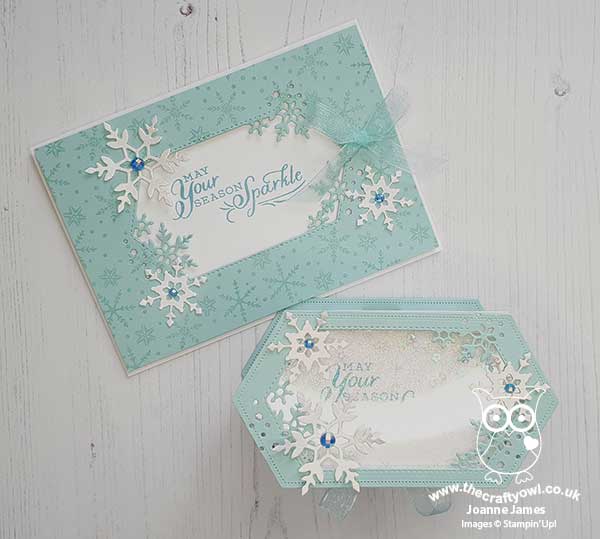
First up - here's my Christmas card, with the hexagonal aperture cut using the So Many Snowflake dies:
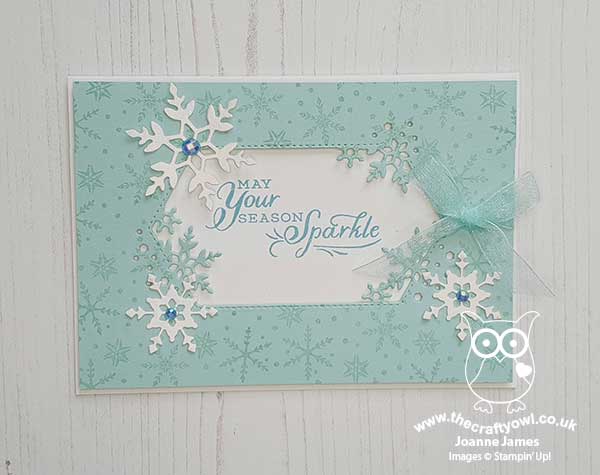
 

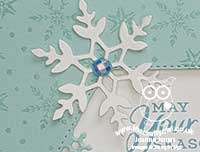
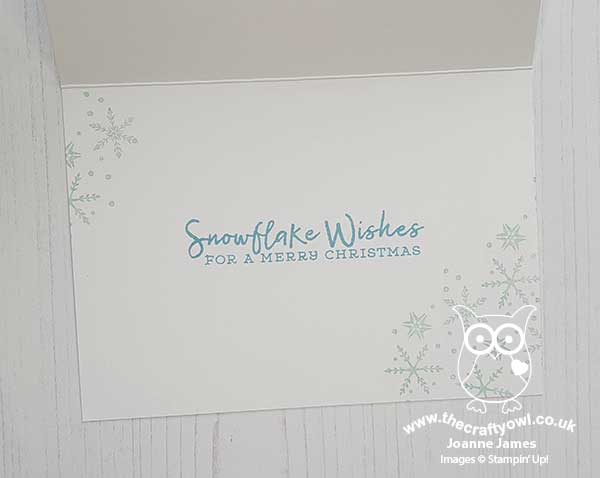
I added some diecut snowflakes painted with Frosted White shimmer paint and finished with those pretty Balmy Blue adhesive-backed gems and a pretty Pool Party sheer ribbon bow, with a simple sentiment and snowflake decoration on the inside of my card:
 

 Check out the effect of those faceted gems - so sparkly!
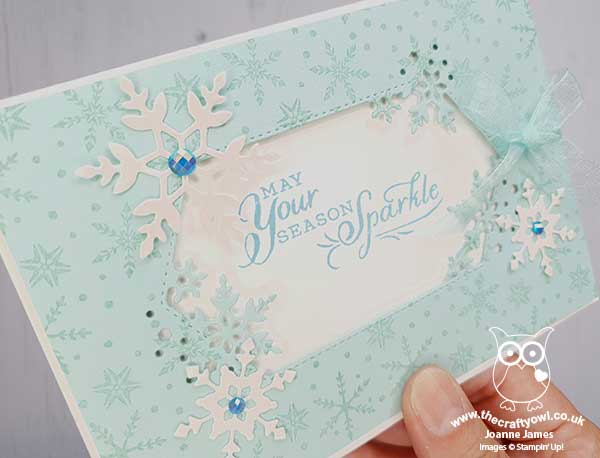
This card was a variation on one I made in my monthly card class featuring the Snowflake Wishes bundle a few months ago. I liked the card so much, I decided to make a matching box, using the same hexagonal aperture and the Stitched Nested Label Dies from the annual catalogue. I made a simple birthday gift box using these dies previously (you can see that box here if you missed it) and have been wanting to make a video tutorial to show how it was done, so this seemed like the perfect opportunity. Here is my finished box closed:
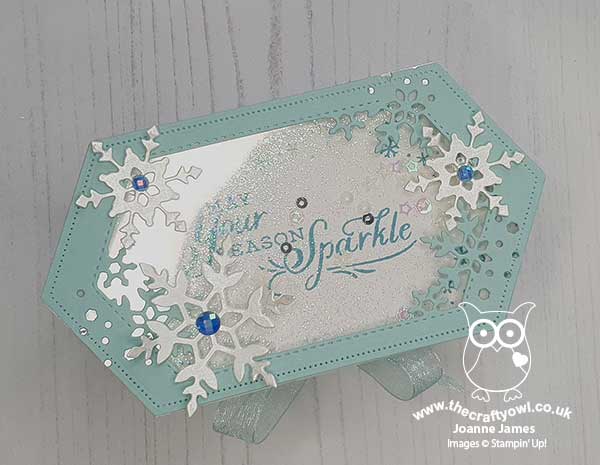
 

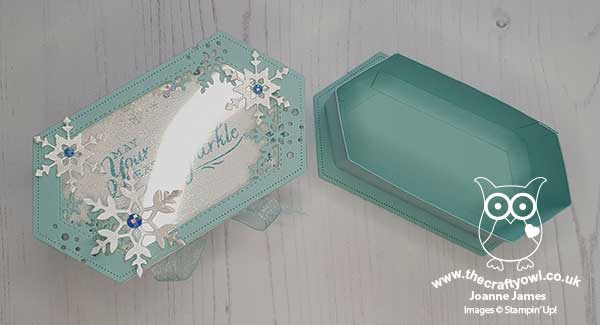
And this is what it looks like open - the lid and base extend beyond the sides of the box and the top slides off to reveal the inside:
 

I wanted to step up my box so instead of simply creating an open aperture on the lid, I added some acetate and created a shaker, filled with snowflake sequins and glitter - check out  this out - it's not only the sentiment that's full of sparkle:
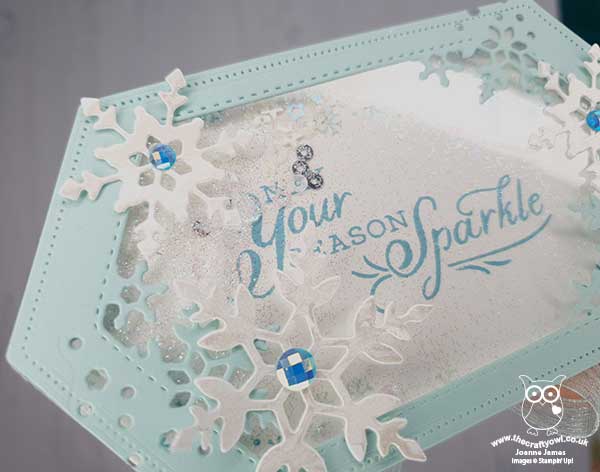
 

I added some Snowflake Splendor designer paper to the sides of my box lid and wrapped and tied it with more of the Pool Party sheer ribbon, to tie it in with the detail on my card - you can see that better below:
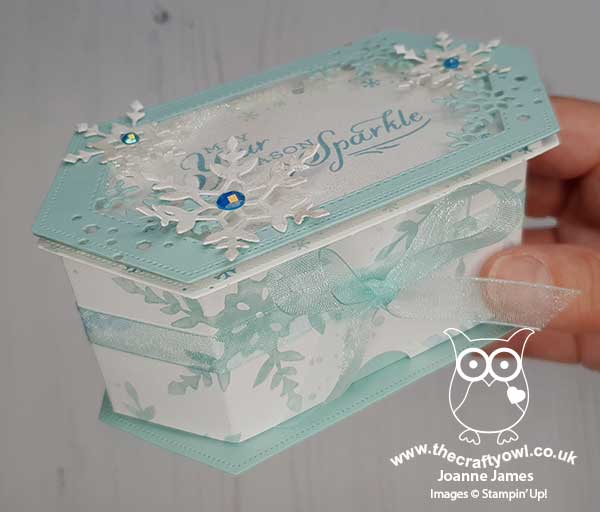
 

Rather than detail exactly how I made this project in words, I thought I would make a video tutorial should you wish to have a go at making one yourself - so here it is:

I am just in love with this set; the box isn't huge, but will hold small gifts such as chocolates, jewellery, a scented candle - lots of options! Here's a final photo of my projects together:
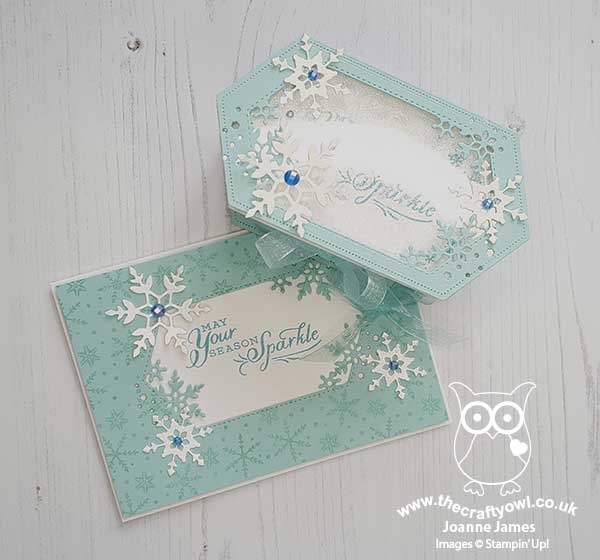
 

I would love to know what you thought of my video tutorial too; was it useful? Would you like to see more of this type of content. Do let me know - I would love to hear your thoughts!

Here is the visual summary of the key products used on today's project for you to pin for easy reference:
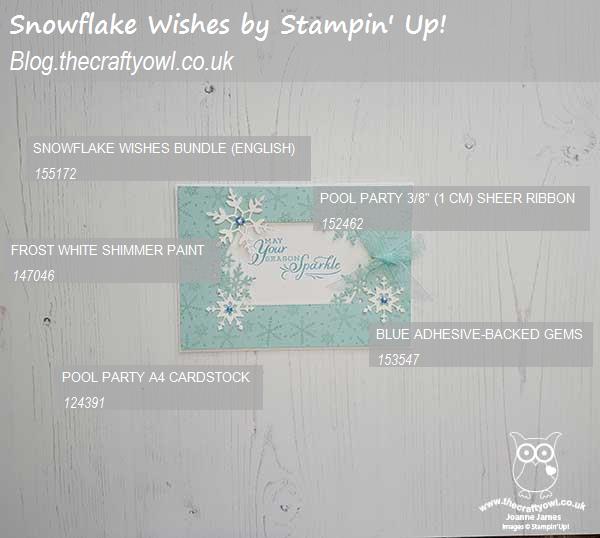
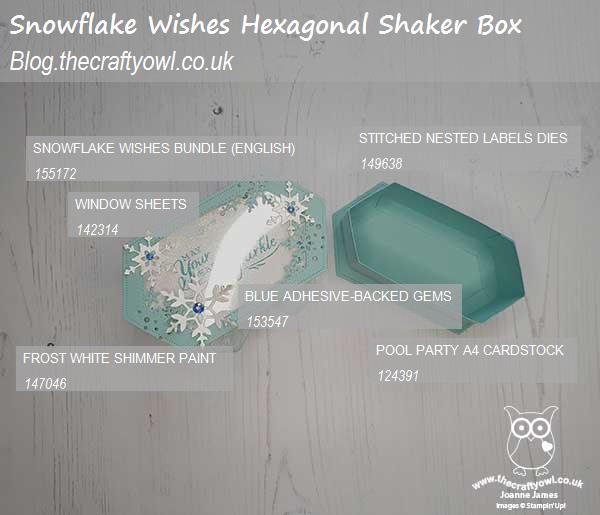


You can see all of my Product and 'How To' summaries on my 'How To - Tips and Techniques' Pinterest board in case you've missed any. 

Before you reach for your ink and papers, check out what our amazing team has created to inspire you this week:

Here's a quick recap of our challenge rules:
 
1.  Create a new paper project
2.  Upload your creation to your blog with a link back to us and provide a direct link to the post featuring your challenge submission.
3.  Please link your card to no more than four challenges, TOTAL.
4.  Have FUN!

You can see all of my 'How To' summaries on my 'How To - Tips and Techniques' Pinterest board in case you've missed any. 

Enjoy your day; I started writing Christmas cards whilst at hockey yesterday and am hoping to crack on with those this afternoon to get them in the post tomorrow, which will be a huge achievement! I'll be back tomorrow with another project. Until then, happy stampin'!
Stampin' Up! Supplies Used: 

Table built using Product Table Builder by The Crafty Owl - Independent Stampin' Up! Demonstrator.

Poinsettia Double Fan Fold Christmas Card PP519

by Joanne James29. November 2020 09:00

Today it's Sunday and time for this week's new challenge over at The Paper Players! It's the fifth week of the month and the turn of the amazing Anne Marie to host with a fun TicTaToe challenge board for you to work with:


I decided to go all-out with a fancy fold card today and originally was aiming for the central column of the board with diecut - fancy fold - embellishment; by the time I'd finished my card, I had inadvertently covered every square except 'colouring tool'! This card (almost!) has it all - take a look:


Here's the low-down on today's card:

Double Fan Fancy Fold - I chose to make a double fan fancy fold card today as I've seen lots of these doing the rounds this season and for a fancy fold, they really aren't that tricky. I did a little bit of internet searching for a template, but in the end decided to make my own. My card measures 8 1/4" x 9", scored on the vertical at 1 1/2", 3", 6" and 7 1/2" and then scored on the diagonal as shown below. The basic outline is really straightforward - cutting the mats and layers to decorate was a little more time consuming, but worth it as they look lovely when finished. The card then has space on the reverse for the panel that would otherwise have been on the inside:


Poinsettia Showcase - I chose my favourite holly paper from the Poinsettia Place pack for my panels and chose to create a single layered poinsettia for my centrepiece. I cut a three layered flower from red velvet paper for my poinsettia using the poinsettia dies and added some holly leaves and gold berry sprigs. The red velvet paper is gorgeous and perfect for a showcase flower such as this - I wish you could feel the texture of it; it embosses beautifully too, as you can see on the close up below:


Pearls and Shine - I added a beaded pearl embellishment to the centre of my flower for the perfect finishing touch. Combined with the velvet paper, touches of gold foil and twine and gold embossed sentiment, this makes for quite a special Christmas card.

I'm linking my card up over at TGIF Challenges where the theme is 'Have a magical Christmas' (my sentiment was the perfect choice!) and over at SUO Challenges where the theme is also Christmas.

Here is the visual summary of the key products used on today's project for you to pin for easy reference:


You can see all of my Product and 'How To' summaries on my 'How To - Tips and Techniques' Pinterest board in case you've missed any. 

Before you reach for your ink and papers, check out what our amazing team has created to inspire you this week:

Here's a quick recap of our challenge rules:
 
1.  Create a new paper project
2.  Upload your creation to your blog with a link back to us and provide a direct link to the post featuring your challenge submission.
3.  Please link your card to no more than four challenges, TOTAL.
4.  Have FUN!

You can see all of my 'How To' summaries on my 'How To - Tips and Techniques' Pinterest board in case you've missed any. 

Enjoy your day; for the first time ever whilst still in November, I think we are decorating the house for Christmas this afternoon. The James Juniors have been pestering me all week and to be honest I think we could all use a little festive cheer, so decorations it is!  I'll be back tomorrow with another project. Until then, happy stampin'!


Stampin' Up! Supplies Used: 

Table built using Product Table Builder by The Crafty Owl - Independent Stampin' Up! Demonstrator.

Feels Like Frost Split Panel Christmas Card PP518

by Joanne James22. November 2020 09:00

Today it's Sunday and time for this week's new challenge over at The Paper Players! It's the turn of the amazing LeAnne to host this week and she has my favourite, a sketch challenge for you to work with:


My card is all about the winter blues today - perfect for the Double D challenge (thanks for the heads up on this one LeAnne!) I really liked LeAnne's sketch layout this week and decided to use those panels to highlight one of the photographic images in the Feels Like Frost designer series paper pack - take a look:

Here's the low-down on today's card:

I chose a lovely image of frosty seed heads against a blue background and cut out the panels using my Rectangle Stitched Dies before piecing back together to create the finished layout:

I brushed the frosty elements with my clear Wink of Stella brush which is difficult to see in the photo but give it a lovely subtle sparkle in real life. I added a sentiment from 'Snowflake Wishes' and a mat border of silver glimmer paper and finished off the inside with a sentiment from the same set:


The most tricky part of today's card was cutting the stitched rectangles and aligning them to the image. Otherwise, a pretty straightforward card!

Here is the visual summary of the key products used on today's project for you to pin for easy reference:

 I 

You can see all of my Product and 'How To' summaries on my 'How To - Tips and Techniques' Pinterest board in case you've missed any. 

Before you reach for your ink and papers, check out what our amazing team has created to inspire you this week:

Here's a quick recap of our challenge rules:
 
1.  Create a new paper project
2.  Upload your creation to your blog with a link back to us and provide a direct link to the post featuring your challenge submission.
3.  Please link your card to no more than four challenges, TOTAL.
4.  Have FUN!

You can see all of my 'How To' summaries on my 'How To - Tips and Techniques' Pinterest board in case you've missed any. 

Enjoy your day; today is officially 'Stir up Sunday', an old tradition when home cooks spend the last Sunday before advent 'stirring up' their Christmas pudding and in modern times their Christmas cake and homemade mincemeat too.  The day gets its name from the beginning of the collect for the day in the Book of Common Prayer, which begins with the words, "Stir up, we beseech thee, O Lord, the wills of thy faithful people". We had a day of preparation yesterday and made a batch of mincemeat and some mince pies; today we are making Christmas puddings and cake - yum! I'll be back tomorrow with another project. Until then, happy stampin'!


Stampin' Up! Supplies Used: 

Table built using Product Table Builder by The Crafty Owl - Independent Stampin' Up! Demonstrator.

Sounds of the Season CAS Christmas Bells PP517

by Joanne James15. November 2020 09:00

Today it's Sunday and time for this week's new challenge over at The Paper Players! It's the turn of the amazing Ann to host this week and she has a timely Clean and Simple challenge for you to work with:


Our theme this week is 'Hooray For The Holidays'. With Christmas just around the corner I decided to go with another card to add to my growing pile, but you could choose Thanksgiving or any holiday you like - as long as your card is clean and simple.  So what do we mean by Clean and Simple?

  • Minimal layers and embellishments
  • Plenty of open space, aka "white" space
  • Simple and uncluttered

I decided to use the Sounds of the Season jingle bells again on my card this week, this week changing from silver to gold and pairing with red for the challenge over at Less Is More. I also used the sketch over at CAS Colours and Sketches which gave me the perfect opportunity to use a die from the Dove of Hope Dies that I haven't been able to find a good use for until now - take a look:


 The die was just perfect to create a couple of lengths of holes to show the gold foil below, to compliment my diecut bells and gold heat embossed sentiment. You can see the detail a little better on the angled shot below - the weather has been so poor here in the UK that I've struggled to photograph the foil without artificial light, which is never as clear as daylight:


A quick clean and simple check:
  • Minimal layers and embellishments with one main focal point - yes
  • Lots of open 'white' (or in my case red!) space - yes
  • Simple and uncluttered - yes
I'd call that a result! 
 
Here is the visual summary of the key products used on today's project for you to pin for easy reference:


You can see all of my Product and 'How To' summaries on my 'How To - Tips and Techniques' Pinterest board in case you've missed any. 

Before you reach for your ink and papers, check out what our amazing team has created to inspire you this week:

Here's a quick recap of our challenge rules:
 
1.  Create a new paper project
2.  Upload your creation to your blog with a link back to us and provide a direct link to the post featuring your challenge submission.
3.  Please link your card to no more than four challenges, TOTAL.
4.  Have FUN!

You can see all of my 'How To' summaries on my 'How To - Tips and Techniques' Pinterest board in case you've missed any. 

Enjoy your day; my day will definitely be spent indoors today, so I'm thinking cooking, crafting and a movie could be the order of the day! I'll be back tomorrow with another project. Until then, happy stampin'!


Stampin' Up! Supplies Used: 

Table built using Product Table Builder by The Crafty Owl - Independent Stampin' Up! Demonstrator.

Sounds of the Season Silver Bells Christmas Card and Gift Tin PP516

by Joanne James8. November 2020 09:00

Today it's Sunday and time for this week's new challenge over at The Paper Players! It's my turn to host this week and I have a festive colour challenge for you to work with:


I'm also linking up with the challenge over at Festive Friday, where I used diecut, pattern paper, ribbon and sentiment from the inspo list. The colours I chose for this week's challenge are some of my favourite to work with when creating cards and projects for the festive season, and whilst you are free to create whatever you like with the palette, I couldn't resist creating a card and matching gift box ready for Christmas. This is a rather photo-heavy post, so here goes! First up - here's my card and co-ordinating gift packaging together:


Pretty, right? Let's take a close look at each on turn. First up - here's the card I made:


Here's the low-down on today's card:

Sounds of The Season - A pair of silver foil jingle bells from the Sounds of the Season Dies are the centrepiece of today's card. I used these larger-than-life bells to frame my sentiment from the 'Wrapped in Christmas' stamp set and paper-pieced the holly leaves with a second set cut from green foil for contrast. I added Real Red Rhinestone jewels for my berries, added some diecut pine sprigs and finished with a Real Red sheer ribbon bow to each. These bows do make the card a little less post-friendly, but I think the extra detail is worth it. You can see the detail on the bells on the close-up below:


'Tis The Season - I used a combination of a Shaded Spruce/Real Red/Black/White plaid and a holly pattern from the 'Tis The Season designer series paper pack to compliment my silver bells and added a thin border of silver between the layers for added shine. I love the white splatter on the plaid pattern - and it's part of the design, no extra effort required!

Rectangle Gift Tin - I liked my card so much that I decided to create a belly band wrap for one of the silver rectangle tins that are in the Autumn-Winter catalogue. Available in packs of 4, they are great for a gift card or to hold a small item such as a piece of jewellery or item of make up, for example. Here's my finished tin:


I've decorated it in much the same way, strengthening the band with a piece of Real Red cardstock for the base layer and adding a wrapped bow in the wide Shaded Spruce ribbon from the Wonder Of The Season Ribbon combo pack. Here's a close up from another angle with a better view of the bell decoration: 


Here are the visual summaries of the key products used on today's projects for you to pin for easy reference:


 And for the tin:


You can see all of my Product and 'How To' summaries on my 'How To - Tips and Techniques' Pinterest board in case you've missed any. 

Before you reach for your ink and papers, check out what our amazing team has created to inspire you this week:

Here's a quick recap of our challenge rules:
 
1.  Create a new paper project
2.  Upload your creation to your blog with a link back to us and provide a direct link to the post featuring your challenge submission.
3.  Please link your card to no more than four challenges, TOTAL.
4.  Have FUN!

You can see all of my 'How To' summaries on my 'How To - Tips and Techniques' Pinterest board in case you've missed any. 

Enjoy your day; I'm hoping to do a little bit of crafting, a little bit of cooking and generally catch up on everything I've avoided doing whilst I've been at Stampin' Up!'s Onstage at Home virtual online event these past couple of days. I'll be back tomorrow with another project. Until then, happy stampin'!

Stampin' Up! Supplies Used: 

Table built using Product Table Builder by The Crafty Owl - Independent Stampin' Up! Demonstrator.

Harvest Hello Pumpkin Giving Thanks PP515

by Joanne James1. November 2020 09:00

Today it's Sunday and time for this week's new challenge over at The Paper Players! It's the turn of the amazing Laurie to host this week and she has a theme challenge for you to work with:


I don't have any turkeys in my current stamp collection so decided to go with pumpkins and the overall 'thankful' theme, along with the layout of the inspiration photo over at Inspire.Create, to create my card this week - take a look:


Here's the low-down on today's card:

Harvest Hellos - I used the 'Harvest Hellos' stamp set for my feature pumpkin on today's card, and highlighted the detail with Pumpkin Pie and Calypso Coral Stampin' Blends, before punching out with the Apple Builder Punch. 

Texture, Texture - There's lots of texture on today's card: a woodgrain background courtesy of the In Good Taste designer paper, wooden leaf embellishments, twine, linen braid and the lacy diecut panel from the Stitched Lace Die. Not very post-friendly granted, but the texture and dimension add so much interest and detail:

Word Wishes - For my sentiment, I snipped the word 'thanks' from the 'thanksgiving' die in the Word Wishes set and stacked it on the front of my card, and paired it with the word 'giving' that was masked from the full sentiment that I used inside my card:


I was really pleased with the way this card turned out. I'm also linking up with the team over at SUO Challenges with another entry for their Autumn/Fall challenge.

Here is the visual summary of the key products used on today's project for you to pin for easy reference:


You can see all of my Product and 'How To' summaries on my 'How To - Tips and Techniques' Pinterest board in case you've missed any. 

Before you reach for your ink and papers, check out what our amazing team has created to inspire you this week:

Here's a quick recap of our challenge rules:
 
1.  Create a new paper project
2.  Upload your creation to your blog with a link back to us and provide a direct link to the post featuring your challenge submission.
3.  Please link your card to no more than four challenges, TOTAL.
4.  Have FUN!

You can see all of my 'How To' summaries on my 'How To - Tips and Techniques' Pinterest board in case you've missed any. 

Enjoy your day; we will more than likely be spending the day indoors to once again escape the howling winds and rain - the weather has been dreadful here this week! With continued social distancing a focus during this half term, we resorted to an online escape room game on Friday afternoon; whilst not the same as doing one in person, it was surprisingly good fun. We bought a 3 game package so I think the James' may well be spending the afternoon breaking more codes and solving puzzles against the clock!

I'll be back tomorrow with another project. Until then, happy stampin'!


Stampin' Up! Supplies Used: 

Table built using Product Table Builder by The Crafty Owl - Independent Stampin' Up! Demonstrator.

Mini Catalogue

BROWSE THE CATALOGUE

The mini catalogue is now live! Read and download your copy here.

Shop Online

Access my online shop 24 x 7, 365 days of the year:

Current April hostess code:

VDKNV7BH

Shop Online

Join My Team

It's always a great time to join Stampin’ Up! New team members can get £130 worth of products for only £99 + free business supplies + free shipping + all the fun being a part of Stampin’ Up! Stampin' Up! has something for everyone: join my growing team and benefit from my support to enjoy Stampin' Up! however you choose.

If you're interested, call me for a chat to understand how I can help you realise your goals. Alternatively, if you have already decided to sign up and you just can't wait, please click here for the link to the online form where you can sign up and order your starter kit right away! 

Latest Kit!

Stampin Cut and Emboss

The Rock Legend Kit has all you need to make 8 cards with coordinating envelopes. Along with the new Panda Friends Kit, both are available from January 4th for just £14 each - get yours here!

2023-24 Annual Catalogue

BROWSE THE CATALOGUE

Click on the catalogue for a full list of current SU! supplies - if you would like to order any of the items featured, please drop me a line at [email protected] or give me a call on 07773 421446 - I'd be happy to help.

New Online Exclusives

There are new products available exclusively in the online store from 5 March - check them out here.

About Me

Hi I'm Joanne and live in Northampton and when I'm not looking after my husband and two beautiful children, am an avid crafter with a passion for all things Stampin' Up!

I must confess that I have never been a big rubber stamper - until I discovered Stampin' Up! that is. I love the fact that I can get such great results with co-ordinating stamps, inks, papers and punches - the possibilities are endless! Join me on my stamping journey as I share the things I love and be inspired to create amazing things yourself!

Follow Me

Monthly Newsletter

Box Builder

Click the button above to use Box Buster to create your custom box design using the Envelope Punch Board!

Kits Collection Now Available!

Stampin Cut and Emboss

The new Kits Collection from Stampin' Up! is now available!

Click here to see the current kits available and order yours online today.

I Design For


Stampin' Up Stuff

This is my personal blog and is not endorsed by Stampin’ Up! I hope you find it a plentiful source of ideas and personal inspiration but please don't copy my designs for contest submission or use for classes, publication or sale without express permission.