Countryside Inn Country Wreath PP659

by Joanne James24. September 2023 08:00

Today it's Sunday and time for this week's new challenge over at The Paper Players! It's the turn of the fabulous Anne Marie to host this week and she has my favourite, a sketch challenge for us to work with:


The weather here has become much more autumnal this week, so I found myself feeling inspired by the beautiful autumn wreath that is bottom left of the Hand Stamped Sentiments inspiration photo and decided to recreate it with the Color Dare colours above (I used my closest colours for all 6) for a pretty autumnal card - take a look:


Here's the low-down on today's card:

I chose a striped pattern from the Countryside Inn designer series paper pack to accentuate the lines of the horizontal panels of the sketch as my starting point, then added my leafy wreath that I diecut using the Country Wreath Dies, with some pumpkins in Smoky Slate and Very Vanilla added from the retired Seasonal Swirls die set:

A fussy cut sentiment from 'Season of Chic', a linen thread bow and a trio of speckled dots complete my card. I had a few leftover bits and pieces so used them to add a little additional decoration to the inside of my card:


I love the softness of the Very Vanilla with the mix of browns and I think they compliment the blues nicely too.

Here is the visual summary of the key products used on today's project for you to pin for easy reference:


You can see all of my Product and 'How To' summaries on my 'How To - Tips and Techniques' Pinterest board in case you've missed any. 

Before you reach for your ink and papers, check out what our amazing team has created to inspire you this week:

Here's a quick recap of our challenge rules:
 
1.  Create a new paper project
2.  Upload your creation to your blog with a link back to us and provide a direct link to the post featuring your challenge submission.
3.  Please link your card to no more than four challenges, TOTAL.
4.  Have FUN!

Enjoy your day; I'm planning on spending my day baking an gardening in equal measure! I'll be back tomorrow with another project. Until then, happy stampin'!


Stampin' Up! Supplies Used: 

Table built using Product Table Builder by The Crafty Owl - Independent Stampin' Up! Demonstrator.

Masterfully Made Colourful Hello GDP412

by Joanne James23. September 2023 19:00

I managed to get lots of crafting done today so am well on my way to getting back into the swing of things! I've a quick post to share a card inspired by this week's Case The Designer challenge over at Global Design  Project:

I love the layering of Wilma's original card so this was the starting point for my card - take a look:


Here's the low-down on today's card:

My card features one of the brightly coloured pages from the Masterfully Made designer series paper pack and I took the colours for my base, foliage and stamping from there. I used my favourite leaf stem from the Gorgeously Made Dies for my foliage stems, adding one in Berry Burst and another in Melon Mambo, and softened the Crushed Curry stamping on my white panel with an additional layer of vellum. A couple of Pretty Peacock sequins complete my card:


My card is a riot of clashing colour and whilst you can't see much of the designer paper layer, it does a great job of bringing all of the colours together. I love it! 

If you are also in love with the Gorgeously Made bundle, remember if you purchase it before the end of September you will receive the 'Create With Jan and Joanne' tutorial bundle containing 4 projects designed by myself and my crafty friend Jan Clothier featuring this versatile suite.

Here is the visual summary of the key products used on today's project for you to pin for easy reference:


You can see all of my 'How To' summaries on my 'How To - Tips and Techniques' Pinterest board in case you've missed any. 

Enjoy your evening and I'll be back tomorrow with my card for this week's new challenge over at The Paper Players. Until then, happy stampin'!


Stampin' Up! Supplies Used:

Table built using Product Table Builder by The Crafty Owl - Independent Stampin' Up! Demonstrator.

Hello with Just My Type for FF0143

by Joanne James15. September 2023 09:00

Today I have my card for the new challenge over at Festive Friday Card Making and Paper Crafting Challenge


The challenge that we are celebrating this week is 'World Card Making Day' which is on 7 October. Remember the fun thing is that at Festive Friday you do not need to actually celebrate the occasion; your goal is to simply use three or more items from the inspiration list on your project. This week I used bright colours, sequins and layers and this is what I came up with:


Here's the low-down on today's card:

World Card Making Day - This week's challenge celebrates World Card Making Day. This day is celebrated on the first Saturday in October each year, which this year falls on 7th October. As a crafter and committed card maker, this is definitely a day to celebrate! I always try to make sure I do some crafting for fun on that day but if you would like something more organised, you can join with me and the team at Stampin' Up! who are hosting a free event for this day:


This is a virtual event that will run from 1-4pm UK time and during this time we will be using a trio of different supplies to make three different cards. You can download the supplies list here and you've plenty of time to order anything you need in advance of the session (you can of course substitute other supplies if you don't have those detailed to hand). There is also a handy measurements guide for you to use in preparation and to refer to during the session. The session is FREE to attend; you can register here ahead of time, but if you haven't registered and happen to be free simply come along! I hope to see you there!

Just My Type - My card to celebrate this day is a simple 'hello' card featuring the 'Just My Type' stamp set and the Delightfully Eclectic designer series paper. The flowers in the paper co-ordinate beautifully with those in the stamp set that I featured behind my typewriter. I picked out the colours in the paper for my 'hello' sentiment and added a few hearts and sequins and a fold of ribbon to complete my card. I stamped the typewriter in Night of Navy onto Fresh Freesia cardstock for a different look - what do you think?


I really like this card - the pops of colour against the darker blues make me happy :-)

Here is the visual summary of the key products used on today's project for you to pin for easy reference:


You can see all of my 'How To' summaries on my 'How To - Tips and Techniques' Pinterest board in case you've missed any. 

How does our board inspire you? I can’t wait to see what YOU create! For more inspiration, be sure to visit the rest of the Festive Friday Card Making and Paper Crafting Challenge Design team:

Enjoy your day; I'll be back Sunday with my Paper Players project. Until then, happy stampin'!


Stampin' Up! Supplies Used:

Table built using Product Table Builder by The Crafty Owl - Independent Stampin' Up! Demonstrator.


Abundant Beauty Sunflowers PPP657

by Joanne James10. September 2023 08:00

Today it's Sunday and time for this week's new challenge over at The Paper Players! It's the turn of the fabulous Jaydee to host this week and she has an interesting colour challenge for us to work with:


I paired Jaydee's colours with the sketch at Hand Stamped Sentiments and since I had a little more time this week decided I would have a little play with some new product - take a look:


Here's the low-down on today's card:

Exposed Brick Texture - First up is a new-to-me product, the Exposed Brick 3D embossing folder that I used to emboss not only a piece of Pebble Path-coloured designer paper from the Fresh As A Daisy pack, but also the solid coloured trio of panels that sit on top of the base. I don't use a lot of embossing as a rule, but isn't that texture just something? It is great for adding detail to backgrounds and I really love the effect.

Abundant Beauty Sunflowers - It will be no surprise to my regular readers that the Abundant Beauty masks were one of the first things onto my pre-order shopping list - I do love a good stencil! This is a great pack with a herringbone design, autumn and snowflake panels and a layering stencil that includes a trio of sunflowers. These are the stencils I used today - I used my blending brushes to apply colour to my flower trio - I used Crushed Curry as my additional colour to 'brighten' my sunflowers and allow for more graduated colour - and some additional leaves, then fussy cut them out and pieced them onto my frame/panel background. Check out the texture and detailing on the close up below:

Charming Sentiments - To finish I added a simple sentiment from the 'Charming Sentiments' set and diecut it with the coordinating die. I love that this stamp set has such a great variety of phrases for each and every occasion, and they can be diecut perfectly with no need to fussy cut - bonus!

I'll be honest I did find Jaydee's colour palette a challenge this week and I wasn't sure about this card once finished but having let it sit a while, I've decided it looks just fine, even if those leaves are a slightly unorthodox choice! What do you think? How would you use these colours? What do you have to be grateful for today? Leave me a comment below - I'd love to hear your thoughts.

Here is the visual summary of the key products used on today's project for you to pin for easy reference:


You can see all of my Product and 'How To' summaries on my 'How To - Tips and Techniques' Pinterest board in case you've missed any. 

Before you reach for your ink and papers, check out what our amazing team has created to inspire you this week:

Here's a quick recap of our challenge rules:
 
1.  Create a new paper project
2.  Upload your creation to your blog with a link back to us and provide a direct link to the post featuring your challenge submission.
3.  Please link your card to no more than four challenges, TOTAL.
4.  Have FUN!

Enjoy your day; we are still in the grips of the late summer heatwave we've been experiencing here in the UK this week, so as much as I'd love to type more posts and share more things with you, my craft room is a veritable sauna, so I am spending as little time in it as possible - the garden and BBQ beckons! I'll be back later in the week with another project. Until then, happy stampin'!


Stampin' Up! Supplies Used: 

Table built using Product Table Builder by The Crafty Owl - Independent Stampin' Up! Demonstrator.

An Even Quicker Beary Christmas Card for PP656

by Joanne James3. September 2023 08:00

Today it's Sunday and time for this week's new challenge over at The Paper Players! It's my turn to host this week and I have a fun theme challenge for us to work with:


I feel like I need to start today's post with a confession! I am hosting this week - and for a variety of reasons I have been super busy with family commitments and not had a moment to craft all week! So when it came to making my card with limited time to spare, I remembered I had the cutest family of four-legged friends that would enable me to make a super-quick card - take a look:


Here's the low-down on today's card:

Yes - the Beary Christmas Memories & More Cards to the rescue! For this week's card, I used not only one of the printed cards but also a pre-printed card base with co-ordinating envelope; all I needed was to add a little ribbon loop detail and pop the card up on dimensionals and I was done. By using the pre-printed bases, this card was even quicker to pull together than last week. And isn't this cute family of polar bears just the cutest?


The Memories & More cards are perfect for crafting when time is of the essence - and this set of four legged friends is just adorable! They are making me sleepy just looking at them - so contented.

Here is the visual summary of the key products used on today's project for you to pin for easy reference:


You can see all of my Product and 'How To' summaries on my 'How To - Tips and Techniques' Pinterest board in case you've missed any. 

Before you reach for your ink and papers, check out what our amazing team has created to inspire you this week:

Here's a quick recap of our challenge rules:
 
1.  Create a new paper project
2.  Upload your creation to your blog with a link back to us and provide a direct link to the post featuring your challenge submission.
3.  Please link your card to no more than four challenges, TOTAL.
4.  Have FUN!

Enjoy your day; I'll be back soon with another project. Until then, happy stampin'!


Timeless Arrangements Thank You Card and Envelope Gift Box FF0142

by Joanne James1. September 2023 09:00

Today I have my project for the new challenge over at Festive Friday Card Making and Paper Crafting Challenge


The challenge that we are celebrating this week is 'World Gratitude Day' which is on September 21st. Remember the fun thing is that at Festive Friday you do not need to actually celebrate the occasion; your goal is to simply use three or more items from the inspiration list on your project. This week I did embrace the challenge theme wholeheartedly and used ribbon, gift packaging, die cuts, flowers and thank you and this is what I came up with:
 

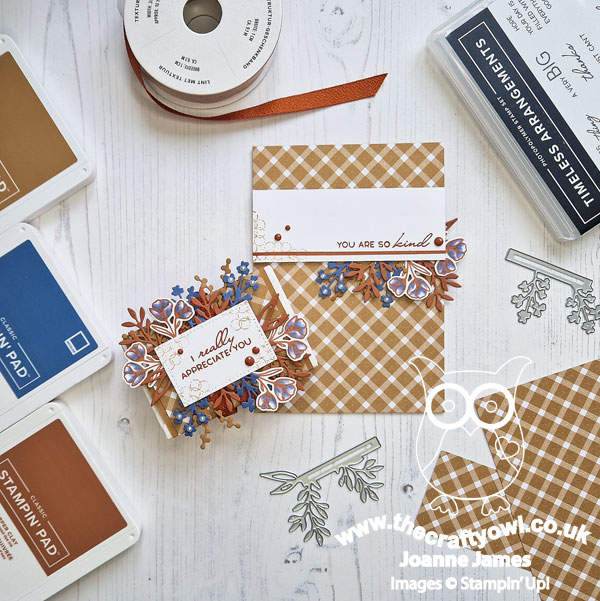
I created both some gift packaging and a co-ordinating card using the lovely autumnal colour palette over at Hand Stamped Sentiments this week. Here's the low-down on today's projects:

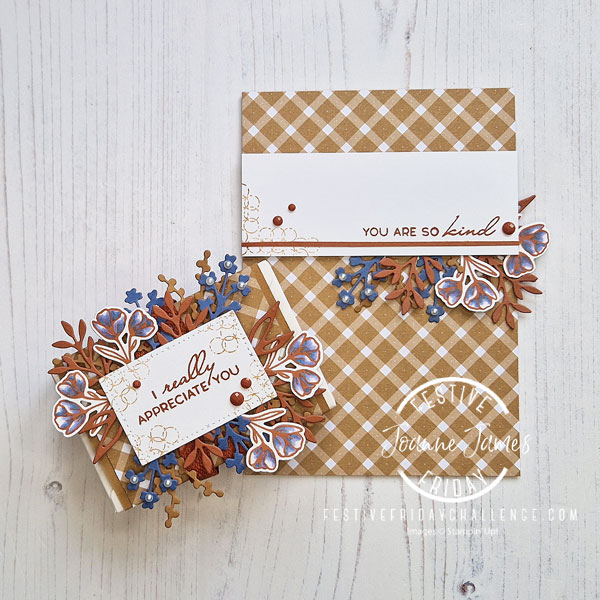
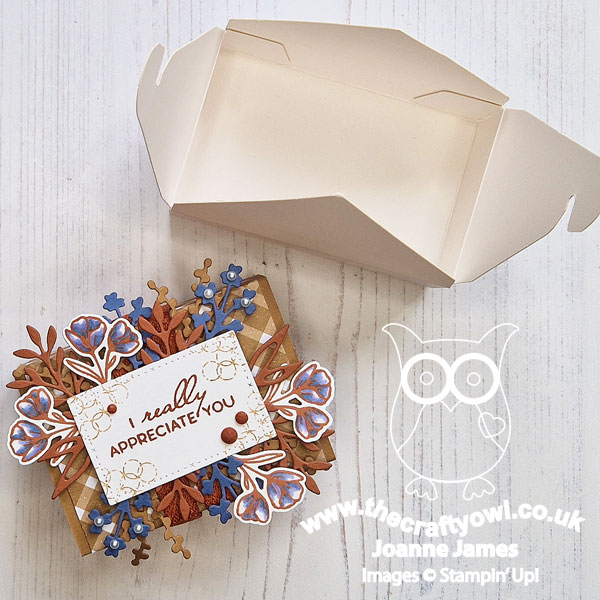
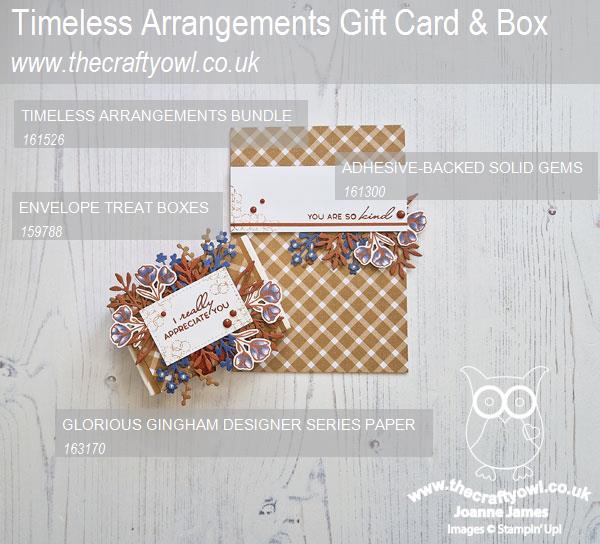
Gift Packaging Made Easy - For my gift box, I created a decorative belly band for one of the Envelope Treat Boxes that can be found on page 126 of the Stampin' Up! annual catalogue. Have you seen them? They are white, stampable boxes that measure 2 1/4" x 3 1/2" x 1" when folded and are perfect for packaging little treats. I made my wrap using the Glorious Gingham designer paper in Pecan Pie, then added a label that I decorated with foliage and stamped and coloured flowers and a trio of solid gems:
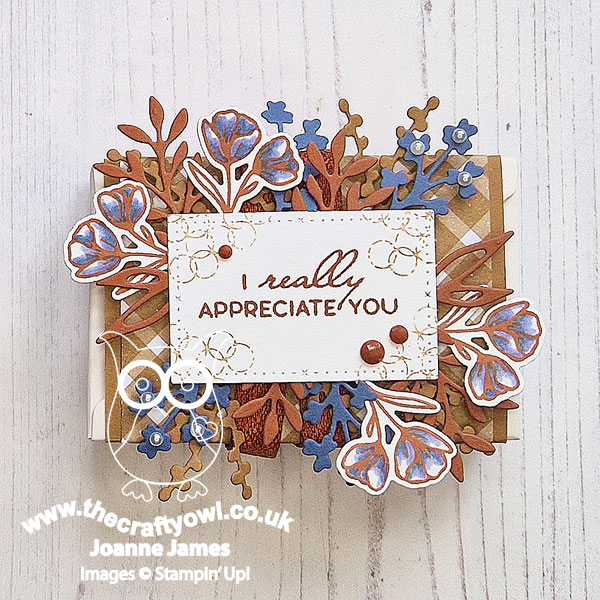
 

Here's a picture with the belly band removed, so that you can see how the box opens (gold foil stickers are also included with the boxes to seal them, although they are principally decorative - the box will hold itself closed):
 

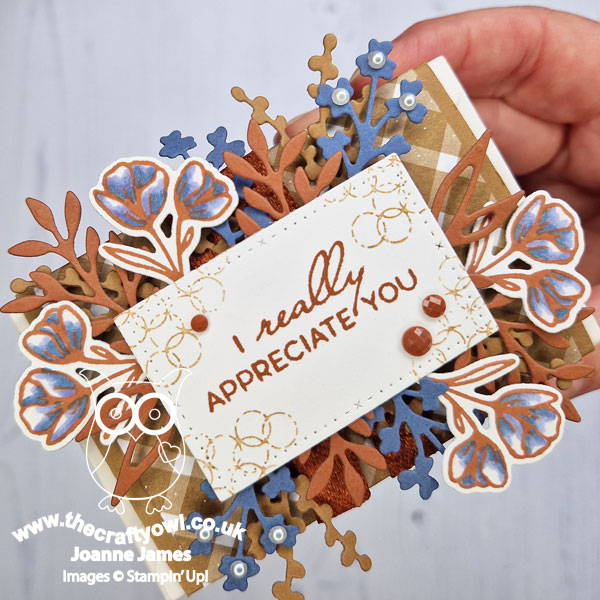
Here's a close up showing the stamping on my label and my coloured flowers - I just love the warm tones of this trio of colours together:
 

A Co-ordinating Thank You - I decided to create a co-ordinating card to give with my gift; I used elements of my packaging design and carried them into my card, using the simple layout over at Try Stamping on Tuesday as the basis for my design:
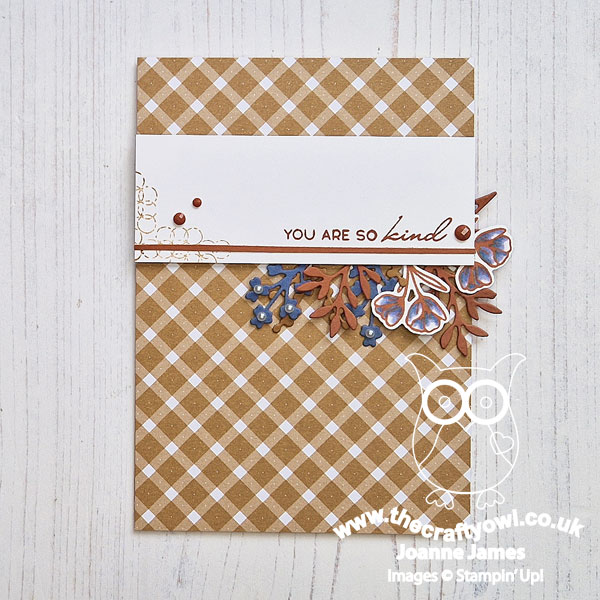
 

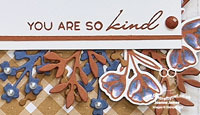
On my card I only added foliage to the bottom portion of the sentiment strip, to mimic the sketch; I also added a thin, solid strip of cardstock to highlight the simple thank you sentiment:
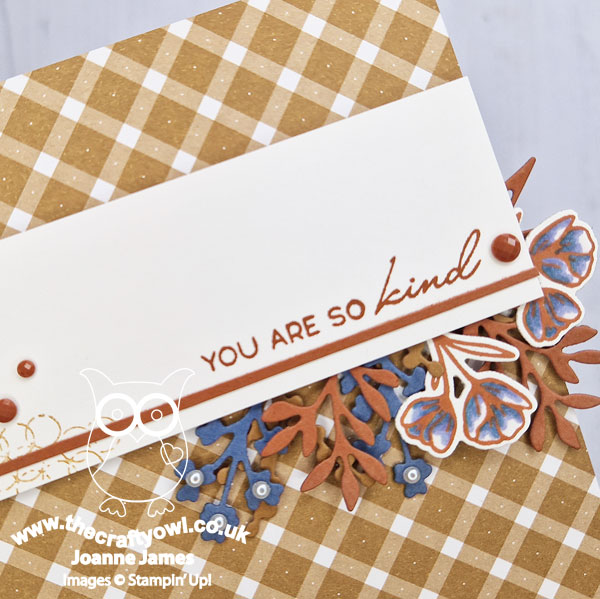
 

The layering of the foliage diecuts in the Timeless Arrangements bundle adds so much detail to this otherwise clean card and I love the blend of this trio of warm, almost autumnal colours. It's been so chilly here in the UK these past few days, this set fits right in!

Here is the visual summary of the key products used on today's projects for you to pin for easy reference:
 

You can see all of my 'How To' summaries on my 'How To - Tips and Techniques' Pinterest board in case you've missed any. 

How does our board inspire you? I can’t wait to see what YOU create! For more inspiration, be sure to visit the rest of the Festive Friday Card Making and Paper Crafting Challenge Design team:

 Enjoy your day and I'll be back tomorrow with another project. Until then, happy stampin'!
A Quick Beary Christmas Card for PP655

by Joanne James27. August 2023 08:00

Today it's Sunday and time for this week's new challenge over at The Paper Players! It's the turn of the fabulous LeAnne to host this week and she has my favourite, a sketch challenge for us to work with:


I thought that the main panel on LeAnne's sketch was crying out to frame something, so decided to create a quick and easy Christmas card using the panel with an aperture to frame a Memories & More card from the Beary Christmas set in the upcoming mini catalogue. - take a look:


Here's the low-down on today's card:

The new Beary Christmas Memories & More cards feature polar bears, trees, presents and patterns and are just great for quick and easy Christmas cards. I added a small one featuring a large sentiment and trimmed slightly to a Balmy Blue card base, then taking a smaller panel of Balmy Blue, cut a square aperture using the Stylish Shapes Dies then ran the whole panel through my diecutting machine with my (retired) Wintry 3D embossing folder - check out the lovely embossed effect in more detail on the close up below:

I added a Real Red ribbon and bow to complete my card. So simple, yet the embossing adds a really pretty detail. I'm linking today's card up over at 52 Christmas Card Throwdown where they are asking us to make Christmas cards that feature an embossing folder this week.

Here is the visual summary of the key products used on today's project for you to pin for easy reference:


You can see all of my Product and 'How To' summaries on my 'How To - Tips and Techniques' Pinterest board in case you've missed any. 

Before you reach for your ink and papers, check out what our amazing team has created to inspire you this week:

Here's a quick recap of our challenge rules:
 
1.  Create a new paper project
2.  Upload your creation to your blog with a link back to us and provide a direct link to the post featuring your challenge submission.
3.  Please link your card to no more than four challenges, TOTAL.
4.  Have FUN!

Enjoy your day; I'll be back tomorrow with another project. Until then, happy stampin'!


Dainty Delight Clean and Simple Thank You PP654

by Joanne James20. August 2023 08:00

Today it's Sunday and time for this week's new challenge over at The Paper Players! It's the turn of the fabulous Ann to host this week and she has a fun clean and simple challenge for us to work with:


I love clean and simple week! With the theme of 'insects' I was tempted to make another bee card this week, but instead decided to make a card showcasing one of the prettiest embellishments in the current catalogue - take a look:


Here's the low-down on today's card:

Brass butterflies - did you spot them? I stamped a simple spray of flowers and thank you sentiment from the 'Dainty Delight' stamp set, coloured my flowers with a variety of Blends (I've shared those that are still current below) and added a trio of brass butterflies for my insect embellishment:

These butterfly embellishments are small but pack a punch - when the catch the light they are so pretty! A super simple card today - #simplestamping at its best!

Here is the visual summary of the key products used on today's project for you to pin for easy reference:


You can see all of my Product and 'How To' summaries on my 'How To - Tips and Techniques' Pinterest board in case you've missed any. 

I'm also linking up today's card over at Color Dare; I went across the bottom row paprika/shortbread/mocha and also used honey yellow too.

Before you reach for your ink and papers, check out what our amazing team has created to inspire you this week:

Here's a quick recap of our challenge rules:
 
1.  Create a new paper project
2.  Upload your creation to your blog with a link back to us and provide a direct link to the post featuring your challenge submission.
3.  Please link your card to no more than four challenges, TOTAL.
4.  Have FUN!

Enjoy your day; I'll be back tomorrow with another project. Until then, happy stampin'!


Stampin' Up! Supplies Used: 

Table built using Product Table Builder by The Crafty Owl - Independent Stampin' Up! Demonstrator.

A Warm Hello With Circle Sayings For FF0141

by Joanne James18. August 2023 09:00

Today I have my card for the new challenge over at Festive Friday Card Making and Paper Crafting Challenge


The challenge that we are celebrating this week is 'National Beach Day' which is on 30th August. Remember the fun thing is that at Festive Friday you do not need to actually celebrate the occasion; your goal is to simply use three or more items from the inspiration list on your project. This week I used pastel colours, pearls and shells and this is what I came up with:


Here's the low-down on today's card:

I decided I would make a simple summery 'hello' card for my friend Elizabeth who leaves by the beach so I used a Pool Party background to evoke the sea and paired it with some pastel pinks an purples for a feminine touch. I added some horizontal stripes and coloured my collection of shells with co-ordinating Blends and a sprinkling of pearls and Fresh Freesia enamel gems:

Super simple and I really like that this card has a beachy, summery feel even with a pastel colour scheme. I'm also linking up over at Inspire.Create where their theme is summer so my shells should fit right in! I love collecting shells at the beach; I spent part of my vacation last year on Sanibel island off the coast of southern Florida, a place know for its magnificent shell beaches - here's one of my photos so you can see what I mean:


Shells as far as the eye could see for miles! I collected some beautiful shells and whilst I didn't find a prized junonia shell, I did see a beautiful conch one day whilst paddling in the sea - still inhabited though, so I left it where I found it. Perhaps I'll discover \n empty one next time!

Here is the visual summary of the key products used on today's project for you to pin for easy reference:


You can see all of my 'How To' summaries on my 'How To - Tips and Techniques' Pinterest board in case you've missed any. 

How does our board inspire you? I can’t wait to see what YOU create! For more inspiration, be sure to visit the rest of the Festive Friday Card Making and Paper Crafting Challenge Design team:

Enjoy your day and I'll be back tomorrow with another project. Until then, happy stampin'!


Stampin' Up! Supplies Used:

Table built using Product Table Builder by The Crafty Owl - Independent Stampin' Up! Demonstrator.

Textured Floral Birthday Blooms For PP653

by Joanne James13. August 2023 08:00

Today it's Sunday and time for this week's new challenge over at The Paper Players! It's the turn of the fabulous Anne Marie to host this week and she has a warm colour challenge for us to work with:


I love these warm colours together! I paired them with Jen T's fabulous sketch over at Freshly Made Sketches this week and grabbed one of my new sets to create a pretty birthday card - take a look:


Here's the low-down on today's card:

Textured Floral - You know when you think you have enough floral sets and you couldn't possibly need another one? Yep, that was so not me when we had the recent stamp sale! I picked up the Textured Floral stamp set and couldn't wait to create something with it. The texture on these stamps adds so much detail and whether you use in conjunction with the co-ordinating dies and layer or use the stamps along to create more of a collage feel, this is a stamp set with lots of possibilities. It's a great set for a beginner stamper too - you really can't go wrong with it! I stamped a mirrored collection of florals in opposing corners and added some additional Calypso Coral ink with a blending brush to achieve even greater warmth and colour.

A Straightforward Sketch? - I love Jen's sketch this week and it was perfect for me to experiment with my corner florals. When it came to that sentiment though, I dithered for ages! I did consider a simple horizontal sentiment stamped directly onto my floral panel (a more literal interpretation of the FMS layout), but my sentiment was overpowered by the bold florals. I ended up trying diecut sentiments in various shapes/colours, eventually settling on a white-on-black sentiment cut with one of my circular Stylish Shapes Dies. I added a twist of gingham ribbon behind it for a little extra detail:

I like this version better and I think with these bold colours the addition of black as a neutral works well. 

Finishing Touches - Finally you can see a hint of the decoration I added to the front of the envelope; I carried the design to the inside of the card too. No naked envelopes or insides here! I have lots of September birthdays to prepare for, so this one will be heading into my stash. I am looking forward to having more opportunities to play with this set!

Here is the visual summary of the key products used on today's project for you to pin for easy reference:


You can see all of my Product and 'How To' summaries on my 'How To - Tips and Techniques' Pinterest board in case you've missed any. 

Before you reach for your ink and papers, check out what our amazing team has created to inspire you this week:

Here's a quick recap of our challenge rules:
 
1.  Create a new paper project
2.  Upload your creation to your blog with a link back to us and provide a direct link to the post featuring your challenge submission.
3.  Please link your card to no more than four challenges, TOTAL.
4.  Have FUN!

Enjoy your day; we have nothing on, so will just be enjoying the peace and quiet! I'll be back soon with another project. Until then, happy stampin'!


Stampin' Up! Supplies Used: 

Table built using Product Table Builder by The Crafty Owl - Independent Stampin' Up! Demonstrator.

Mini Catalogue

BROWSE THE CATALOGUE

The mini catalogue is now live! Read and download your copy here.

Shop Online

Access my online shop 24 x 7, 365 days of the year:

Current April hostess code:

VDKNV7BH

Shop Online

Join My Team

It's always a great time to join Stampin’ Up! New team members can get £130 worth of products for only £99 + free business supplies + free shipping + all the fun being a part of Stampin’ Up! Stampin' Up! has something for everyone: join my growing team and benefit from my support to enjoy Stampin' Up! however you choose.

If you're interested, call me for a chat to understand how I can help you realise your goals. Alternatively, if you have already decided to sign up and you just can't wait, please click here for the link to the online form where you can sign up and order your starter kit right away! 

Latest Kit!

Stampin Cut and Emboss

The Rock Legend Kit has all you need to make 8 cards with coordinating envelopes. Along with the new Panda Friends Kit, both are available from January 4th for just £14 each - get yours here!

2023-24 Annual Catalogue

BROWSE THE CATALOGUE

Click on the catalogue for a full list of current SU! supplies - if you would like to order any of the items featured, please drop me a line at [email protected] or give me a call on 07773 421446 - I'd be happy to help.

New Online Exclusives

There are new products available exclusively in the online store from 5 March - check them out here.

About Me

Hi I'm Joanne and live in Northampton and when I'm not looking after my husband and two beautiful children, am an avid crafter with a passion for all things Stampin' Up!

I must confess that I have never been a big rubber stamper - until I discovered Stampin' Up! that is. I love the fact that I can get such great results with co-ordinating stamps, inks, papers and punches - the possibilities are endless! Join me on my stamping journey as I share the things I love and be inspired to create amazing things yourself!

Follow Me

Monthly Newsletter

Box Builder

Click the button above to use Box Buster to create your custom box design using the Envelope Punch Board!

Kits Collection Now Available!

Stampin Cut and Emboss

The new Kits Collection from Stampin' Up! is now available!

Click here to see the current kits available and order yours online today.

I Design For


Stampin' Up Stuff

This is my personal blog and is not endorsed by Stampin’ Up! I hope you find it a plentiful source of ideas and personal inspiration but please don't copy my designs for contest submission or use for classes, publication or sale without express permission.