Hello There Birdie - A Feathered Friend For The Paper Players

by Joanne James15. February 2015 09:00

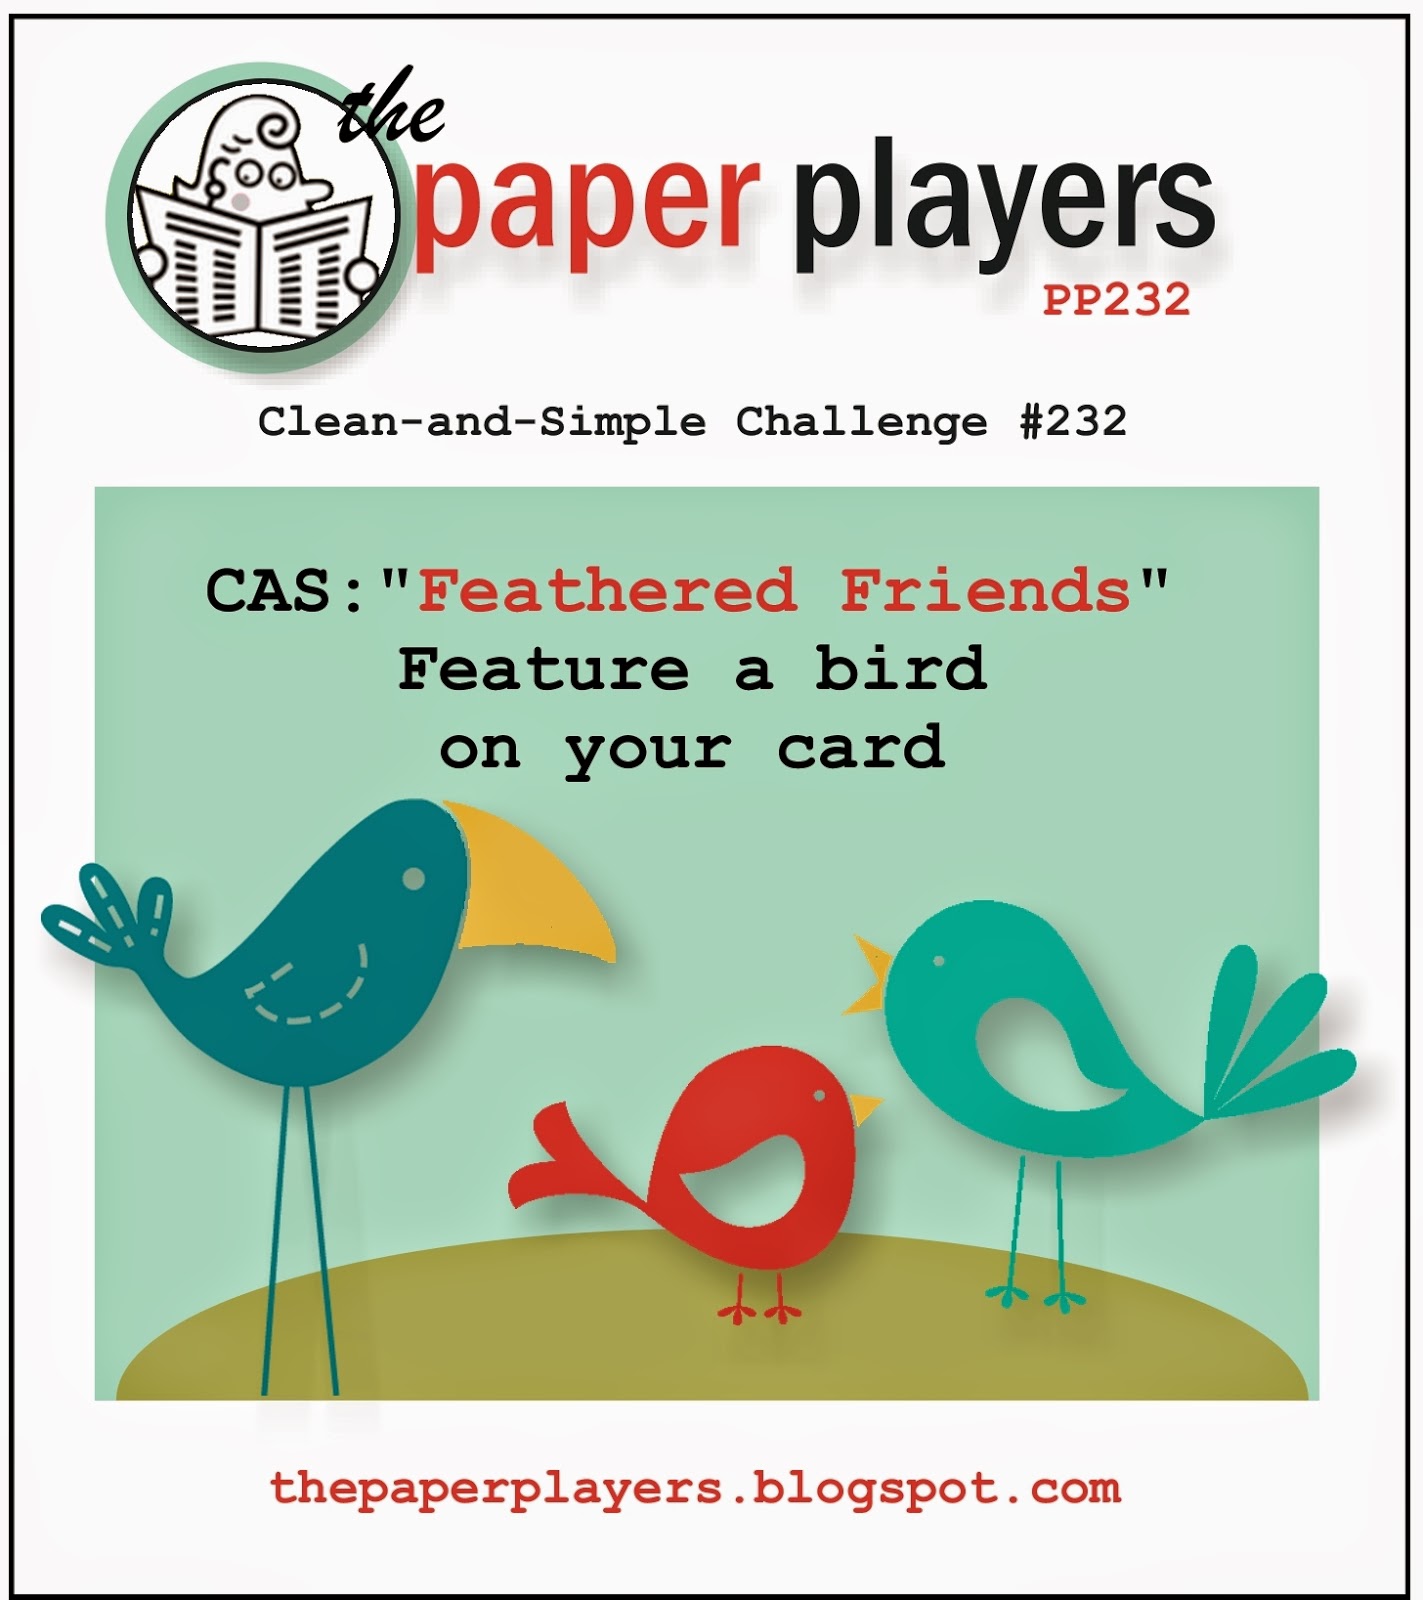
It's Sunday and time for this week's challenge over at The Paper Players - and this week it's a double does of excitement as I am hosting my very first challenge with this wonderfully talented group of ladies. 'Feathered friends' is the theme of my clean and simple challenge this week so I'm looking for a bird (or two!) on your card! Here is the wonderful challenge badge that the lovely Nance has created for this week's challenge:


This is one of those challenges when I was truly spoilt for choice - there are lots of great bird images around at the moment. I decided after my busy week that I was definitely in need of some theraputic colouring, so decided to reach for the quirky bird stamp in the Spring-Summer hostess set, 'Time To Celebrate':

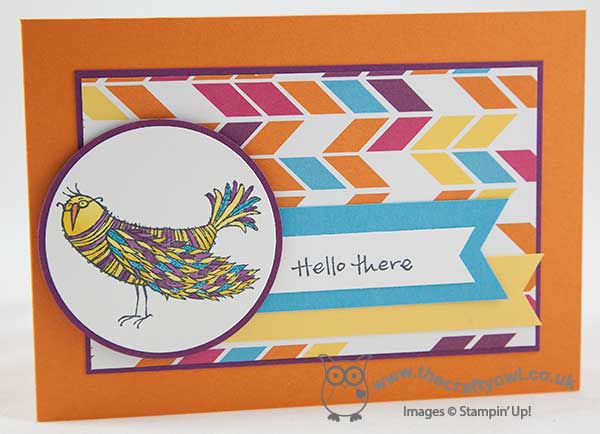
Since this bird doesn't look like any I've ever seen in my garden, I decided to throw caution to the wind and colour him in some totally tropical colours and really go to town! I used my Daffodil Delight and Rich Razzleberry Blendabilities markers and a Tempting Turquoise Stampin' Write marker and got colouring. I love that you can colour images like this and you really don't need to be any kind of expert to get a good result. Here's a close up of my bird so that you can see just how imprecise my colouring is: 

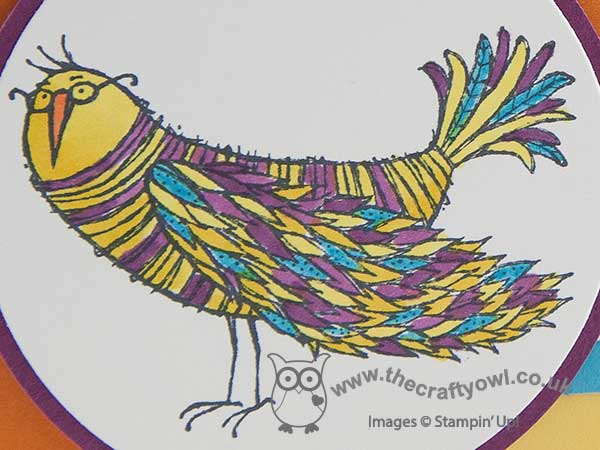
I really would urge anyone who is reading this and not tried colouring with Blendabilities to give it a go - I guarantee you'll like the results! I paired my bird with a piece of brightly coloured 'Sweet Taffy' paper and added a few simple banners in co-ordinating colours to finish off my card. I love the colours I used on my card today - Brights are my favourite of the Stampin' Up! colour families, and whilst there isn't a huge amount of 'white space' on my card due to my piece of bold, patterned DSP I love the finished card, which I think still has a clean feel with minimal layers and embellishments.

Before you reach for your ink pads, do visit the other design team members to see what interesting ideas they've had this week:

The Paper Players Design Team
 
Here's a quick recap of our challenge rules:
 
1.  Create a new paper project
2.  Upload your creation to your blog with a link back to us and provide a direct link to the post featuring your challenge submission.
3.  Please link your card to no more than three challenges, TOTAL.
4.  Have FUN! 

I look forward to seeing your bird projects in the gallery this week, whether chirpy, quirky or just plain feathered! The children are on half-term holiday this week so we are having a more restful week than usual. I was almost ready for a sport-free day today, when Ben was selected to play in a basketball tournament this afternoon. He is really excited about it though as it's his first one and he LOVES basketball, so is really looking forward to it.

Back tomorrow with another project; until then, happy stampin'!


Stampin' Up! Supplies Used:

Table built using Product Table Builder by The Crafty Owl - Independent Stampin' Up! Demonstrator.


Monochrome Butterfly Basics Card

by Joanne James14. February 2015 09:00

I hope you all received lots of Valentine's cards today - I certainly sent plenty! Today I'm sharing a card that I made using the Butterfly Basics stamp set to share with the ladies that attended my technique class earlier this week. In addition to the cards that I design for us to make in the class, I produce a selection of alternative samples to provide further ideas and ways in which they can use the stamp set and practise the techniques that we have covered. There are times when one of these cards produces so many 'oohs' and 'aahs' that it makes me wonder if I should have included the card as the class card - this is one of those cards!! The ladies made me promise I would blog it share with all of you, so here it is:

A monochromatic purple card on a base of Elegant Eggplant, featuring the lovely outlined bloom in the stamp set along with the lacy butterfly. There are lots of touches of sparkle on this card which in real life really add a touch of luxury: the thin strip of silver glimmer paper, the silver heat-embossed sentiment, the sparkling rhinetones and the vanilla smooch spritz sprayed onto the Wisteria Wonder butterflies that adds a subtle pearlescent finish.

I hope you like today's card; back tomorrow with this week's card for our new challenge over at The Paper Players - and it's my first one!

Until then, happy stampin'!


Stampin' Up! Supplies Used:

Table built using Product Table Builder by The Crafty Owl - Independent Stampin' Up! Demonstrator.


Tags: , , , , , , ,

Cards | Classes | Stamping

A Sweet Tweet For You!

by Joanne James13. February 2015 22:00

Yay it's Friday! It's been a long week and I'm glad the weekend is finally here. As it's Valentine's Day tomorrow, both James Juniors were keen to take some sweet treats into school to share with their class mates. I found these lovely heart-shaped jelly beans, that fitted perfectly into the thin cello bags:

This is just the first few - production became quite intense at one point and included boy- and girl themed packaging. You can see pictures of the total effort over on my Facebook page. These pretty pink ones were of course headed in the direction of the young ladies; we were stamping the tab top from the 'Hey, Valentine' set in a variety of pinks and colouring in with Blendabilities. Here's a close-up:

I definitely like the Melon Mambo one best (I'm such a 'brights' girl at heart) but they all look cute, especially with the addition of a heart-shaped Hodgepodge clip too. This little bag topper is a perfect fit for these cello bags and will work just as well at any other time of year too, not just Valentines. I also made a batch for a children's birthday party that I am hosting tomorrow afternoon, in pinks and purples. Our cello bags are great value at 50 for £2.25 and make such a nice way to create beautifully decorated party favours.

I'm told that the treats were well received by everyone which is nice to know and provided the perfect start to our forthcoming week-long half-term break.

Back tomorrow with another project; until then happy stampin'!


Stampin' Up! Supplies Used:

Table built using Product Table Builder by The Crafty Owl - Independent Stampin' Up! Demonstrator.


Another Hugs and Kisses Valentine's Card!

by Joanne James12. February 2015 07:00

Another quick, clean and simple Valentine's card for you today - a second crack at the 'hugs and kisses' challenge over at Addicted to CAS and Can You Case It:


My card was inspired by Kylie's in the ATCAS Design Team - it reminded me of the little 'xoxo' framelit in the circle thinlits set, which was perfect for the fun little game I had in mind - here's my card:

I cut out a few of the 'xoxo' in both Real Red and Basic Black, then snipped them apart so that I could use them for my game of tic-tac-toe. I created my 'board' by piercing some holes in my Whisper White layer and threading them with black baker's twine - here's a close up so that you can see it in more detail:

I substituted my final 'x' with a little red heart, popped up on a dimensional - sweet! Another no stamping card too - that doesn't happen often!!

Today's post is short and sweet too - I have a very busy day ahead so I'm off to get started. Back with another project tomorrow - until then, happy stampin'!


Stampin' Up! Supplies Used:

Table built using Product Table Builder by The Crafty Owl - Independent Stampin' Up! Demonstrator.


Tags: , , , , , , , ,

Cards | Punch Art | Stamping

Love, Hugs and Kisses Valentines Card

by Joanne James11. February 2015 09:15

I still have a couple more Valentine's cards to share with you this week, all of them quick and easy to execute though if you are making a last-minute card for your loved one! Today's card has been made using this week's sketch over at CAS(E) This Sketch and I am also entering it into the 'Hugs and Kisses' challenge over at Addicted to CAS and the colour challenge at Can You CASE IT:


This is one of those 'go to' sketch layouts for clean and simple cards and is also great for showcasing designer series paper, as I've done here with the hugs & kisses pattern from the 'Stacked With Love' DSP stack. Take a look: 

For the other half of my base layer, I used another of the black and white patterns in the stack, and used a heart framelit to create a die cut in my top red layer that allowed an element of the paper design to show through. I finished my card with a 'vintage' love die cut with my now retired Expressions thinlits - these are still available on the clearance rack and can be picked up for a bargain £13.79 and lastly rounded the bottom right corner of my card. Not a stamp in sight either - no risk of inky fingers with this one!

Simple but effective I hope you will agree! Back tomorrow with another Valentine's card to share with you; until then, happy stampin'!


Stampin' Up! Supplies Used:

Table built using Product Table Builder by The Crafty Owl - Independent Stampin' Up! Demonstrator.


Wednesday Weekly Deals Are Here!

by Joanne James11. February 2015 09:00

It's Wednesday so that means a new collection of Wednesday Weekly Deals! This week's deals are included below - they will be available for one week only, before a new collection of deals is announced.

As always, if you want to take advantage of any of the deals on offer, you can support my business by placing your order online by clicking here or using the link to my store on the right hand side of my blog page where it says 'Shop Online' or with me in person. Don't forget to add the Hostess Code for January/February (you can find this under the 'Shop Online' section on the right) and be sure to make sure that you don't check the 'no contact' box if you'd like to be kept updated with the progress of you order and receive a little thank you in the post from me. 

Here's a summary of this week's one-week only Wednesday deals - click on each item to go to the online store to purchase:

Table built using Product Table Builder by The Crafty Owl - Independent Stampin' Up! Demonstrator.

There are some lovely ribbons and a useful MDS download this week, but the real stars of the show are the Magnetic Platform - no Big Shot should be without one! - and the framelits and dies that are on offer - all really useful and great bargains to boot!

Back shortly with today's creative post; meanwhile, race you to the shop!

Tags: , , , , , ,

Promotions | Shop Online

Roses are Pink...Two-for-One Valentine's Cards

by Joanne James10. February 2015 08:00

Today I have not one but two cards for you! Both cards fit this week's colour challenge over at Pals Paper Arts, where there is a gorgeous colour palette to work with this week:

I absolutely love this colour combination and couldn't wait to create something pink and pretty with it. Here is my first card:

I layered the colours in two sections and in the central section used one of the lovely rose die cut panels from the Artisan Embellishment kit as a stencil and stencilled the roses in the two shades of pink, adding in touches of Basic Grey for the flower leaves. These die cuts are so beautiful - it's a shame there are only two in the kit! Here's a close up of the sponged area:


The form of the roses is just so pretty I think and looks really beautiful. I added a bow in luxurious silver satin ribbon and stamped my sentiment on the wide mat layer of Pink Pirouette, stamped in Versamark and heat embossed in pewter. This card is full of romance, but I think it would work equally well as a birthday card.

My second card today uses exactly the same colour palette, but is altogether a more clean and simple affair. This week the team over at Less is More is celebrating its 4th birthday and have a colour challenge of 'pink and grey'. Here is my card for this week's challenge:

My card started out as a two-tone pink and grey affair, with an inlaid split sentiment - I die cut the word 'love' using my Little Letters thinlits, then did the same with the cardstock the other way around top and bottom in order that I could paper-piece the reverse colours into the negative space. The more I looked at it though, the more it needed a little something else - I toyed with a scrap of Rose Red that sat on my desk leftover from the first card and the addition of the tiny heart with a tiny sparkle was just what it needed. You can see the detail of the die cut and inlaid letters below:

Congratulations to Chrissie and the team on their 4th birthday - you are an awesome bunch who run a most successful weekly challenge and are truly an inspiration. 

I'll be back tomorrow with another card; until then, happy stampin'!


Stampin' Up! Supplies Used:

Card 1: 

Table built using Product Table Builder by The Crafty Owl - Independent Stampin' Up! Demonstrator.
 
Card 2:
 
Table built using Product Table Builder by The Crafty Owl - Independent Stampin' Up! Demonstrator.

Butterfly Thinlits Paper Pieced Butterfly

by Joanne James9. February 2015 09:00

Today is a busy day for me: I have my monthly technique class this morning and this afternoon I'm heading to Ikea to stock up on picture frames for a party at the weekend. This month's technique class features the 'Butterfly Basics' stamp set and co-ordinating Butterfly Thinlit Dies, so I have been using them to make lots of samples recently. Today's card is one of the ones I made to show the ladies that are attending my class and works wonderfully with the palette over at Colour Q this week:

The butterflies can be used in a number of ways to incorporate colour into them - having seen some interesting samples using vellum and also colouring with Blendabilites, I decided to have a go at paper-piecing a solid butterfly image. Here is my card:


Whilst this card looks deceptively simple, with its inlaid black butterfly outline and coloured wings, I can assure you it isn't altogether quick to put together! Keeping track of all the tiny pieces from the insides of the four coloured butterflies I cut was something of a challenge, but was well worth it - I love the effect of the solid, brightly coloured paper-pieced butterfly. Here's a close up of the detail:

In addition, I also have the four coloured butterflies to use for other projects - bonus!

That's all from me today. check out my Facebook page if you would like to see the fun that the ladies are getting up to in my class and what this week's cakes look like! Better still, get in touch with me and join me for next month's technique class on 9th March, when we will be using Blendabilities and the lovely Easter stamp set, 'Indescribable Gift'. You can find more details on my class schedule here.  Back tomorrow with another project; until then happy stampin'!


Stampin' Up! Supplies Used:

* Pretty In Pink cardstock - retired

Table built using Product Table Builder by The Crafty Owl - Independent Stampin' Up! Demonstrator.


'I Do Love You' Valentine's Card

by Joanne James8. February 2015 08:00

Good morning lovely blog readers! Today it's Sunday and time for a new challenge over at The Paper Players, where this week the lovely Nance has this great colour combination for us:


I also used this week's sketch over at Mojo Monday for the layout of today's card. I was tempted to use the florals in the inspiration photo as the starting point for my card - isn't the badge great? Nance creates all our blog challenge badges and does such a fantastic job, thank you Nance! - but in the end the lure of my 'Stacked with Love' DSP paper stack was too strong and I decided to make another Valentine's card! Come and take a look:


I used one of the large sentiments from the 'Big on You' stamp set as the focal point for my card and stamped it in Versamark on blackboard paper and heat embossed in white. I rubbed a little white kraft ink around the edges to add to the chalkboard look and feel of this panel. The large sentiment allowed me to use a number of the other DSP patterns for the background layers to my card. Red and black are clearly taking centre stage on my card, but there are a couple of pops of Calypso Coral - both the flag banner behind the strip of punched hearts and in the popped-up heart, finished with a Real Red bow cut with one of the Mini Treat Bag Thinlit accessory dies and a rhinestone. I haven't made a card using these papers for over a week and I was clearly getting withdrawal symptoms; having got them back out on the desk I've been creating with them again and I have a few more cards to share that feature them this week, so stay tuned!

Before you reach for your ink pads, do visit the other design team members to see what interesting ideas they've had this week:

The Paper Players Design Team
 
Here's a quick recap of our challenge rules:
 
1.  Create a new paper project
2.  Upload your creation to your blog with a link back to us and provide a direct link to the post featuring your challenge submission.
3.  Please link your card to no more than three challenges, TOTAL.
4.  Have FUN! 

I look forward to seeing your projects in the gallery this week. I'm off to hockey this morning and looking forward to an afternoon with a spot of crafting and some fun with the rest of the family before the new week starts again in earnest.

Back tomorrow with another project; until then, happy stampin'!


Stampin' Up! Supplies Used:

Table built using Product Table Builder by The Crafty Owl - Independent Stampin' Up! Demonstrator.


Butterfly Basics For Freshly Made Sketches

by Joanne James7. February 2015 14:00

Today I'm sharing a card that I designed for my class next week using the Butterfly Basics stamp set and the co-ordinating Butterfly Thinlit Dies and this week's Freshly Made Sketch as my inspiration:


I created my card in the vertical mirror image as I wanted my ferns to lean into the centre of my card - take a look:

I used Naturals Ivory for my card today - I love the natural feel of this cardstock and it works so well when used in conjunction with nature images. I inked the fern stamp in Baked Brown Sugar and stamped it three times, without re-inking in between to create a graduated effect and some depth to the background. I layered my stamped sentiment banner on a piece of Baked Brown Sugar that I edged with the Large Scallop Edgelit and used the rope stamp for the horizontal element, then added a butterfly, stamped in Bermuda Bay, cut out with the smallest of the butterfly thinlits and finished with a small gold button and a strand of burlap tied in a bow. For the final element of the sketch I added the post mark stamp in Crisp Cantaloupe. 

I hope you like today's card, especially the ladies who are coming to class on Monday and for whom this constitutes a 'sneak peek'! Back tomorrow with our new challenge over at The Paper Players; until then, happy stampin'!


Stampin' Up! Supplies Used:

Table built using Product Table Builder by The Crafty Owl - Independent Stampin' Up! Demonstrator.


Mini Catalogue

BROWSE THE CATALOGUE

The mini catalogue is now live! Read and download your copy here.

Shop Online

Access my online shop 24 x 7, 365 days of the year:

Current April hostess code:

VDKNV7BH

Shop Online

Join My Team

It's always a great time to join Stampin’ Up! New team members can get £130 worth of products for only £99 + free business supplies + free shipping + all the fun being a part of Stampin’ Up! Stampin' Up! has something for everyone: join my growing team and benefit from my support to enjoy Stampin' Up! however you choose.

If you're interested, call me for a chat to understand how I can help you realise your goals. Alternatively, if you have already decided to sign up and you just can't wait, please click here for the link to the online form where you can sign up and order your starter kit right away! 

Latest Kit!

Stampin Cut and Emboss

The Rock Legend Kit has all you need to make 8 cards with coordinating envelopes. Along with the new Panda Friends Kit, both are available from January 4th for just £14 each - get yours here!

2023-24 Annual Catalogue

BROWSE THE CATALOGUE

Click on the catalogue for a full list of current SU! supplies - if you would like to order any of the items featured, please drop me a line at [email protected] or give me a call on 07773 421446 - I'd be happy to help.

New Online Exclusives

There are new products available exclusively in the online store from 5 March - check them out here.

About Me

Hi I'm Joanne and live in Northampton and when I'm not looking after my husband and two beautiful children, am an avid crafter with a passion for all things Stampin' Up!

I must confess that I have never been a big rubber stamper - until I discovered Stampin' Up! that is. I love the fact that I can get such great results with co-ordinating stamps, inks, papers and punches - the possibilities are endless! Join me on my stamping journey as I share the things I love and be inspired to create amazing things yourself!

Follow Me

Monthly Newsletter

Box Builder

Click the button above to use Box Buster to create your custom box design using the Envelope Punch Board!

Kits Collection Now Available!

Stampin Cut and Emboss

The new Kits Collection from Stampin' Up! is now available!

Click here to see the current kits available and order yours online today.

I Design For


Stampin' Up Stuff

This is my personal blog and is not endorsed by Stampin’ Up! I hope you find it a plentiful source of ideas and personal inspiration but please don't copy my designs for contest submission or use for classes, publication or sale without express permission.