by Joanne James14. November 2014 21:36Today I thought I would share with you the Christmas star wreath I made at my class yesterday. I used the All is Calm Speciality Designer Series Paper for my version, which looks like this:
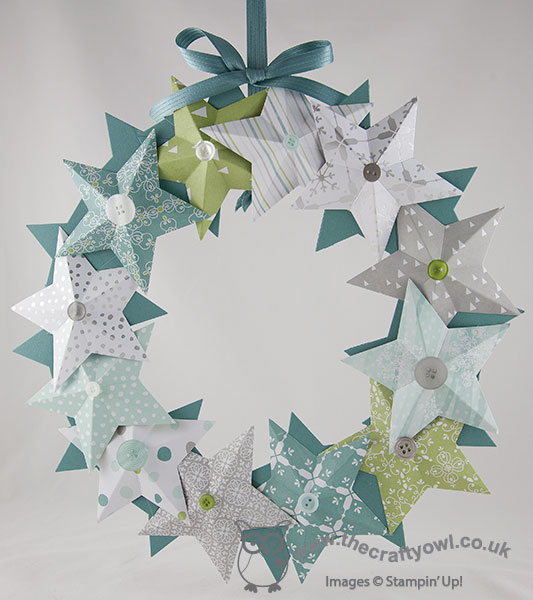
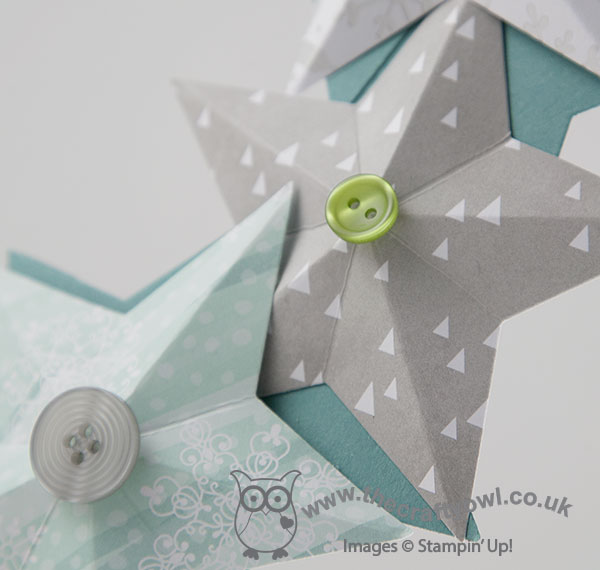
I layered a circle of Lost Lagoon flat stars, cut out with my Stars framelits, onto my wreath base, then cut 12 stars out of the All Is Calm Speciality DSP for the 3D stars. Each of these stars was scored from the point to the opposite side then pinched together to create the dimension and once glued to the wreath base, finished with a selction of Brights, Neutrals, Subtles and silver buttons:
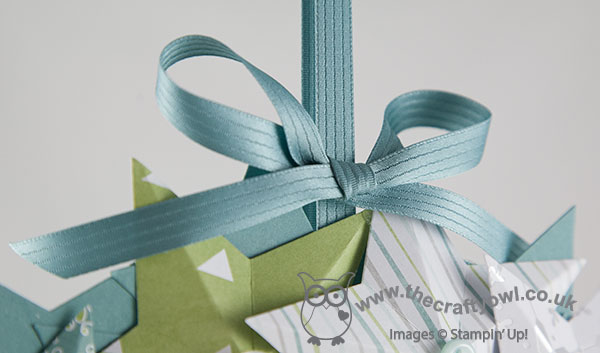
To finish, a length of the luxurious In-Colour Lost Lagoon satin ribbon to create a bow and hanging loop:
You can see another example of this wreath made with the Under The Tree Speciality DSP over on my Facebook page - it looks lovely in the kraft and more traditional, red, greens and browns, so do check it out. I have another of these classes next week where the ladies will be making them using other papers of their choice.
I hope you like today's project; this is going to be my indoor wreath as it matches my dining room colours perfectly; I have another two wreaths to share with you in coming weeks, so if home decor is your thing, keep an eye out for the other versions!
Back tomorrow with another project; until then, happy stampin'!
Stampin' Up! Supplies Used:
5659ab48-c840-43d3-b738-3ab09bab83d3|0|.0|96d5b379-7e1d-4dac-a6ba-1e50db561b04
Tags: 3D Projects, All Is Calm, Big Shot, Christmas, Shop online, Stampin' Up, Stampin' Up Card ideas, Stampin' Up Supplies, Star Framelits, Wreaths, In Colours
3D Projects | Classes
by Joanne James13. November 2014 20:10Today I'm sharing my card for this week's challenge over at Less is More, where the focus for this week's one layer challenge is a 'starry, starry night'. I was aiming for an early LIM entry this week and this post was originally scheduled for Tuesday, but best laid plans and all that .... So two days later, here it is:
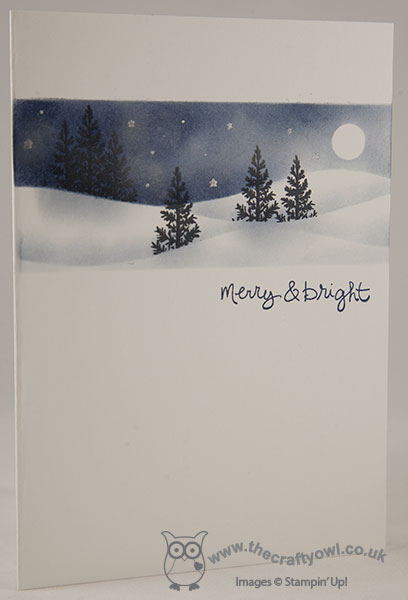
So how did I create today's card? Well, I've been wanting to create a sponged snowy scene for a while, so this card was the perfect opportunity. I masked off a horizontal panel, added a masked circle for my moon and then created a 'hill' mask to create my landscape itself. I sponged in my sky using Night of Navy ink and used the same colour to highlight the edges of the snow dunes and some subtle tree shadows (I did this bit after I stamped in the trees). Once I'd created my snowscape, I used the tip of the pine tree from the Festival of Tree stamp set to add in my trees. I stamped them in Memento Black ink, being careful to keep my mask in place each time so that the trees were behind the surface of the snow. To finish, I used some Encore silver ink to sponge in some tiny stars using a stencil I created with my Confetti Stars punch, along with a few dots added with my Silver marker. I also lightly sponged some Encore Silver onto some areas of the sky to add a subtle sheen. To finish, I stamped my sentiment from the 'Good Greetings' stamp set beneath my scene. Here's a closeup of the scene itself so that you can see it in more detail:
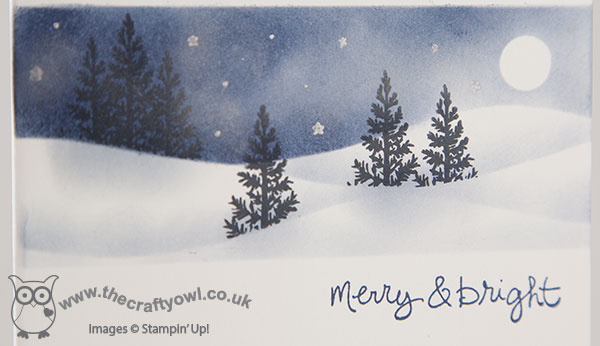
For such a 'blue' card, this really is very pretty and for a one layer card has so much going on. I think I might have to make a few more like this!
Back tomorrow with another card; until then, happy stampin'!
Stampin' Up! Supplies Used:
998fba23-8838-4f0a-a0f9-7baa554c0316|0|.0|96d5b379-7e1d-4dac-a6ba-1e50db561b04
Tags: Christmas, circle punch, Confetti Stars Punch, one layer cards, Festival of Trees, Good Greetings, Shop online, Sponging, Stampin' Up, Stampin' Up Card, Stampin' Up Card ideas, Stampin' Up Supplies
Cards | Stamping
by Joanne James12. November 2014 09:07It's Wednesday and time for this week's challenge over at Colour Me...! where we have a striking palette for you to work with this week:
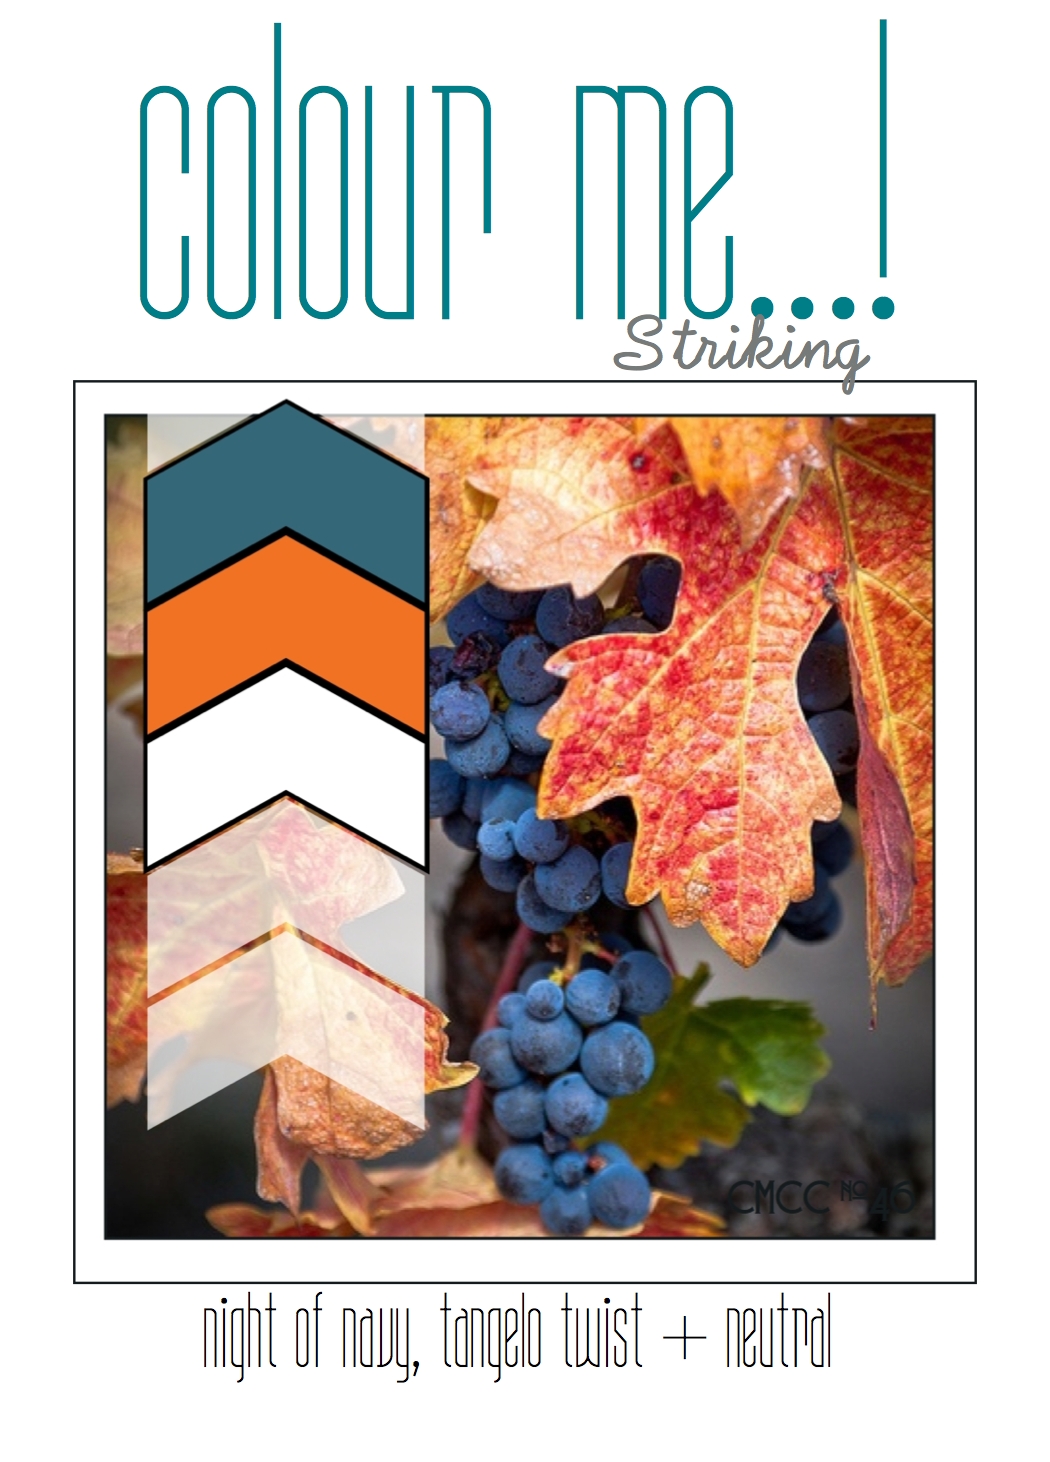
This week's colours put me in something of a quandry: I am completely into Christmas makes at the moment, but these colours really weren't shouting Christmas at me, not even in an unconventional sense! I also considered a fall/autumn themed card, but in the end decided to make a card to add to my 'ready to go'stash that could be used for a number of different purposes. So here's today's card:
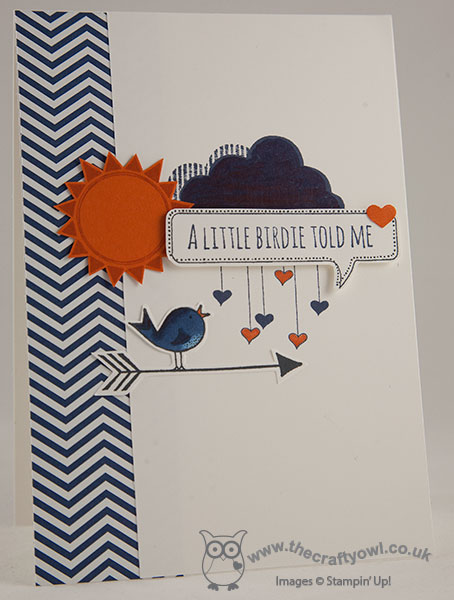
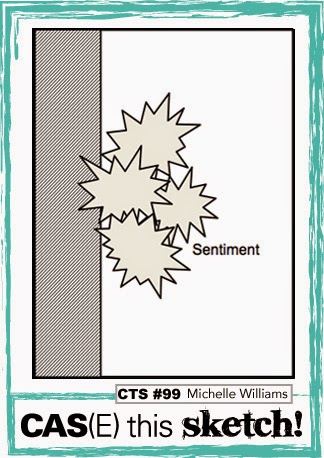
I used this week's sketch over at CAS(E) This Sketch for my layout and the hostess set 'Hello Love' which has the cute little birds in it and decided to make a clean 'collage style' card using the various images in the set and creating some subtle layering of the various elements. I used my Night of Navy Stampin' Up! Blendabilities pens to colour in the bird and also to colour in the words 'hello love' which would otherwise be on the cloud, as I wanted my sentiment to be contained within the word bubble. This is such a fun set as it comes with a number of possible second sentiments, so that you could make the card into a number of different types of congratulations card. I haven't actually stamped the inside, although I think I might add the birthday sentiment as this card would make a fun card for my nephew's birthday next week (according to my daughter!)
So what do you think? Feel free to leave a comment on today's card, before hopping over to check out the amazing cards by the rest of the Colour Me...! team:
We look forward to seeing your striking creations - what do these colours inspire you to create?
I have another busy day today, with my monthly Project Life class this afternoon, a team meeting this evening and a wreath class tomorrow (I'll be sharing some of these outputs later this week!) Back tomorrow with my card for this week's one layer challenge over at Less Is More; until then, happy stampin'!
Stampin' Up! Supplies Used:
732cbc24-2c1b-4ee0-933c-dc9996257752|0|.0|96d5b379-7e1d-4dac-a6ba-1e50db561b04
Tags: Hello Love, Host a Party, Colour Me...!, Design Team Member, Blendabilities, Hearts Border Punch, Stampin' Up, Stampin' Up Card, Stampin' Up Card ideas, Stampin' Up Supplies, Shop online
Cards | Stamping
by Joanne James12. November 2014 09:00It's Wednesday so that means a new collection of Wednesday Weekly Deals! This week's deals are included below - they will be available for one week only, before a new collection of deals is announced.
As always, if you want to take advantage of any of the deals on offer, you can support my business by placing your order online by clicking here or using the link to my store on the right hand side of my blog page where it says 'Shop Online' or with me in person. Don't forget to add the Hostess Code for November (you can find this under the 'Shop Online' section on the right) and be sure to make sure that you don't check the 'no contact' box if you'd like to be kept updated with the progress of you order and receive a little thank you in the post from me.
Here's a summary of this week's one-week only Wednesday deals - click on each item to go to the online store to purchase:
Some great offers this week, including the borders plate and diagonal plate for your scoreboard. If you have a standard Simply Scored scoreboard, the diagonal plate is a useful addition for enveloping making and the borders plate is great for adding detail to your cards, envelope flaps or to create additional detail on your scrapbook pages. MDS, buttons, embossing powder and ribbons too - what more could you want?!
Back shortly with today's creative post; until then, happy shopping!
by Joanne James10. November 2014 21:46It's Monday - yay! I've spent most of my day at the swimming pool watching both James juniors taking part in an inter-school gala. The school team didn't win, but there was some stiff competition and all of the children put in a sterling effort. I got home and managed to get a couple of cards made, so all in all a good day. Today's card is for the challenge over at CAS Colours and Sketches where this week its a colour challenge and a new (to me) challenge that I've come across called Addicted to Stamps where the inspiration photo caught my eye:
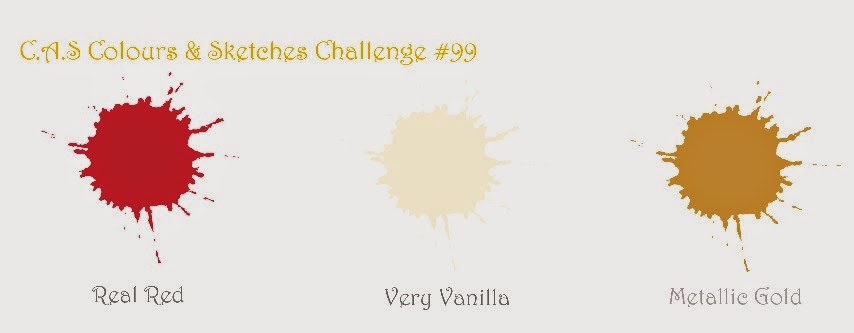

With these colours and that fabulous sparkly bauble, I just had to make a Christmas card; here it is:

I used Real Red for my card base and then matted a panel of Very Vanilla with Brushed Gold. I stamped a sentiment from the Bright and Beautiful sentiment in Real Red, then created two baubles, each made from a circle punched out of Real Red cardstock with a 1 3/4" circle punch and punched with the Confetti Stars punch to reveal the gold foil stars underneath (this is a second 1 3/4" gold foil circle adhered behind). One of my baubles is adhered directly to the card an one popped up on dimensionals. Each is finished with a ribbon bow of sparkly gold ribbon. I'm not sure the photo really does this card justice - the gold stars on the baubles do have more shine in real life.
That's me done for today. Back tomorrow with another Christmas card; until then, happy stampin'!
Stampin' Up! Supplies Used:
by Joanne James9. November 2014 07:00It's Sunday and time for a new challenge over at The Paper Players and this week Sandy has a fantastic colour challenge for us:
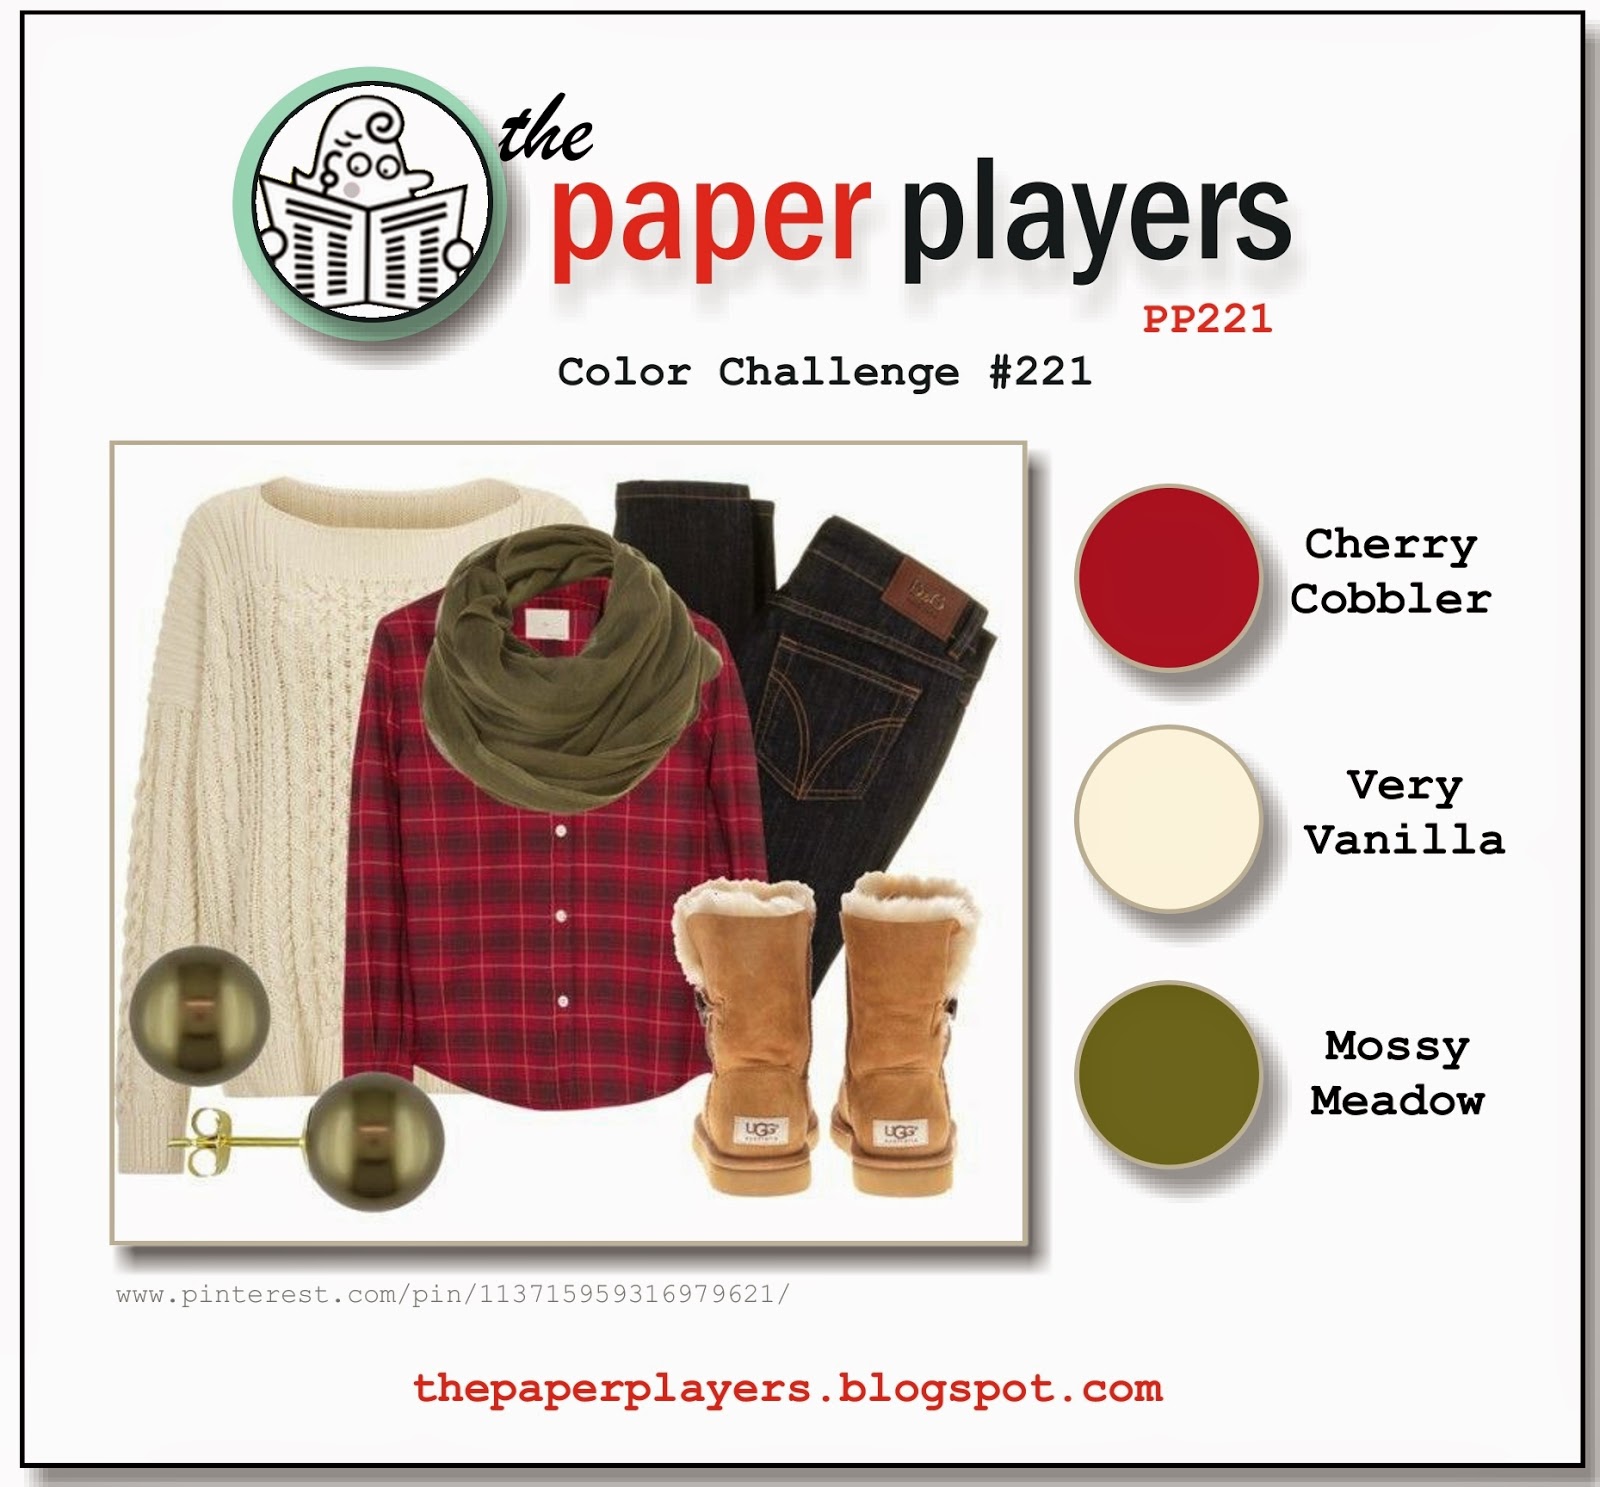
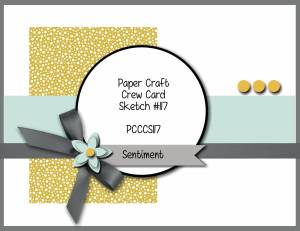
Aren't these colours so reminiscent of winter? I also used this week's sketch over at The Paper Craft Crew for the layout for today's card:
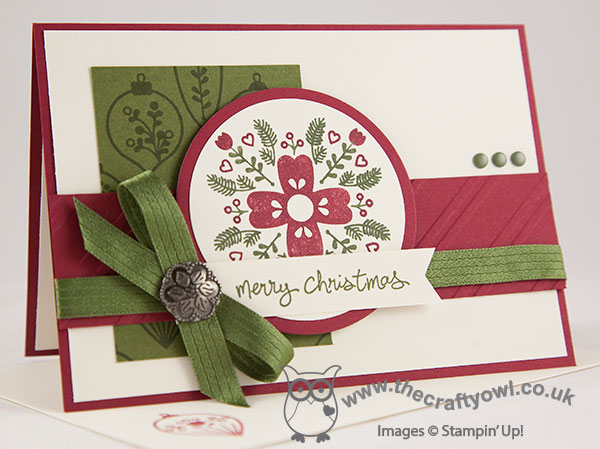
I used Cherry Cobbler for my card base and matted this with a piece of Very Vanilla cardstock. I created my own DSP for my background panel by stamping Mossy Meadow ink on Mossy Meadow cardstock and stamping a selection of the baubles from the Nordic Noel set. The focal image of my card is the main stamp in this set, which I coloured with my Mossy Meadow and Cherry Cobbler markers to achieve the two-colour pattern. A Stylish Stripes embossed panel added a little background texture and I finished with the gorgeous in-colour Mossy Meadow satin ribbon and an antique brad, along with a sentiment from Good Greetings. Lastly, there is a 'cheat' element to my card today - did you spot it? For all of you wondering where I managed to get my Mossy Meadow candy dots from, since they aren't in the catalogue, I'll let you into a secret - they're actually Always Artichoke! I'm hoping Sandy will forgive me, but as they aren't next to anything that is Mossy Meadow you cant see the subtle difference in colour so they do the job as far as my card is concerned. I won't tell if you don't ;-).
I hope you like today's card; do pop by The Paper Players gallery to see what the rest of the team have come up with - there are some great cards as always. There's even one by LeAnne that uses the exact same sketch layout as me, yet it looks completely different, so check it out for double inspiration!
Back tomorrow with another project; until then, happy stampin'!
Stampin' Up! Supplies Used:
9029a9f0-cd51-4a53-8d0f-9230cc557144|0|.0|96d5b379-7e1d-4dac-a6ba-1e50db561b04
Tags: Big Shot, Candy Dots, Christmas, circle punch, Circles Framelits, Nordic Noel, Shop online, Stampin' Up, Stampin' Up Card, Stampin' Up Card ideas, Stampin' Up Supplies, Stylish Stripes TIEF, The Paper Players
Cards | Stamping
by Joanne James7. November 2014 07:00Yay it's Friday - always a good day! Today I'm sharing my card for this week's Less is More challenge, where the theme is non-traditional colours on a Christmas card (specifically no red or green). I decided to go with another Nutcracker card - he is so perfect for non-traditional colour schemes, and this time with a very simple layout; here's my card:

I used a base of Soft Sky and layered a couple of mats of Rich Razzleberry and Soft Sky, then stamped my Nutcracker image directly onto the Soft Sky layer and did some basic paper piecing on the jacket and hat to add the Rich Razzleberry elements and the Soft Sky crown. His face was stamped on Blushing Bride and again paper pieced together. I coloured the eyebrows and hair using my Smoky Slate Stampin' Up! Blendabilities markers, and stamped the moustache in Memento Black onto Smoky Slate cardstock and popped it up on dimensionals. Some Rich Razzleberry candy dots on his crown and Soft Sky ones on his jacket complete the look.
There you have it - another non-traditional nutcracker card. Back tomorrow with another project; until then, happy stampin'!
Stampin' Up! Supplies Used:
by Joanne James6. November 2014 09:36Good morning everyone! I'm back with another Christmas card today - well, it truly is the season for it now! Today's card uses the sketch over at CAS(E) This Sketch which was the perfect layout for me to showcase some lovely Nordic Noel DSP and incorporate a layered die cut. Here's this week's sketch:
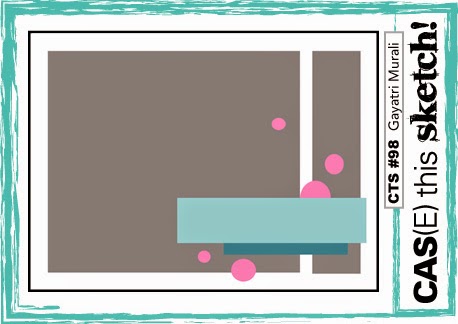
And this is my card:
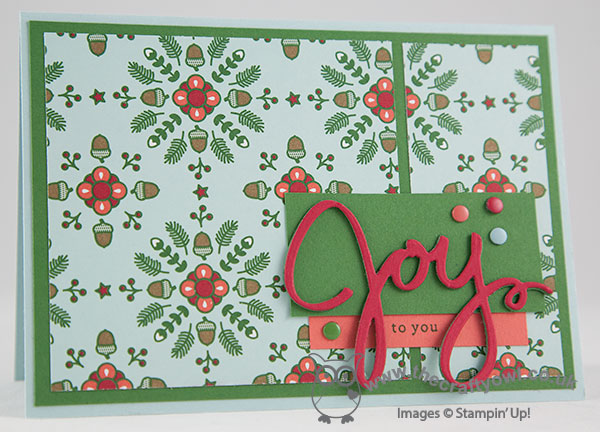
A simple layering of Garden Green on Soft Sky, followed by the Nordic Noel DSP. This paper has such a busy pattern I find it only really works on cards like this where there isn't anything to clutter it; I cut my 'Joy' die cut in Real Red, then stacked it on a couple of identical die cuts in Garden Green to give it real dimension (I used adhesive transfer sheets to hold the layers together, which made for very easy layering). I decided to mount it onto a rectangular piece of Garden Green cardstock, because the die cut didn't stand out enough against the patterned paper without, then I added the 'to you' from the Endless Wishes stamp set in Garden Green on Calypso Coral beneath it - the only stamping on today's card! Lastly, I added a sprinkling of candy dots in something of a nod to the sketch, albeit that I restricted use of them to the solid colour panels.
Hope you like today's card - if you like this layout you should check out the other cards on the CAS(E) This Sketch page - there are some great examples there.
Right, I'm off to get some work done - back tomorrow with another Christmas card; until then, happy stampin'!
Stampin' Up! Supplies Used:
by Joanne James5. November 2014 10:00It's Wednesday and time for this week's challenge over at Colour Me...! where we have a monochromatic palette for you to work with this week:
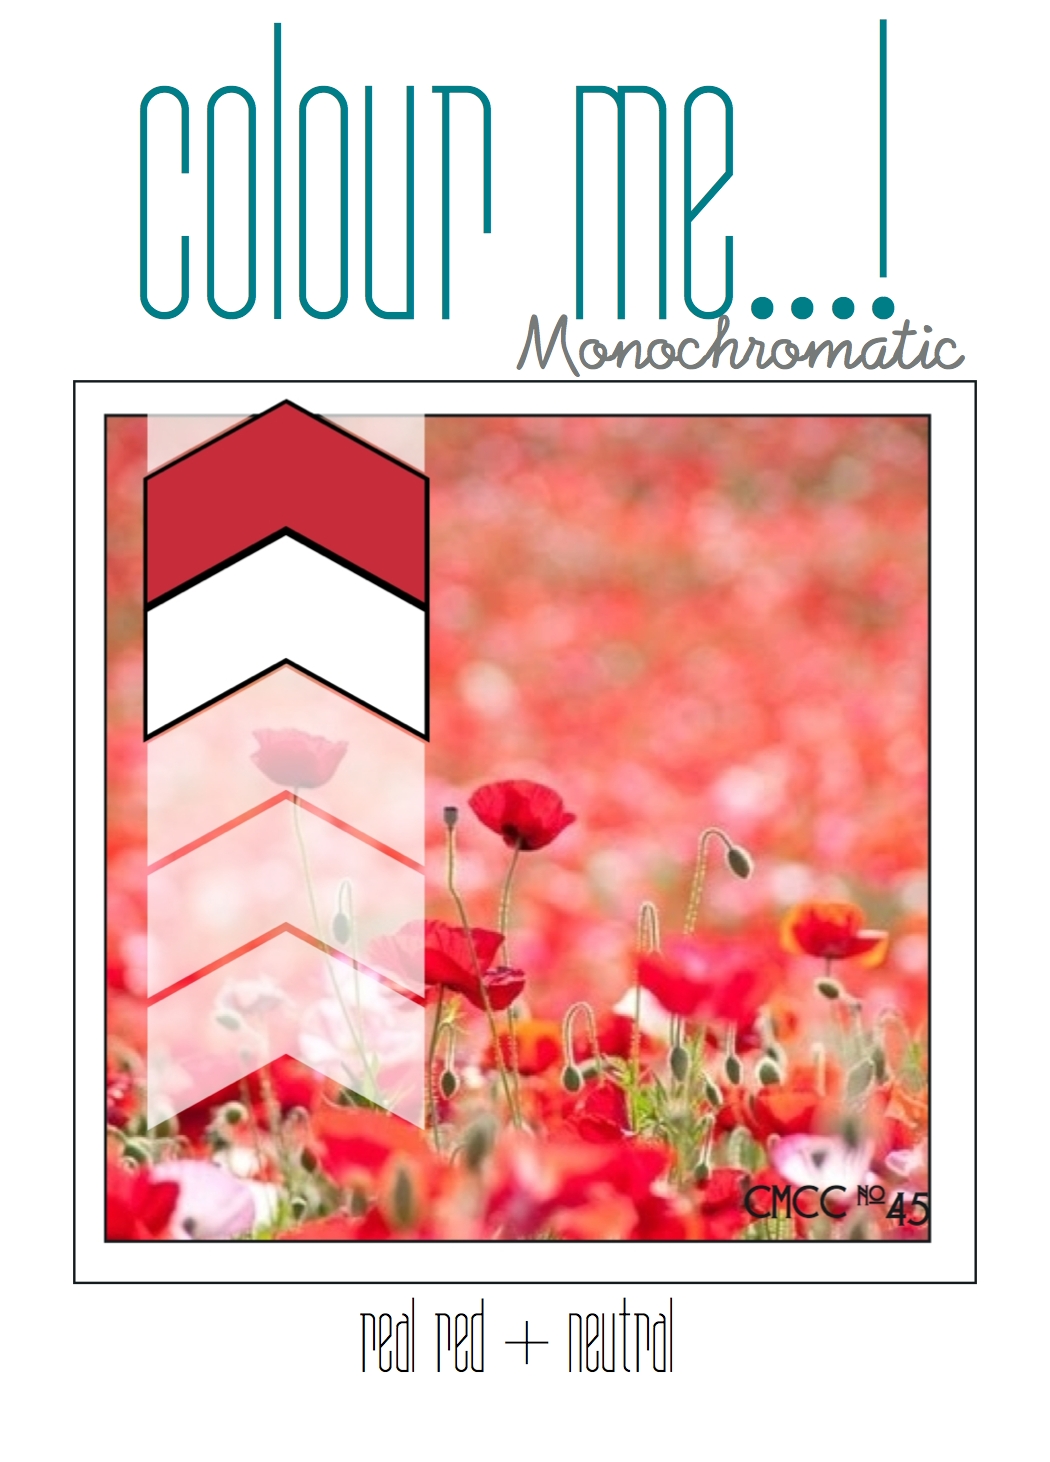
I decided to go with something CAS and festive with this week's feature colour of Real Red - here's my card:
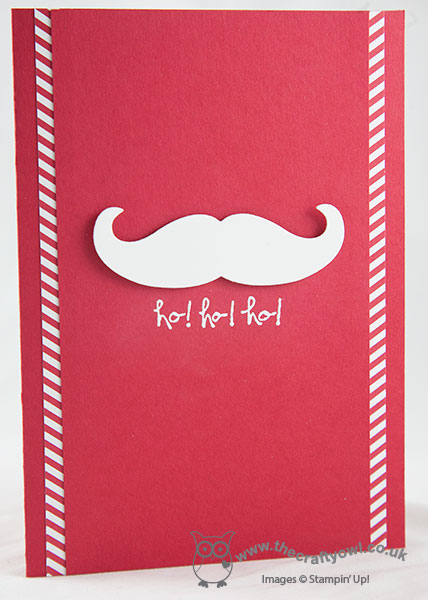
I used Real Read as my card base, then used some of the red chevron pattern paper from the Brights DSP stack down the centre of my card, which I then overlaid with another panel of Real Red, mounted on dimensionals. I cut a white Santa mustache using the Mustache Framelit and my Big Shot and adhered this using dimensionals and stamped my 'Ho, ho, ho!' sentiment from the 'Good Greetings' Stamp set in Versamark and heat embossed in White embossing powder to finish. Simple, yet effective, I think - I am surprised at just how much I love my Mustache framelit!
So what do you think? Feel free to leave a comment on today's card, before hopping over to check out the amazing cards by the rest of the Colour Me...! team:
We look forward to seeing your creative creations - will you go festive or choose something completely different?
I have another busy day today, with a trip to the hairdressers and Parent's Evening at school amongst other things. Back tomorrow with another project; until then, happy stampin'!
Stampin' Up! Supplies Used:
by Joanne James5. November 2014 09:32It's Wednesday so that means a new collection of Wednesday Weekly Deals! This week's deals are included below - they will be available for one week only, before a new collection of deals is announced.
As always, if you want to take advantage of any of the deals on offer, you can support my business by placing your order online by clicking here or using the link to my store on the right hand side of my blog page where it says 'Shop Online' or with me in person. Don't forget to add the Hostess Code for November (you can find this under the 'Shop Online' section on the right) and be sure to make sure that you don't check the 'no contact' box if you'd like to be kept updated with the progress of you order and receive a little thank you in the post from me.
Here's a summary of this week's one-week only Wednesday deals - click on each item to go to the online store to purchase:
A mixed bag of bits and pieces this week, with a scrapbooking kit, MDS, stamp set, triangle punch and a journal and sticker set, along with some vanilla coaster board.
Back later with my creative post - happy shopping!