by Joanne James15. August 2014 21:00No blog post yesterday as I took the James juniors to the zoo for the day and had a team get-together in the evening and didn't manage to squeeze one in! We had a great day at the zoo and managed to dodge the worst of the rain showers, so all good. Today I'm sharing a quick shaker card designed by Monica Gale that we made at our last quarterly team training day:
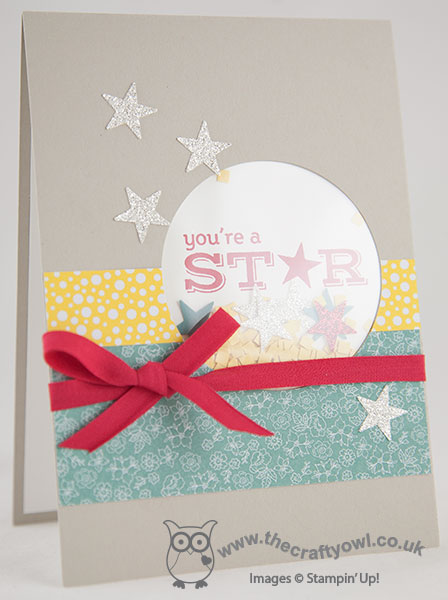
Not the best of photos I'm afraid as I struggled to beat the refection and glare on the window sheet, but hopefully good enough to get the idea. Shaker cards are all the rage at the moment and whilst you can build a window with depth for a card with real 'shake-ability (I'm sure it's a word!), you can also get the effect simply and easily by creating a pocket behind a punched opening and adding just a few elements - I added some glitter stars and square confetti created with my fringe scissors. The front of the card is simply decorated with a few strips of All Abloom DSP, some stars punched from the new Dazzling Diamonds Glimmer paper and a tied bow made with 1/4" Real Red cotton ribbon.
Short and sweet today! Back tomorrow with another project. until then, happy stampin'!
Stampin' Up Supplies Used:
97147742-8c49-4452-a304-7de7cc3e4ecb|0|.0|96d5b379-7e1d-4dac-a6ba-1e50db561b04
Tags: All Abloom, Pictogram Punches, Fringe Scissors, Itty Bitty Accents Punch Pack, Shop online, Shaker cards, Stampin' Up, Stampin' Up Card, Stampin' Up Card ideas, Stampin' Up Supplies, circle punch
Cards | Stamping
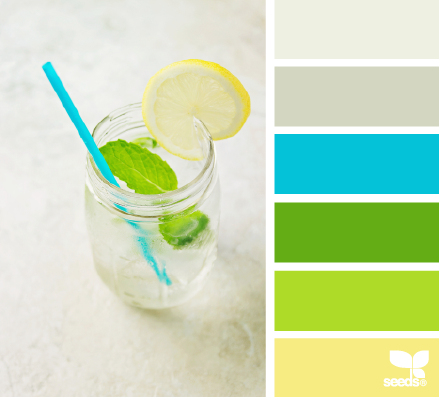
by Joanne James13. August 2014 10:00Time for this week's challenge over at Colour Me...! where we have this striking colour palette to work with this week:

After much thought, I decided that a fun card was the order of the day so I got to work creating another card with a custom sentiment using my Alphabet rotary stamp - such a useful stamp. Here's the outside of my card:

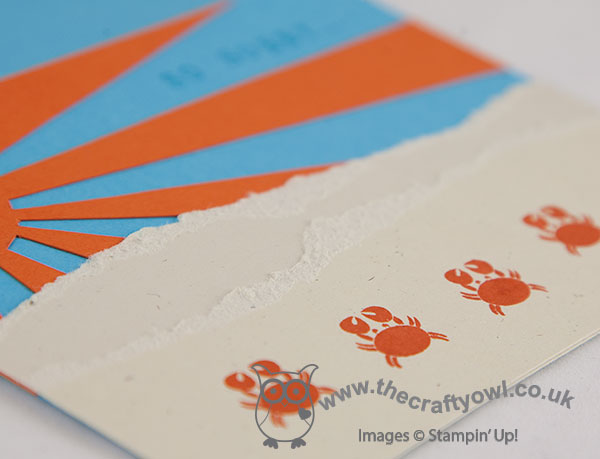
I used Tempting Turquoise for my base, then cut a Tangelo Twist starburst sun and adhered this to my base. I tore a couple of strips of naturals Ivory cardstock to look like sand, then randomly stamped a row of crabs across the front in Tangelo Twist ink and added the first party of my sentiment to the sky, stamped in Tempting Turquoise. The remainder of the sentiment continues on the inside of the card:
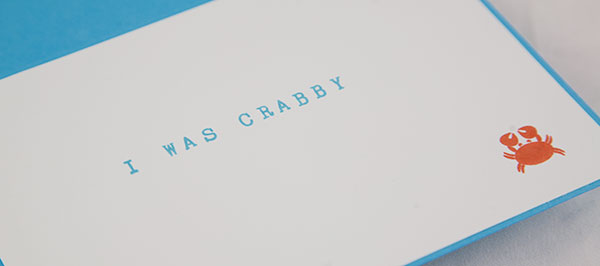
Fun, eh?! Let's face it - we all have times when we're grumpy and maybe others are on the receiving end of our less than happy demeanour - this would be the perfect fun apology! The Alphabet Rotary stamp is so useful for this kind of thing - you can create custom sentiments in a snap (pardon the pun!)
I hope you like today's card; why not visit the other Colour Me...! designers and check out their takes on this week's colour combination:
Back tomorrow with another project; until then, happy stampin'!
Stampin' Up! Supplies Used:
by Joanne James12. August 2014 08:00Today I'm sharing a card that I made for this week's challenge over at Less is More that is full of sneak peeks from the new seasonal Autumn-Winter catalogue that is launching at the end of the month. This week it's a one layer challenge with the focus on foliage; the minute I saw the theme, I knew exactly what I wanted to create. Here is my card:
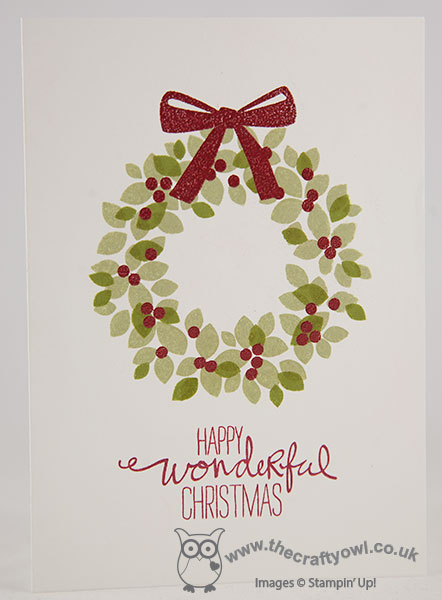
I have used the new Wondrous Wreath set for my card today. This set comprises layered elements to create a beautiful Christmas wreath and also comes with a set of co-ordinating framelits, that make light work or cutting out. It's a photopolymer set too, which makes for incredibly easy alignment of the images - no stamp-a-ma-jig required! For today's card though I used the stamps alone - they are also great for a one layer card. I stamped the base wreath in Pear Pizzazz, then stamped the second section in Old Olive. I then stamped the berries and bow in Versamark and heat embossed with Cherry Cobbler embossing powder to leave a lovely sheen. Lastly, I added the sentiment from the same set in Cherry Cobbler ink.
The seasonal catalogue is choc-full of amazing products, but I think this may turn out to be my favourite of the Christmas sets due to its sheer versatility. If you like the look of this set, you only have another 16 days to wait until the new catalogue launches.
Following yesterday's fun day of Lego building, a trip to the cinema and birthday cake, today I'm partying of a different kind - I'm demonstrating at a Stampin' Up! party this afternoon. Wish me luck! Back tomorrow with this week's Design Team card for the Colour Me...! card challenge. until then, happy stampin'!
Stampin' Up! Supplies Used:
*Wonderous Wreath - available 28th August
by Joanne James11. August 2014 08:00It's Monday and today I have a special card for a special day - today my youngest James Junior turns 7! I can't quite believe it - some days I'm not sure where the last 7 years have gone. So today I'm sharing a birthday card I made for Ben to celebrate his special day. I used this week's sketch over at the Paper Craft Crew as my inspiration:
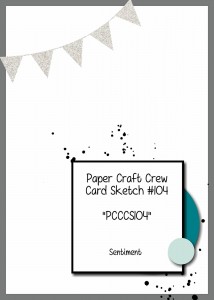
My card is slightly larger than usual - A5, 21cm x 14.9cm - and features a fun shaker element along with my favourite Sea Street stamp set:
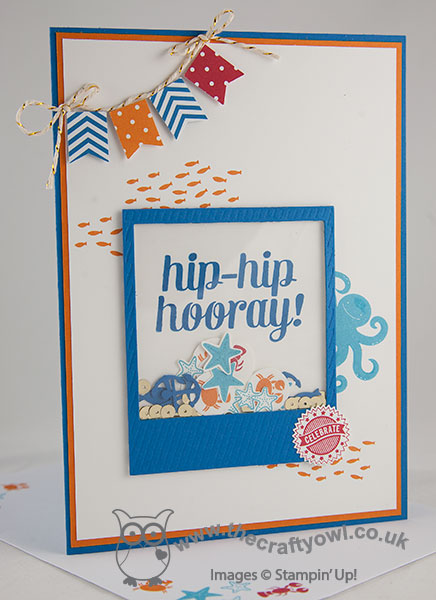
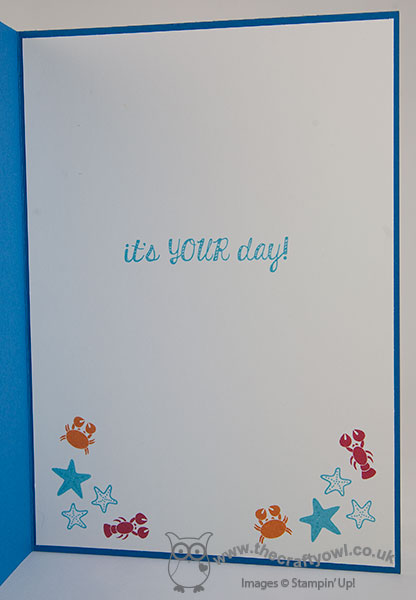
The shaker is made using the surround from the On Film framelit set and filled with fussy cut starfish, crabs, lobsters, gold sequins and some fish and anchors cut with my now retired Oh Whale! clearlit. I stamped the 'Hip Hip Hooray' onto the background before putting the shaker together and carried the sentiment on to the inside of the card:
We have a fun day planned today, including a visit to the cinema and maybe even a cycle ride on his new bicycle if the weather holds! Back tomorrow with another project; until then, happy stampin!
Stampin' Up! Supplies Used:
2c2eb077-9770-47ec-8a3c-b72d6218c1ee|0|.0|96d5b379-7e1d-4dac-a6ba-1e50db561b04
Tags: Bravo, Sea Street, Shop online, Stampin' Up, Stampin' Up Card, Stampin' Up Card ideas, Stampin' Up Supplies, Starburst Framelits, Starburst Sayings, Big Shot, Oh Whale, Shaker cards, On Film Framelits
Cards | Stamping
by Joanne James10. August 2014 08:00Yay - it's Sunday and time for a new challenge over at The Paper Players! Today Nance has an interesting colour challenge for us:
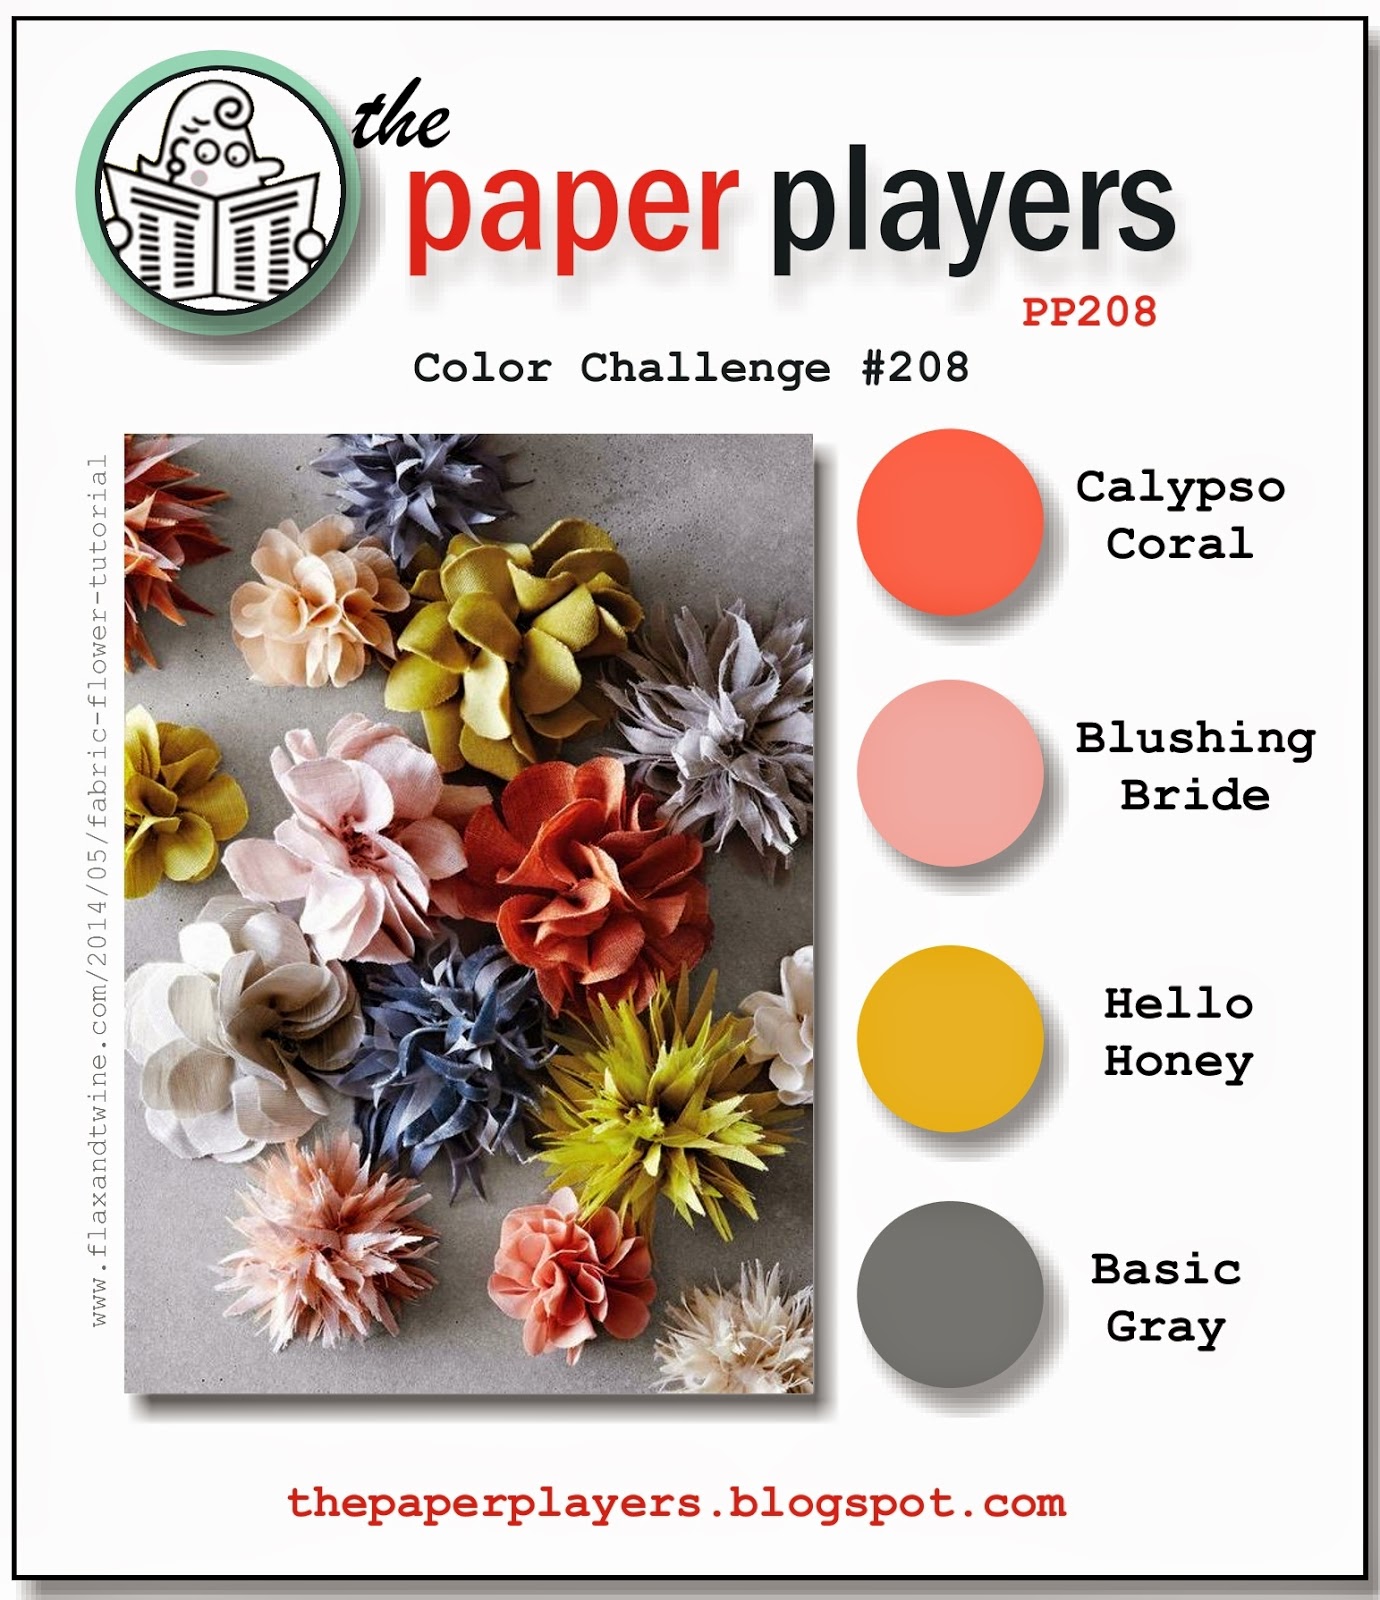

Today I have an unusual card to share with you, in more ways than one! When I saw Nance's colour palette, I immediately thought of the Simply Created Banner Kit that I used for the decorations for Rebecca's recent birthday party; I knew I had a few offcuts and leftover pieces of DSP from the kit and that Calypso Coral, Blushing Bride and Basic Grey were 3 of the feature colours of the add-on kit, so using this week's sketch over at Create with Connie and Mary as my starting point (perfect for using up scraps!) I set to work. Here is my finished card:
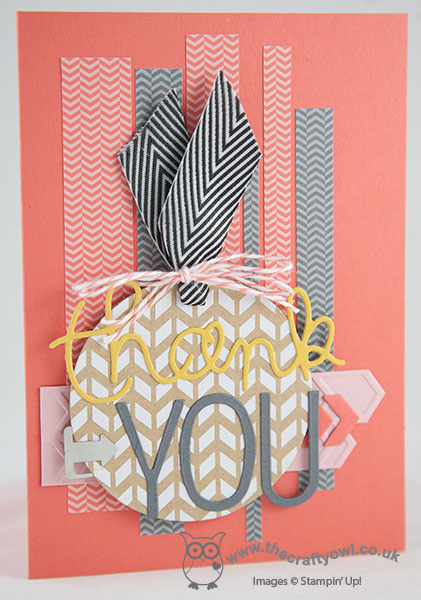
Using Calypso Coral as my base, I layered a number of strips of DSP in varying widths/lengths across the front of my card, alternating between the Calypso Coral/Blushing Bride chevron pattern and the Basic Grey/Smoky Slate chevron pattern. I then embossed a strip of Blushing Bride cardstock with the Arrows Embossing Folder and cut one end to a point. I layered some Calypso Coral chevrons that I had cut out with one of the framelits from the Circle Thinlit card, then created a tag, again using a pre-printed leftover tag from the kit. I added some black chevron ribbon (a little bit of a liberty as far as the colour scheme is concerned, but the closest match I could get from my stash!) and tied it with some retired Calypso Coral baker's twine in a double bow. I finished my tag with a die cut 'thank' in Hello Honey, part of the 'thankful' framelit from the now retired Expressions Thinlits set (still available on the European Clearance Rack if you fancy snapping up a bargain!) and the YOU cut out of Basic Grey with my Big Shot and the new Perfect Print Alphabet Bigz die. lastly, I added an Essentials Hardware Clip to my tag before adhering it to my card with dimensionals.
I love the idea of collage cards but find them really difficult to create, so am quite pleased with the way this arrow-filled card turned out. Also, on completion I realised that I hadn't done any stamping at all on this card - how unusual is that??! For more inspiration from the Design Team and to see the fabulous cards they've made using this colour palette, pop on over to The Paper Players blog to see what they've created and to link up your own card.
Back tomorrow with a fun birthday card; until then, happy stampin'!
Stampin' Up! Supplies Used:
4dcd9f68-b080-4270-8357-93f19d13890c|0|.0|96d5b379-7e1d-4dac-a6ba-1e50db561b04
Tags: Calypso Coral Celebration Add-on Kit, Perfect Print Alphabet Bigz, Expressions Thinlits Dies, Essentials Hardware Clips, Arrows TIEF, Circle Thinlit Card, Big Shot, Shop online, Stampin' Up, Stampin' Up Card, Stampin' Up Card ideas, Stampin' Up Supplies, Celebrations Basics kit
Cards | Punch Art
by Joanne James9. August 2014 20:53Yesterday we spent a fun day with friends and I was out in the evening, so didn't manage to squeeze in a blog post. However today I'm sharing two cards to make up for it! These are a couple of cards I made for Stampin' Up! using the Traveler stamp set that I demonstrated at the Stampin' Up! UK Regional Training Day in Telford at the end of May. The Traveler stamp set consists of a number of travel-themed sketch images and I created the cards that I'm sharing today to show that masculine cards don't always have to be dark or brown colours - take a look at the first one:

Both cards follow the same basic design: this one has a Marina Mist card base, with a Wild Wasabi panel stamped with the World Map stamp in the same colour, then the Very Vanilla tag is punched with the Angle Tag Topper Punch, stamped in Versamark and heat embossed with Early Espresso embossing powder and the globe sponged with Marina Mist and Wild Wasabi. An early Espresso bker's twine double bow finished it off and it is adhered to the card with dimensionals. The final banner is cut from Marina Mist and stamped in Early Espresso and embellished with a tag left over from my Hip Hip Hooray Simply Created card kit.
I created exactly the same card, this time using a much brighter colour combination just to pep things up a bit:
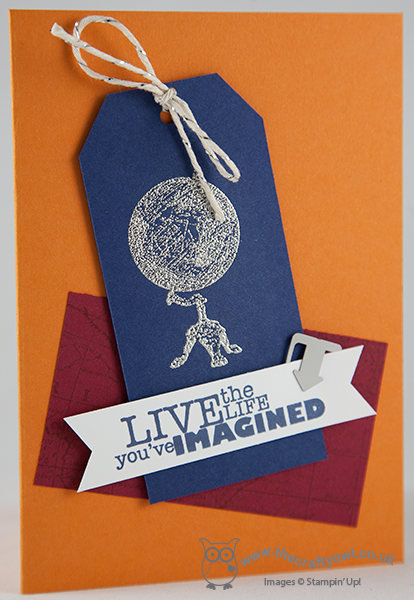
This time I used a Pumpkin Pie card base, stamped the map in Cherry Cobbler and embossed the tag in Silver on Night of Navy, tied with some silver baker's twine and finished with an Essentials Hardware Clip. As we enter the season for exam results during the next couple of weeks, I think these cards would make great congratulations cards for someone who has passed and is about to embark on a new phase - be that further study, travel, a new job.
So, thoughts - which colour scheme do you prefer? Leave me a comment below - I'd love to know what you think.
Back tomorrow with my design team card for this week's challenge over at The Paper Players; unitl then, happy stampin'!
Stampin' Up! Supplies Used:
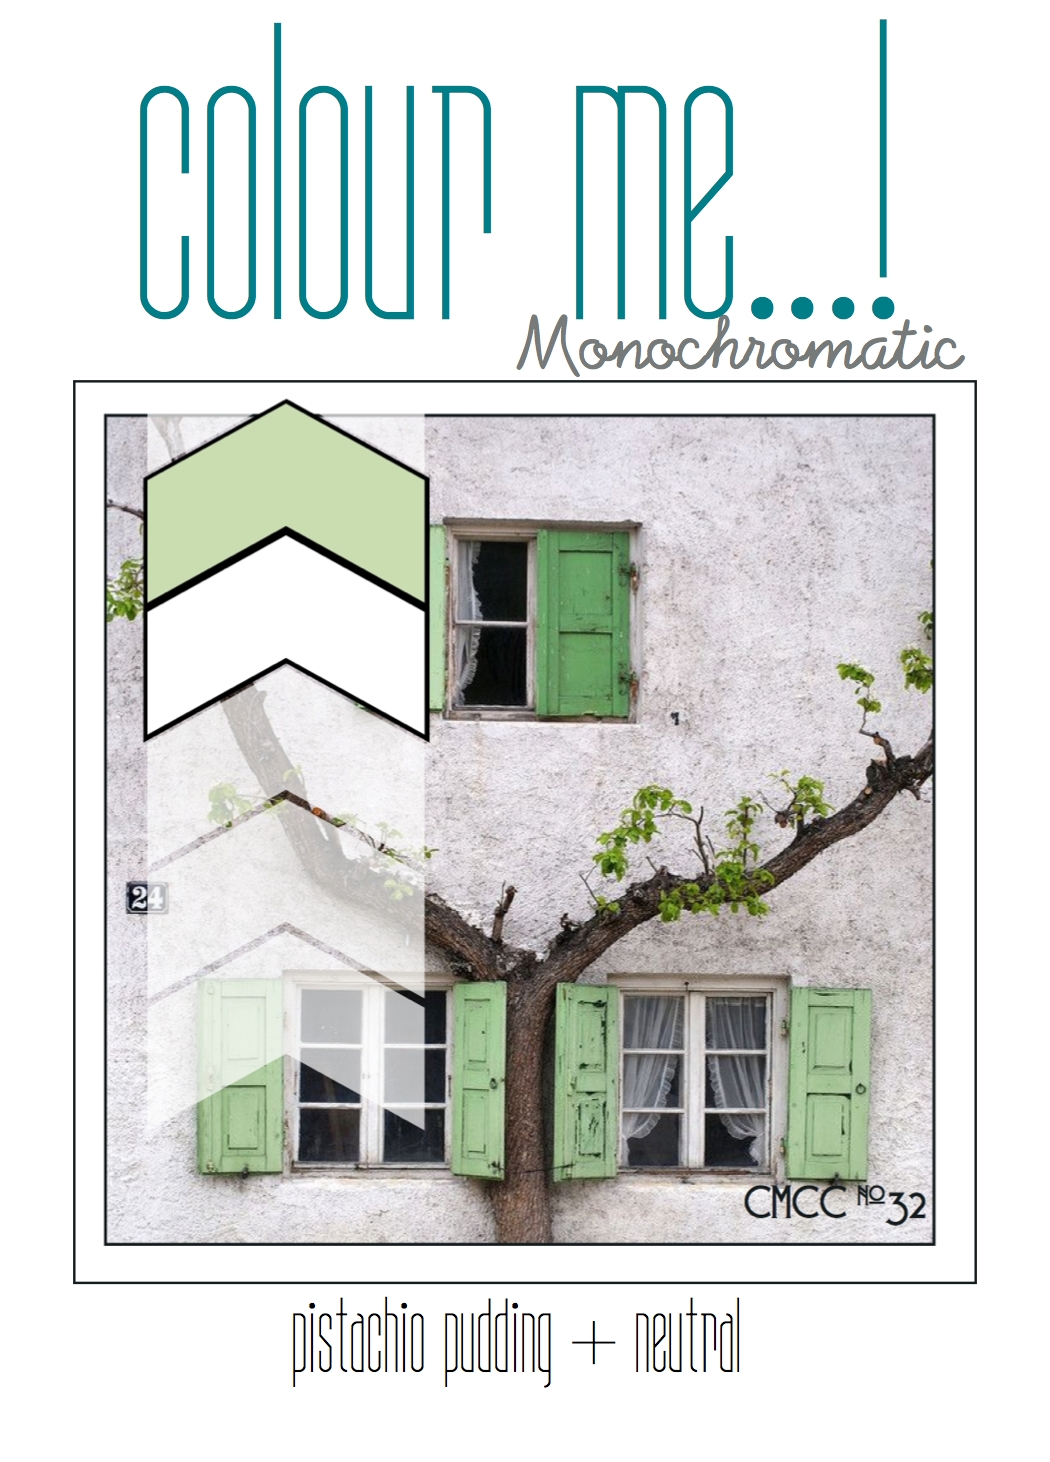
by Joanne James7. August 2014 20:56Today I'm excited to share with you my first Flower Patch card! Now, this may not seem like a big event, but for someone who has had the stamp set for over a month whilst having to wait (not so) patiently for the matching framelit set, it is a big deal! I decided to make a card for the challenges over at 'Less is More' and Retrosketches, where the colour palette and sketch were perfect for what I had in mind:
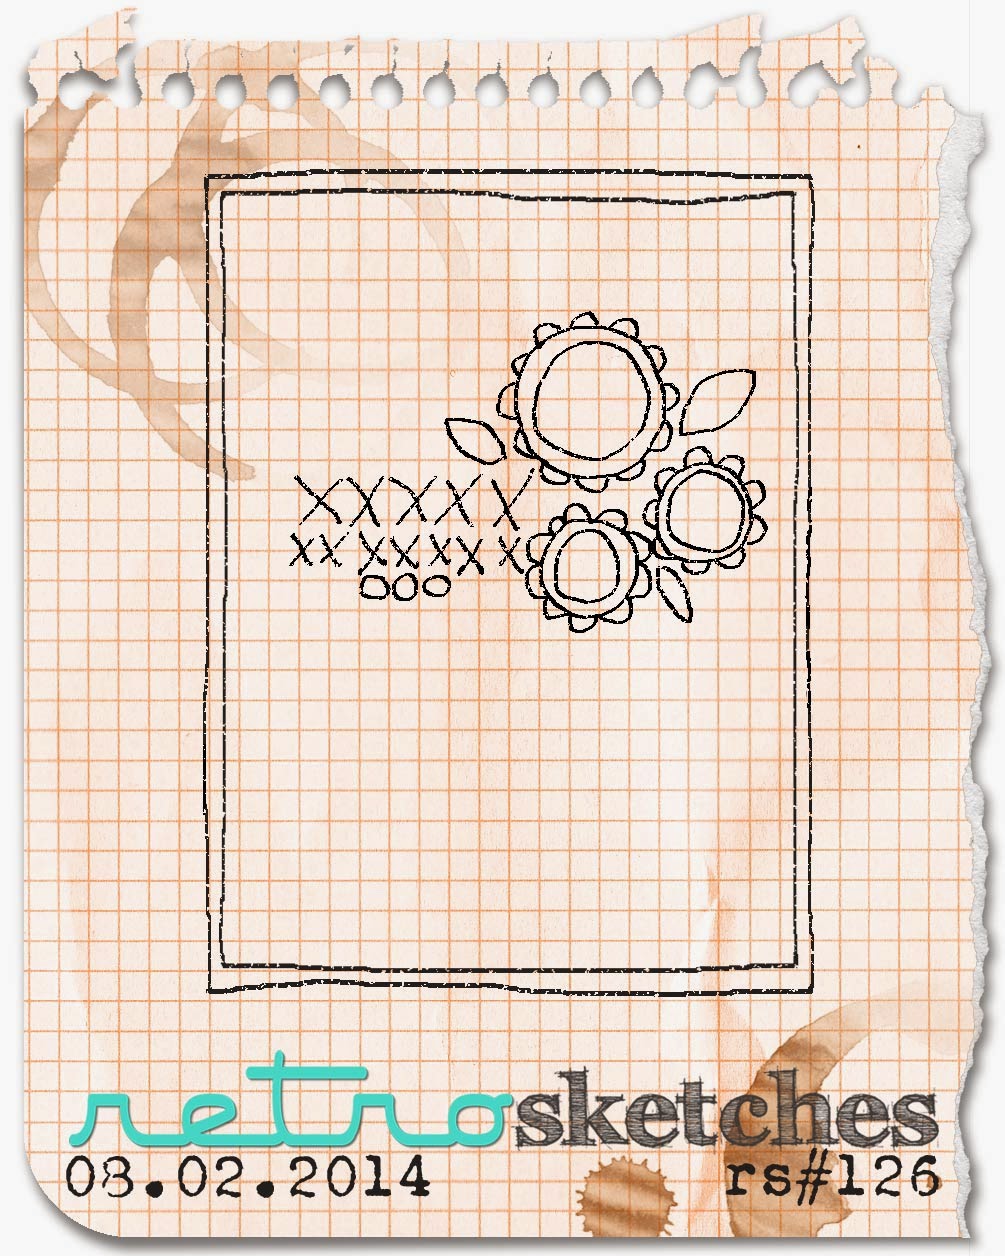
Since the lovely Sarah over at 'Less Is More' is celebrating her birthday this week, I decided a birthday card should be the order of the day. Here's what I came up with:
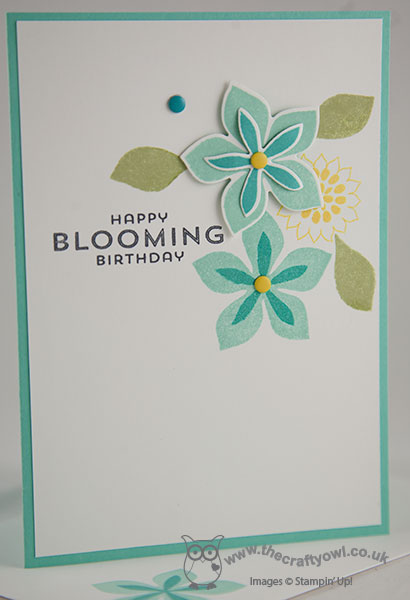
My card base is Coastal Cabana, which I matted with Whisper White and stamped my sentiment in Momento Black, then surrounded it with a trio of flowers in Coastal Cabana, Daffodil Delight and Bermuda Bay, cutting out one of these with my framelits and layering it to add depth and dimension. I finished with a few candy dots for the flower centres and a random one (just because!). The stamp set is photopolymer, which makes aligning everything so easy no need even for a stamp-a-ma-jig!
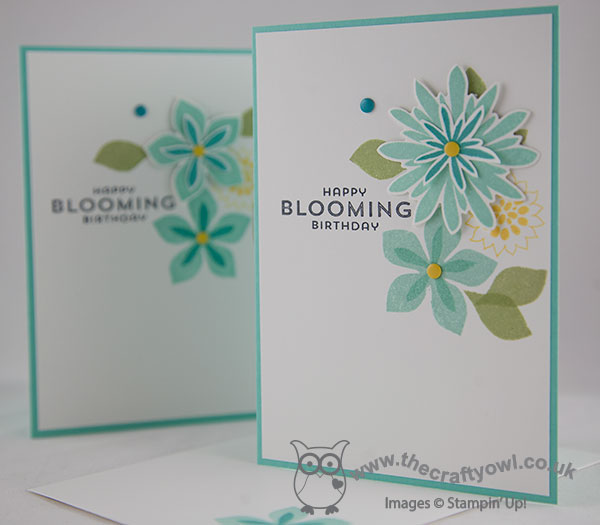
I liked my card so much, I decided to create another one with one of the other framelits in the set - I need a few extra birthday cards in my 'emergency' box - here is my slight variation on the card above:
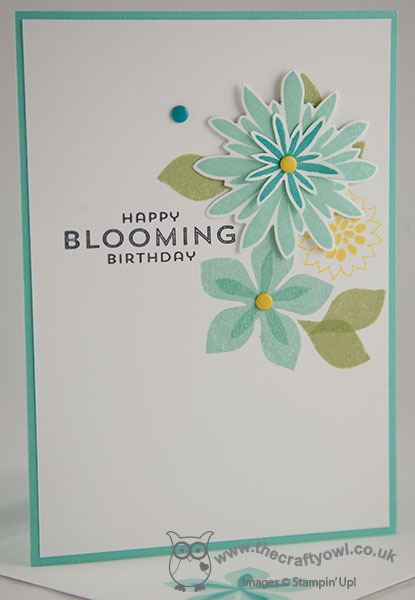
These cards use surprisingly few supplies, yet I think they have real interest. This set has so much potential I am so glad that I can finally get creating with it - it my well replace Simple Stems from the Spring-Summer seasonal catalogue in my 'bold flower' affections! I'm also linking my card up over at SUO Challenges, where the theme this week is 'new toys' - well, I've certainly had fun playing with mine!
Back tomorrow with another project; until then, happy stampin'!
Stampin' Up! Supplies Used:
by Joanne James6. August 2014 11:00Happy Wednesday everybody! Today is a good day - the sun is shining again, my Autumn-Winter pre-order has arrived so I have lots of Halloween and Christmas goodies to play with, there's a new bunch of weekly deals (see earlier post here) and it's time for this week's Colour Me...! Challenge, where we have a monochromatic colour challenge this week using Pistachio Pudding and a neutral:
I thought this challenge would be trickier than it actually was. I used the latest sketch from the Deconstructed Sketch for my layout and inked up my new Kinda Eclectic stamp set which I have been keen to get working with - here's my card:
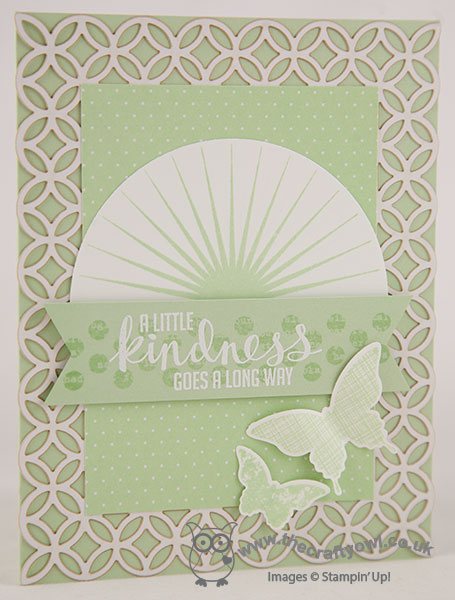
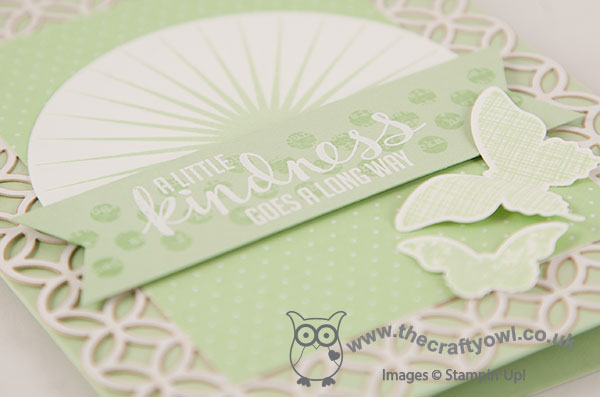
For my card I used a base of Pistachio Pudding, then layered one of the die-cut pieces from the now retired Simply Sent card kit in last year's annual catalogue. I added some Pistachio Pudding polka dot paper from the All Abloom DSP stack, then stamped the sunburst from Kinda Eclectic in Pistachio Pudding onto Whisper White and cut out using my Big Shot and Circles Framelits and cut the bottom third off the circle. For the central banner, I stamped the spots in Pistachio Pudding on the cardstock of the same colour, then stamped my sentiment in Versamark and heat embossed in White embossing powder over the top to add additional dimension. Lastly, I replaced the flags in the sketch with the butterflies from Kinda Eclectic, stamped in Pistachio Pudding onto Whisper White cardstock and punched out using the co-ordinating punches. I think the key to a single colour card where you are using one single colour plus a neutral, and don't have then benefit of tonal shades of the same colour, is to add layers, patterns and shapes for extra interest. If you're based in the UK and Europe, the Pistachio Pudding ink pad is on this week's Wednesday Weekly Deals List too and can be yours for just £3.71 instead of the usual £4.95 this week, so if you needed an incentive to have a go at this week's challenge, this is it!
I look forward to seeing what you come up with in the gallery this week - meanwhile, check out what the other designers have in store for you over at Colour Me and our new featured guest designer for the month of August.
Back tomorrow with another project for you; until then, happy stampin'!
Stampin' Up! Supplies Used:
1354179a-167f-4bc5-8a25-c568f87aa6cb|0|.0|96d5b379-7e1d-4dac-a6ba-1e50db561b04
Tags: Colour Me...!, Kinda Eclectic, Simply Fabulous Simply Sent, Butterflies, Big Shot, Circles Framelits, All Abloom, Shop online, Stampin' Up Card, Stampin' Up, Stampin' Up Card ideas, Stampin' Up Supplies
Cards | Stamping
by Joanne James4. August 2014 21:12Considering that today is Monday, I feel like I've lived half my week already! So a quick post from me to share one of the cards made in today's Blendabilties class.
We made a variety of cards with everyone using different colour pens so we ended up with a complete mix of finished pieces. This is one of the samples I made using the Daffodil Delight Blendabilities set - I think the yellows are my favourite! Here's my card:
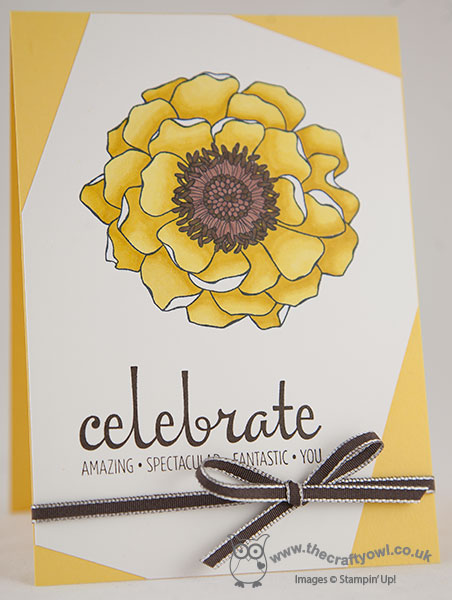
All of the cards in this month's classes featured the Blended Bloom stamp and were quite simple in design, since the focus was on colouring the images and practising different blending techniques. For this card, we simply stamped the Blended Bloom flower onto an offset panel of Whisper White, coloured using Daffodil Delight and Skin tone (for the centre) Blendabilities and added the 'celebrate' sentiment from the Fabulous Four stamp set in Early Espresso and a taffeta ribbon bow in the same colour (this colour is now retired in this ribbon type but you could easily substitute with the new 1/4" cotton ribbon in the same colour).
That's all from me today; back tomorrow with another project. Until then, happy stampin'!
Stampin' Up! Supplies Used:
by Joanne James3. August 2014 08:00It's time for this week's challenge over at The Paper Players and Sandy has a theme challenge for us this week that's all about buttons:
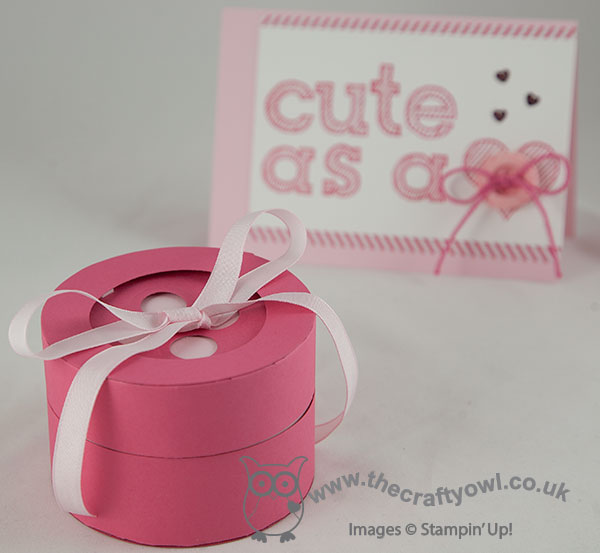
You can use any kind of buttons - real, embossed, paper - so for my card I decided to take Sandy's theme quite literally and create a 'Cute as a button' card suitable for a baby girl and featuring a clay button made with Simply Pressed Clay in one of Stampin' Up!'s silicone moulds - here is my card:
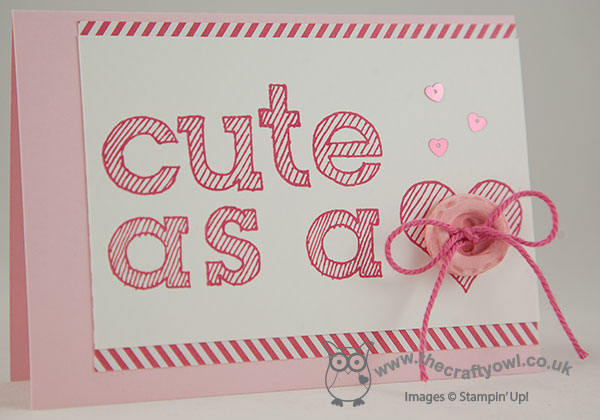
I used a Pink Pirouette card base and matted my Whisper White panel with a piece of Strawberry Slush DSP from the In-Colour stack in the chevron design, although with just enough showing so that it looks like a simple diagonal to echo the lines of the text. On my white panel, I stamped 'cute as a <3' using the new Epic Alphabet set. This set is photopolymer, which makes aligning the letters accurately so easy - with no stamp-a-ma-jig required! I moulded my clay button in the Simply Pressed Clay Mould and allowed it to dry before colouring it with my Pink Pirouette Stampin' Write marker - you can colour your clay before you mould it with reinker or afterwards with ink/markers, it's really up to you. The colour differs slightly depending on the method; personally I like to mould my buttons and embellishments in uncoloured clay a few at a time, then keep the dried pieces in a box to be coloured as required depending on the project. Here's a close up of my button:
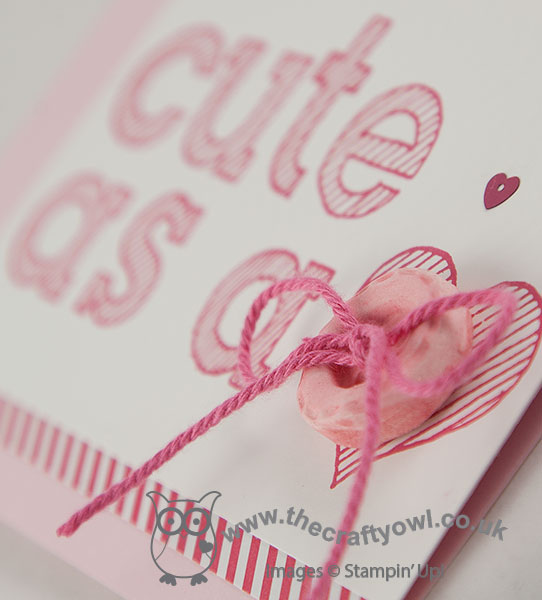
To finish, I pierced two holes in the button with my paper piercer and threaded some Strawberry Slush baker's twine through the holes and tied in a bow and added a scattering of In-Colour heart sequins.
I really love how my card turned out - but I couldn't stop there! I thought it would be fun to create a button gift box to go with it, using my Big Shot and Circles Framelits - here it is:
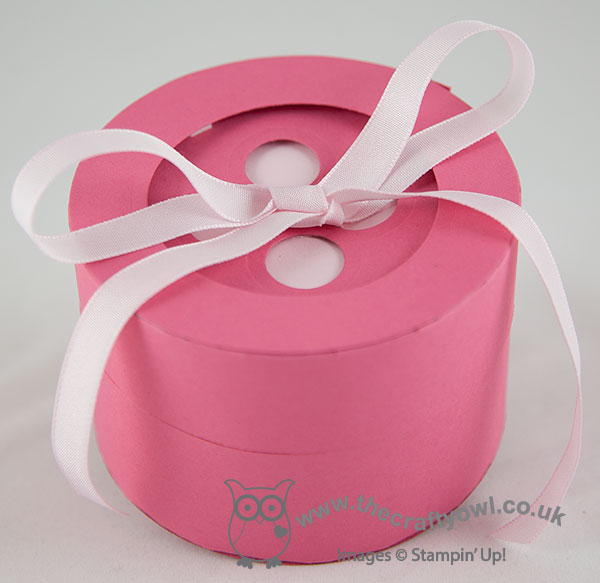
I used Strawberry Slush cardstock and the second largest of the circle framelits for my box, which measure 9.3cm in diameter and 7cm tall. I lined my box with Pink Pirouette cardstock for rigidity and to allow for an edge-to-edge closure. This box is just big enough to fit in a cute onesie, some bibs or a pair of booties - here's a photo of the inside:

Lastly, I threaded some retired Pink Pirouette ribbon through the button holes and tied in a bow. So there you go - two cute as a button projects, I hope you'll agree! Do pop over to The Paper Players and see what the other talented designers have for you today and I very much hope you'll join us in creating something for this week's challenge.
Back tomorrow with another project; until then, happy stampin'!
Stampin' Up! Supplies Used: