Today it's Sunday and time for this week's new challenge over at The Paper Players! It's the fifth week of the month and the turn of the amazing Ann to host this week with a fun TicTaToe challenge board for you to work with:
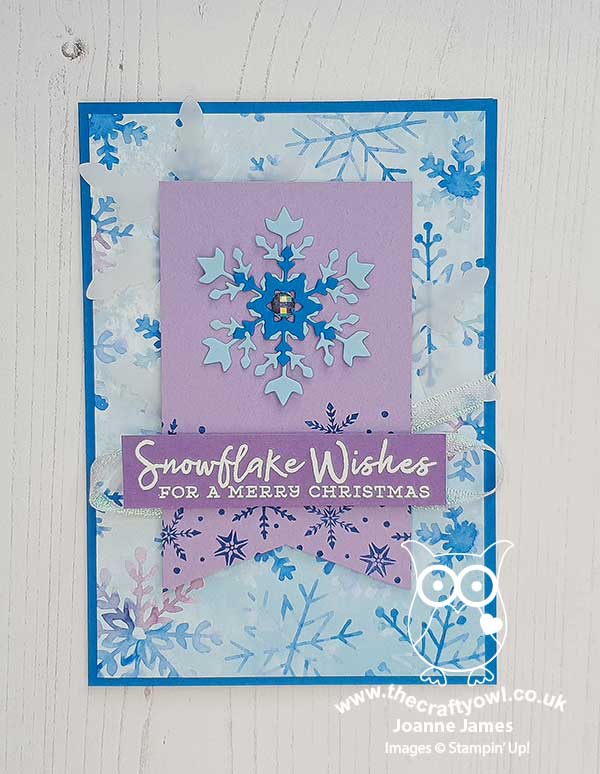
My cards today feature lots of products from the Snowflake Splendor Suite in the Autumn-Winter mini catalogue. Take a look:
Here's the low-down on today's card:
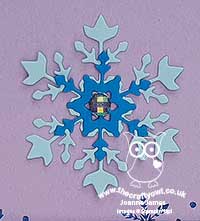
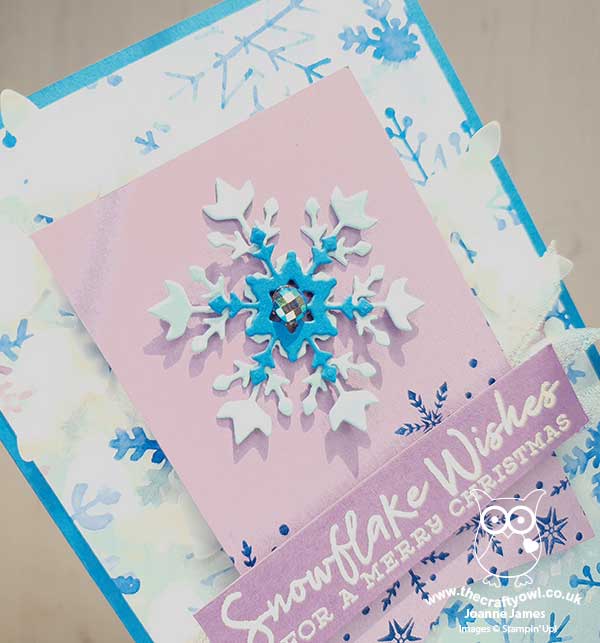
TicTacToe - I love a tic tac toe board - they offer such a wealth of creative possibility and always result in an interesting gallery. I went along the diagonal bottom left to top right - diecut, embossing and patterned paper - for my card today, but realised afterwards it also works for the middle horizontal row of ribbon, embossing and gems - check out the sparkly blue faceted gem I used to centre my diecut layered snowflake:
CASEing The Catalogue - Does the layout I chose for today's card look familiar? The team over at SUO Challenges are challenging us to CASE (Copy And Share Everything or Copy And Selectively Edit, you choose) either of the cards featuring the 'Whale Done' Suite on page 94 of the catalogue:
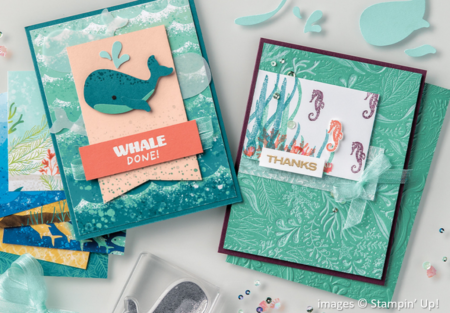
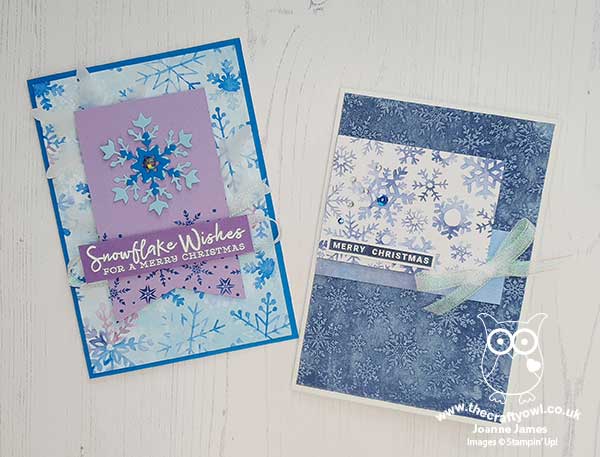
I often use my Stampin' Up! catalogue for inspiration in terms of colours or layouts and this was a fun challenge to show how you can take inspiration from the catalogue to create something fresh and new. I actually made both of the cards I'm sharing today live in a Zoom demonstration with the ladies in my Online Classes Facebook Group during last week's session, as I wanted to explain my process and encourage them not to discount pages that featured products that might not be of interest to them, but instead look to see what other inspiration they could take. My card uses the same layout as the one on page 94 and includes all of the same elements: patterned paper, a central banner with contrasting stamping, a feature diecut image, diecut vellum pieces behind the banner and an embossed sentiment backed with ribbon - yet my card looks quite different to the one on page 94 as it uses a completely different product suite.
Snowflake Splendor Times Two - Having made this card, I then went on to CASE the second card on this page, that highlights an inked embossing folder technique:
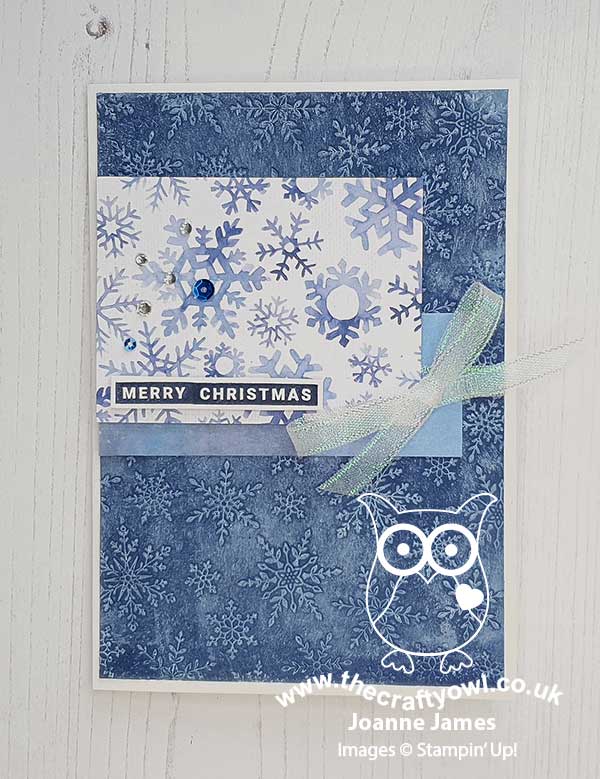
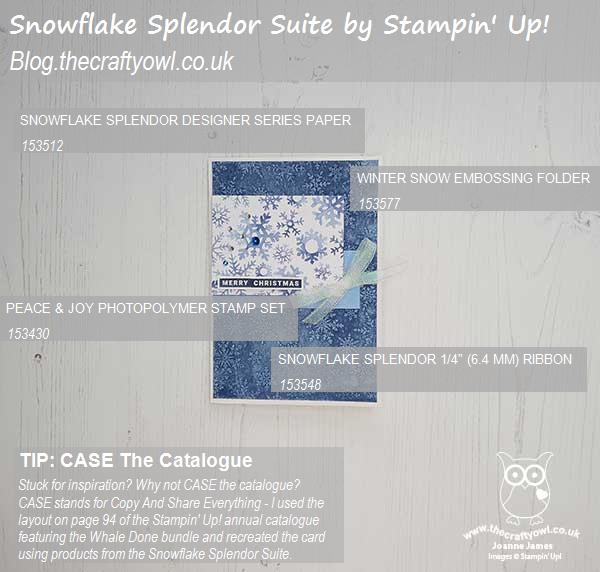
I used the Winter Snow embossing folder and instead of a stamped panel, used a couple of pieces of contrasting designer series paper for the feature panel, embellished with some rhinestones and Whale of a Time sequins, along with a sentiment created from stamping two of the greetings from the 'Peace And Joy' stamp set next to each other to create a single one; this one is slightly different in layout to the catalogue sample, yet the similarities in layout still make it recognisable.
Here's both of my CASEd cards together:
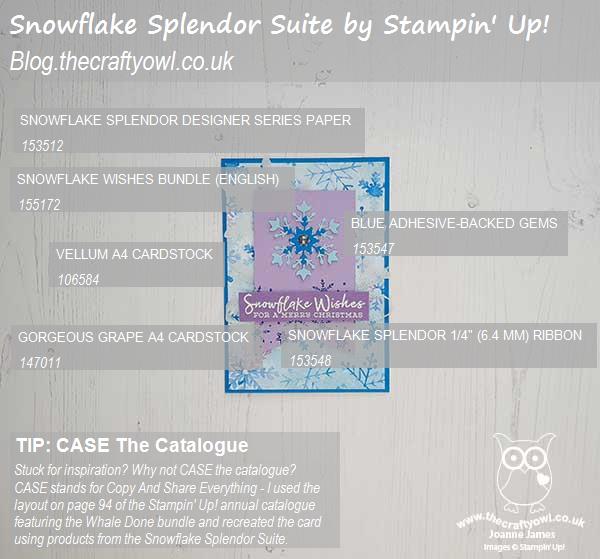
Here is the visual summary of the key products used on today's project for you to pin for easy reference:
You can see all of my Product and 'How To' summaries on my 'How To - Tips and Techniques' Pinterest board in case you've missed any. Do you ever use layouts from the catalogue as a starting point for your card making? Do let me know in the comments below - I'd love to hear what inspires you to create! Equally, if you would like to watch the video of me making both of these cards, do get in touch for more details on how to join my Online Classes group - I would love to have you join me.
Before you reach for your ink and papers, check out what our amazing team has created to inspire you this week:
The Paper Players Design Team
Here's a quick recap of our challenge rules:
1. Create a new paper project
2. Upload your creation to your blog with a link back to us and provide a direct link to the post featuring your challenge submission.
3. Please link your card to no more than four challenges, TOTAL.
4. Have FUN!
You can see all of my 'How To' summaries on my 'How To - Tips and Techniques' Pinterest board in case you've missed any.
Enjoy your day; my day today will be a busy one, for a Sunday. Rebecca is back to hockey for the first time in 6 months for pre-season training so is very excited about that and I have hours of content to catch up on from Stampin' Up!'s Leader Summit this past few days, much of which I didn't do live because we were otherwise engaged as a family celebrating young Master James' finishing of prep school. Thank heavens for online recordings and catch-up - where would we be without it?! I also have a mound of raspberries to make into jams, jellies and more - the weather here these last few days has been positively autumnal so I have some very soft and squishy fruit that has been rather battered by the high winds! I'll be back tomorrow with another project. Until then, happy stampin'!
Stampin' Up! Supplies Used: