So Detailed Thinlit Die Mother's Day Card

by Joanne James17. March 2017 17:00

Now I know since it's St Patrick's Day I should probably be sharing something green, however my plans today took a different turn so instead with Mother's Day only just over a week away here in the UK I'm sharing a Mother's Day card with you instead - take a look:


 Here's the low-down on today's card:

So In Love - The inspiration for my card today came from the patterned paper that forms the base of my card. A busy, detailed outline pattern that features the same floral that can be found in the 'So In Love' stamp set (featured behind my sentiment) and the largest image in the So Detailed Thinlits Dies. I used this die to create a feature detail on the left of my card, backing it with vellum so that the detail continues to stand out from the paper behind it. My card measures a slightly larger than usual 6" x 6".

Love At First Sight - The sentiment that I featured on my card is from the 'First Sight' stamp set in the annual catalogue; beautiful words that seem so appropriate to show appreciation on Mothering Sunday. It's easy to overlook the annual catalogue when we have a seasonal with so many new and exciting sets, yet it contains many hidden gems, including ones that work for seasonal occasions such as Mother's Day so don't forget to take a look when your deciding on products for your projects.

A Little Flower - I added some vanilla ribbon and one of those gorgeous vanilla Falling in Love floral embellishments to finish off my card today. I kept to neutral colours to avoid any clash with the other more detailed elements of my design.

Here is the visual summary of the key products used on today's project for you to pin for easy reference:


You can see all of my 'How To' summaries on my 'How To - Tips and Techniques' Pinterest board in case you've missed any. 

This is the card that I've made for my Mum for Mother's Day (I'm safe to post it early as she doesn't read my blog) and I've already made another identical one for a friend's Mum too. 

I'll be back tomorrow with another project. Until then, happy stampin'!


Stampin' Up! Supplies Used:

Table built using Product Table Builder by The Crafty Owl - Independent Stampin' Up! Demonstrator.
 

Party Animal Surprise Birthday Card

by Joanne James16. March 2017 06:00

I had a busy day yesterday, part of which was spent kicking off a new project that I will be sharing with you soon, but alas no time to blog. I'm back nice and early today though to share a card inspired by the sketch over at TGIF Challenges:

 #tgifc98 Card Sketch Challenge

 The moment I saw the sketch I saw a present! Can you see it too? I rotated the sketch anti-clockwise and this is what I came up with:


Fun, right? This is a card with a surprise though - read on to find out more!

Here's the low-down on today's card:

Be A Party Animal - My card today was inspired by the bright colours and patterns of the Party Animal Suite of products - bright and fun, just perfect for a birthday celebration.

A Hidden Message - I added an 'open me already!' tag to my parcel as there is more to my gift than meets the eye: I used the tag topper pieces of the Balloon Pop-Up Thinlits Dies to create a parcel-shaped tag that fits inside a gift sleeve and reveals a hidden birthday greeting - take a look:


Here's my greeting tag, stamped with a sentiment from the 'Big On Birthdays' stamp set, completely removed:

Adventures On The Inside - I also added a little birthday fun to the inside of my card too:

I love this kind of card - a truly universal birthday greeting that can't fail to raise a smile!

Here is the visual summary of the key products used on today's project for you to pin for easy reference:


You can see all of my 'How To' summaries on my 'How To - Tips and Techniques' Pinterest board in case you've missed any. 

Enjoy your day and I'll be back tomorrow with another project. Until then, happy stampin'!


Stampin' Up! Supplies Used:

Table built using Product Table Builder by The Crafty Owl - Independent Stampin' Up! Demonstrator.


Falling For You Anniversary Card

by Joanne James14. March 2017 07:00

Today I'm here nice and early sharing a card for the current sketch challenge over at Fab Friday:

This team have such great sketch designs and I've been playing with this one a lot of the weekend. I instinctively wanted to avoid using a doily for that bottom semi-circle, but I had a card design in mind that wouldn't go away and suited a doily perfectly so I went with it - take a look:


It's all about the pretty today! Here's the low-down on today's card:

Falling For You - Do you ever buy a stamp set because it contains one sentiment that resonates with you and you just have to have, regardless of whatever else the set has to offer? I do - and this is one of those sets! 'Falling For You' contains some lovely sentiments in a fabulous swirly, romantic font that work for weddings and anniversaries, but this one for me sells it - who wouldn't want to receive a card that says 'Every heart needs one special person to love - you're my person'? Maybe I'm an old romantic at heart, but it's fair to say I definitely fell for this stamp set hook, line and sinker!

Falling In Love Too - I used a piece if the Falling In Love designer series paper for my background and embellished with some of the other products in the Falling In Love Suite - including that doily! I'm not overly partial to a doily, but I do like these ones - the sharp laser-cut design and the versatility of them being white on one side and vanilla means they don't look as out of place with my clean and layered style. 

A Romantic Colour Combo - I took today's colour combination straight from the Falling In Love papers too - perfect for softer cards that evoke that marriage of romance and shabby chic. Feel free to save it if you would like to try it out too:

I just love the soft colours, falling hearts pattern and romantic feel of this card - all I need now is to find someone to send it to me!!!

Here is the visual summary of the key products used on today's project for you to pin for easy reference:


You can see all of my 'How To' summaries on my 'How To - Tips and Techniques' Pinterest board in case you've missed any. 

Enjoy your day and I'll be back tomorrow with another project - perhaps an alternative take on the same sketch! Until then, happy stampin'!


Stampin' Up! Supplies Used:

Table built using Product Table Builder by The Crafty Owl - Independent Stampin' Up! Demonstrator.

Sunshine Sayings Meets Thankful Life

by Joanne James13. March 2017 10:55

Good morning and welcome to another week! Mine is going to be a busy one so without further ado I'm sharing a card for this week's challenge over at Freshly Made Sketches:

These ladies have some great sketches and this one from Jen M is no exception - I love the layering of the panels. I went bright today - take a look:


Here's the low-down on today's card:

Get A Vase of Flowers For Hosting A Stampin' Up! Party - Yes, that's right - today's card features the vase of flowers from the hostess set in the Spring-Summer seasonal catalogue, 'Thankful Life', a set available to purchase exclusively to customers who host a Stampin' Up! party or place a single order of £150 or more. Extra Stampin' Rewards during Sale-A-Bration make this an excellent time to host, although stamp sets like this one make it worth hosting a party all year round. The stamps are photopolymer and so easy to line up to create a vase of colourful blooms that will last so much longer than fresh ones! This set will be available to hostesses until the Spring-Summer catalogue ends on 31st May, so if it's a set you would like to own, do get in touch with me to arrange a night for your crafty night in with friends. 

You Brighten My Day - The 'Thankful Life' hostess set does come with two sentiments of its own, however both were too too big for the embellishment 'button' that I wanted to create. I opted instead for this one from 'Sunshine Sayings' that seemed particularly appropriate given my colour choices for today's card.  

A Fiesta Of Colour - I took the inspiration for my colour combination straight from the Festive Birthday Designer Series Paper that I used for my background panel - as a brights girl these colours really appeal to me and I just love the mix of patterns they contain: 

Here is the colour combination if you would like to save it to use on your projects too:


What a great combination of bold and bright colours - guaranteed to cheer!

Here is the visual summary of the key products used on today's project for you to pin for easy reference:


You can see all of my 'How To' summaries on my 'How To - Tips and Techniques' Pinterest board in case you've missed any. 

Enjoy your day and I'll be back tomorrow with another project. Until then, happy stampin'!


Stampin' Up! Supplies Used:

Table built using Product Table Builder by The Crafty Owl - Independent Stampin' Up! Demonstrator.

Designer Tee When In Doubt STAMP Card

by Joanne James8. March 2017 21:48

I've had a busy week so far but it's about time I squeezed in a quick blog post! I realise I haven't shared the card that I sent out to my lovely customers with my Spring-Summer catalogues and Sale-A-Bration catalogues at the beginning of January and since it's super clean and simple (well, I had a lot of them to make!) this is a great time to share it - take a look:


Here's the low-down on today's card:

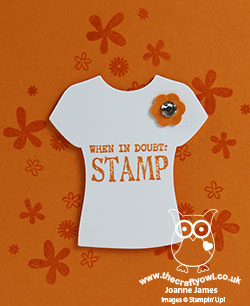
Design Your Tee FOR FREE - Each of my cards features a cute t-shirt featuring one of the stamps from the Sale-A-Bration Designer Tee set, stamped onto Whisper White cardstock and cut out using one of the T-Shirt Builder Framelit Dies in the Spring-Summer catalogue. A number of this year's SAB products co-ordinate with bundles in the Spring-Summer catalogue, which is such a plus; this Designer Tee stamp set extends the creative possibilities of the Customer Tee Bundle even further and I thought the stamp on my t-shirt was just perfect to send to a bunch of people who share my love of all things Stampin' Up! Better still, if you buy the Custom Tee bundle you are well on your way to receiving the Designer Tee stamp set - or any other SAB promotional item - for FREE! We are in the third and final month of this year's Sale-A-Bration promotion - if you haven't yet reaped the benefits, there's still time!

Itty Bitty Flower - I added a punched flower to my t-shirts, finished with a rhinestone for a little girly bling. So many of you lament the retiring of the Itty Bitty Punch Pack, but did you know that the Tree Builder Punch has this tiny flower that is very similar and just as useful? What's more it's a current product and is still available to purchase.

Perpetual Birthday Flowers - I wanted to add a little background to my cards, so I went to one of my 'go to' stamp sets for a little background pattern - Perpetual Birthday. I love the little motifs in this set, so useful for backgrounds, creating your own designer paper and seasonal projects. I guess you could say this set is my personal 'Gorgeous Grunge', a set that I know is a stamp room staple for many of my customers - a little more gorgeous and a little less grunge!

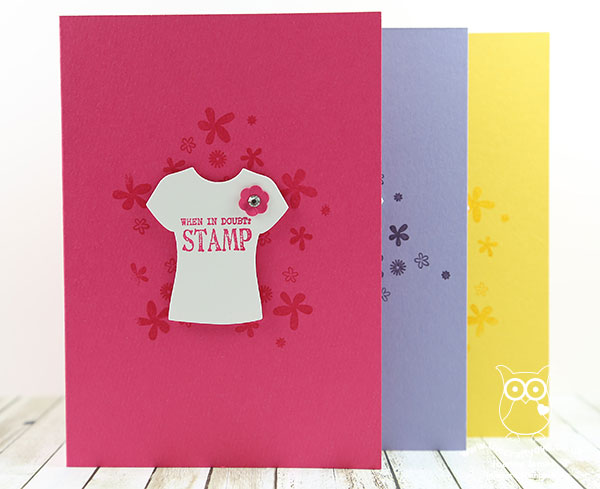
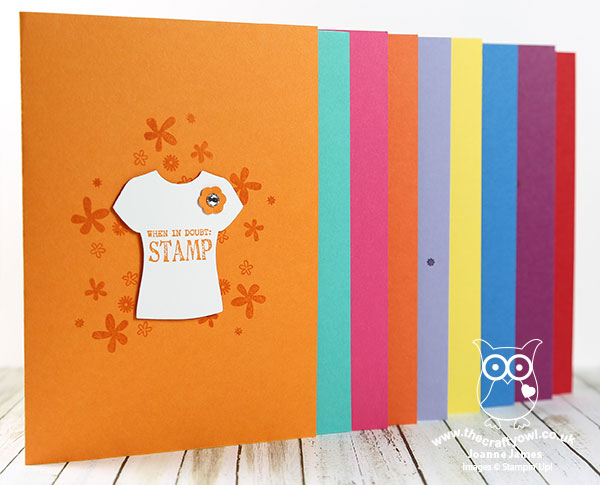
When I'm mass-producing cards in this volume, I also like to make the same card in a rainbow of colours (it stops me from getting bored!) and I often reach for my favourite brights - here's a little shot showing the colours I used:


If you received one of these, which colour did you get? Feel free to leave a comment below or better still upload a picture of you and your card on my Facebook page - I would love to see! If you didn't receive one, it will be because you're not on my customer list; if you don't already have a demonstrator and would like to receive a catalogue, just get in touch and I can pop one in the post to you.

Lastly, check out this video from the Stampin' Up! Home Office Team that shows you lots of other cool things you can do with this stamp set:

I'll be back tomorrow with another project. Until then, happy stampin'!


Stampin' Up! Supplies Used:

Table built using Product Table Builder by The Crafty Owl - Independent Stampin' Up! Demonstrator.

Carousel Circle Trio Birthday Card

by Joanne James1. March 2017 12:00

I've had a busy couple of days making costumes for World Book Day which is today and helping with some fundraising project that Rebecca is involved with so no time to blog. Good news is though I'm back today and I'm sharing a card using items from the Cupcakes and Carousels Suite - take a look:


Here's the low-down on today's card:

All The Fun Of The Fair - Cupcakes and Carousels Suite is described in the Stampin' Up! literature as 'funfair imagery with vintage flair'. This is one of those sets that didn't overly appeal to me at first glance, but having seen so many lovely things made with it by fellow demonstrators my mind was changed. The carousel horse is a definite favourite and I love how the images work together with the unusual retro styling of the fonts.  

An alternative Approach to Layers - Today's card is based on this week's Paper Players sketch. You can see my Design Team card here in Sunday's post; I also created this one still with three images, but as the images were larger I decided to stamp the ferris wheel directly onto the background paper, then added a vanilla doily behind the carousel horse image on the medium sized circle before finishing with the smallest one up front.

A Colourful Combo - The colour scheme for my card was inspired by the starburst-style sheet of designer series paper I chose from the Cupcakes and Carousels Paper Stack. Rich tones of Early Espresso, with the bright red and orange along with a hint of vanilla - feel free to save this combination if it's one that appeals to you:


Here is the visual summary of the key products used on today's project for you to pin for easy reference:


You can see all of my 'How To' summaries on my 'How To - Tips and Techniques' Pinterest board in case you've missed any. 

In addition there is still time to play along with our challenge over at The Paper Players - you can get the full details here.

Enjoy your day and I'll be back tomorrow with another project. Until then, happy stampin'!


Stampin' Up! Supplies Used:

Table built using Product Table Builder by The Crafty Owl - Independent Stampin' Up! Demonstrator.

Basket Bunch Easter Egg Hunt Card

by Joanne James27. February 2017 20:44

Happy Monday everyone! I hope you've had a good day. I've had a busy start to the week with preparation for next week's classes followed by a pleasant hour watching Rebecca swim in a school swimming gala (she won all her races and the team won overall, so smiles all round.) Rebecca came second in her competition race yesterday too and had a new personal best time, so all good. Anyway, to today's cards - yes, two! I've made a couple of cards on the same theme using the same colours for a couple of different challenges:

Visit the Paper Craft Crew and play along with Card Sketch 232. #pcc2017 #cardsketch #papercraftcrew  www.papercraftcrew.com   

I decided I needed to get cracking (excuse the pun!) with my Easter makes, so today it's all about the Basket Bunch bundle  - take a look:


Paper Craft Crew have a great sketch this week and I really love the CAS Colours & Sketches colour combination - I will be so sad to see Cucumber Crush leave us in June! - and thought it was perfect for a little Easter egg hunt through the grass. I stamped and die cut a selection of eggs and interspersed them between my strip of grass. I layered it onto a piece of basket weave patterned paper from the Sale-A-Bration Carried Away Designer Series Paper and finished with this fun sentiment from the Basket Bunch stamp set, cut out with my Layering Ovals. May all your chocolate be solid - I love it!

Having completed this card, I thought it was probably a little too layered to qualify as truly 'clean and simple' for the lovely ladies over at CAS Colours and Sketches, so I die cut a few more pieces and created something a little more in keeping: 


Clean and simple with an alternative sentiment, yet no less colourful!

Here is the visual summary of the key products used on today's projects for you to pin for easy reference:


And for my second card:


You can see all of my 'How To' summaries on my 'How To - Tips and Techniques' Pinterest board in case you've missed any. 

Enjoy your day and I'll be back tomorrow with another project. Until then, happy stampin'!


Stampin' Up! Supplies Used:

Table built using Product Table Builder by The Crafty Owl - Independent Stampin' Up! Demonstrator.

SING Movie-Inspired Faux Illuminated Card Using Large Letters Framelits

by Joanne James24. February 2017 20:29

Yay it's Friday! Today I'm sharing a card that I made last week following my half-term visit to the movies with the James Juniors - take a look:


Here's the low-down on today's card:

Movie Inspiration - We had been to the movies to see the fun computer-animated comedy movie 'Sing' (you can read all about that here if you're interested) and with this week's Paper Players challenge in mind (use a sentiment as the focal point on your card) I decided to create something using the movie title image as my inspiration:

Image result

With a daughter who sings and often participates in public performances and examinations, I knew that this would make a great encouragement card for her - I'm sure you can see the similarities.

Love Those Letters - I know I say it every time I use them, but the Large Letters Framelits are so worth the investment - I love them! Buying them during Sale-A-Bration leaves you only £1 away from two free gifts too, what a great time to invest! Here I layered them, cutting one set in red and then tracing the inner line of the framelit with a pencil and fussy-cutting them by hand in order to leave a thin border visible. I also used my Labeler Alphabet for the 'loud' part of my sentiment - a great 'mix and match'. 

Fake Illumination - I used a liberal dose of gold metallic enamel shapes  to create my illuminated letters and heat embossed the starburst from the Kinda Eclectic stamp set to give the illusion of bright lights shining in the background along with a strip of gold glimmer for extra sparkle. The layering and lettering detail made this card less than 'clean and simple', hence the reason why I decided not to use it as my Paper Players card.

I love this card though - just shows that sometimes inspiration can strike in the strangest places. What things inspire you? Do leave me a comment below - I'd love to hear your thoughts.

Here is the visual summary of the key products used on today's project for you to pin for easy reference:


You can see all of my 'How To' summaries on my 'How To - Tips and Techniques' Pinterest board in case you've missed any. 

I'll be back tomorrow with another project. Until then, happy stampin'!


Stampin' Up! Supplies Used:

Table built using Product Table Builder by The Crafty Owl - Independent Stampin' Up! Demonstrator.

Love Sparkles Congratulations Card

by Joanne James23. February 2017 07:00

Today I'm sharing a congratulations card that I made for one of the hard-working members of my team who has been achieving great things during Sale-A-Bration - take a look:


 Here's the low-down on today's card:

A Sparkly Celebration - I took the 'Celebrate' stamp in the 'Love Sparkles' stamp set and decided to create a multi-coloured embossed background to echo the idea of sparklers and fireworks. I used a selection of (retired) coloured embossing powders - Melon Mambo,Blushing Bride and Crushed Curry - but you could equally ink your stamp with the same colour inks and a sponge dauber, then heat emboss with clear embossing powder. 

Going For Gold - I added a stacked gold glimmer 'you', diecut with my Hello You Thinlits, a couple of strips of gold glimmer top and bottom and a starburst of gold glitter stars to add to the celebratory feel.

Be A Hoot Too - My team of demonstrators, known as The Hoots, range from happy hobbyists to full-time business builders - everyone is welcome and they are all united by a love of crafting and more specifically, a love of crafting with Stampin' Up! products. If you have ever considered joining Stampin' Up!, whether to get a discount on your hobby supplies or because you want to run your own successful direct sales company (or somewhere in between), Sale-A-Bration is one of the best times of the year to do so. During Sale-A-Bration, your starter kit is extra special as not only do you get your choice of £130/175 Euros worth of product for £99/129 Euros, but you get to choose an additional 2 stamp sets FOR FREE - that could be worth as much as an extra £93/126 Euros. There are so many ways in which you can benefit from being a Stampin' Up! demonstrator - please do give me a call on 07773 421446 or email me if you'd like to discuss further.

Here is the visual summary of the key products used on today's project for you to pin for easy reference:


You can see all of my 'How To' summaries on my 'How To - Tips and Techniques' Pinterest board in case you've missed any. 

Congratulations Helen and I hope you liked your colourful card! 

Enjoy your day and I'll be back tomorrow with another project. Until then, happy stampin'!


Stampin' Up! Supplies Used:

Table built using Product Table Builder by The Crafty Owl - Independent Stampin' Up! Demonstrator.

Irresistibly Floral Spring Thank You Card

by Joanne James22. February 2017 07:00

Today I'm sharing a card for this week's challenge over at CAS(E) This Sketch:

I decided to break out one of my new sponge brayers and some Irresistibly Floral embossed paper for my card today - take a look:


Here's the low-down on today's card:

Easy Embossing - I decided to brayer the circle shape onto a piece of Irresistibly Floral Specialty Designer Series Paper using a sponge brayer. This is the first time I've brayered with one of these and I must confess I'm rather impressed - they make it so easy to get a smooth graduated finish and are great for this kind of ink technique, really bringing out the pattern of the paper. I created a simple circle stencil using a spare piece of cardstock and my Circle Framelits and brayered from bottom left to top right of my circle as I wanted to try and emulate the less-than-perfect circle of the sketch. As for the paper - this patterned clear-embossed white paper is great for colouring and sponging - a great embossed finish without any for of Versamark or heat tool required. Cheating? No! Easy? Most definitely!!

Co-ordinating Florals - I stamped a flower from the Falling Flowers stamp set and diecut it and a couple of leaves from the co-ordinating May Flowers Framelits to ground my simple diecut sentiment (cut from the now retired Greetings Thinlits - still one of my go-to sets!) This bundle which you can see on page 127 of the annual catalogue also co-ordinates with the patterns on the Irresistibly Floral embossed paper - and makes designing easy!

Fresh Colour Combination - I chose a fresh, spring colour combination of pink and green to compliment my contrasting black and white background and sentiment today - here it is if you would like to save it for future inspiration too:


Here is the visual summary of the key products used on today's project for you to pin for easy reference:


You can see all of my 'How To' summaries on my 'How To - Tips and Techniques' Pinterest board in case you've missed any. 

Enjoy your day and I'll be back tomorrow with another project. Until then, happy stampin'!


Stampin' Up! Supplies Used:

Table built using Product Table Builder by The Crafty Owl - Independent Stampin' Up! Demonstrator.

Mini Catalogue

BROWSE THE CATALOGUE

The mini catalogue is now live! Read and download your copy here.

Shop Online

Access my online shop 24 x 7, 365 days of the year:

Current April hostess code:

VDKNV7BH

Shop Online

Join My Team

It's always a great time to join Stampin’ Up! New team members can get £130 worth of products for only £99 + free business supplies + free shipping + all the fun being a part of Stampin’ Up! Stampin' Up! has something for everyone: join my growing team and benefit from my support to enjoy Stampin' Up! however you choose.

If you're interested, call me for a chat to understand how I can help you realise your goals. Alternatively, if you have already decided to sign up and you just can't wait, please click here for the link to the online form where you can sign up and order your starter kit right away! 

Latest Kit!

Stampin Cut and Emboss

The Rock Legend Kit has all you need to make 8 cards with coordinating envelopes. Along with the new Panda Friends Kit, both are available from January 4th for just £14 each - get yours here!

2023-24 Annual Catalogue

BROWSE THE CATALOGUE

Click on the catalogue for a full list of current SU! supplies - if you would like to order any of the items featured, please drop me a line at [email protected] or give me a call on 07773 421446 - I'd be happy to help.

New Online Exclusives

There are new products available exclusively in the online store from 5 March - check them out here.

About Me

Hi I'm Joanne and live in Northampton and when I'm not looking after my husband and two beautiful children, am an avid crafter with a passion for all things Stampin' Up!

I must confess that I have never been a big rubber stamper - until I discovered Stampin' Up! that is. I love the fact that I can get such great results with co-ordinating stamps, inks, papers and punches - the possibilities are endless! Join me on my stamping journey as I share the things I love and be inspired to create amazing things yourself!

Follow Me

Monthly Newsletter

Box Builder

Click the button above to use Box Buster to create your custom box design using the Envelope Punch Board!

Kits Collection Now Available!

Stampin Cut and Emboss

The new Kits Collection from Stampin' Up! is now available!

Click here to see the current kits available and order yours online today.

I Design For


Stampin' Up Stuff

This is my personal blog and is not endorsed by Stampin’ Up! I hope you find it a plentiful source of ideas and personal inspiration but please don't copy my designs for contest submission or use for classes, publication or sale without express permission.