by Joanne James26. April 2018 20:30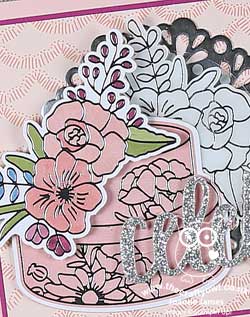
I've had a few cards to make of late for milestone birthdays so thought I'd share one of them today, that uses last week's Freshly Made Sketches layout as inspiration - take a look:
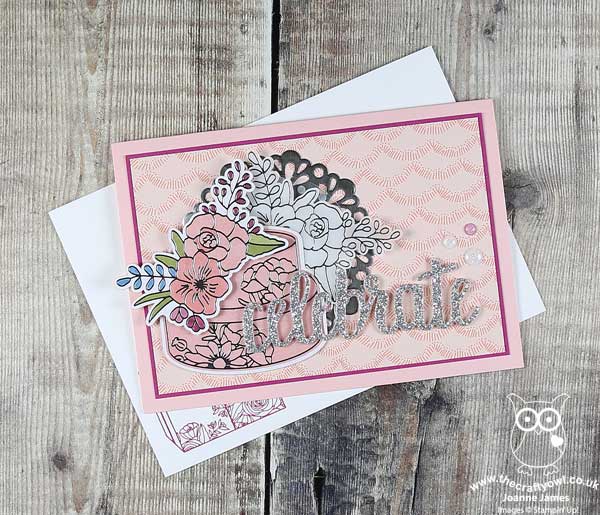
I decided to use up some of the leftover bits and pieces from my Sweet Soiree Embellishment Kit (I just love this - it really does keep on going!) and layer a cake with some of the flowers, along with a silver doily, a circle of silver spotted acetate and a proper sparkly die cut sentiment - so glad these 'Celebrate You' thinlits from this year's Sale-A-Bration offering are carrying over to the new annual catalogue. A background of co-ordinating Sweet Soiree paper and no stamping - well not on the front of my card anyway! I did stamp on the envelope and on the inside of my card:

I also added some numbers from the kit and a strip of foil washi tape to the inside of my card just to finish things off. Suitably special without being too over the top, I think - I'd love to hear your views, do feel free to leave me a comment below!
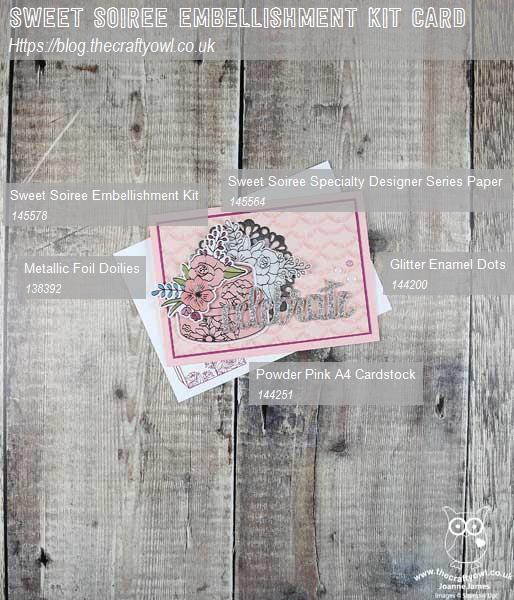
Here is the visual summary of the key products used on today's project for you to pin for easy reference:
You can see all of my 'How To' summaries on my 'How To - Tips and Techniques' Pinterest board in case you've missed any.
I'll be back tomorrow with another project. Until then, happy stampin'!
Stampin' Up! Supplies Used:
d0287620-1450-4643-b30b-3ad1646d8c06|0|.0|96d5b379-7e1d-4dac-a6ba-1e50db561b04
Tags: Sweet Soiree, Cake Soiree, Celebrate You Thinlits, Birthday, Shop online, Shop Stampin' Up online, Shop Stampin' Up! Online, Stampin' Up, Stampin' Up Card, Stampin' Up Card ideas, Stampin' Up Supplies
Cards | Shop Online | Shop Stampin' Up! Online | Stamping
by Joanne James25. April 2018 20:30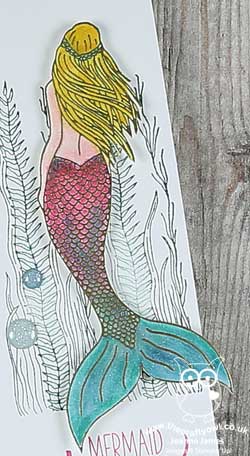
Another busy day today catching up on household admin today, but just time to share a card for this week's challenge over at CAS(E) This Sketch:

For some reason I had lots of ideas for this sketch, which is a pretty good job since the first card I made featured a couple of pens from the Crafting Forever set and a 'Just a Note' sentiment and my lovely Paper Players teamie and friend LeAnne posted one that was almost identical! You can see her card here; I decided that instead of posting my card that was so similar, I would work up one of my other ideas and got out my Magical Mermaid stamp set for some aquatic fun - take a look:
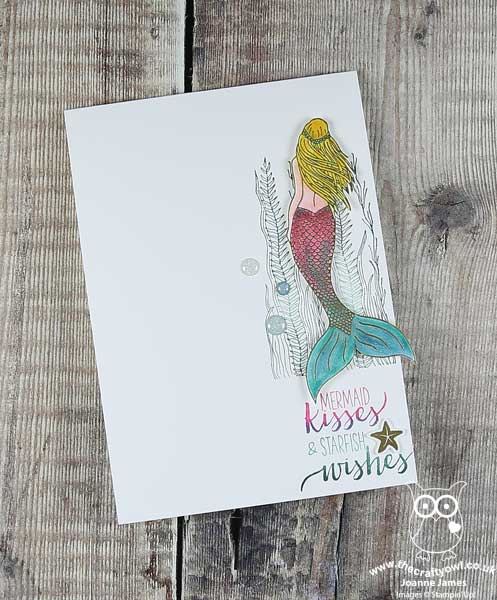
I stamped the seaweed twice and added my sentiment below as per the sketch, creating an ombre effect by sponging the sentiment stamp with Melon Mambo, Bermuda Bay and Tranquil Tide before stamping and fussy cutting a gold embossed starfish. The real star of this card though is the mermaid: I stamped her in Versamark and heat embossed in gold, then coloured her by sponging ink and blending lots of pinks and aquas to create her tail, before covering with a liberal does of clear Wink of Stella, fussy cutting and popping her on some dimensionals for extra lift. I also allowed her to sit slightly off the edge of the card for added interest.
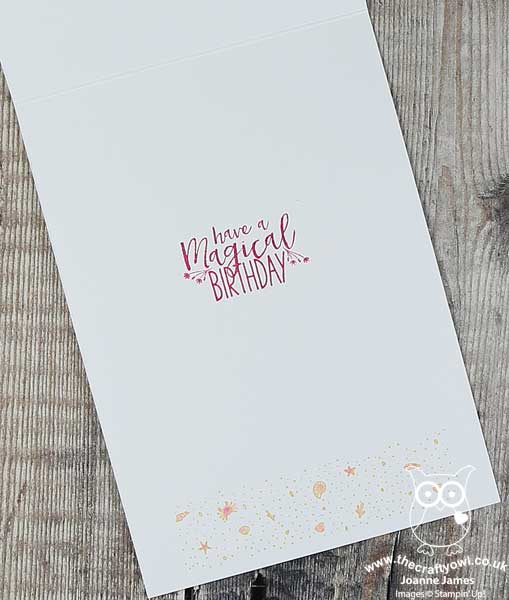
This really is one of those cards where the photo doesn't do my card justice - it is so shimmery and sparkly in real life and the blended tail colour so pretty. Try as I might though I could capture the effect on film, so you'll just have to take my word for it! I did take a quick picture of the inside too, with its seaside border:
I think this is the first time I've blogged a card using this set, but it is actually getting lots of use as I've recently decorated Rebecca's room and one of her bed sets has mermaids on it, so we are in the process of using this set to create some fun wall art and home decor pieces.
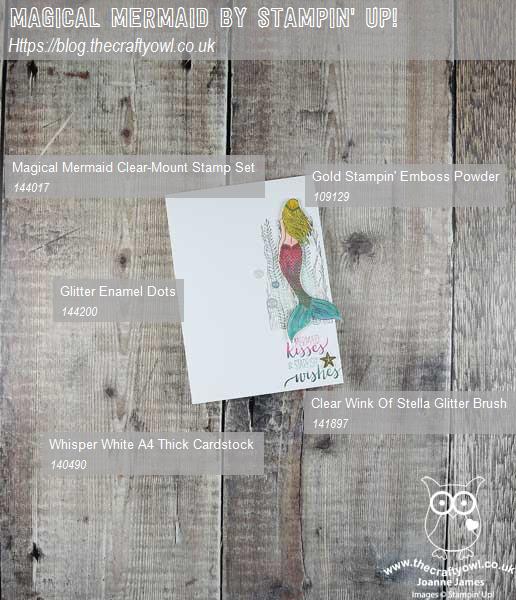
Here is the visual summary of the key products used on today's project for you to pin for easy reference:
You can see all of my 'How To' summaries on my 'How To - Tips and Techniques' Pinterest board in case you've missed any.
I'll be back tomorrow with another project. Until then, happy stampin'!
Stampin' Up! Supplies Used:
by Joanne James24. April 2018 17:00
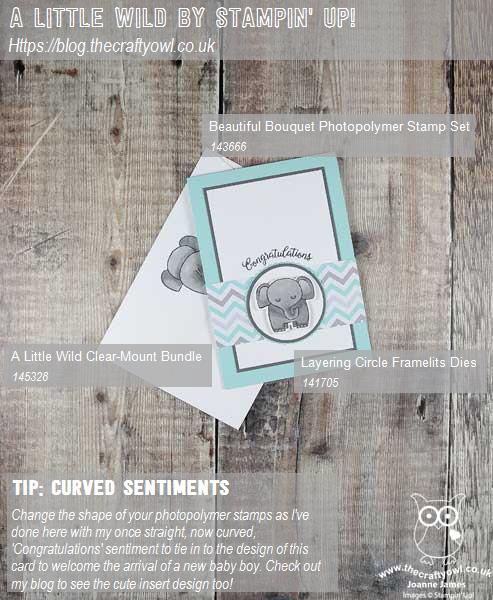
With the birth of a Royal baby yesterday, a second son and third child for the Duke and Duchess of Cambridge, it seemed only fitting today to share a card to welcome the arrival of a baby boy to the world that fits perfectly for the following challenges:


I used both the sketch and photo inspiration over at Fusion and coloured my sweet baby elephant with my Smoky Slate Stampin' Blends for the challenge over at StampInkPaper - take a look:
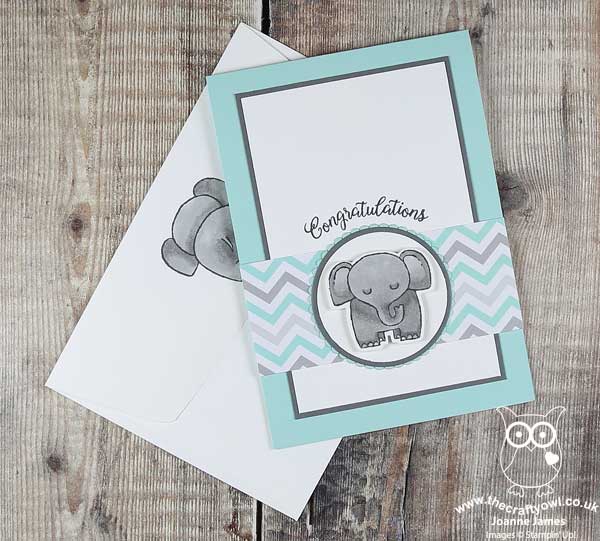
Here's the low-down on today's card:
A Little Wild Elephant - The little animals in the 'A Little Wild' stamp set are just the cutest and so perfect for a card to welcome a new arrival. Today's card just had to feature the elephant, given the Fusion photo inspiration; I also used a strip of retired designer series paper (from the A Little Foxy DSP stack) for my horizontal strip as it was perfect to tie my colours in together.
It's All In The Curve - I decided to curve my sentiment to follow the line of my layered circle, so chose to use the 'congratulations' stamp from the Beautiful Bouquet set. It's photopolymer which means that even though it is a straight stamp, it is flexible enough to be moulded to an alternative shape.
Fun On The Inside - One of the cute features of the 'A Little Wild' animal stamps is that as they are designed to work as a gift tag, they include both front and back of the animals. This doesn't preclude them from being used on cards - in fact, it's a fun way to decorate both the front and back of your envelope and the inside of your card. I added a sentiment from the same stamp set, a strip of left over DSP and a cute enamel heart - and for once, I remembered to take a photograph to share it with you! Here it is:

How sweet is that?! The blues could easily be switched out for pinks to make a girl card with the same details - an idea for another day, perhaps!
Here is the visual summary of the key products used on today's project for you to pin for easy reference:
You can see all of my 'How To' summaries on my 'How To - Tips and Techniques' Pinterest board in case you've missed any.
Enjoy your evening and I'll be back tomorrow with another project. Until then, happy stampin'!
Stampin' Up! Supplies Used:
633ac074-f920-4f44-92be-9ec22b1ec03d|0|.0|96d5b379-7e1d-4dac-a6ba-1e50db561b04
Tags: A Little Wild, A Little Foxy, Baby cards, Beautiful Bouquet, Little Loves Framelits Dies, Layering Circles Thinlits, Shop online, Shop Stampin' Up online, Shop Stampin' Up! Online, Stampin' Up, Stampin' Up Card, Stampin' Up Card ideas, Stampin' Up Supplies
Cards | Shop Online | Shop Stampin' Up! Online | Stamping
by Joanne James17. April 2018 20:50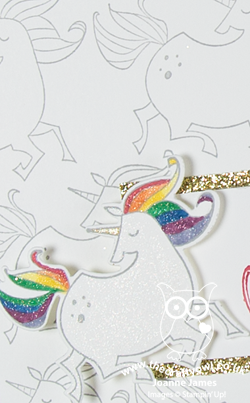
Today I have another card that I made with this week's challenge over at The Paper Players in mind.
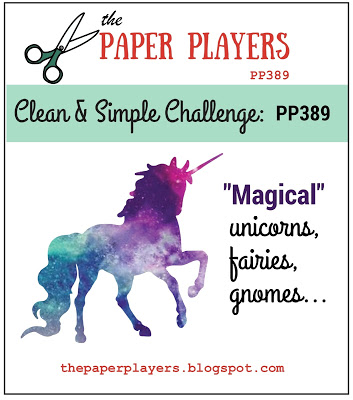
I love the card that I used as my design team entry on Sunday, but wanted to try another idea that I had for that lovely magical unicorn that was a little more clean and simple - take a look:
Here's the low-down on today's card:
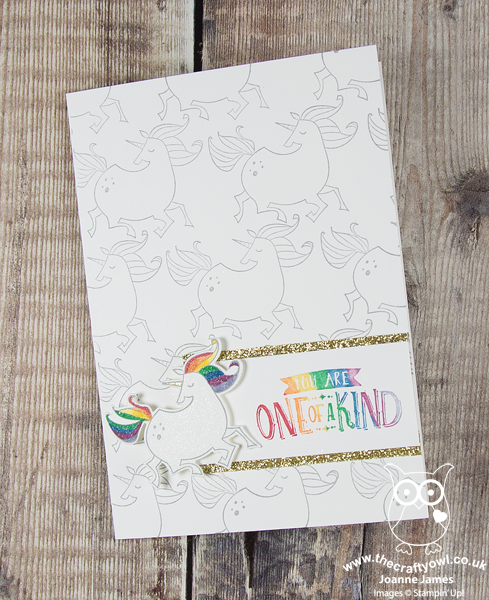
Keep It CAS - Whilst still not entirely 'white space', I created a subtle repeating pattern of pale grey outline unicorns to add enough detail to allow me to highlight my unique 'one of a kind' unicorn and sentiment.
One Of A Kind Unicorn - I stamped and coloured another unicorn to anchor my sentiment, adding a rainbow mane and tail, a liberal dose of clear Wink of Stella and a sparkling gold unicorn horn. This unicorn is all about standing out from the crowd!
Rainbow Highlights - My unicorn anchors my rainbow sentiment, coloured with Stampin' Write markers in the same colours as my unicorn mane and backed with some gold glimmer paper. A pop of colour on my clean and simple card, created with just one stamp set and some inks - truly clean and simple.
Here is the visual summary of the key products used on today's project for you to pin for easy reference:

You can see all of my Product and 'How To' summaries on my 'How To - Tips and Techniques' Pinterest board in case you've missed any.
Remember, you have until Friday to join our magical Clean and Simple challenge over at The Paper Players - we look forward to receiving your entries!
I'll be back tomorrow with another project; until then, happy stampin'!
Stampin' Up! Supplies Used:
by Joanne James17. April 2018 08:00
What a great start to a Tuesday - I logged on this morning to find a surprise update to the Clearance Rack. There are now lots of new items available, some with as much as 60% off. As is always the case, popular items will sell out quickly, so don't spend too long deliberating - get in there quick! There are some great paper bargains, including many designer series papers, accessories, kits, framelits and even the odd punch. The gorgeous Painted Autumn DSP is there along with some great varieties of washi tape. I could go on, but the best thing you can do is hop on over and take a look.
Click here to go the clearance rack in my online store and grab a bargain whilst stocks last! Don't forget to include the current hostess code YDNWGUGS make sure that 'allow your demonstrator to contact you' is ticked in order that you receive your special 'thank you' in the post from me next month.
Race you to the shop - first one there gets the bargains! Happy shopping!
by Joanne James11. April 2018 12:00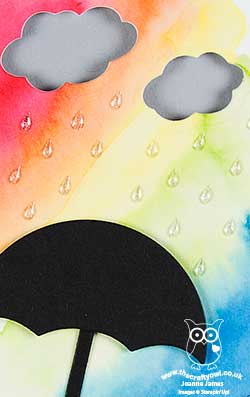
I have another information post lined up for you today with even more information on the Colour Revamp and the new ink pads, but first it's time for a little creative inspiration for this week's challenge over at Addicted to CAS that will hopefully bring a little colour to yet another grey, wet and miserable UK day as far as the weather is concerned:

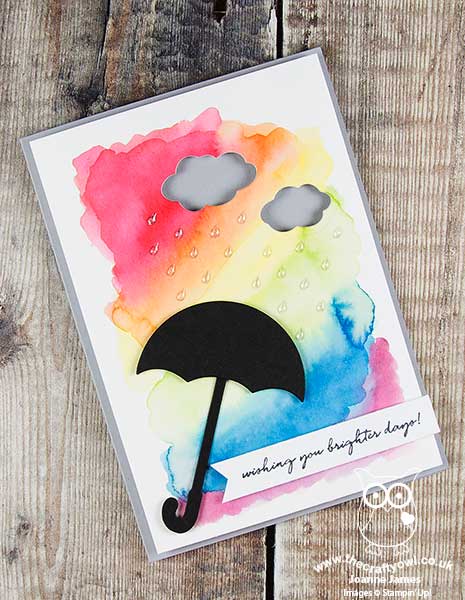
My card is super simple with a loose, watercoloured rainbow background - take a look:
Here's the low-down on today's card:
Watercolour Rainbow - To create my background, I simply took a selection of inks - Real Red, Pumpkin Pie, Daffodil Delight, Old Olive, Pacific Point, Rich Razzleberry - and using my aquapainter, wet my watercolour paper and brushed the various colours across the background, allowing them to blend as I painted. No science to it - as simple as that!
Farewell, Umbrella Weather - Once dried, I used my Umbrella Weather Framelits to cut out some clouds from my watercolour panel to reveal the grey clouds below. My black diecut umbrella is from the same set. Both the framelits and co-ordinating 'Weather Together' stamp set are retiring at the end of May, so if these are on your wishlist still you need to purchase them now before they are gone for good.
Epoxy Glitter Raindrops - These little glittery raindrops from the seasonal catalogue really are so pretty and really make this card; they catch the light and reflect the rainbow of colours beneath.
This is one of those cards that definitely looks better in real life - so pretty with the variagated colour and the sparkly raindrops! A lovely pick-me up to brighten someone's day.
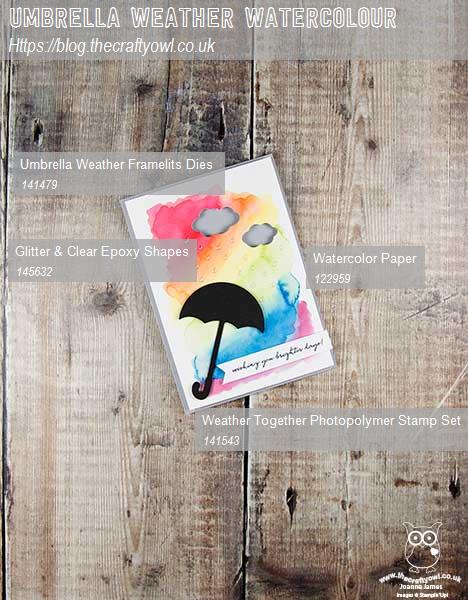
Here is the visual summary of the key products used on today's project for you to pin for easy reference:
You can see all of my 'How To' summaries on my 'How To - Tips and Techniques' Pinterest board in case you've missed any.
Enjoy your day and I'll be back soon with another project. Until then, happy stampin'!
Stampin' Up! Supplies Used:
6865ccab-d665-4dc6-bc52-d43291d45381|0|.0|96d5b379-7e1d-4dac-a6ba-1e50db561b04
Tags: Shop online, Shop Stampin' Up online, Shop Stampin' Up! Online, Stampin' Up, Stampin' Up Card, Stampin' Up Card ideas, Stampin' Up Supplies, Umbrella Weather, Weather Together, Watercolouring, Retiring Lists, retiring stamps, retiring accessories
Cards | Promotions | Shop Online | Shop Stampin' Up! Online | Stamping
by Joanne James10. April 2018 19:30 
I hope you are all enjoying the retiring lists - I'm sure, like me, you will be sad to see some of the items on them go, but on the bright side - I can assure you there is plenty more good coming our way as the new annual catalogue is AWESOME (yes, it is worthy of capital letters!)
As promised today, I have some more news for you on the colour revamp. There is lots of information floating around the internet on this already and not all of it accurate, so here are the main things you need to know right now:
Stampin' Up! has announced that there will be a change to many of the core colours as part of a colour revamp, as opposed to a colour refresh (impacting fewer colours), in the 2018-2019 annual catalogue. No changes have been made to the core colour offering since 2013 and it remains part of Stampin' Up!'s plan to update colours every three to five years.
In terms of numbers, the overall changes can be summarised as follows:
.png)
In a nutshell:
- We are keeping 27 of the existing core colours
- 13 core colours are going away (in addition to the 2016-18 in-colours, although Flirty Flamingo is leaving as an in-colour and returning as a core colour)
- We are adding 10 new core colours
- We are adding 6 returning In Colours that will now be core colours (colours offered in the past that will now be available again)
At this stage, the main colours you need to be concerned about are the departing in-colours that I highlighted in yesterday's post and in addition those 13 core colours that are going away. They are shown below for your reference:
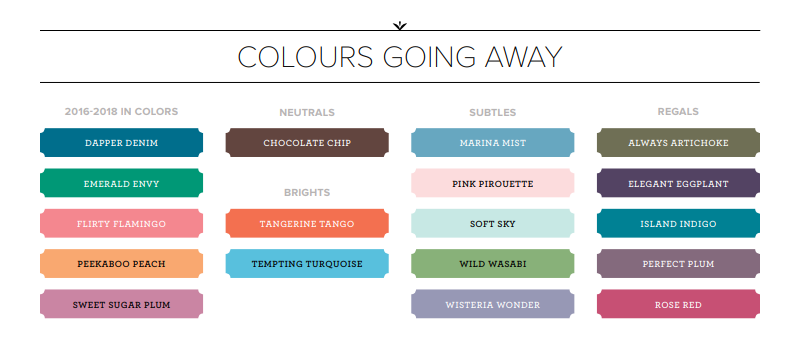
If any of these colours are favourites of yours, then now is the time to stock up on ink pads, cardstock, reinkers or co-ordinating accessories before they are gone forever. Availability of individual ink pads and re-inkers for the 13 Classic colours that are retiring ONLY will be guaranteed until May 7th. After that, ink pads and re-inkers will join cardstock, ink pad collections and accessories which will already be available only while stocks last until 31st May.
To make it easier for you, I have included a table below that links directly to the online store listing each of the products in the retiring Classic colours that are currently still available at time of posting - the pictures are quite small as there is a lot to fit in!
If you need the links for the retiring in-colours, you can find those in yesterday's post here.
I will be sharing the details of the new in-colours and the new colours joining our core collections in a future post; meanwhile, I am going to include here the 6 previous in-colours that are returning to join those core colour collections - I know this will cause lots of people to whoop with joy to see old favourites returning on a permanent basis:
.png)
Who else is as excited as me to see the return of Blackberry Bliss?! I think that's more than enough information for one post - I will post separately about the changes to ink pad design as I know this is something that you also are keen to know more about, based on the enquiries I've been fielding today, but didn't want to overload you with information - there really is a lot to take in.
Back soon with a creative post - meanwhile, get those retiring colour orders in before it's too late! Happy shopping!
ec805f76-e0c3-4a07-a827-8deec5f8300d|0|.0|96d5b379-7e1d-4dac-a6ba-1e50db561b04
Tags: Colour Revamp, Color Revamp, 2018 Annual Catalogue, retiring accessories, Retiring Lists, retiring stamps, Promotions, Stampin' Up, Stampin' Up Card, Stampin' Up Card ideas, Stampin' Up Supplies, Shop online, Shop Stampin' Up online, 2017 Annual Catalogue
Promotions | Shop Online | Shop Stampin' Up! Online | Stamping
by Joanne James9. April 2018 20:00
It's here - the list of products that will be retiring from this year's annual and Spring-Summer seasonal catalogues has been announced!

You can see and download the full list of items retiring from the current Spring-Summer catalogue by CLICKING HERE.

You can see and download the full list of items retiring from the current Annual catalogue by CLICKING HERE.
Retiring products are only available WHILE STOCKS LAST, so if you've still items on your wish list from this year's annual or spring-summer seasonal catalogues, you need to check the retiring lists and if they're on it put an order in pronto! Don't forget to add this month's online hostess code: YDNWGUGS
Some of the things I will miss most that feature on this list include:
I will do a further review tomorrow, however if you want to stock up on any of the retiring in-colour items and you haven't already done so, especially re-inkers, I would urge you to do that sooner rather than later as they are always the first things to sell out.
Click on the links below to take you directly to my online shop to purchase any of the 2016-18 in-colour items that are retiring:
You will notice there are also a number of colour products from other colour families that are included on the list; this is because Stampin' Up! has announced a colour revamp that will involve a complete overhaul of our colours, that includes movement between colour families, additional retiring colours and also some old favourites that will be returning - yay! - along with a redesign of the ink pad casing itself. I will have more news on that for you in the next few days.
I'll be back tomorrow with a creative post and an update on the retiring list; until then, happy shopping!
00407306-60e1-4442-9a56-ba02d53be035|0|.0|96d5b379-7e1d-4dac-a6ba-1e50db561b04
Tags: retiring accessories, Retiring Lists, retiring stamps, Promotions, Stampin' Up, Stampin' Up Card, Stampin' Up Card ideas, Stampin' Up Supplies, Shop online, Shop Stampin' Up online, 2017 Annual Catalogue
Catalogues | Promotions | Shop Online | Shop Stampin' Up! Online | Stamping
by Joanne James31. March 2018 20:00
I'm back for a second post today! I had a little time for a spot of crafting this morning - I feel like I haven't been in my craft room to make something 'just because' in such a long time! So somewhat ironically, given that it's Easter weekend, I made a Christmas card! Yes - I couldn't resist making a card to join in with the challenge over at Merry Monday this week:
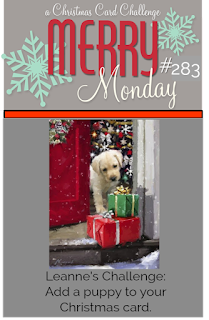
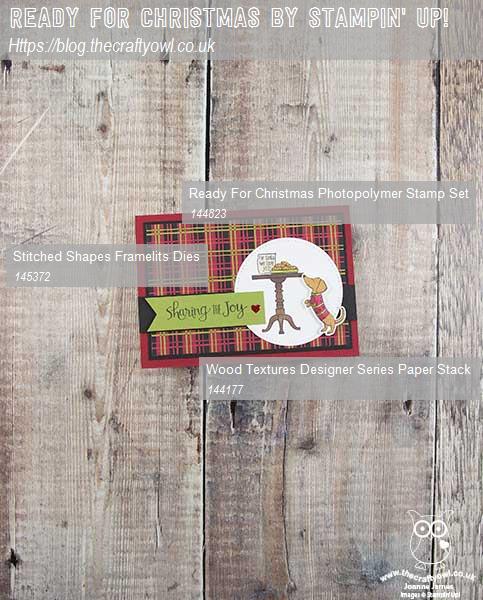
I decided to use the cute little sausage dog from the Ready For Christmas stamp set, still available on carryover from the last Autumn-Winter seasonal catalogue, along with some retired Christmas Around The World tartan designer series paper:

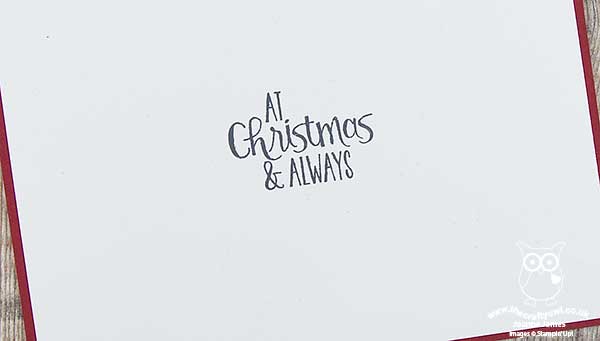
I had a little fun with this card, and paper pieced both the occasional table and the dog using two different patterns from the Wood Textures DSP stack - don't you just love the honey-colour of that naughty-but-cute dachshund?! And a simple sentiment on the inside from the same set completes my card:
Here is the visual summary of the key products used on today's project for you to pin for easy reference:
You can see all of my 'How To' summaries on my 'How To - Tips and Techniques' Pinterest board in case you've missed any.
Back soon with another project. Until then, happy stampin'!
Stampin' Up! Supplies Used:
55f9c9f6-14c1-4812-b8eb-f8ff00770191|0|.0|96d5b379-7e1d-4dac-a6ba-1e50db561b04
Tags: Ready For Christmas, Christmas Staircase Thinlits, Stitched Shapes Framelits, Shop online, Shop Stampin' Up online, Shop Stampin' Up! Online, Stampin' Up, Stampin' Up Card, Stampin' Up Card ideas, Stampin' Up Supplies, Christmas, Christmas Around The World
Cards | Shop Online | Shop Stampin' Up! Online | Stamping
by Joanne James31. March 2018 08:00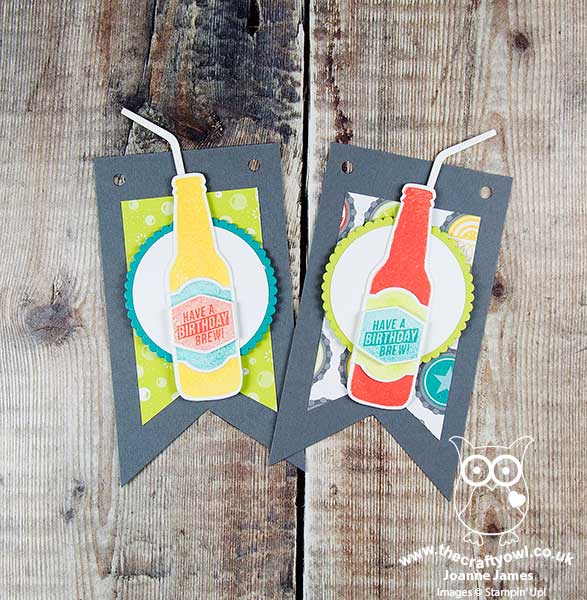
Today it's the last day to snap up a Sale-A-Bration freebie, whether that's free stamps with your starter kit when you join my team, extra hostess rewards when you place an order of £200 or more or a free gift with a purchase of £45 or more. You only have until 10.50pm this evening though, so don't leave it too late!

I'm sharing the last of my Sale-A-Bration makes with you today, a party banner featuring the Bubble Over stamp set and Bottles & Bubbles Framelits Dies, and the FREE Bubbles & Fizz Designer Series Paper - take a look:
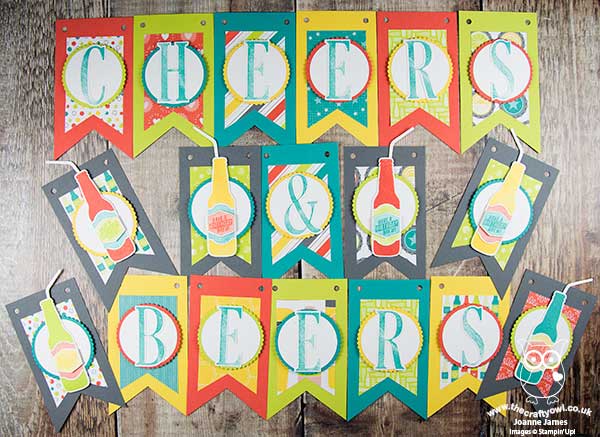
My banner letters are courtesy of the Letters For You stamp set and co-ordinating Large Letters framelits, on some layered circles before adding to the pennants featuring all of the designer paper designs. Here's a picture of it hanging properly at last November's Onstage event:
.jpg)
This is a great set for making part banners for a birthday or summer BBQ celebration (if it stops raining for long enough here in the UK to light one, of course!) and the Bubbles and Fizz designer papers add great colour and pattern with a fun party vibe.
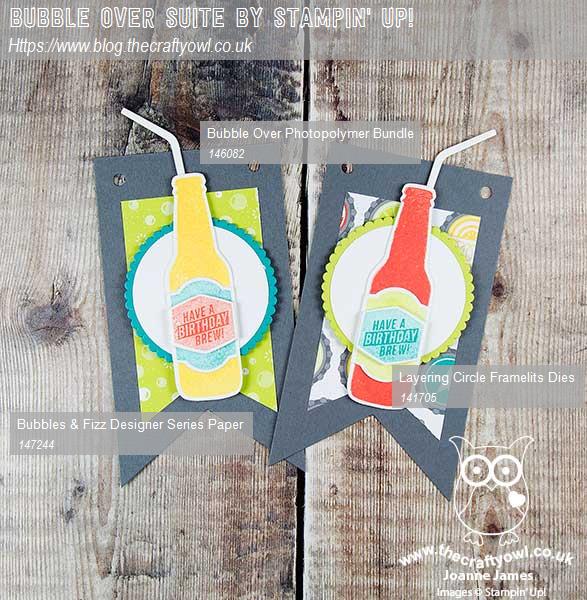
Here is the visual summary of the key products used on today's project for you to pin for easy reference:
You can see all of my 'How To' summaries on my 'How To - Tips and Techniques' Pinterest board in case you've missed any.
I'll be back tomorrow with this week's project for our new challenge over at The Paper Players. Until then, happy stampin'!
Stampin' Up! Supplies Used:
f5911637-5876-48aa-8758-624762655778|0|.0|96d5b379-7e1d-4dac-a6ba-1e50db561b04
Tags: Stampin' Up Supplies, Stampin' Up Card ideas, Stampin' Up, Shop Stampin' Up online, Shop Stampin' Up! Online, Shop online, Letters For You, Large Letters Framelits, Bubbles and Fizz, Bubble Over, Bottles and Bubbles Framelits, Sale-A-Bration 2018, Layering Circles Thinlits
3D Projects | Promotions | Sale-a-bration | Shop Stampin' Up! Online | Stamping