Bloom and Grow Pinewood Planks Birthday Card

by Joanne James30. August 2019 09:00

Woohoo, it's Friday! I have another 'Bloom and Grow' card for you today, this time using both the sketch and inspiration photo over at Fusion:


Today's card is a little more 'stepped up' than my earlier clean and simple version (you can see that card here if you missed it) with a few more tools involved - take a look:

On today's card my sentiment is in the same place, however I have added a split top layer of Costal Cabana cardstock that I first embossed with the Pinewood Planks embossing folder. I coloured my row of five flowers with my Stampin' Blends and cut them out using the co-ordinating Budding Blooms Dies before popping up with dimensionals across the edge of the mat layer. This card just shows how a few well chosen additional tools and accessories can create a completely different card with the same stamp set.

Here is the visual summary of the key products used on today's project for you to pin for easy reference:


You can see all of my 'How To' summaries on my 'How To - Tips and Techniques' Pinterest board in case you've missed any. I am really loving this stamp set at the moment; I made the cards for my in-colour club with it too. It makes such great feminine birthday cards and is really easy to work with.

Enjoy your day and I'll be back tomorrow with another project. Until then, happy stampin'!


Stampin' Up! Supplies Used:

Table built using Product Table Builder by The Crafty Owl - Independent Stampin' Up! Demonstrator.

Bloom and Grow Clean and Simple One Layer Birthday Card

by Joanne James29. August 2019 14:00

Today I'm sharing a card for the current challenge over at Fusion where both the sketch and inspiration photo got my creative juices flowing this week, so much so that I made two cards! Today I'm sharing a clean and simple one layer card inspired by the photo that is also perfect for the current challenge over at Addicted to CAS and I will be back with a stepped up card that uses the sketch too tomorrow.


My card also fits the bill over at SUO Challenges and this month's Stampin' Up! #SimpleStamping challenge since it is a simple combination of stamps, ink and paper to make a birthday card - take a look:


This card really was super simple to make: I positioned my sentiment and stamped it in Memento Black ink onto extra thick whisper white cardstock, then took one of the boughs of flowers from the 'Bloom and Grow' stamp set and stamped it both above and below if along the fold of the card, stamping off the edge to add interest. I coloured them with my Stampin' Blends and added a graduated aqua border to make the flowers stand out and mimic the colour of the inspiration photo.

Here is the visual summary of the key products used on today's project for you to pin for easy reference:


You can see all of my 'How To' summaries on my 'How To - Tips and Techniques' Pinterest board in case you've missed any. 

Enjoy your day and I'll be back tomorrow with another project. Until then, happy stampin'!


Stampin' Up! Supplies Used:

Table built using Product Table Builder by The Crafty Owl - Independent Stampin' Up! Demonstrator.

Important Stampin' Up! News: Last Chance For Stampin' Trimmer Blades

by Joanne James27. August 2019 11:00

This is my second post of today! You can read my earlier creative post here but I wanted to make sure you had the latest information regarding Trimmer Blades for Stampin' Up!'s discontinued Stampin' Up! Trimmer.

The final batch of Stampin’ Trimmer Cutting Blades (item 126995) arrived in the warehouse earlier than the expected September due date, so they will be made available to purchase TOMORROW. 

Trimmer blades will be available to order on Wednesday, 28 August at 6:00 p.m. (UK), and when they sell out they will be gone for good.

In the past, blades have sold out within minutes and individuals placing single orders have had more success than demonstrators placing orders for multiple customers. As such, my advice to you is to be ready to place your order online at 6pm and arrange for them to be shipped to you directly. Remember, the limit is three packs of blades per customer.  

Stampin' Up! has also announced that there will be a new paper trimmer available for demonstrators to purchase before the end of 2019, which will sell for £23. This should be available to customers shortly thereafter and I will provide you with more information as soon as it becomes available.

Lastly, since this is the last week in August, don't forget if you earned bonus coupons last month, this is your last chance to use them if you haven't done so already. It's also the last opportunity to take advantage of the 'Extra, Extra' recruiting promotion. If you need more information, do get in touch or read all about it here.

Copper Metallic Brightly Gleaming Christmas Card AYSI207 FF041

by Joanne James27. August 2019 09:00

Today I'm sharing another Christmas card, this time for the current challenges over at As You See It and Festive Friday:


I was determined to have another go at the current AYSI sketch and go with it the right way up and since metallics are a big feature of my card today it is also perfect for the challenge over at Festive Friday too - take a look:


Here's the low-down on today's card:

Brightly Gleaming - This fabulous copper detailed designer series paper from the Brightly Gleaming specialty designer series paper is the inspiration for the colour scheme of my card today. The Brightly Gleaming Suite is one of the new suites in the forthcoming autumn-winter seasonal catalogue and the specialty paper is most definitely the star of the show in my opinion! Seasonal stars and bauble images combined with all-purpose patterns, with half of the designs having copper foil accents that truly make this paper shine. 

Christmas Gleaming Ornaments - I stamped and heat embossed all of the elements of my decorated bauble ornament and added some Night of Navy colouring with my Stampin' Blends for added detail, before punching out with the co-ordinating ornament punch. This was so quick, a little fussy cutting with the holly and berries was totally worth it. I also did a little stamping inside my card:


Copper Cabana - If you're still reading then please accept my apologies for the dodgy Barry Manilow reference :-) Today's card really is a celebration of metallics, and copper in particular. That gorgeous copper foil-accented paper, a full copper foil mat, the heat embossed sentiment and ornament detail, along with the addition of one of the foil elements that also form part of this suite, all serve to give this card a truly luxurious feel.

Here is the visual summary of the key products used on today's project for you to pin for easy reference:


You can see all of my 'How To' summaries on my 'How To - Tips and Techniques' Pinterest board in case you've missed any. 

Enjoy your day and I'll be back tomorrow with another project. Until then, happy stampin'!


Stampin' Up! Supplies Used:

Table built using Product Table Builder by The Crafty Owl - Independent Stampin' Up! Demonstrator.


Tis The Season For Santa Hats - Not! FMS400

by Joanne James26. August 2019 14:00

So today is the hottest August Bank Holiday Monday on record here in the UK and I am sharing a Christmas card with you - go figure!! I managed to play along with week 3 of the Freshly Made Sketches 400th birthday celebrations so it just had to be done:

I thought the panels would be perfect to showcase some designer series paper, so I used another of the patterns in my Night before Christmas paper pack and this is what I came up with:


I created a couple of layered panels then decided to make my sentiment the focal point of my Stitched Oval and used one of the festive dies from the Jolly Season dies that are also in the Night Before Christmas Suite, with a little offset layering to make it stand out. I fussy cut a santa hat from a leftover scrap of paper and added this at a jaunty angle to bring the whole thing together. The only stamping on my card was the sentiment on the inside of my card:


And my card was done!

Here is the visual summary of the key products used on today's project for you to pin for easy reference:


You can see all of my 'How To' summaries on my 'How To - Tips and Techniques' Pinterest board in case you've missed any. 

Enjoy your day and keep cool! I'll be back tomorrow with another project. Until then, happy stampin'!


Stampin' Up! Supplies Used:

Table built using Product Table Builder by The Crafty Owl - Independent Stampin' Up! Demonstrator.

Bloom and Grow Purple Clean And Simple Birthday Card

by Joanne James25. August 2019 20:00

I managed to get a few hours in my craft room yesterday and finished some cards for a few challenges that I wanted to play. The first was using the gorgeous purple-based colour palette over at CAS Colours and Sketches this week which I really couldn't resist; I also used the current CAS(E) This Sketch layout:


I love purples and couldn't resist creating some pretty florals using the Bloom and Grow bundle:


This card was actually super simple: I used my Subtles embossing folder to emboss my Highland Heather card base, then stamped my sentiment on a piece of Whisper White, backed with a piece of Gorgeous Grape that I added a scalloped border to using one of the dies in the Budding Blooms Dies set. I stamped one of the floral images onto Whisper White and coloured it using my Stampin' Blends and Stampin' Write Markers, adding a little clear Wink of Stella to the dark purple berries for a subtle sparkle and shine. A little decoration to the inside using the same set completes my card:


This is the first card I've made using the Bloom and Grow stamp set, but it's a great set for clean and simple cards and once I'd started I couldn't stop so I hope you like it as I have a few more to share this week, in between more Christmas card sneak peeks too!

Here is the visual summary of the key products used on today's project for you to pin for easy reference:


You can see all of my 'How To' summaries on my 'How To - Tips and Techniques' Pinterest board in case you've missed any. 

Enjoy the rest of your evening and I'll be back tomorrow with another project. Until then, happy stampin'!


Stampin' Up! Supplies Used:

Table built using Product Table Builder by The Crafty Owl - Independent Stampin' Up! Demonstrator.

Stitched Stars Exam Congratulations Card

by Joanne James22. August 2019 09:00

Today I'm sharing a card using this week's CAS(E) This Sketch layout that is also perfect for the theme over at Global Design Project #GDP203 this week:


Today is the day when for lots of students in the UK the wait is finally over as GCSE results are announced. My nephew is one of those students for whom today represents the culmination of months of study and hard work and whilst I don't know his results at the time of writing this, I am confident that a card to congratulate him on his exam success will be in order. Since my card is for a boy I didn't want anything too fussy, so the above sketch layout was perfect. I took the opportunity to play with some new product from my Autumn-Winter catalogue pre-order to create a cool and colourful card - take a look:


Here's the low-down on today's card:

Not Just For Christmas - Stitched Stars are one of the few stitched shapes now missing from the Stampin' Up! collection - but not any more! The Autumn-Winter catalogue has a great bundle called 'So Many Stars' featuring both stitched and decorative stars and that great rolling, starry die that I've used on my card today. I inset the die into my top layer of Granny Apple Green and used a base of Mango Melody so that the base colour shows through the star shapes (I paper-pieced the non-star elements back in) before finishing with my sentiment in a larger stitched star. Great for Christmas, but perfect for a congratulations card too! 

A Punny Sentiment - My sentiment comes from the Darling Label Punch Box stamp set - one of my favourites for a cool congratulations card for a discerning teenager. I masked off the stripes that surround it so that I had just the words, which fit inside my stitched star perfectly. I finished the inside of my card with a sentiment from the now retired 'Amazing Congratulations' stamp set and some stars from the new So Many Stars stamp set:


Two Cards, Four Colours - I chose a bright and colourful palette for my card today and couldn't initially decide whether to add Granny Apple Green or Poppy Parade to my pairing of Mango Melody and Blueberry Bushel. So I created two cards featuring each of the colours. Here's the second one:

And here's a photo of the cards together - which one do you prefer? Leave me a comment below - I'd love to hear your thoughts!

Either way, here's the colour palette I used in case you would like to save it to inspire your future crafting projects:


Here is the visual summary of the key products used on today's project for you to pin for easy reference:


You can see all of my 'How To' summaries on my 'How To - Tips and Techniques' Pinterest board in case you've missed any. 

Enjoy your day and I'll be back tomorrow with another project. Until then, happy stampin'!


Stampin' Up! Supplies Used:

Table built using Product Table Builder by The Crafty Owl - Independent Stampin' Up! Demonstrator.

Modern Heart Heat Embossed Black Card

by Joanne James20. August 2019 20:45

Today I'm sharing a card for the current challenge over at TGIF Challenges where they have an interesting challenge this week:


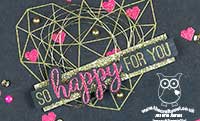
 All on black - now this was a challenge! After much thought, I decided to use a new stamp set and the (now retired) 2018-20 In Color Embossing powders for a pop of bright colour and ended up creating not one but two cards! Here's my favourite - take a look:


 Here's the low-down on today's card:

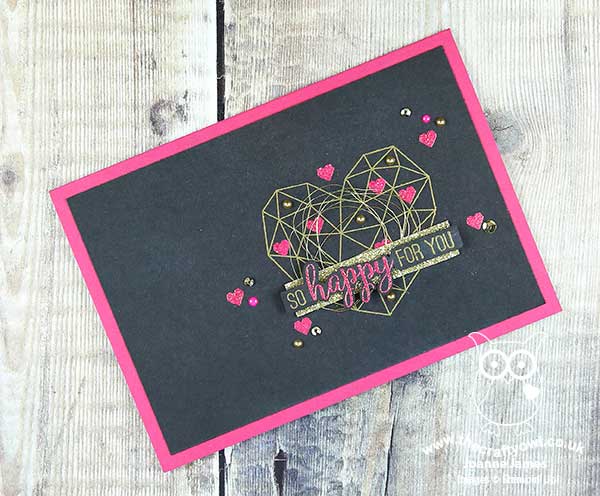
A Modern Heart - This stamp set was one that I picked up because my daughter loves it, so it seemed only fair I made a card with her in mind. This card would work as an engagement card I guess, but I made it with congratulations in mind; she works so hard both at school and in her extra-curricular sports and music activities and I know it won't be long before we have another exam pass or success of some kind to celebrate and she will appreciate the sparkle and grown-up feel of this clean and graphic design.

Double Heat Embossing - In order to achieve my gold and Lovely Lipstick design, I stamped and heat embossed in two stages: first I stamped and heat embossed the gold heart, then I added the red hearts later. For the sentiment, I stamped in one go, the dipped the ends in gold first then carefully masked the ends off to add the coloured embossing powder to the word 'happy' before heat embossing both together.

Touches of Gold - To finish my card, I added some gold metallic pearls and gold sequins, along with a touch of gold glimmer paper and some (retired) gold thread for some texture and to add a little sparkle. I also added a few Lovely Lipstick enamel dots to complete my card.

Here is the visual summary of the key products used on today's project for you to pin for easy reference:


You can see all of my 'How To' summaries on my 'How To - Tips and Techniques' Pinterest board in case you've missed any. 

I so liked the effect of the bright colours against the black, I also made a second card using the Accented Blooms stamp set and some Pineapple Punch embossing powder, ribbon and DSP for another super bright card:


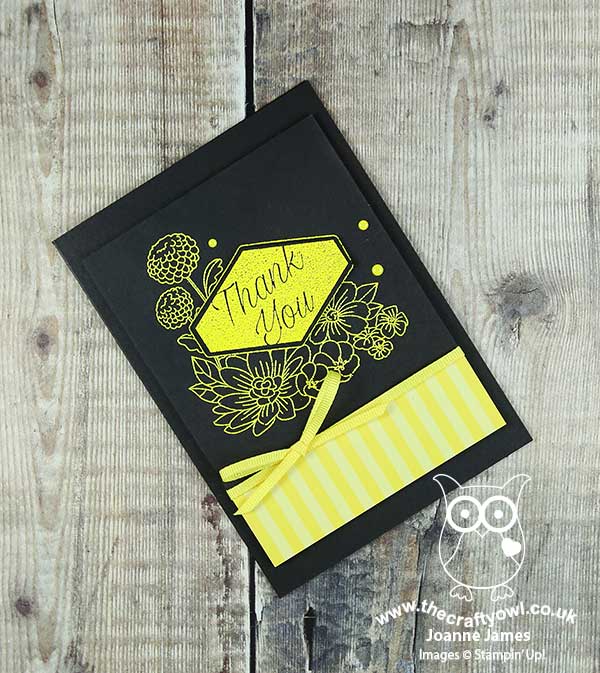
When the James Juniors wandered into my craft room to see what I'd been making, they declared the heart much nicer and the one that I should share here, but I thought I'd share this one too as I rather like it and if you have some coloured embossing powders in the back of your craft drawer, you may like to try it too!

Having braved the sports shop for rugby boots and hockey shoes yesterday, today we ventured further afield and braved the shops for new school shoes, trousers and other items of uniform needed in readiness for the return to school in a couple of weeks time. Thankfully we didnt need much and our trip was successful. We are rewarding ourselves tomorrow with a trip to the cinema! Enjoy your evening and I'll be back tomorrow with another project. Until then, happy stampin'!


Stampin' Up! Supplies Used:

Table built using Product Table Builder by The Crafty Owl - Independent Stampin' Up! Demonstrator.

Magnolia Lane Memories and More No Stamping Card

by Joanne James19. August 2019 21:00

Happy Monday everyone! Today I'm sharing a super quick card using the CAS Colours and Sketches layout and the theme over at Just Add Ink:


I was thrilled to see the JAI theme this week; when you're busy and short on crafty time, what can be better than a 'no stamping' card? I had the Magnolia Lane Memories and More Card pack out on my desk still following last week's class, so chose card and set to work:


I backed my card with a panel of Early Espresso, added a sentiment sticker, some co-ordinating twine and a trio of pearls to my Petal Pink card base, that I had already run through my Subtles embossing folder and I was done! I even added a larger M&M card to the inside for a pre-decorated interior:

Seriously - it took longer to photograph and watermark my card and type up this post than it did to make it!

 As a result I did manage to get a couple more cards made this afternoon, so I will share those with you tomorrow.

Here is the visual summary of the key products used on today's project for you to pin for easy reference:


You can see all of my 'How To' summaries on my 'How To - Tips and Techniques' Pinterest board in case you've missed any. 

Enjoy your evening and I'll be back tomorrow with another project. Until then, happy stampin'!


Stampin' Up! Supplies Used:

Table built using Product Table Builder by The Crafty Owl - Independent Stampin' Up! Demonstrator.

We'll Walrus Be Friends Walrus Thank You Card

by Joanne James9. August 2019 20:00


Today I'm sharing a card for the current sketch challenge over at Fab Friday:

This is one of those great sketches that is so versatile with so many possibilities. I used the opportunity to break out a new stamp set - take a look:


Here's the low-down on today's card:

We'll Walrus Be Friends - I love a punny sentiment and am finding myself doing more and more colouring these days, so 'We'll Walrus Be Friends' was always going to be on my list! A great set with words for lots of occasions and images that are small enough to colour quickly but also give a satisfying few minutes of relaxation, this is a great fun set. 

High Seas - I coloured my image in with my Stampin' Blends and I embossed the mat layer on my card base with the High Seas embossing folder to tie in with the waves on my stamped image. I don't tend to use a lot of texture on my cards, but I love the extra layer of detail this embossing gives. 

Not Quite CAS - I started out intending this card to be my entry for the current Less Is More challenge where the challenge this week is to use orange, aqua and white on your card, but decided once I'd added the embossed layer that this probably wasn't clean and simple enough for the strict rules that the LIM ladies follow - back to the drawing board on that one! I do love the fresh colour combo though - here it is if you would like to save it for future reference:


Here is the visual summary of the key products used on today's project for you to pin for easy reference:


You can see all of my 'How To' summaries on my 'How To - Tips and Techniques' Pinterest board in case you've missed any. 

Enjoy your evening; I'll be back tomorrow with another project. Until then, happy stampin'!


Stampin' Up! Supplies Used:

Table built using Product Table Builder by The Crafty Owl - Independent Stampin' Up! Demonstrator.

Mini Catalogue

BROWSE THE CATALOGUE

The mini catalogue is now live! Read and download your copy here.

Shop Online

Access my online shop 24 x 7, 365 days of the year:

Current April hostess code:

VDKNV7BH

Shop Online

Join My Team

It's always a great time to join Stampin’ Up! New team members can get £130 worth of products for only £99 + free business supplies + free shipping + all the fun being a part of Stampin’ Up! Stampin' Up! has something for everyone: join my growing team and benefit from my support to enjoy Stampin' Up! however you choose.

If you're interested, call me for a chat to understand how I can help you realise your goals. Alternatively, if you have already decided to sign up and you just can't wait, please click here for the link to the online form where you can sign up and order your starter kit right away! 

Latest Kit!

Stampin Cut and Emboss

The Rock Legend Kit has all you need to make 8 cards with coordinating envelopes. Along with the new Panda Friends Kit, both are available from January 4th for just £14 each - get yours here!

2023-24 Annual Catalogue

BROWSE THE CATALOGUE

Click on the catalogue for a full list of current SU! supplies - if you would like to order any of the items featured, please drop me a line at [email protected] or give me a call on 07773 421446 - I'd be happy to help.

New Online Exclusives

There are new products available exclusively in the online store from 5 March - check them out here.

About Me

Hi I'm Joanne and live in Northampton and when I'm not looking after my husband and two beautiful children, am an avid crafter with a passion for all things Stampin' Up!

I must confess that I have never been a big rubber stamper - until I discovered Stampin' Up! that is. I love the fact that I can get such great results with co-ordinating stamps, inks, papers and punches - the possibilities are endless! Join me on my stamping journey as I share the things I love and be inspired to create amazing things yourself!

Follow Me

Monthly Newsletter

Box Builder

Click the button above to use Box Buster to create your custom box design using the Envelope Punch Board!

Kits Collection Now Available!

Stampin Cut and Emboss

The new Kits Collection from Stampin' Up! is now available!

Click here to see the current kits available and order yours online today.

I Design For


Stampin' Up Stuff

This is my personal blog and is not endorsed by Stampin’ Up! I hope you find it a plentiful source of ideas and personal inspiration but please don't copy my designs for contest submission or use for classes, publication or sale without express permission.