Mosaic Mood Meets Praiseworthy Prose

by Joanne James10. May 2020 10:00

Two posts from me today as whilst I did squeeze in a little crafting yesterday morning, I was too busy enjoying the sunshine the rest of the day to blog - so I'm sharing today! I loved Linda's sketch over at Freshly Made Sketches this week and chose to use green, congratulations sentiment embossing folder from the Festive Friday inspo list:


So many ways to interpret the sketch, but in the end I decided to use up more of those fussy cut Mosaic Mood designer papers and pair some border strips with a gorgeous glossy hummingbird and a sentiment from Praiseworthy Prose:


Praiseworthy Prose is another of those sets that hasn’t seem much (any!) ink so I stamped my sentiment in Soft Suede onto a Very Vanilla stitched rectangle and used my hummingbird to accent it. Some subtle embossing to my mat layer completes my card.

I really like this finished card and its one of those that could be used for men or women, which is great as I didn’t have anyone in mind to send it to when I started creating. 

Here is the visual summary of the key products used on today's project for you to pin for easy reference:


You can see all of my 'How To' summaries on my 'How To - Tips and Techniques' Pinterest board in case you've missed any. 

Enjoy your day and I'll be back tomorrow with another project. Until then, happy stampin'!


Stampin' Up! Supplies Used:

Table built using Product Table Builder by The Crafty Owl - Independent Stampin' Up! Demonstrator.

Wonderful Moments - The Bride AYSI 225

by Joanne James8. May 2020 12:00

Today I'm sharing my design team card for our new challenge over at As you See It where it's time for my favourite, a sketch challenge courtesy of the lovely LeAnne:


I have been trying to get some use out of sets that are about to retire and decided to pair today's sketch with the wedding theme over at Global Design Project and create a wedding card for the bride - take a look:


Here's the low-down on today's card:

For The Bride - I bought the 'Wonderful Moments' set the minute it became available in the catalogue; I love the style of the artist - it's the same design as 'Beautiful You', 'Artfully Aware', 'A Good Man' and 'Beautiful Moments' - and in this particular set it was the bride image that sold it to me. That said - this is the very first time I've inked it up!! Clearly 'so many stamp sets, so little time' in my house!! For me though it is a keeper - the set has some great sentiments, and I adore this bridal image. I decide to heat emboss my image in silver which can be a little tricky to photograph, so I've added a couple of extra images so that you can appreciate the detail and shine:


Lovely In Lavender - I paired my silvers with one of my favourite and oft overlooked papers in the Best Dressed DSP stack - I love the subtle white roses on the variegated Purple Posy background and I couldn't resist using it for my background today. I have a friend who actually got married in a wedding dress that was this soft lilac colour and this card reminds me of that day. 

Outside the Frame - I wanted to use an embossed rectangular frame for one of the layers on my card (I used some retired brushed silver cardstock) but rather than frame my image, I fussy cut the bride and positioned her outside the frame for maximum impact. I really like the finished effect:


I did take one or two liberties with LeAnne's sketch, especially with the sentiment placement, which I had to move and place inside my frame (I heat embossed it on vellum and used this as another of my layers) and I downplayed the vertical strip with a piece of metallic edged ribbon, but hopefully you can see the broad layout there. Either way, I LOVE this card and hope you do too! I had no-one in mind to send my card to when I made it and Rebecca popped her head around the door as I was photographing and asked me who it was for. Jokingly, as the bride has her colouring, I said "no-one in particular; maybe I'll keep it for you." She promptly said "Put it somewhere safe then - it will be at least 25 years before I get married!!" What can I say - a typical teenage girl with other things on her mind!

Here is the visual summary of the key products used on today's project for you to pin for easy reference:


You can see all of my 'How To' summaries on my 'How To - Tips and Techniques' Pinterest board in case you've missed any. 

Before you put your creative thinking caps on, why not check out the blogs of the other As You See It team members:

Amy Jasper

Heather Cooper

Jan Clothier

Jane Knudsen

LeAnne Pugliese

Here's a summary of our challenge rules:

  • Create any card, scrapbooking page, 3D project or packaging   project that fits the challenge.
  • Please include the challenge graphic and link back to the challenge in your blog post. Turn off word verification so we can leave you lots of lovely comments. Make sure you link the post not the whole blog to the Linky. Use #AYSIXXX when uploading to a public gallery.
  • If you’re unsure about ‘the rules’, check the details under the Challenge Guidelines tab on the As You See It Challenge homepage.
  • In a sketch challenge, you are welcome to rotate or flip a sketch. You can replace shapes used such as substituting a circle panel for a square panel. However, we must be able to still see the basis of the original sketch in your finished product.

We look forward to seeing your creations in the AYSI gallery.

Enjoy your day; we have a Bank Holiday here in the UK today to celebrate the 75th Anniversary of VE (Victory in Europe) day. There was a Red Arrows flypast during one of my online demonstration sessions this morning and one of the ladies on the call was lucky enough to see them fly overhead through her skylight as we crafted. I didn't see or hear them but one of the ladies in my choir snapped this rather good photo:


They fly by so fast it's quite tricky to catch a good photo. I hope you enjoy the rest of your day and I'll be back tomorrow with another project. Until then, happy stampin'!


Stampin' Up! Supplies Used:

Table built using Product Table Builder by The Crafty Owl - Independent Stampin' Up! Demonstrator.

Friendly Silhouettes Summer Meadow Feel Good Card TTT 62

by Joanne James30. April 2020 09:00


It's Thursday and time for a new challenge over at TicTacToe! It's the turn of Team X to host this week and the lovely Amy is our featured designer. This is the fun board that we are playing along with: 


I adore the bright colours of the Just Us Girls Challenge photo this week so couldn't resist combining with our board this week for a bright and sunny scene - take a look:


Here's the low-down on today's card:

Tic Tac Toe Three Ways - I started off with Pink-Flowers-Clouds in the first column as my TTT solution, but by the time I finished realised I had also managed the first row Pink-Diecut-Grass and the diagonal Clouds-Twine-Grass. What can I say? #OverAchiever. Truth is, I was so panicked about not covering three squares, I ended up nearly covering the board!!

A Friendly Silhouette - I used the Friendly Silhouettes dies to create my grassy flower meadow, cutting the whole thing out in Granny Apple Green then again in pink, yellow and red so that I could paper-piece the flowers to the top of the stems as I didn't want a true silhouette on this occasion. I added a few pearls as flower centres. I completed my scene by punching a yellow 1/2" circle, cutting some clouds using a retired die and the two teeny tiny orange butterflies are cut using the Butterfly Beauty Dies - the perfect size for my scene.

A Darling Label Punch - I added a sentiment from the co-ordinating Friend Like You stamp set, but decided to punch it out using the punch in the Darling Label Punch Set box so that it would stand out instead of stamping it straight onto my layer. This kit is retiring so currently a bargain at £16.80 in the online store - link below if you would like to grab one. I also used the Friends Like You stamp set to decorate the inside of my card:

A nice uplifting sentiment for the times we find ourselves in. Sometimes a warm cup of tea, a walk in the sunshine with the ones we love or even a slice of cake delivers just the right amount of pleasure when there is so much going on around us that is not within our control.

Here is the visual summary of the key products used on today's project for you to pin for easy reference:


You can see all of my Product and 'How To' summaries on my 'How To - Tips and Techniques' Pinterest board in case you've missed any. 

A tictactoe board offers so many creative possibilities - how does this week's board inspire you? Why not have a go? We would love to see you in the gallery and who knows - you might be selected for Designer's Choice and be eligible to be a guest designer on a future challenge. 

Enjoy your day; I will be spending some time crafting and creating more delights to share with you in the coming week. I'll be back tomorrow with another project - a lovely card and gift combo, even if I say so myself - you won't want to miss it! Until then, happy stampin'!


Stampin' Up! Supplies Used: 

Table built using Product Table Builder by The Crafty Owl - Independent Stampin' Up! Demonstrator.

Smile with Daisy Lane for AYSI 224

by Joanne James24. April 2020 12:00

Today I'm sharing my design team card for our new challenge over at As you See It where it's time for a speed challenge:
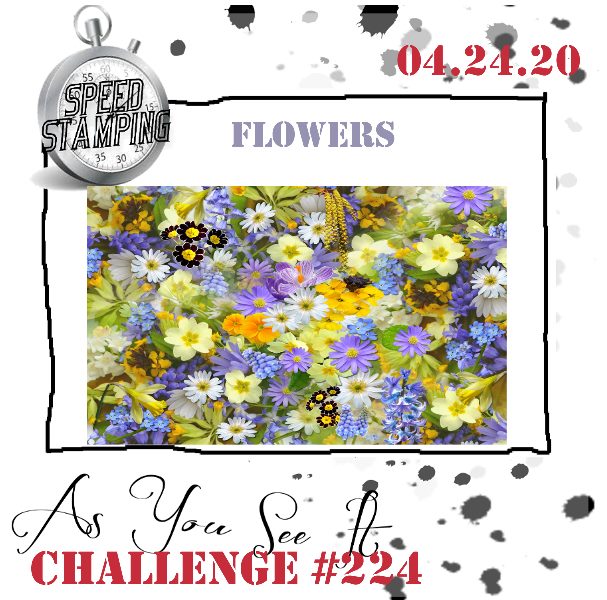
    

I also decided to inject a shot of bright colour with the CAS Colours and Sketches colour palette that I felt strangely drawn to this week for my speedily stamped card and pulled out an old favourite - take a look:
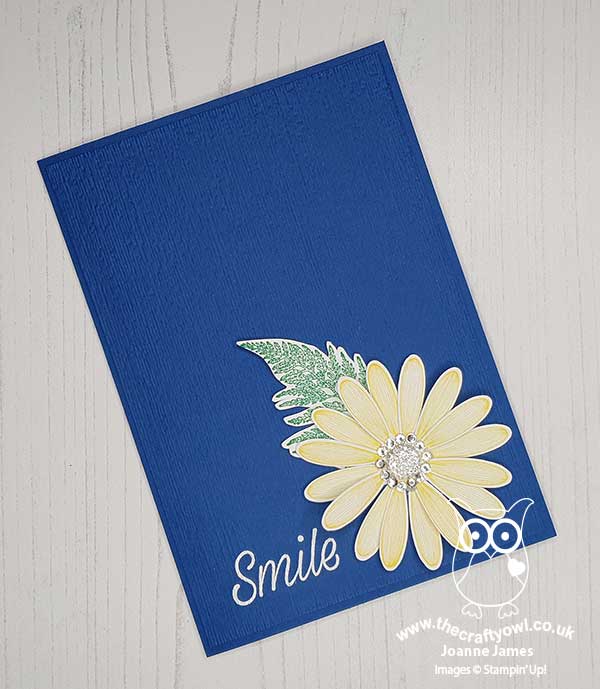
 

Here's the low-down on today's card:

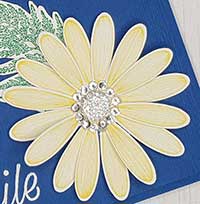
Top Speed Tip: Pick A Punch - So this is really my top mass-production tip, but the reason I would always use a punch rather than die-cutting machine when mass producing is really because it saves time. Punches make light work and the Daisy Punch is a case in point. I've used it today with the Daisy Lane stamp set and I can confirm that both of these items are carrying over to the new Stampin' Up! annual catalogue in June; the other stamp that co-ordinates with the Daisy Punch, Daisy Delight, is not - so if you want to add this to your collection, do it now before it's gone forever. 

Always Be Prepared - Of course, if you want to create a card in under 10 minutes, the main thing is to be prepared! I had a clear idea of what I was going to create and made sure I had all of the items I needed to hand before I started the process. It's also worth keeping the design simple; this doesn't necessarily mean it needs to be one layer, but it shouldn't be overly complicated. I managed to achieve a number of different elements on my card in a short space of time: dry embossed background, heat embossed sentiment, stamped and punched flowers (x2) and a stamped and fussy cut fern, along with gemstone decoration. I was doing so well on time I decided to add a ring of rhinestones around my central clear faceted gem (I will miss these - they make such lovely daisy centres) - I just so happened to have a long strip from a retired rhinestone pack, so didn't need to place them individually which would have taken longer - I just adhered the strip in one motion. 

A Time Triumph - I am always pushing the time limit on a speed challenge, so imagine my surprise when I managed to finish this one in record time:

Yes, 7 minutes and 18 seconds, and that included stamping and punching a third daisy too, as I tore a petal off my first one as I curved the petals in haste with my bone folder! I was so pleased with myself I thought I would share a picture of my stopwatch!! How did I use my remaining minutes? Well, I took an aerial shot of my desk so that you can see the absolute chaos that creating in 7 minutes and 18 seconds takes:
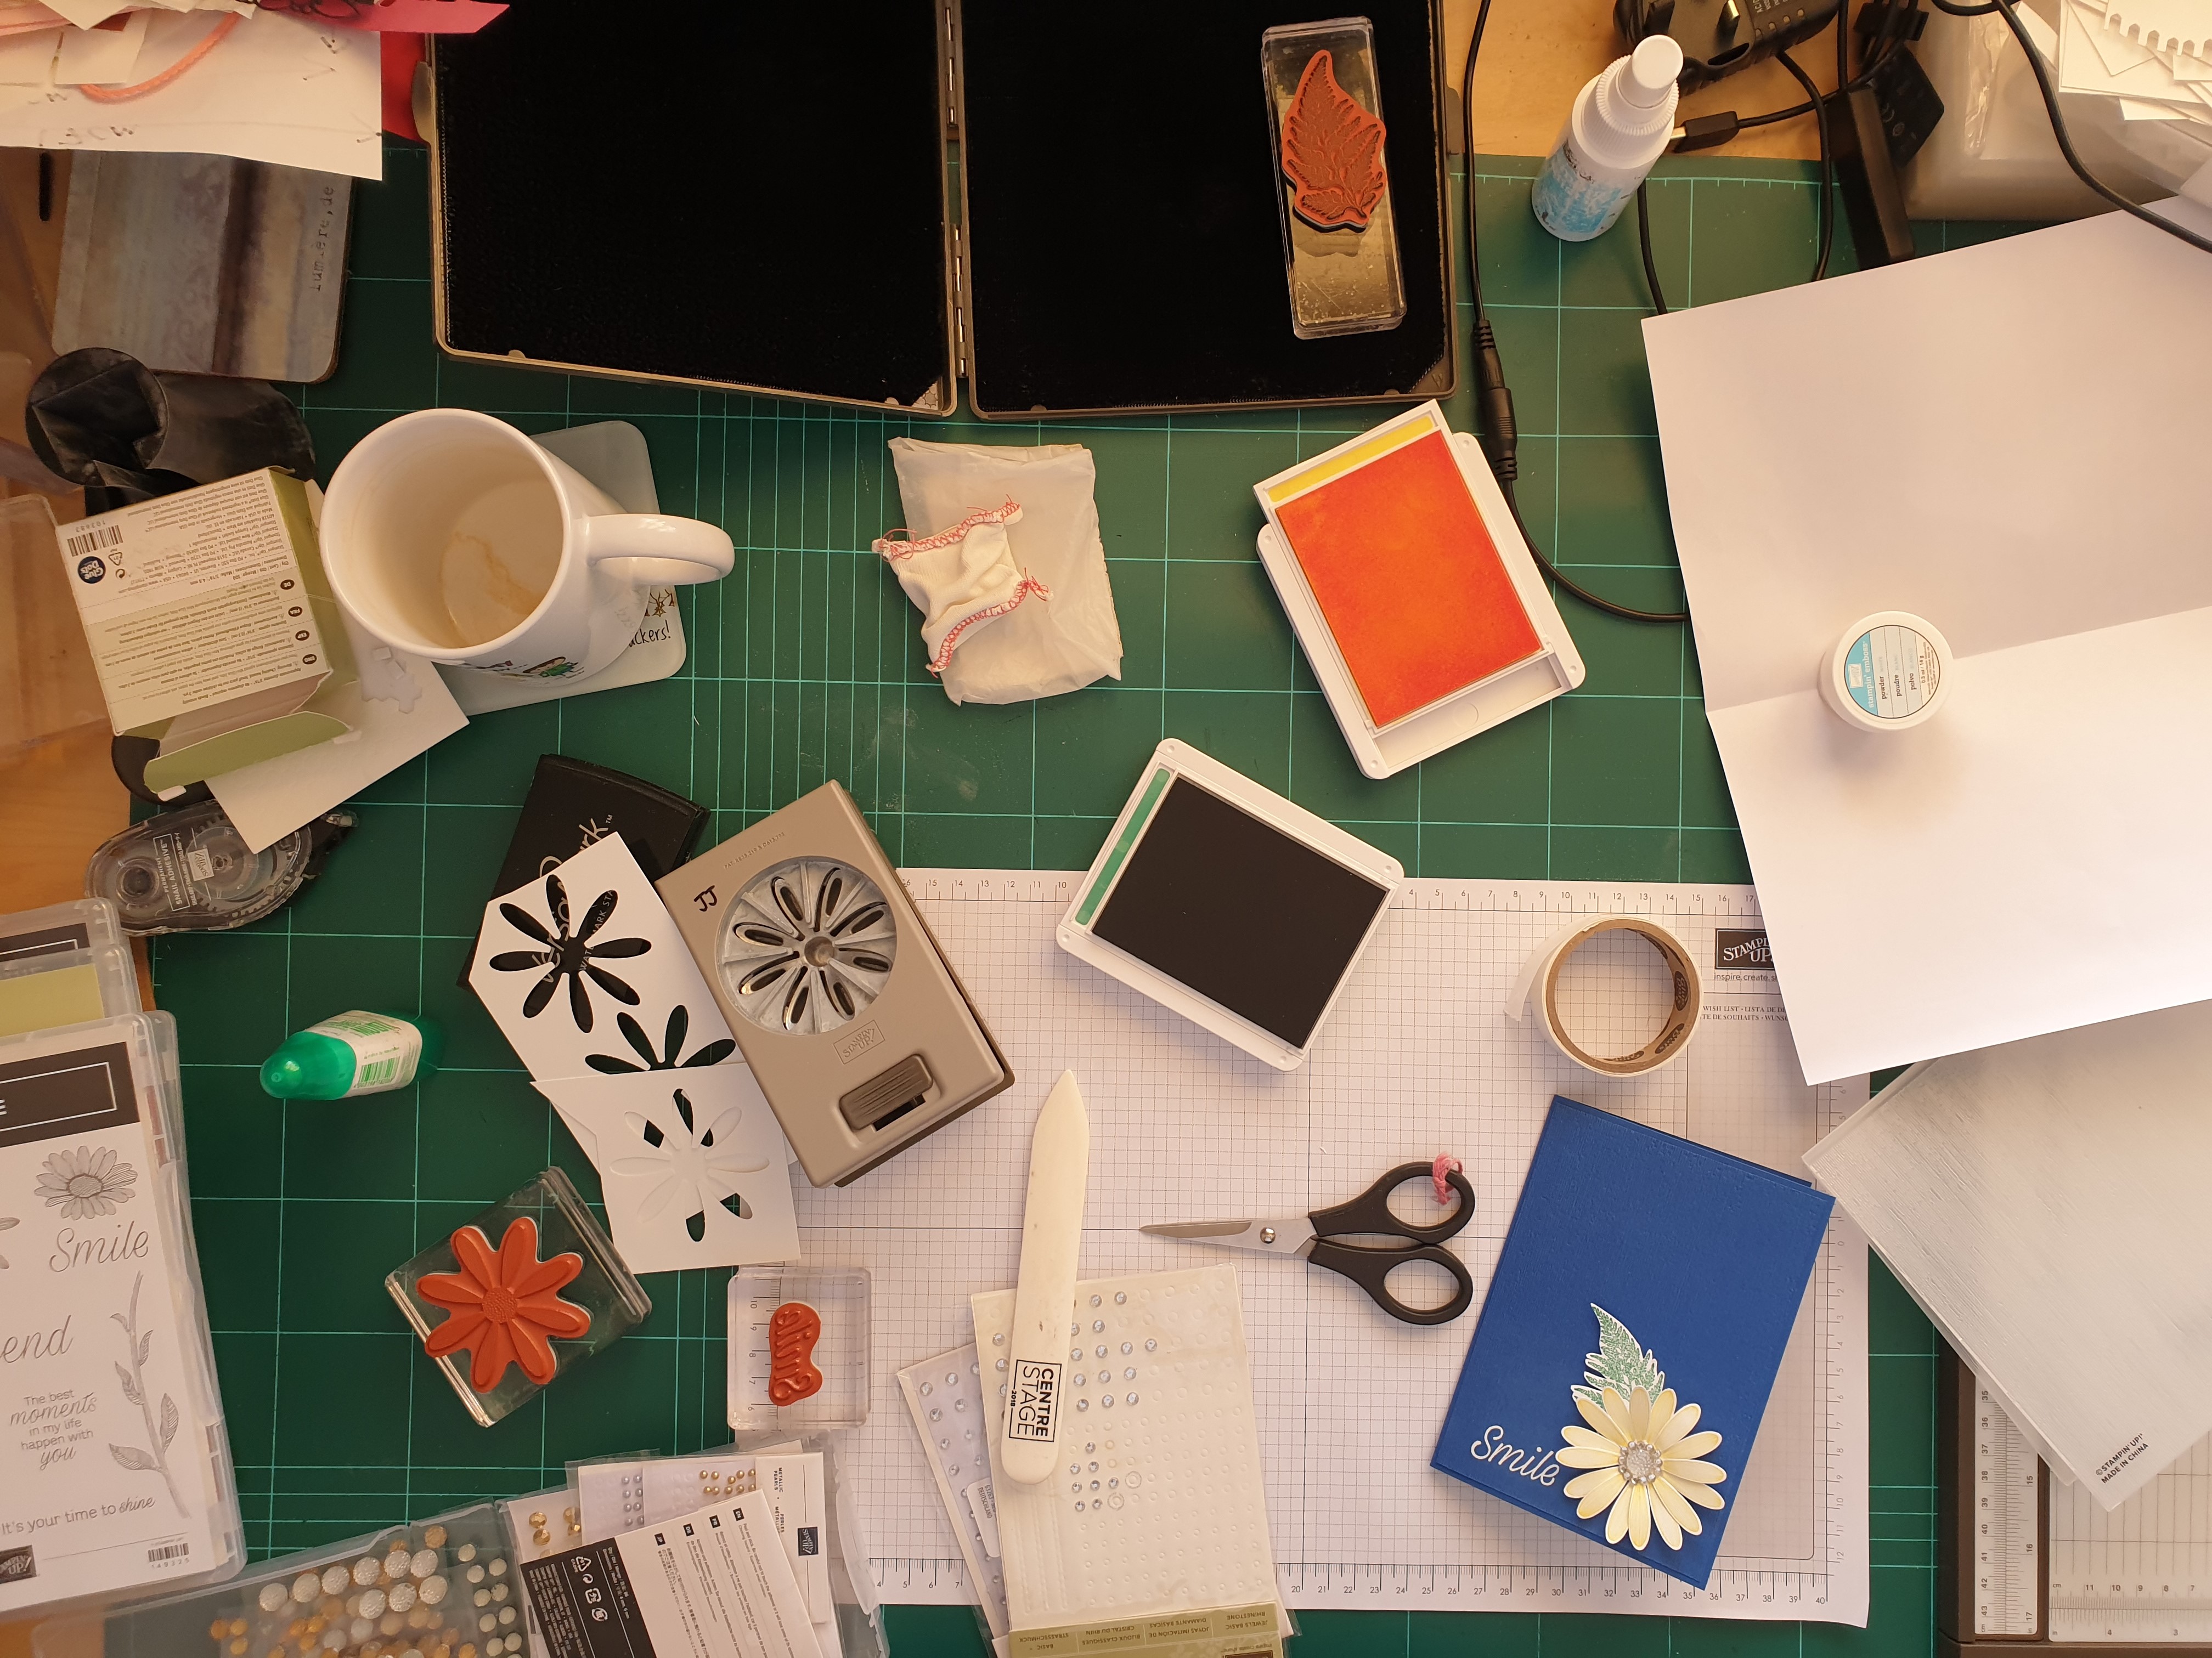
 

Then I brushed the craft-a-math to one side to stamp a quick daisy on the inside panel too:
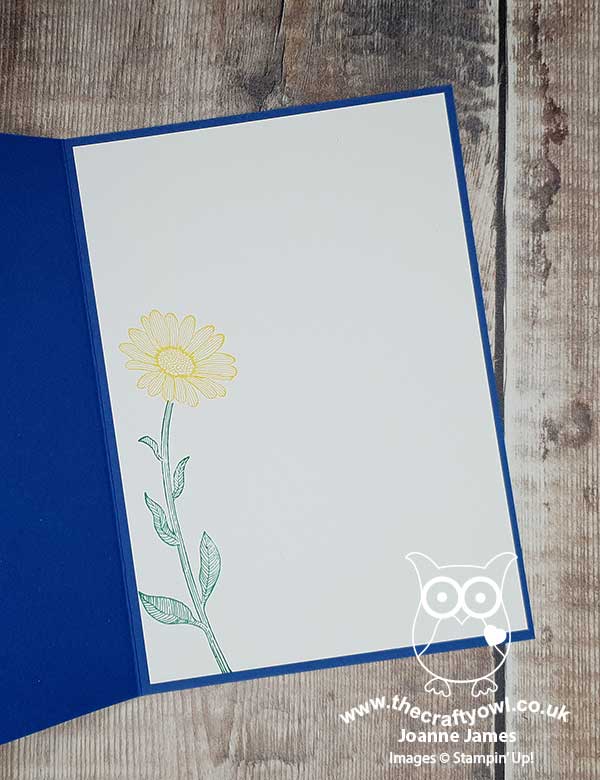
 

I really love this card - I think the bright blue background makes this bright daisy pop.

Here is the visual summary of the key products used on today's project for you to pin for easy reference:
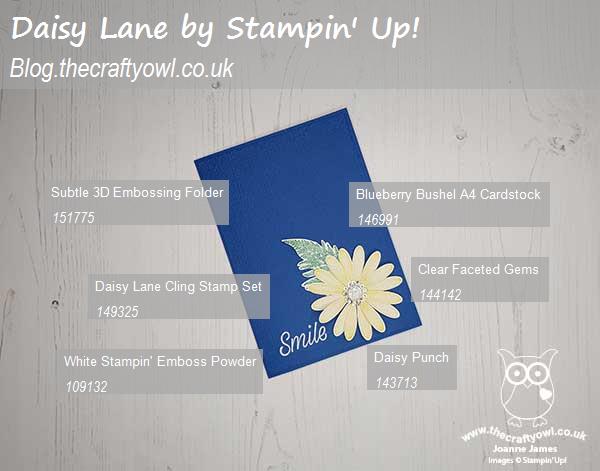
You can see all of my 'How To' summaries on my 'How To - Tips and Techniques' Pinterest board in case you've missed any. 

Before you put your creative thinking caps on, why not check out the blogs of the other As You See It team members:

Amy Jasper

Heather Cooper

Jan Clothier

Jane Knudsen

LeAnne Pugliese

Here's a summary of our challenge rules:

  • Create any card, scrapbooking page, 3D project or packaging project that fits the challenge.
  • Please include the challenge graphic and link back to the challenge in your blog post. Turn off word verification so we can leave you lots of lovely comments. Make sure you link the post not the whole blog to the Linky. Use #AYSIXXX when uploading to a public gallery.
  • If you’re unsure about ‘the rules’, check the details under the Challenge Guidelines tab on the As You See It Challenge homepage.
  • In a colour challenge, black or other neutral can be used in outlines and sentiments but no other colours should be included. Stampin’ Up colours are used for reference but colours that are a close match are welcome. 

We look forward to seeing your creations in the AYSI gallery.

Enjoy your day and I'll be back tomorrow with another project. Until then, happy stampin'!


Stampin' Up! Supplies Used:

Table built using Product Table Builder by The Crafty Owl - Independent Stampin' Up! Demonstrator.

The 2019-20 Retiring Lists Explained

by Joanne James23. April 2020 12:00


Following the announcement of the 2019-20 Annual Catalogue and 2020 Spring-Summer catalogue retiring lists, I just thought I would pop by with a quick post to highlight some of the key points of note and some of the things that I will miss the most. The lists are so long (and tiny!) that it can be easy to miss some key points. So here goes: 

  • Stampin' Blends are NOT RETIRING! They will still be available in teh new catalogue (and with more colours too!) but they will be unavailable as singles, only as a Light & Dark Combo pack. They are on the retiring list because of this and the new combo packs will have a different number to the one they have currently.
  • Some of the bundles are retiring but only as a BUNDLED ITEM. Each item will still be available individually, but no longer at the 10% bundled price. This primarily impacts Annual catalogue bundles; for the first time, a number of the seasonal catalogue bundles are carrying forward into the new catalogue as a bundle, retaining their discount. 
  • Some dies are NOT RETIRING! The old packaging and product numbers are retiring. Due to a change in supplier/manufacturer, these dies will still be available but will have new product numbers. 

There are a number of items on the retiring lists that are key items/tools in a crafter's arsenal or that you may be surprised to see depart that I want to make sure you are aware of that are leaving that might get lost amongst the stamp sets, and they are:

  • Embossing Buddy
  • Circle punches - various
  • Glimmer paper
  • Copper embossing powder
  • Stamparatus metric plates pack
  • 12"x12" Memories and more album and page protectors

There are also some amazing bargains, especially on kits: one of my favourites is the 'Notes of Kindness' card kit that at 60% off is just £13.20 - bargain!!

Retiring products are only available WHILE STOCKS LAST, so if you've still items on your wish list from this year's annual or spring-summer seasonal catalogues, you need to check the retiring lists and if they're on it put an order in pronto! Don't forget to add this month's online hostess code: WG4Q4WQV

Hop online to get the latest on stock availability and place your orders. Some retiring items are discounted by up to 60% so these may well be snapped up quickly. 

I will be back tomorrow with a creative post; until then, happy shopping!

Last Chance - The List of 2020 Retiring Products Has Been Announced!

by Joanne James22. April 2020 20:00


It's here - the list of products that will be retiring from this year's annual and Spring-Summer seasonal catalogues has been announced!

You can see and download the full list of items retiring from the current Spring-Summer catalogue by CLICKING HERE.

You can see and download the full list of items retiring from the current Annual catalogue by CLICKING HERE.

Retiring products are only available WHILE STOCKS LAST, so if you've still items on your wish list from this year's annual or spring-summer seasonal catalogues, you need to check the retiring lists and if they're on it put an order in pronto! Don't forget to add this month's online hostess code: WG4Q4WQV

If you want to stock up on any of the retiring in-colour items and you haven't already done so, especially re-inkers, I would urge you to do that sooner rather than later as they are always the first things to sell out - please see my earlier post here for full details and direct links for these products to the online store. 

Hop online to get the latest on stock availability and place your orders. Some retiring items are discounted by up to 60% so these may well be snapped up quickly. 

I hope to be back tomorrow with a creative post and an update on the retiring list; until then, happy shopping!

Fable Friends Card TTT 60

by Joanne James16. April 2020 12:00

It's Thursday and time for a new challenge over at TicTacToe! It's the turn of Team X to host this week and the lovely Shannon is our featured designer this week. This is the fun board that we are playing along with: 


I went with the first vertical column, Tilted-Stitched-Blue, and I'm also linking up with the current challenge over at Addicted to CAS where the code word is 'animal' as today's card features a furry friend - take a look:


Here's the low-down on today's card:

Fable Friends - For some the squirrel is considered more foe than friend and certainly my chickens think that of the grey squirrels that frequent my garden, but today I decided to go with a cheery red squirrel from 'Fable Friends' for my card. This isn't a stamp I use often so thought I would dust it off and give it some love and stamped him in Memento black onto a stitched rectangle of Whisper White and coloured him with my Blends markers, using another colour I don't often use outside of autumn, Cajun Craze, for my red colour. I do think he looks quite sweet in his sailor's outfit, even if I say so myself! 

On The Tilt - I considered trying to get away with the fact that the squirrel was wearing his hat at a jaunty angle for the 'tilted' element of today's board, but instead decided to 'embrace the wonky' and used an old sketch I had as the basis for my overlaid tilted panels and tilted strip of punched flowers, just like the daisy the squirrel is holding. I'm not generally one for tilted panels, as I like things to be 'just so', but I think they work ok here - I'm not sure I'll make a habit of it though!

Sideways Sentiment - The sketch layout I used had two sentiments, one vertical and another horizontal beneath the stitched panel. I used the former and considered adding 'Hello Spring' from the same stamp set beneath the panel too, but decided against it as I have lots of friends with birthdays in the next couple of months so wanted to leave this card open with the option of adding a birthday sentiment to the inside. On reflection, I think the second sentiment might have been a nice touch, but since I embossed the cardbase with my Subtles embossing folder after stamping the first one, unless I make another identical card and add it first we will never know!

Here is the visual summary of the key products used on today's project for you to pin for easy reference:


You can see all of my Product and 'How To' summaries on my 'How To - Tips and Techniques' Pinterest board in case you've missed any. 

A tictactoe board offers so many creative possibilities - how does this week's board inspire you? Why not have a go? We would love to see you in the gallery and who knows - you might be selected for Designer's Choice and be eligible to be a guest designer on a future challenge. 

Enjoy your day; the sun is shining so I'm hoping to get my chores out of the way this morning and then head outside to get some gardening for done this afternoon. That's one thing with that can be said for the current lockdown - our garden has never looked so good! I'll be back tomorrow with another project. Until then, happy stampin'!


Stampin' Up! Supplies Used: 

Table built using Product Table Builder by The Crafty Owl - Independent Stampin' Up! Demonstrator.


A Rainbow of Varied Vases for AYSI 223

by Joanne James10. April 2020 12:00

Today I'm sharing my design team card for our new challenge over at As you See It where it's time for a theme challenge:


As promised, I've another rainbow card for you today! I decided that 'Varied Vases' would be the perfect way to incorporate my rainbow colours - take a look:


Here's the low-down on today's card:

I'm a big fan of the Varied Vases stamp set - I love the simple outline detailing and it has some lovely birthday sentiments too. My card is larger than usual (21cm x 11cm) which was necessary to accommodate all of my vases. I stamped a row of 14 overlapping vases in varying sizes, then added flowers to 7 of them and stamped the infills, before then stamping 7 vases in the same colours and punching them out with my Vases Builder Punch and popping them over some of the outlines on dimensionals for a little extra lift. I stamped water into the vase holding my violet flower stem and added a few pearls to finish. I stamped my shelf and sentiment and then finished this on the inside of my card with another flower vase: 

Here is the visual summary of the key products used on today's project for you to pin for easy reference:


You can see all of my 'How To' summaries on my 'How To - Tips and Techniques' Pinterest board in case you've missed any. 

Before you put your creative thinking caps on, why not check out the blogs of the other As You See It team members:

Amy Jasper

Heather Cooper

Jan Clothier

Jane Knudsen

LeAnne Pugliese

Here's a summary of our challenge rules:

  • Create any card, scrapbooking page, 3D project or packaging project that fits the challenge.
  • Please include the challenge graphic and link back to the challenge in your blog post. Turn off word verification so we can leave you lots of lovely comments. Make sure you link the post not the whole blog to the Linky. Use #AYSIXXX when uploading to a public gallery.
  • If you’re unsure about ‘the rules’, check the details under the Challenge Guidelines tab on the As You See It Challenge homepage.

We look forward to seeing your creations in the AYSI gallery.

What are your plans for this Good Friday? I will be spending some time in the garden enjoying the warm weather and planting some new raspberry canes whilst reluctantly also continuing to plough through my ironing pile. The National Theatre is one of the many companies that are streaming live performances for free whilst we are all under lockdown and this week it's the turn of 'Jane Eyre', one of my most favourite books of all time, so I might watch this at the same time for some welcome distraction! There may well be some baking too - Easter cupcakes, perhaps?!

Enjoy your day and I'll be back tomorrow with another project. Until then, happy stampin'!


Stampin' Up! Supplies Used:

Table built using Product Table Builder by The Crafty Owl - Independent Stampin' Up! Demonstrator.

Heirloom Frames Meets Pressed Petals Friendship Cards TTT 58

by Joanne James2. April 2020 10:00

It's Thursday and time for a new challenge over at TicTacToe! It's the turn of Team X to host this week and Felicita is our featured designer this week. This is the fun board that we are playing along with: 


I went with the vertical column layers/friend/heat embossing this week! I had some of the panels of Pressed Petals designer series paper out on my desk leftover from the cards I shared with you last week and wanted to use them up and thought I would combine it with this week's challenge over at TGIF Challenges (thanks for the pick last week ladies!) where they are looking for projects that are gold-dipped, something I've been wanting to try with my Heirloom Frames 3D embossing folders for a while. So I pulled out my Positive Thoughts stamp set for my sentiment and some background detail on my first card and this is what I came up with:


On this card I used a Night of Navy embossed frame. To achieve the antique-dipped effect, you simply rub the embossed frame with your Versamark pad then sprinkle with gold embossing powder and heat - in some places it sticks and in others the base colour is exposed. For my second card, I used a few more layers on my base instead of background stamping, and used an oval frame heat embossing gold onto Mossy Meadow:


I used the same sentiment and anchored with a Designer Element accent on each. And here's one last photo of both my cards together:


So what do you think? This style of card is quite different for me so whilst I like them, I'm not sure I love them - but it's always good to try something different once in a while! I would love your comments and if vintage is your thing and you think these cards can be improved in any way, I'd love to hear!

Here is the visual summary of the key products used on today's project for you to pin for easy reference:


You can see all of my Product and 'How To' summaries on my 'How To - Tips and Techniques' Pinterest board in case you've missed any. 

A tictactoe board offers so many creative possibilities - how does this week's board inspire you? Why not have a go? We would love to see you in the gallery and who knows - you might be selected for Designer's Choice and be eligible to be a guest designer on a future challenge. 

Enjoy your day; on Tuesday I finally took delivery of a new washing machine, having had mine break down completely 10 days ago - what great timing! I knew it was on its way out so I ordered a new one before it went completely, however with the whole country going into lockdown I was afraid that my new machine wouldn't arrive at all. Fortunately the lovely people at John Lewis made it happen and I have spent the last 2 days washing non-stop! I have another 4 loads to do today and then I should be caught up - just the ironing to get stuck into then! At least the weather has been fine enough for me to line dry and no school has meant that the Juniors could wear anything as we had run out of school uniform! It's probably a good job that none of us have had to leave the house though - our outfits were starting to look a little eclectic! I am hoping to get some crafting in today before tackling my ironing mountain (hubby has suggested since no-one can see us we should just go with the crumpled look, but I'm not sure if my standards will allow it!). 

I'll be back tomorrow with another project. Until then, happy stampin'!


Stampin' Up! Supplies Used: 

 To be updated.

Sale-A-Bration 2020 Release 3 - New Items Available for FREE!

by Joanne James27. March 2020 22:48


Just popping by with a quick update post for you all; you all know that this year's Sale-A-Bration promotion will end on 31st March and in addition to hosting and joining benefits (you can read about those here) you also earn a free product for every £45/90 spend - you can see the existing items here and here. Please note the Kerchief Card Kit and the Golden Honey Specialty Designer Series Paper are both sold out and no longer available. 

Plenty of good news though: from now until the 31st March, you will also be able to choose from a number of other catalogue items (you must use the special code as detailed as opposed to the usual item code to get one of these items free with a £45/90 spend):


As you can see, this new selection includes some gorgeous Designer Series Paper packs, embellishments, Blends and more that can be yours free with a spend of £45/£90 or more. 

To make things easier for you, I've created a table linking each of the products directly to the promotional item in my online store - just click on the links below:

Table built using Product Table Builder by The Crafty Owl - Independent Stampin' Up! Demonstrator.


If you would like more information or to place an order, either go here to purchase from my online store (don't forget to add this month's hostess code RDJNFTTJ) or you can email or telephone me if you would prefer. Please note there will be no local pickups or deliveries at the present time, due to the countrywide lockdown restrictions, but product is shipping as normal and can be posted as usual.

Back tomorrow with a new creative project; until then, happy shopping!

Mini Catalogue

BROWSE THE CATALOGUE

The mini catalogue is now live! Read and download your copy here.

Shop Online

Access my online shop 24 x 7, 365 days of the year:

Current April hostess code:

VDKNV7BH

Shop Online

Join My Team

It's always a great time to join Stampin’ Up! New team members can get £130 worth of products for only £99 + free business supplies + free shipping + all the fun being a part of Stampin’ Up! Stampin' Up! has something for everyone: join my growing team and benefit from my support to enjoy Stampin' Up! however you choose.

If you're interested, call me for a chat to understand how I can help you realise your goals. Alternatively, if you have already decided to sign up and you just can't wait, please click here for the link to the online form where you can sign up and order your starter kit right away! 

Latest Kit!

Stampin Cut and Emboss

The Rock Legend Kit has all you need to make 8 cards with coordinating envelopes. Along with the new Panda Friends Kit, both are available from January 4th for just £14 each - get yours here!

2023-24 Annual Catalogue

BROWSE THE CATALOGUE

Click on the catalogue for a full list of current SU! supplies - if you would like to order any of the items featured, please drop me a line at [email protected] or give me a call on 07773 421446 - I'd be happy to help.

New Online Exclusives

There are new products available exclusively in the online store from 5 March - check them out here.

About Me

Hi I'm Joanne and live in Northampton and when I'm not looking after my husband and two beautiful children, am an avid crafter with a passion for all things Stampin' Up!

I must confess that I have never been a big rubber stamper - until I discovered Stampin' Up! that is. I love the fact that I can get such great results with co-ordinating stamps, inks, papers and punches - the possibilities are endless! Join me on my stamping journey as I share the things I love and be inspired to create amazing things yourself!

Follow Me

Monthly Newsletter

Box Builder

Click the button above to use Box Buster to create your custom box design using the Envelope Punch Board!

Kits Collection Now Available!

Stampin Cut and Emboss

The new Kits Collection from Stampin' Up! is now available!

Click here to see the current kits available and order yours online today.

I Design For


Stampin' Up Stuff

This is my personal blog and is not endorsed by Stampin’ Up! I hope you find it a plentiful source of ideas and personal inspiration but please don't copy my designs for contest submission or use for classes, publication or sale without express permission.