by Joanne James18. February 2016 08:05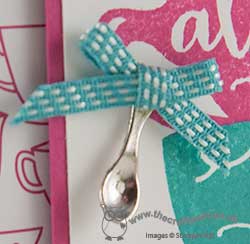
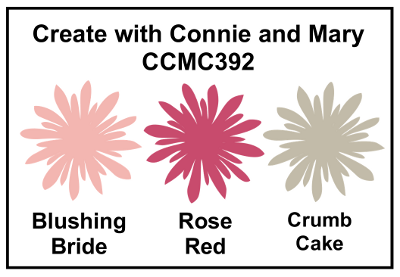
Today it's time for a new challenge over at Create With Connie and Mary and this week we have a colour combination for you:
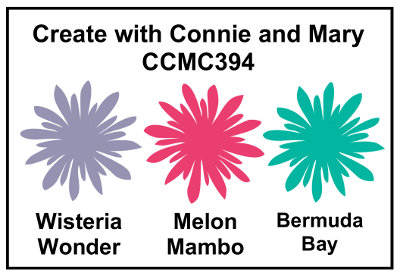
This colour combination is straight out of the Have A Cuppa Designer Series Paper Stack and whilst not one I would naturally be drawn to, I decided to create a colour-blocked card using a selection of the papers and the trio of cups stamp from the co-ordinating 'A Nice Cuppa' stamp set:
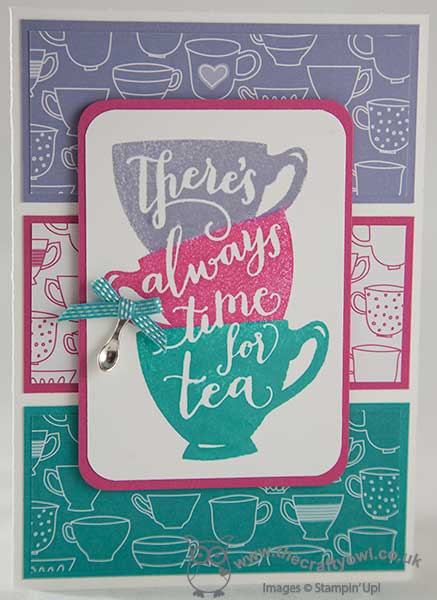
I selectively inked each of the cups in the trio in each of the challenge colours, then created a trio of panels featuring cups in each of the same colours to go behind each one and made a short technique video tutorial to show you how I did it, which you can see here:
I added a tiny teaspoon charm from the Have A Cuppa Embellishments set to a Bermuda Bay stitched ribbon bow and attached this to one of the cup handles as a finishing touch. Isn't that teaspoon just the cutest?! I think this cup stamp looks great stamped in a single colour, however inking in a variety of colours adds definition to the shape of the individual cups. The busy paper makes a good background too, as there isn't much of it on show so it doesn't overwhelm.
Do visit the other Design Team members to see what they did with this week's colours; there's lots of inspiration over on their blogs too!
Enjoy your day and I'll be back tomorrow with another project; until then, happy stampin'!
Stampin' Up! Supplies Used:
- Have A Cuppa Designer Series Paper Stack
- A Nice Cuppa Photopolymer Stamp Set
- Have A Cuppa Cardstock Pack
- Have A Cuppa Embellishments
- Bermuda Bay 1/8" Stitched Ribbon
- Whisper White A4 Thick Cardstock
- Wisteria Wonder Classic Stampin' Pad
- Melon Mambo Classic Stampin' Pad
- Bermuda Bay Classic Stampin' Pad
- Punch Corner Project Life
by Joanne James11. February 2016 08:05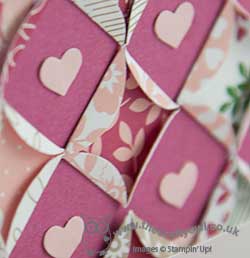
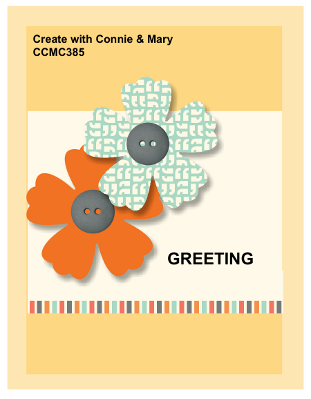
Today it's time for a new challenge over at Create With Connie and Mary and this week we have a great sketch for you:
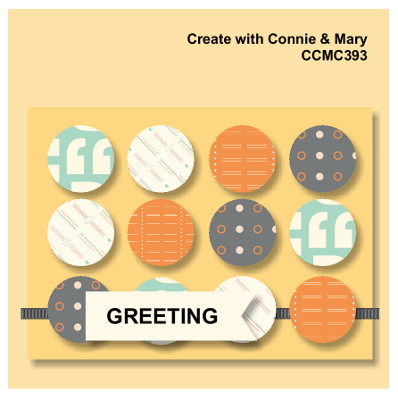
I decided to use the circles in the sketch to showcase the Love Blossoms paper and create a quilt-effect card - take a look:
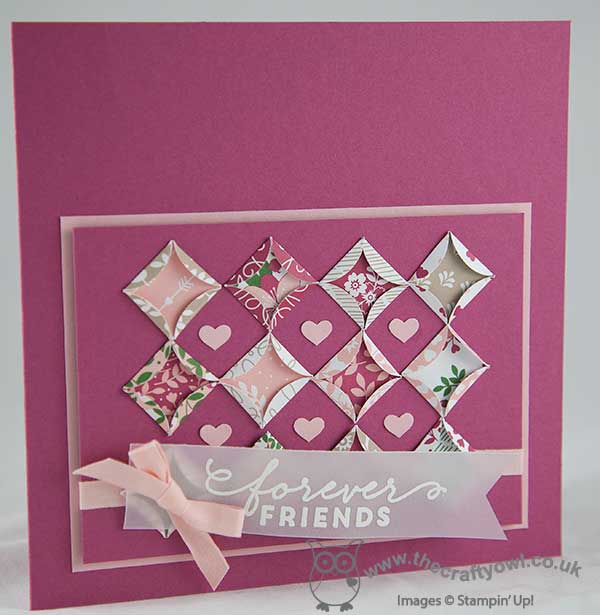
I really can't decide which of the patterns in the stack I like the most, so I used one of each of the 12 patterns on the Love Blossoms DSP stack for my quilted circles, although you can't see the bottom row well in the photo because of the banner; I actually heat-embossed the sentiment in white onto vellum so that in reality they can be seen and are not wholly obscured - they really are too pretty to cover up! To create my pattern I punched 12 1" circles, one from each of the paper patterns, then scored each circle on parallel sides into a diamond (more difficult to explain but you can see from the card what I mean!) then adhered them so that each one touched at the point. I added a little Blushing Bride punched heart in each space, punched with my Hearts Border Punch, to add extra interest, along with a piece of Blushing Bride 1/4" cotton ribbon across the bottom to finish my sentiment banner with a bow.
I guess this card would work for Valentines, Mother's Day, Anniversary - lots of occasions. I actually made it as a birthday card for one of my very best friends; I think it works for a birthday too so I hope she agrees!
Do visit the other Design Team members to see how they interpreted this week's sketch; there's lots of inspiration over on their blogs too!
Enjoy your day and I'll be back tomorrow with another project; until then, happy stampin'!
Stampin' Up! Supplies Used:
- Love Blossoms Designer Series Paper Stack
- First Sight Clear-Mount Stamp Set
- 1" Circle Punch
- Blushing Bride 1/4" Cotton Ribbon
- Banner Triple Punch
- Vellum A4 Cardstock
- Rose Red A4 Cardstock
- Blushing Bride A4 Cardstock
- Versamark Pad
- White Stampin' Emboss Powder
- Heat Tool (Uk)
- Embossing Buddy
by Joanne James4. February 2016 08:05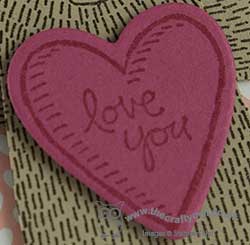
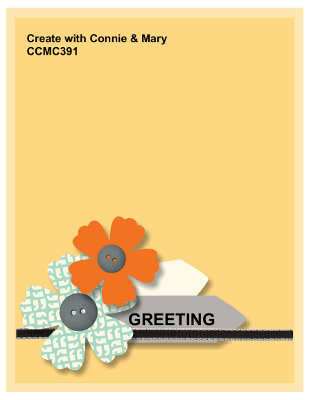
Today it's time for a new challenge over at Create With Connie and Mary and this week we have a colour combination for you:
These three colours feature in the Love Blossoms Designer Series Paper Stack which made it an obvious choice to feature on my card today, but I also wanted to have a go at a fun card using the 'Bear Hugs' stamp set. The saying in this set 'I love you this much' was just asking for a bear with growing arms; it was on my 'to do' list when I saw this great example by Kirsteen Gill and knew that a double-slider card was the way forward. The mechanism in my card is the same as Kirsteen's, however I altered my measurements and dimensions to fit a standard A6 14.9cm x 10.5cm metric card. Here's my finished card:
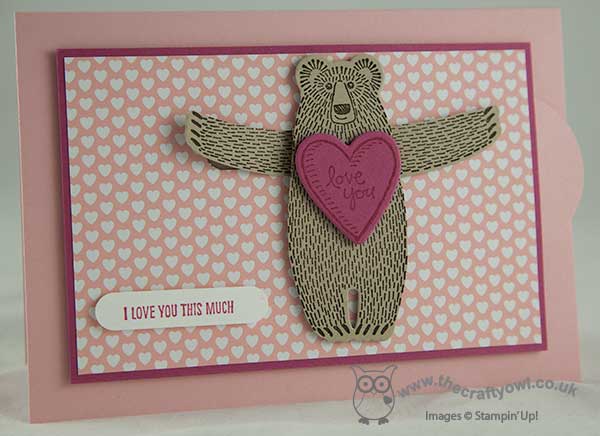
A simple enough layout, using a base of Blushing Bride and a piece of Blushing Bride heart-patterned paper from the Love Blossoms pack too. I used the Rose Red for my border, sentiment and stamped heart but the real fun element of this card is what happens to my Crumb Cake bear when the little tab is pulled on the side of the card:
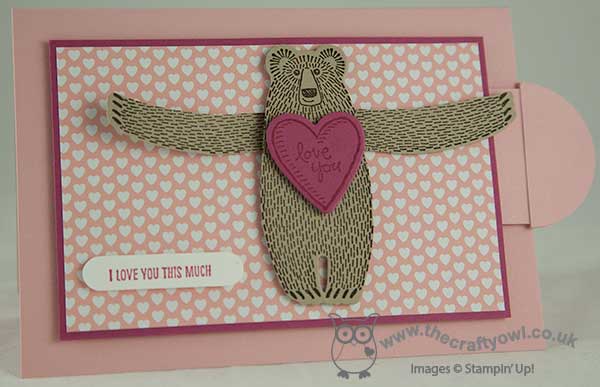
His arms expand to show just how much he loves you - isn't that just the cutest?!! Interactive cards are such fun, whatever the occasion - my daughter loved this one!
Do visit the other Design Team members to see what they did with this week's colours; there's lots of inspiration over on their blogs too!
Enjoy your day and I'll be back tomorrow with another project; until then, happy stampin'!
Stampin' Up! Supplies Used:
- Bear Hugs Clear-Mount Bundle
- Love Blossoms Designer Series Paper Stack
- Crumb Cake A4 Cardstock
- Early Espresso Classic Stampin' Pad
- Rose Red Classic Stampin' Pad
- Rose Red A4 Cardstock
- Blushing Bride A4 Cardstock
- Whisper White A4 Cardstock
- Big Shot
- Word Window Punch
by Joanne James28. January 2016 08:05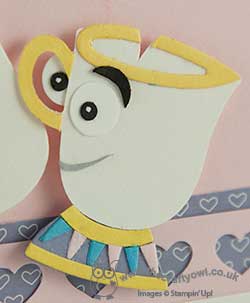
Today it's time for a new challenge over at Create With Connie and Mary and this week we have a great sketch for you:
Now as my regular readers know I love a good sketch but it wasn't actually the sketch that inspired my card today; I was working on a couple of projects at the same time and had my Cups and Kettle Framelits Dies still out on my desk from my Paper Players card (if you missed it you can see that card here) and the minute I set eyes on that little cup (or it might even be a milk jug, I'm not sure) I just knew it would be perfect to make Chip, the little cup from Disney's movie 'The Beauty and The Beast' - you know the little guy I mean?
 (Copyright Disney)
Paired with a customised teapot for Mrs Potts, Chip's Mum, this sketch gave me the perfect layout to showcase my fun characters - here's my finished card:
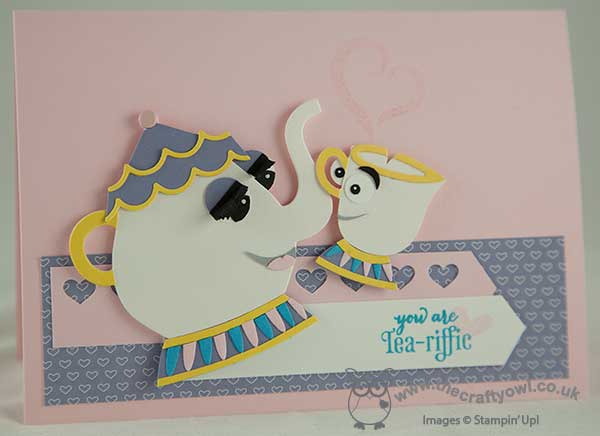
Now I know I'm biased since I made the card, but aren't that pair just the cutest?! So how did I make them? Here are the key component parts you need:
- Basic teapot and cup cut from Shimmery White cardstock (I reversed my cup for the above card as I wanted the characters to be looking at each other)
- Cupbase and teapot base made from the base of the other cup framelit cut from Wisteria Wonder
- Cut an extra teapot and cup in Daffodil Delight and trim off the handles and some strips to edge the bases
- Cut three of the looped framelit pieces, one each in Daffodil Delight, Tempting Turquoise and Pink Pirouette. Detach and use one whole yellow loop to line the cup. Snip the blue and pink ones in half across the middle and glue them in alternating colours to the Wisteria Wonder base.
- Cut a teapot lid out of Wisteria Wonder and add a Pink Pirouette candy dot to the lid top.
- Cut two pieces of the wave shapes, one each from Daffodil Delight and Wisteria Wonder. Paper-piece them together and adhere to the teapot edge to create the frill.
- Punch some eyes using the circle from the owl builder punch, adding eyelids and eye lashes to Mrs Potts and cut the eyebrows and mouths freehand with paper snips.
- Lastly, don't forget to snip to add Chip's chip!
I stamped a faint heart on the background, added a strip of 'Have a Cuppa' designer series paper and a heart boarder, along with my sentiment, to complete my card. Punch art-type cards like this are sometimes time-consuming to create, but so worth it I think for a special card!
Do visit the other Design Team members to see how they interpreted this week's sketch; there's lots of inspiration over on their blogs too!
Enjoy your day and I'll be back tomorrow with another project; until then, happy stampin'!
Stampin' Up! Supplies Used:
8b1f0c40-a6e1-4d83-9018-34fcfc859af2|1|4.0|96d5b379-7e1d-4dac-a6ba-1e50db561b04
Tags: Create With Connie And Mary, Stampin' Up, Stampin' Up Card, Stampin' Up Card ideas, Stampin' Up Supplies, Punch Art, Cups and Kettle Framelits Dies, A Nice Cuppa, Have A Cuppa, Hearts Border Punch, Owl Punch
Cards | Punch Art | Shop Online | Stamping
by Joanne James21. January 2016 08:05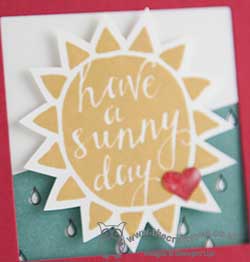
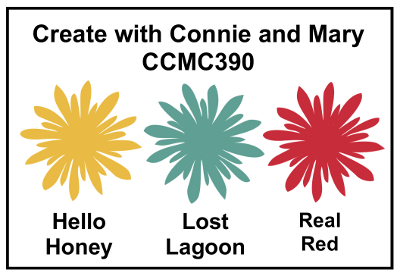
Today it's time for a new challenge over at Create With Connie and Mary and this week we have an interesting colour combination for you:

I struggled a little with this colour combo - having seen Lisa Martz, one of the other Design Team members, adorable chick card I couldn't see how to use these colours for anything else (does that ever happen to you when you see something that was in your mind's eye all along?!) Finally this week's sketch over at Retrosketches helped me out and I came up with this:
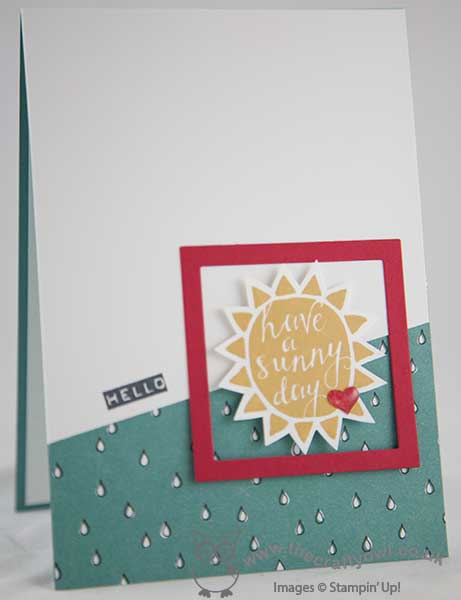
I used Lost Lagoon for my card base then covered this with a piece of the raindrop patterned paper from the Sale-A-Bration 'Wildflower Fields' designer series paper pack and a top layer of Whisper White, stamped with my 'hello' greeting in Memento Black. I added a bright red frame cut with my Big Shot and square framelits and a Hello Honey sun, also from the Silhouettes and Script' hostess stamp set, which I fussy cut and popped up on dimensionals. I added an epoxy heart, adhered to Real Red cardstock, as a little embellishment.
A super clean and simple card that brings these colours together in a slightly unconventional way; it might not be that chick, but I like it!
Do visit the other Design Team members to see what they did with this week's colours; there's lots of inspiration over on their blogs too!
Enjoy your day and I'll be back tomorrow with another project; until then, happy stampin'!
Stampin' Up! Supplies Used:
- Silhouettes & Script Clear-Mount Stamp Set
- Wildflower Fields Designer Series Paper
- Squares Collection Framelits Dies
- Big Shot
- Whisper White A4 Cardstock
- Tuxedo Black Memento Ink Pad
- Lost Lagoon A4 Cardstock
- Hello Honey Classic Stampin' Pad
- Real Red A4 Cardstock
- Itty Bitty Accents Epoxy Stickers
0a9ecd6f-738e-4aa6-93dd-acf1a15525bd|0|.0|96d5b379-7e1d-4dac-a6ba-1e50db561b04
Tags: Create With Connie And Mary, Stampin' Up, Stampin' Up Card, Stampin' Up Card ideas, Stampin' Up Supplies, Sale-A-Bration 2016, Silhouettes and Script, Host a Party, Square Framelits, Wildflower Fields, Big Shot
Cards | Shop Online | Stamping
by Joanne James14. January 2016 08:05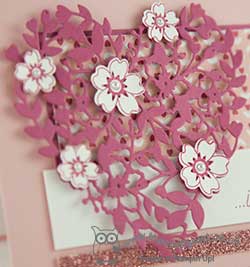
Today it's time for a new challenge over at Create With Connie and Mary and this week we have a great sketch for you:
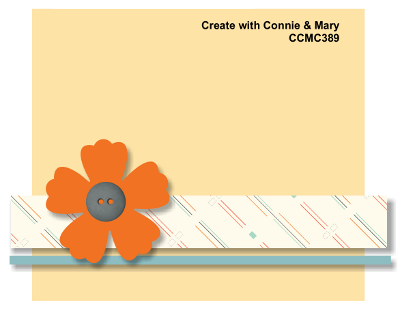
This week's sketch is perfect to showcase the Bloomin' Heart thinlit die. Take a look:
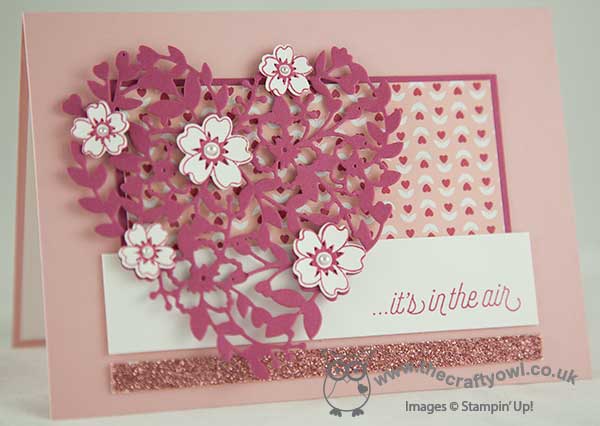
For my card I added some of the co-ordinating stamped flowers, also cut with the flower thinlits that come with the heart, and a sentiment from the 'Bloomin' Love' stamp set that can be purchased with the dies in a bundle for 15% off - add in a Big Shot Die Brush and you could get a free Sale-A-Bration gift too - I love this time of year!! I took my Blushing Bride/Rose Red/Whisper White colour combo from the Love Blossoms designer series paper stack in the same product suite. I added a few pearls and a strip of the new Blushing Bride glimmer paper across the bottom of my card for an added touch of sparkle!
Do visit the other Design Team members to see how they interpreted this week's sketch; there's lots of inspiration over on their blogs too!
Enjoy your day; I'm hosting an open house with my customers today so that they can see and touch lots of lovely new product from the Sale-A-Bration and Spring-Summer catalogues. There will be tea and cake too of course!
I'll be back tomorrow with another project; until then, happy stampin'!
Stampin' Up! Supplies Used:
- Bloomin' Love Photopolymer Bundle
- Love Blossoms Designer Series Paper Stack
- Blushing Bride Glimmer Paper
- Love Blossoms Cardstock Pack
- Whisper White A4 Cardstock
- Rose Red Classic Stampin' Pad
- Pearl Basic Jewels
3cd43b75-b2a7-4e09-ab82-97ccc963fbf2|0|.0|96d5b379-7e1d-4dac-a6ba-1e50db561b04
Tags: Create With Connie And Mary, Stampin' Up, Stampin' Up Card, Stampin' Up Card ideas, Stampin' Up Supplies, Bloomin' Heart Thinlit, Bloomin' Love, Love Blossoms, Big Shot, Big Shot Die Brush, Valentine's, Valentines
Cards | Shop Online | Stamping
by Joanne James7. January 2016 08:05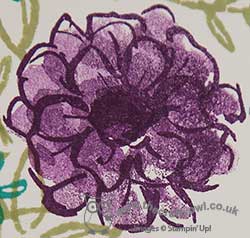
Today it's time for a new challenge over at Create With Connie and Mary and this week we have a great colour combination for you:
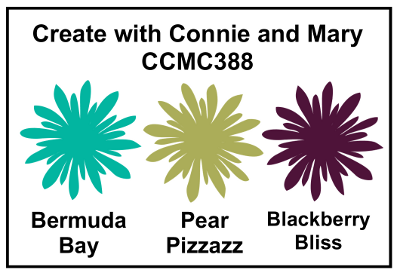
My card this week is all about flowers - and Sale-A-Bration flowers at that! Take a look:
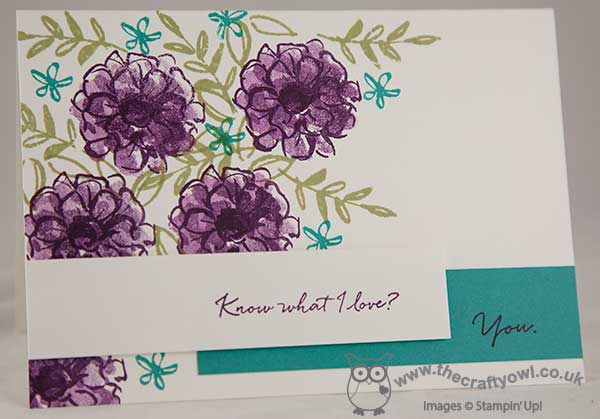
I used one of the Sale-A-Bration sets, 'What I Love', for my card today. This is a triple-time stamp set featuring this blousy large layered flower that I stamped in Blackberry Bliss, leaves stamped in Pear Pizzazz, a small flower stamped on my card with Bermuda Bay and this wonderful sentiment that I chose to highlight on my split layered panels. I think this adds a nice touch of detail to an otherwise simple one layered card.
This is a set with lots of design possibilities and there is much to love about it; as in my blog post title today though, the thing I love most would have to be the fact that you can get this set for FREE! Yes, it is one of the Sale-A-Bration products that you can choose to receive free with every £45 spend. Free product? Yes please! Just in case you missed my earlier blog post, you can get the full low down on all of the benefits of Sale-A-Bration here.
Do visit the other Design Team members to see what they did with this week's colours; there's lots of inspiration over on their blogs too!
Enjoy your day and I'll be back tomorrow with another project; until then, happy stampin'!
Stampin' Up! Supplies Used:
- What I Love Photopolymer Stamp Set
- Blackberry Bliss Classic Stampin' Pad
- Pear Pizzazz Classic Stampin' Pad
- Bermuda Bay Classic Stampin' Pad
- Bermuda Bay A4 Cardstock
- Whisper White A4 Thick Cardstock
by Joanne James31. December 2015 08:05
It's New Year's Eve and it's time for a new challenge over at Create With Connie and Mary and this week we have a great sketch for you:
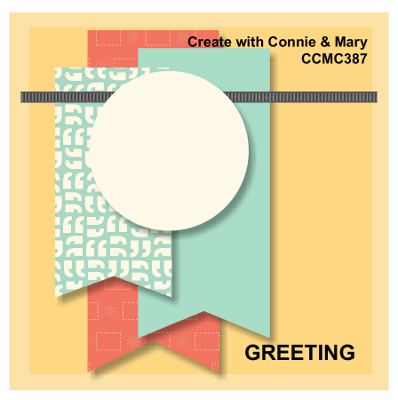
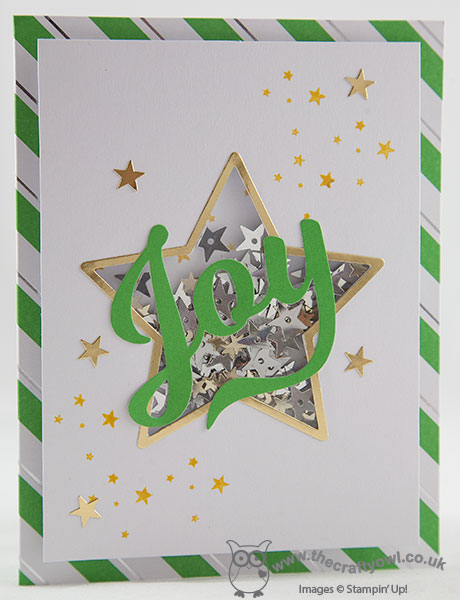
As soon as I set eyes on this sketch I knew what I was going to do with it - I just love it when that happens! I decided to use up some scraps of Winter Wonderland designer series paper and create a card to celebrate the new year - take a look:
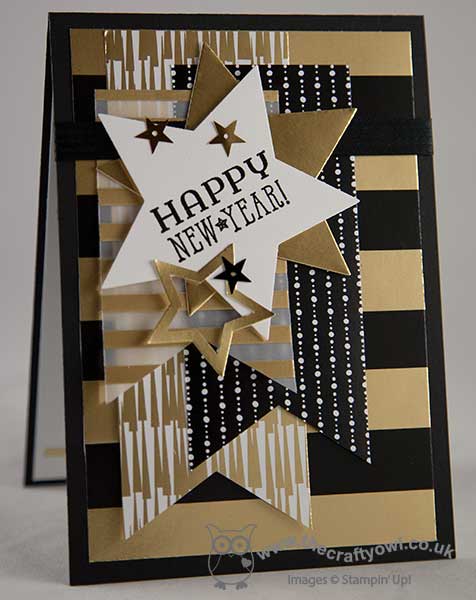
I used a mix of patterns and papers for my banners and then a collection of stars, some solid and some just in outline, cut with my Big Shot and Star Framelits, some metallics star sequins and with my sentiment from the 'Six Sayings' hostess set stamped in Versamark and heat embossed in black across the front of the main star to create the focal point of today's card.
Do visit the other Design Team members to see how they interpreted this week's sketch; there's lots of inspiration over on their blogs too! I will be delivering this card today to my Mother-in-Law who is hosting the annual New Year's James family gathering - I am reliably informed that my brother-in-law's gorgeous puppy Ollie is joining us too, so here's to a day that is likely to be fun and chaotic day!
I'm also linking up today's card over at SUO Challenges where the theme is new years projects.
Enjoy your day and I'll be back tomorrow with another project; until then, happy stampin'!
Stampin' Up! Supplies Used:
- Winter Wonderland Specialty Designer Series Paper
- Winter Wonderland Designer Vellum Stack
- Six Sayings Wood-Mount Stamp Set
- Stars Framelits Dies
- Metallics Sequin Assortment
- Gold Foil Sheets
- Basic Black 3/8" Stitched Satin Ribbon
- Banner Triple Punch
- Big Shot
- Whisper White A4 Cardstock
- Embossing Buddy
- Versamark Pad
- Heat Tool (Uk)
- Black Stampin' Emboss Powder
- Basic Black A4 Cardstock
0ae6e32b-b8b8-4e44-a416-e6746e6e7467|0|.0|96d5b379-7e1d-4dac-a6ba-1e50db561b04
Tags: Create With Connie And Mary, Stampin' Up, Stampin' Up Card, Stampin' Up Card ideas, Stampin' Up Supplies, Host a Party, Six Sayings, Triple Banner Punch, Star Framelits, Big Shot, New Year
Cards | Shop Online | Stamping
by Joanne James17. December 2015 08:05
I've had a few blog-free days this week - so much going on with the end of the school term and Christmas preparations, blogging has had to take a bit of a back seat - however today it's time for a new challenge over at Create With Connie and Mary so I'm back with it and this week we have a great colour combination for you:
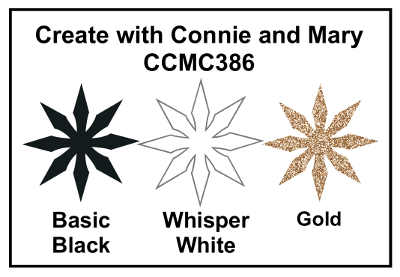
My card this week is all about the reindeer - take a look:
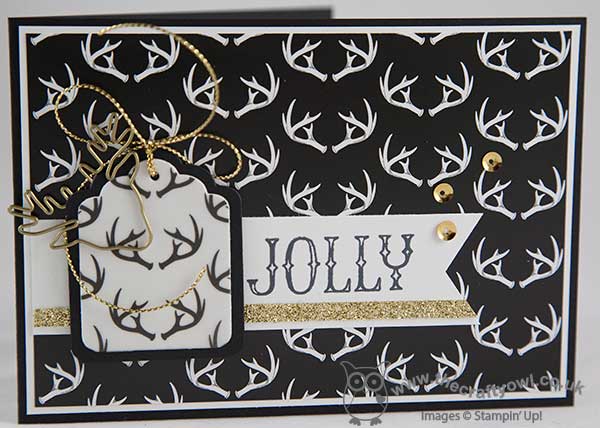
I decided to make a feature of the reindeer antler paper and vellum from the Winter Wonderland designer series paper, with a little gold glimmer paper, a few gold sequins, corded trim and one of my favourite reindeer paper clips to finish off my little layered tag. A little bit of layering but still easy enough to make for those last minute Christmas cards and a great way to use up that rather tricky heavily patterned paper.
Do visit the other Design Team members to see what they did with this week's colours; there's lots of inspiration over on their blogs too! Due to the Christmas festivities, this challenge will run for two weeks instead of one, so lots of time for to squeeze in an entry!
Enjoy your day and I'll be back tomorrow with another project; until then, happy stampin'!
Stampin' Up! Supplies Used:
- Winter Wonderland Specialty Designer Series Paper
- Winter Wonderland Designer Vellum Stack
- Gold Cording Trim
- Reindeer Paper Clips Embellishments
- Tags & Labels Framelits Dies
- Gold Glimmer Paper
- Metallics Sequin Assortment
- Basic Black A4 Cardstock
- Whisper White A4 Cardstock
- Big Shot
- Fine-Tip Glue Pen

f7cc3feb-9faf-428c-b747-9f9fdec49648|0|.0|96d5b379-7e1d-4dac-a6ba-1e50db561b04
Tags: Create With Connie And Mary, Stampin' Up, Stampin' Up Card, Stampin' Up Card ideas, Stampin' Up Supplies, Wonderland, Winter Wonderland, Tags and Labels Framelits, Reindeer paper clip, Christmas, Oh What Fun
Cards | Shop Online | Stamping
by Joanne James10. December 2015 08:05
Today it's time for a new challenge over at Create With Connie and Mary and this week we have a great sketch for you:
I'm still making Christmas cards and wanted something quick and easy that packed a punch, so I decided to go with the only piece of Holiday Fancy Foil Vellum I haven't used - the Christmas trees - and the 'Your Presents' stamp set:
I layered my vellum over a base of Mint Macaron, then added a panel of Whisper White edged in silver glimmer paper with my popped up presents, stamped in Real Red and decorated with either the 1/8" striped ribbon or a bow from the Mini Treat Bag Thinlits. I stamped my sentiment from the same set, punched this out with a 1 3/4" circle punch and popped it up on a dimensional so that it balanced out the gifts.
Do visit the other Design Team members to see how they interpreted this week's sketch; there's lots of inspiration over on their blogs too!
Enjoy your day and I'll be back tomorrow with another project; until then, happy stampin'!
Stampin' Up! Supplies Used:
- Your Presents Wood-Mount Stamp Set
- Holidays Fancy Foil Designer Vellum
- Real Red & Garden Green 1/8" (3.2 Mm) Striped Ribbon
- Mini Treat Bag Thinlits Dies
- Rhinestone Basic Jewels
- Cucumber Crush Classic Stampin' Pad
- Mint Macaron A4 Cardstock
- Whisper White A4 Cardstock
- Silver Glimmer Paper
- 1-3/4" Circle Punch