by Joanne James28. June 2015 11:00It's Sunday and time for our new challenge over at The Paper Players! I really enjoyed our gallery full of summer treats last week; this week should be easier on the waistline though, as the lovely Nance has a great sketch challenge for us:
My card features an altogether more healthy treat this week in the form of apples, on a tree created with the Sprinkles of Life stamp set and co-ordinating tree builder punch:
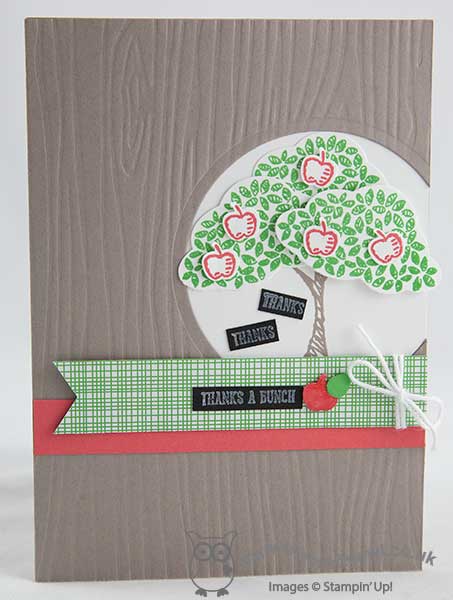
My card also features three of the five new in-colours: Tip Top Taupe, Cucumber Crush and Watermelon Wonder so I am also linking up with the team over at Fab Friday as their challenge is all about the new in-colours this week. I used Tip Top Taupe for my card base, then adhered a piece of Whisper White to the card front. I embossed another piece of Taupe with my woodgrain textured embossing folder then using my Big Shot and Circles Framelits cut away a partial circle from one side before adhering this on top of the white layer. I stamped the tree trunk in Taupe onto the white panel, then stamped my leaves in Cucumber Crush and my apples in Watermelon Wonder onto Whisper White and punched them out with the co-ordinating tree builder punch. I wanted a full tree so punched three treetops and layered them to create my tree, adding the last one with a dimensional to create some lift. For my banners I used a strip of Watermelon Wonder and a piece of green patterned paper from the Cherry on Top DSP stack, tied with white baker's twine and flagged with the triple banner punch. I stamped my sentiment in white Stazon onto Basic Black and cropped it tightly. I finished with another punched apple, which I covered in Crystal Effects to make it nice and shiny, although it's hard to see in the photo above. The Sprinkles of Life Stamp stamp set is so versatile with so many creative options; not only that, every purchase benefits the Ronald McDonald House Charity too as £2 is donated for every stamp set purchased.
With only three more weeks until the end of the school year, I am needing to make more and more teacher thank you cards, so this one is definitely heading for the teacher pile. Well, an apple for the teacher as the saying goes - or in this case, six!
Before you reach for your ink and papers, check out what our amazing team has created to inspire you this week:
The Paper Players Design Team
Here's a quick recap of our challenge rules:
1. Create a new paper project
2. Upload your creation to your blog with a link back to us and provide a direct link to the post featuring your challenge submission.
3. Please link your card to no more than three challenges, TOTAL.
4. Have FUN!
I love a good sketch challenge so I look forward to seeing what you make of this one in the gallery this week. If the weather holds we may manage to squeeze in another weekend BBQ - keep your fingers crossed for me!
Back tomorrow with another project; until then, happy stampin'!
Stampin' Up! Supplies Used:
6e32ab29-0f39-4427-a972-b210a9b3e2d1|0|.0|96d5b379-7e1d-4dac-a6ba-1e50db561b04
Tags: Sprinkles Of Life, Tree Builder Punch, Thankyou cards, Teacher Thank Yous, The Paper Players, Woodgrain TIEF, Stampin' Up, Stampin' Up Card, Stampin' Up Card ideas, Stampin' Up Supplies, Big Shot, Circles Framelits
Cards | Stamping
by Joanne James27. June 2015 21:18It's the weekend and following a glorious day here in the UK, today I have a card to share for this week's Mojo Monday challenge where this week's sketch is all about the layers:

The minute I saw this sketch I knew exactly what I was going to do with the central circle; I bought the 'Hello Life' stamp set for the big feature sentiment but don't get to use it often on cards because it's quite large, so this layout gave me the perfect opportunity:
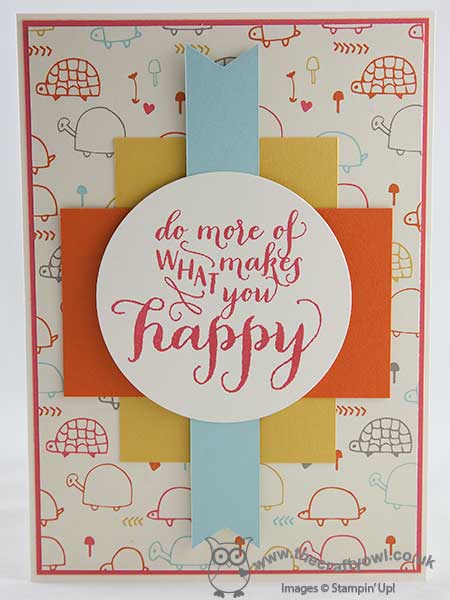
I stamped my sentiment in Watermelon Wonder onto Very Vanilla and decided to use another of the pieces of Designer Series Paper from the Sweet L'il Things pack as my background, then used the featured colours as bold blocks of colour for my rectangular layers and my banner. I love the patterns in this pack - whilst this does feature some cute animals, I think it is quite a fun pattern, that works for non-baby cards too. Truth is, as I was perusing I decided this paper makes me happy - so I went with it!
Short and sweet from me today; I'll be back tomorrow with a card for this week's new challenge over at The Paper Players. Until then, happy stampin'!
Stampin' Up! Supplies Used:
b928be2e-2807-4b33-907f-d7195f85e3d9|0|.0|96d5b379-7e1d-4dac-a6ba-1e50db561b04
Tags: Big Shot, Circles Framelits, Hello Life, Stampin' Up, Stampin' Up Card, Stampin' Up Card ideas, Stampin' Up Supplies, Sweet L'il Things, Triple Banner Punch, Shop online, Shop Stampin' Up online
Cards | Stamping
by Joanne James25. June 2015 08:00It's Thursday and you know what that means: time for a new challenge over at Create With Connie and Mary! This week we have a sketch challenge for you:
I decided to go with another card featuring the Pretty Petals DSP; this time, one of the really bold patterns in the stack:
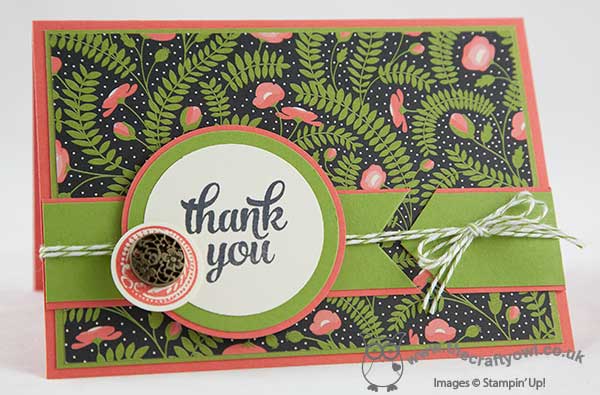
I used Calypso Coral and Old Olive for my mat and base layer and the band across the front of the card, then used the bold patterned DSP to cover my card front. After adhering the band, I tied two lengths of Old Olive baker's twine around the front of my card before adhering my layered circle. Given how busy the pattern of the paper is, I decided to leave my focal point 'clean' and stamped the thank you sentiment from the 'Tin Of Cards' stamp set onto a circle of Very Vanilla. For my embellishment, I stamped the round stamp from the 'Awesomely Artistic' stamp set in Calypso Coral onto Very Vanilla and punched it out with my 1" circle punch. I added an antique brad (deliberately offset) before adhering to my card.
This paper is quite different to the one I used on yesterday's card, but equally lovely I think. I can see me getting through this stack quite quickly!
That's all from me today; do check out the other DT member cards and we look forward to seeing you in the gallery this week.
I'll be back tomorrow with another project; until then, happy stampin!
Stampin' Up! Supplies Used:
- Pretty Petals Designer Series Paper Stack
- Tin Of Cards Photopolymer Stamp Set
- Awesomely Artistic Clear-Mount Stamp Set
- Calypso Coral A4 Cardstock
- Old Olive A4 Cardstock
- Stampin' Dimensionals
- Big Shot
- Magnetic Platform
- Circles Collection Framelits Dies
- 1-3/4" Circle Punch
- 2" Circle Punch
- Antique Brads
- Tuxedo Black Memento Ink Pad
- Old Olive Baker's Twine
- Calypso Coral Classic Stampin' Pad
- 1" Circle Punch
by Joanne James20. June 2015 20:58Hello lovely blog readers! Today I have a card to share that is for this week's Mojo Monday challenge. Before I share it though I wanted to give a congratulations shout out to Justin Krieger and Lori Tecler who were both recently selected to become members of the Mojo Monday Design Team. I admire both of their work and am so pleased they will be joining with the talented Julee and other DT members to provide Mojo inspiration. So here is this week's sketch:

I decided those circles would be great to try something I've had in mind ever since I saw the Cherry on Top DSP stack - take a look:
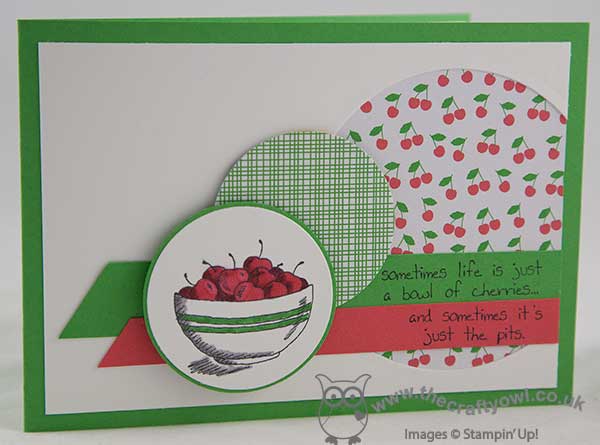
I've been wanting to pair that bowl of cherries image from the Giggle Greetings stamp set with the cheery DSP in the Cherry on Top DSP stack and this layout was a great way to try it out. I used Cucumber Crush for my base then cut a partial circle out of my Whisper White mat using my Circles Framelits and placed a piece of cherry DSP beneath it. I added the flags in Cucumber Crush and Watermelon Wonder and stamped the sentiment in two parts, one on each, having masked off the rest of the stamp:
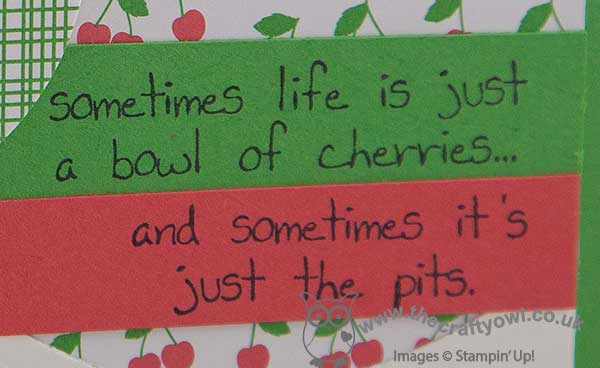
I added another circle of patterned paper from the Cheery on Top DSP stack and then lastly added the circle with the bowl of cherries, which I stamped in Memento Black onto Whisper White and coloured with a combination of my Blendabilities for the cherries and my Stampin' Write markers and mounted on a circle of Cucumber Crush.
I love this fresh colour combo and such a fun way to combine old and new product. That's all from me today; I'm off to catch a movie! Back tomorrow with a new challenge over at the Paper Players; until then, happy stampin'!
Stampin' Up! Supplies Used:
14b5f5c3-6ed1-4cfb-b2c4-b45a27e27764|1|5.0|96d5b379-7e1d-4dac-a6ba-1e50db561b04
Tags: Big Shot, circle punch, Circles Framelits, Cherry on Top, Giggle Greetings, Shop online, Shop Stampin' Up online, Stampin' Up, Stampin' Up Card, Stampin' Up Card ideas, Stampin' Up Supplies
Cards | Stamping
by Joanne James19. June 2015 07:00It's Friday - the end of the week already! The somewhat strange title of my blog post today is as a result of the card that I'm sharing. it's another Sprinkles of Life birthday card, this time using the sketch over at Retrosketches, which has lots of layers this week:
I decided to go for a real mix and match approach with my Cherry on Top DSP stack - this is what I came up with:
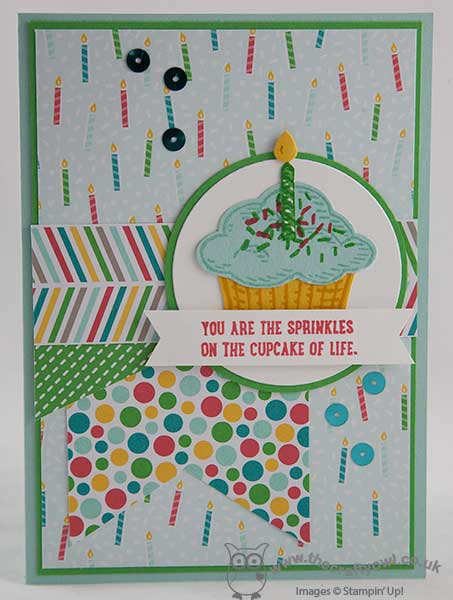
A Pool Party base and borders of Cucumber Crush are the perfect background for the birthday candles paper. For the banner and layers, I chose some of the bold patterns in the pack and kept my cupcake in solid colours with a few sprinkles to tie the cake in with the rest of my card. A paper-pieced candle, some sequin sprinkles and done! I made this card for Ben to give to Rebecca on her birthday earlier this week - she has a real love for bold patterns and colours and is not afraid to mix and match so this card is very her.
That's all from me today; I am treating myself to a rare day of pampering with a couple of friends, with whom I am visiting the spa to enjoy a day of relaxation. Back tomorrow with another project; until then, happy stampin'!
Stampin' Up! Supplies Used:
7cc46842-17a4-410f-82e0-8a87d9b254b0|0|.0|96d5b379-7e1d-4dac-a6ba-1e50db561b04
Tags: circle punch, Circles Framelits, Cherry on Top, Shop online, Shop Stampin' Up online, Stampin' Up Supplies, Stampin' Up Card ideas, Stampin' Up Card, Stampin' Up, Sprinkles Of Life, Triple Banner Punch
Cards | Stamping
by Joanne James25. May 2015 19:20Well the Bank Holiday didn't bring the sunshine I was hoping for, but it did stay nice and dry and we managed a bracing long bike ride this afternoon, so it's all good! Today I have not one but two cards for you! The first one is my card for the current Fab Friday Challenge where they have a sketch challenge this week:
Before I share my card, a big thank you to the team over at Fab Friday for choosing my In-Colour thank you card as their Fab Fave - I'm honoured! You can see that card here. Now onto today's card:
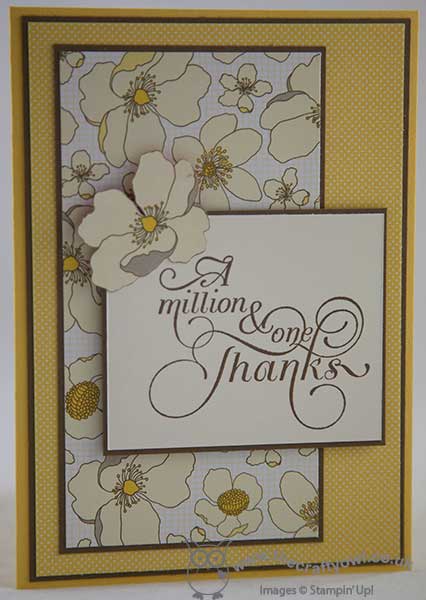
I'm still on my quest to use up more of my Designer Series Paper (I am such a DSP hoarder!) and this sketch was the perfect opportunity to showcase some. So no 'sneak peeks' today; instead a Daffodil Delight base with some mats in Soft Suede, and two of the patterns in the Park Lane pack. I used one of my favourite retiring thank you stamps, 'One in a Million', for my sentiment, stamped in Soft Suede onto Very Vanilla, and I chose to fussy cut one of the flowers for my accent. I liked the clean lines of this card so much, I made two identical ones - if you are one of my contactable online customers, you may find one winging its way to you to you this month!
My next card is for this week's TGIF challenge:
I saw the inspiration photo and I had my Painted Petals set out on my desk preparing for my technique class next month (this is the set we are going to be using) and I just knew the two would work together. Here's my card:
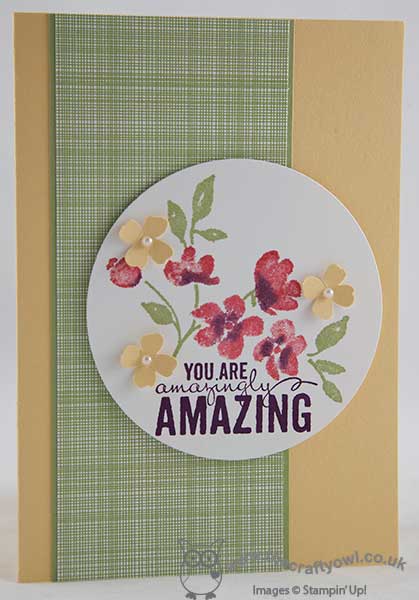
I used So Saffron for my card base and matted a strip of the already retired Gingham Garden DSP (I told you I was a DSP hoarder!) onto a strip of Pear Pizzazz and adhered this to the front of my card. I stamped the flowers on a large circle of Whisper White cut out using my Big Shot and Circles framelits, inking them with one of the new in-colours, Watermelon Wonder, and adding some Blackberry Bliss using my Stampin' Write marker to the flower centres before stamping. I stamped the sentiment in Blackberry Bliss too and to finish added a few So Saffron flowers, punched using one of the Itty Bitty Accent punches and centred with pearls. I popped this circle up on dimensionals to stand away from the card.
Please do check out the design team inspiration for both of the above challenges; they are some amazing cards on both blogs this week. I'll be back tomorrow with another card; until then, happy stampin'!
Stampin' Up! Supplies Used (Card 1):
Stampin' Up! Supplies Used (Card 2):
0084fcea-f009-4701-8df0-72f46e1d3ed5|0|.0|96d5b379-7e1d-4dac-a6ba-1e50db561b04
Tags: Million & One, Park Lane, Shop online, Shop Stampin' Up online, Stampin' Up, Stampin' Up Card, Stampin' Up Card ideas, Stampin' Up Supplies, Big Shot, Gingham Garden, Itty Bitty Accents Punch Pack, Painted Petals, Circles Framelits
Cards | Stamping
by Joanne James14. May 2015 08:05It's Thursday and time for a new challenge over at Create With Connie And Mary and this week we have a sketch challenge for you - my favourite!
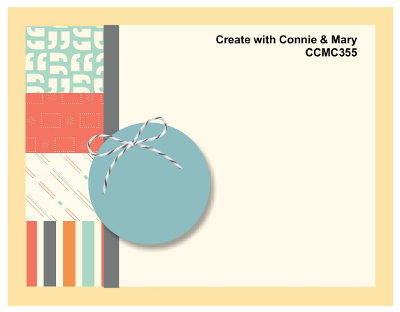
This is a great card for using up scraps of DSP so I set to work with my Birthday Bash Speciality DSP and Birthday Bash Stamp set to create today's card:
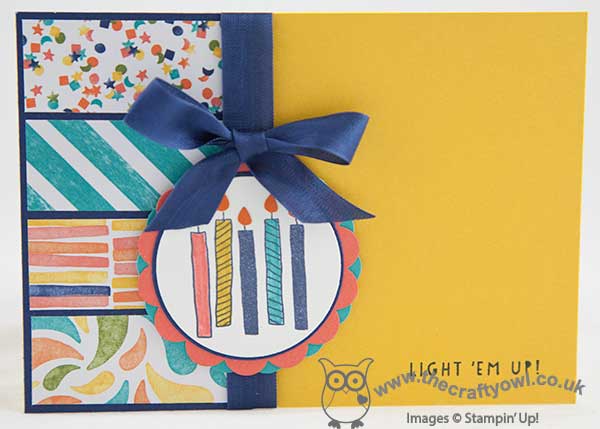
I let the DSP drive the colour scheme for my card so used a Crushed Curry base with a panel of Night Of Navy down the left hand side, which I then overlaid with four co-ordinating rectangles of patterned paper. I then added a piece of Night of Navy seam binding ribbon to cover the join and for my focal point stamped the candles from the 'light 'em up' stamp in the Birthday Bash set in navy on Whisper White, having masked off the words first. I coloured this with my Calypso Coral, Bermuda Bay and Crushed Curry Stampin' Write markers and layered this circle onto another of Night of Navy and two scalloped circles, one each in Bermuda Bay and Calypso Coral. I also punched the candle flames out of Tangerine Tango using my owl builder punch - a small touch, but looks so much better than navy ones! To finish, I stamped the sentiment, this time masking off the candles, in navy in the right hand corner.
I made this card with the ladies in my Stamp-A-Stack class last week and they loved it, so I hope you like it too. Don't forget if 'Birthday Bash' is on your wishlist, it will be retiring on 2nd June so don't leave it too late to place your order.
That's all from me today - I look forward to seeing your takes on this week's sketch in the gallery.
Back tomorrow with another project; until then, happy stampin'!
Stampin' Up! Supplies Used:
- Birthday Bash Specialty Designer Series Paper
- Balloon Bash Photopolymer Stamp Set
- Night Of Navy Classic Stampin' Pad
- Night Of Navy A4 Card Stock
- Card Stock A4 Crushed Curry
- Calypso Coral A4 Card Stock
- Card Stock A4 Bermuda Bay
- Card Stock A4 Tangerine Tango
- Night Of Navy 1/2" Seam Binding Ribbon
- Whisper White A4 Card Stock
- 2-3/8 Inch Scallop Circle Punch
- 2" Circle Punch
- Big Shot Die-Cut Machine
- Circles Collection Framelits Dies
- Big Shot Magnetic Platform
- Owl Builder Punch
by Joanne James10. May 2015 10:00It's Sunday - my favourite day of the week and time for a new challenge over at The Paper Players. I loved the variety of the transportation-themed cards in the gallery last week. This week, the lovely LeAnne has an interesting colour challenge for you to play along with:

I'm also playing along with the TGIF Challenge this week as I've used their sketch as the inspiration for my layout this week. So I deliberately used the word 'interesting' for LeAnne's choice of colours this week - this colour combo had me stumped for a good long while! Then I remembered the piece of Lost Lagoon and Pistachio Pudding patterned DSP in the All Abloom paper stack; I think it's the only piece I've never used (and I've been through a few packs!) as I prefer the pattern on the reverse,so I decided to challenge myself to see if I could make it work on today's card. Here is my finished card:
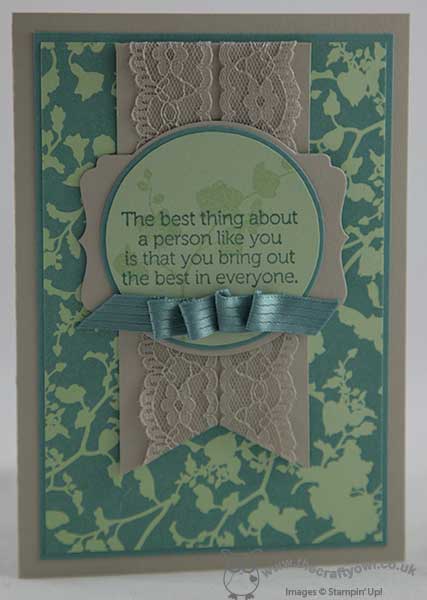
I used Sahara Sand for my base and a mat of Lost Lagoon, then went all out and covered the entire card front with my DSP. This is such a busy pattern, I knew I would have to be careful what else I used on my card to avoid it looking too busy. For my focal point, I chose to stamp one of the silhouette flower stamps in Pistachio Pudding on a circle in the same colour - the paper pattern reminded me of this set - and stamp the sentiment over the top in Lost Lagoon. I mounted this on a slightly larger circle of Lost Lagoon and then a piece of Sahara Sand cut with my Big Shot and a Deco Label framelit. I mounted this on a banner of Sahara Sand that I added a little lace trim to in the same colour - something for a little texture and interest, but not wanting to clash with the strong pattern. Lastly, I added a piece of Lost Lagoon ribbon that I ruched across the front of the card.
This isn't my usual type of card, but I quite like it. The Sahara Sand does a great job of toning down the pattern and also meant I didn't use any Whisper White cardstock at all, which is quite unusual, not even for my sentiment panel. The thing that pleases me most though - I actually managed to use the sheet of patterned paper effectively!
Before you reach for your paper and inks, check out what our amazing team has created to inspire you this week:
The Paper Players Design Team
Here's a quick recap of our challenge rules:
1. Create a new paper project
2. Upload your creation to your blog with a link back to us and provide a direct link to the post featuring your challenge submission.
3. Please link your card to no more than three challenges, TOTAL.
4. Have FUN!
I look forward to seeing how you interpret this week's colour palette. I'm off to finish the preparation for my technique classes this week and enjoy the rest of the weekend.
Back tomorrow with another project; until then, happy stampin'!
Stampin' Up! Supplies Used:
fb50ccf7-e89d-4ddf-b997-21cd99eb59f6|0|.0|96d5b379-7e1d-4dac-a6ba-1e50db561b04
Tags: World Of Dreams, All Abloom, Big Shot, Circles Framelits, Deco Labels Framelits, Shop online, Stampin' Up, Stampin' Up Card, Stampin' Up Card ideas, Stampin' Up Supplies, The Paper Players
Cards | Stamping
by Joanne James28. April 2015 09:00So today I'm sharing a card that I made for this week's Pals Paper Arts challenge, where they have a great sketch for us this week:

The minute I saw this sketch, I knew exactly what I wanted to do with it. In my quest to use up some of my retiring DSP, I knew that the anchor stamp in the 'Guy Greetings' stamp set would work perfectly with some of the papers in the Maritime DSP set, specifically the navy rope and red anchor paper. I decided upon a 5 1/2" square card and I set to work, although my card didn't quite work out as I initially planned. Let me show you my card and then I'll share the story:
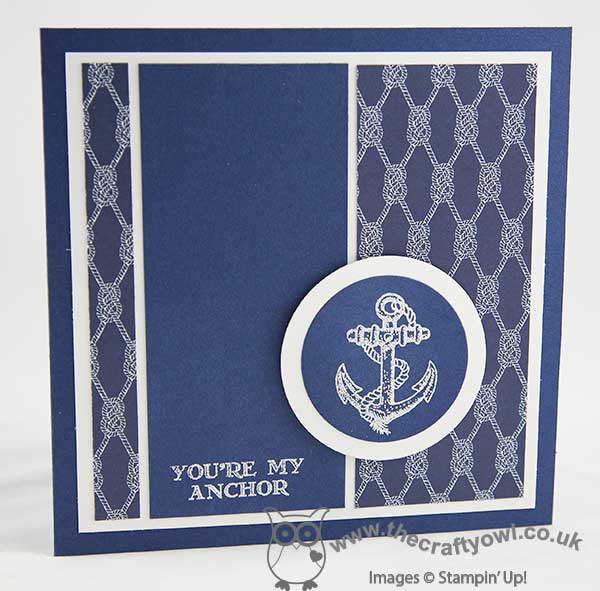
My initial intention had been to use the rope paper as you see above, but flip it for the second section and use the red anchor pattern on the reverse. But after much flipping, trimming and trading of circle mounts for my anchor, I ended up unable to make the patterns work together. They just didn't look right to me and the sentiment banner I had cut interfered with my anchor too much, so I decided to ditch the red and use a plain panel of Night of Navy and heat emboss my sentiment onto it directly in white, leaving my embossed anchor uncluttered and the rope pattern beautifully showcased. As I stood back to admire my handiwork and did a check back to the sketch, I realised that my card is a virtual case of Brian King's Design Team card for the challenge which you can see here - oh dear! This wasn't conscious, although I've shared my love of Brian's work on my blog here before and I am so drawn to his clean and uncluttered style. So I'm hoping he will take it as a compliment and the Pals will allow my linkup as an example of a card truly inspired by a member of their DT this week!
Back tomorrow with a new set of Wednesday Weekly Deals and another project. Until then, happy stampin'!
Stampin' Up! Supplies Used:
by Joanne James9. April 2015 08:05It's Thursday and time for another challenge over at Create With Connie and Mary, where this week we have a great colour combination for you:
This colour combination appears in the Birthday Bash DSP and I couldn't resist using a piece of it on a fun-fold card for a humorous birthday greeting:
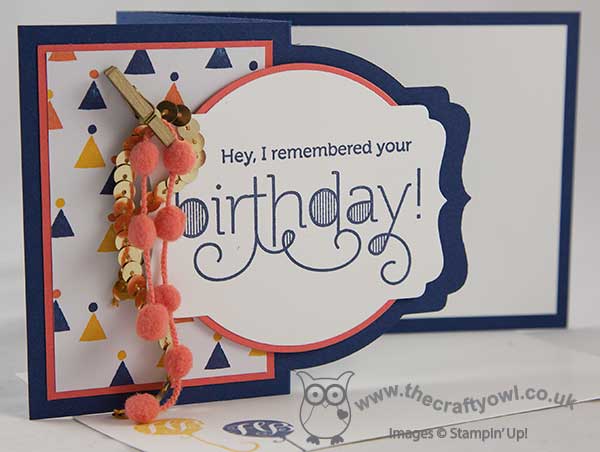
I used Night of Navy for my card base and created a fun-fold card using my Deco Labels framelits. I used Calypso Coral for my mats. I used a piece of the party hat paper for the front section beneath my main sentiment, a lovely curly script from the 'Age Awareness' stampset. I backed my sentiment panel with a circle cut with my circle framelits and popped this up on dimensionals, so that I could attach my Calypso Coral pompom trim and gold sequins to the front with a mini gold peg to add to the party feel. I continued the stamping inside my card, which today I remembered to photograph:
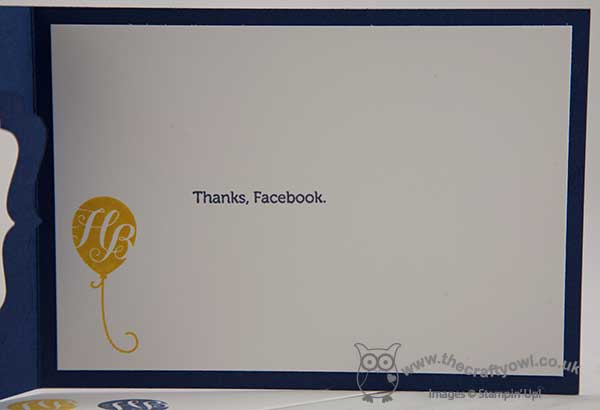
This card is for a good friend whose birthday I not only forgot last year, but worse still bumped into on the day and not even that triggered my extremely poor memory into remembering! Luckily the friend was gracious enough to forgive me, although he has ribbed me mercilessly about it ever since. Needless to say, his birthday isn't until next month but the card is ready and I will be making an extra effort this time around!
The Design Team has some amazing projects to share with you this week, with lots of great inspiration so do pop by their blogs and take a look. So grab your paper and inks and we look forward to seeing you in the gallery this week!
I'll be back tomorrow with another project hopefully; I have my monthly stamp-a-stack class in the morning and the Easter holidays mean I am getting a little less creative time than usual, but I'll do my best. until then, happy stampin'!
Stampin' Up! Supplies Used:
- Age Awareness Photopolymer Stamp Set
- Birthday Bash Specialty Designer Series Paper
- Calypso Coral Pompom Trim `
- Gold Sequin Trim
- Mini Metallic Clothespins
- Deco Labels Collection Framelits Dies
- Circles Collection Framelits Dies
- Big Shot Die-Cut Machine
- Whisper White A4 Card Stock
- Night Of Navy Classic Stampin' Pad
- Night Of Navy A4 Card Stock
- Calypso Coral A4 Card Stock
- Crushed Curry Classic Stampin' Pad
40d39189-44f7-4d94-a627-8d578aa3034d|1|4.0|96d5b379-7e1d-4dac-a6ba-1e50db561b04
Tags: Birthday Bash, Big Shot, Age Awareness, Deco Labels Framelits, Circles Framelits, Create With Connie And Mary, Fun Folds, Shop online, Stampin' Up, Stampin' Up Card, Stampin' Up Card ideas, Stampin' Up Supplies
Cards | Stamping