May The Magic Of The Season Fill Your Heart and Home

by Joanne James19. December 2015 21:30

Good evening lovely blog readers! Christmas preparations are full steam ahead here in the James household and now that the Juniors have broken up from school for the holidays I'm sure there will be even less crafting time than usual; so tough when there is a huge big box of pre-order Spring-Summer seasonal goodies sitting in the corner of my office! Luckily for you I still have some Christmas cards and projects that I haven't shared with you. So today I'm sharing one of the cards from my all day Christmas stamp-a-stack back in September - this one features the Home for Christmas DSP and one of the stamps from the Cozy Christmas set and was a favourite for the ladies who attended:

The Pacific Point really makes the colours on this card pop and the addition of the gold corded trim and the red glimmer paper poinsettia cut out using the framelit from the Delicate Ornament Thinlit Dies set adds a lovely touch of sparkle to this card. If you are in need of some last minute Christmas cards, you could knock a few of these out in no time. This sentiment is one of my absolute favourites - it says everything that is good about the holidays for me.

That's all from me tonight; The Paper Players team and I are taking a couple of weeks break over the Christmas period but fear not - I will be back tomorrow with another festive project that I think you'll like. Until then, happy stampin'!


Stampin' Up! Supplies Used:

Table built using Product Table Builder by The Crafty Owl - Independent Stampin' Up! Demonstrator.


Tags: , , , , , ,

Cards | Stamping

It's All About The Reindeer!

by Joanne James17. December 2015 08:05

I've had a few blog-free days this week - so much going on with the end of the school term and Christmas preparations, blogging has had to take a bit of a back seat - however today it's time for a new challenge over at Create With Connie and Mary so I'm back with it and this week we have a great colour combination for you:


My card this week is all about the reindeer - take a look:


I decided to make a feature of the reindeer antler paper and vellum from the Winter Wonderland designer series paper, with a little gold glimmer paper, a few gold sequins, corded trim and one of my favourite reindeer paper clips to finish off my little layered tag. A little bit of layering but still easy enough to make for those last minute Christmas cards and a great way to use up that rather tricky heavily patterned paper.

Do visit the other Design Team members to see what they did with this week's colours; there's lots of inspiration over on their blogs too! Due to the Christmas festivities, this challenge will run for two weeks instead of one, so lots of time for to squeeze in an entry!

Enjoy your day and I'll be back tomorrow with another project; until then, happy stampin'!


Stampin' Up! Supplies Used:

  • Winter Wonderland Specialty Designer Series Paper
  • Winter Wonderland Designer Vellum Stack
  • Gold Cording Trim
  • Reindeer Paper Clips Embellishments
  • Tags & Labels Framelits Dies
  • Gold Glimmer Paper
  • Metallics Sequin Assortment
  • Basic Black A4 Cardstock
  • Whisper White A4 Cardstock
  • Big Shot
  • Fine-Tip Glue Pen


Tis The Season To Be Holly

by Joanne James13. December 2015 10:00

It's Sunday and time for a new challenge over at The Paper Players! This week it is the turn of my good friend LeAnne to host and she has the following colour palette to get our creative juices flowing this week:


This is a special week for us as we say goodbye to our guest designers Jodi, Amy and Lisa. We are grateful that these lovely ladies have shared their considerable talent and creativity with us for the last 6 months and we wish them well on their respective journeys. We will miss you!

For my card this week I was inspired to use yet more of the lovely Home For Christmas paper and designed my card all around the holly. I also used the sketch over at The Global Design Project for my layout:


Really simple, allowing the holly patterned paper to do all the hard work on this one. The sentiment is from 'Oh What Fun' and the sentiment piece cut using the Tags and Labels Framelits. I added some Cherry Cobbler seam binding ribbon and highlighted the berries on my holly with pearls coloured with my retired Cherry Cobbler Blendabilities. I also created a second version of this card whilst I had everything out on my desk, using the same sketch but this time using the similar but slightly different colour palette over at Paper Pals Arts this week:

   12-10 PPA279

I used gold foil to make my sentiment banner stand out and fussy cut some holly from the dsp in place of the stamped sentiment and also added a flatter, more post-friendly bow with a scrap of ribbon I found in my stash:


Here's a close up of the label detail:

I really like how the gold gives a different effect.

Before you reach for your ink and papers, check out what our amazing team has created to inspire you this week:

The Paper Players Design Team
Anne Marie Hile - on leave
 
 
Here's a quick recap of our challenge rules:
 
1.  Create a new paper project
2.  Upload your creation to your blog with a link back to us and provide a direct link to the post featuring your challenge submission.
3.  Please link your card to no more than three challenges, TOTAL.
4.  Have FUN! 


I look forward to seeing what you create with this colour combination this week. We are hoping to put our Christmas tree up today - it's time to really get our Christmas preparations underway!

Back tomorrow with another project; until then, happy stampin'!


Stampin' Up! Supplies Used:

Table built using Product Table Builder by The Crafty Owl - Independent Stampin' Up! Demonstrator.


Let It Snow Snowflakes Card

by Joanne James6. December 2015 10:00

It's Sunday and time for a new challenge over at The Paper Players! This week it is the turn of my good friend Claire to host and she has a fun theme to get our creative juices flowing this week:


I had an idea brewing in my mind all week for this challenge, but I had rather less time to craft this week than I would have liked so ended up in the end going with something altogether more clean and simple! I was intrigued by this week's sketch over at CAS(E) This Sketch and was sad to see that Hayley and Tara are winding up the Colour Me...! blog after this week's challenge. I had such a lovely time when I did my DT stint over there I just had to play along for this their final challenge (although I did take a little liberty by adding in silver to my monochromatic colour scheme - well ladies, it is Christmas!) I'm also linking with CAS-UAL Fridays, since my card today features snowflakes - take a look:


I used a base of Soft Sky then added some strips of silver glimmer paper, before adding my Whisper White panel. On this panel, I stamped the small snowflake from the Project Life Hello December set in Versamark and heat embossed it in silber. I then cut a stencil with my 1 1/4" circle punch and sponged around the snowflakes in Soft Sky ink. I then took my 'let it snow' sentiment from the Sparkly Season stamp set and having  curved it on my block, I stamped just the first two words in Versamark and heat embossed that in silver too. For my 'snow' to finish the sentiment, I used the coordinating die cut from the same set and cut three in extra-thick Whisper White and one in silver glimmer paper and layered them together to create my stacked sentiment. In retrospect I would change the placement of the 'let it' (it should be above the 'snow' rather than below it) but I was against the clock and didn't have time to make a second panel. That aside, I like the card -there is something soothing about the soft blue colour and the pattern is an interesting one. Oh and it's got silver glimmer paper, which I seem to be using everywhere lately!

Before you reach for your ink and papers, check out what our amazing team has created to inspire you this week:

The Paper Players Design Team
Anne Marie Hile - on leave
 
 
Here's a quick recap of our challenge rules:
 
1.  Create a new paper project
2.  Upload your creation to your blog with a link back to us and provide a direct link to the post featuring your challenge submission.
3.  Please link your card to no more than three challenges, TOTAL.
4.  Have FUN! 


I look forward to seeing your snowy creations this week. I'm off for a morning of basketball and then I've some final preparations for the last of my Christmas card classes tomorrow, hopefully time for a spot of crafting, then Ben is attending a birthday party in the afternoon. Oh and we are going to attempt to put the Christmas tree up - not much to be going on with then!

Back tomorrow with another project; until then, happy stampin'!


Stampin' Up! Supplies Used:

Table built using Product Table Builder by The Crafty Owl - Independent Stampin' Up! Demonstrator.


Pantone-Inspired Dove of Peace

by Joanne James5. December 2015 23:02

Another late post from me today! I have had a non-stop day with grocery shopping, homework and a spot of cardmaking this morning and then Winter Fayre at school this afternoon and a swimming gala this evening. I'm not complaining though: I won first prize in the raffle at school, I won another prize in the swimming gala raffle and my superstar swimmer Rebecca put in an amazing time on her 50m breaststroke and qualified for County trials. So all in all a fantastic day! 

Today's card is for a few challenges: I've had the Dove of Peace stamp for ages and not once inked it up, so when I saw the Merry Monday Challenge this week I knew it was time to remedy that. I also wanted to enter The Challenge, where this week Lesley and the team would like us to create a Christmas card in non-traditional colours.


Well, you can't get more non-traditional than this:

Pastel Pink Pirouette and Wisteria Wonder, inspired by two of the new Pantone colours announced for Spring 2016 (see the full palette and trend report here). I decided on simple blocks of colour and plenty of white space to allow my dove to really take centre stage. I stamped both my sentiment and dove in Versamark and heat embossed them in silver, then coloured the patterns on my dove using my Stampin' Write markers and fussy cut it (so easy with Stampin' Up!'s paper snips) before adding to my card and popping it up on dimensionals. I also added a wide band of silver glimmer paper for some festive sparkle. An unusual colour combination, granted, but I must say I really do quite like it and it still has a definite festive feel I think.

That's all from me today; I will be back tomorrow much earlier with my card for this week's challenge over at The Paper Players where we have a fun theme courtesy of the lovely Claire. Until then, happy stampin'!


Stampin' Up! Supplies Used:

Table built using Product Table Builder by The Crafty Owl - Independent Stampin' Up! Demonstrator.


Nutcracker Christmas Greetings

by Joanne James4. December 2015 22:59

It's Friday and mine has been a busy one! I have another Christmas card for you today, this time using the sketch over at Mojo Monday where it's 'tall and skinny' week:

   SIP Any Challenge 25 800

I'm also linking up with the peeps over at Stamps, Ink and Paper since my card today uses a stamp from my current favourite set - Sparkly Season. Take a look:


I used the striped Home for Christmas designer series paper as the inspiration for the colour scheme for my card and chose Pacific Point blue as the dominant colour; an unusual Christmas colour, but combining it with red and a touch of green definitely makes it worthy. I coloured my little scene with my Stampin' Write markers and finished my framed image with a cute bow cut using my Big Shot from the Mini Treat Bag Thinlits set. I heat embossed my minimalist sentiment in black on one of my two banners and added a Mossy Meadow enamel dot to finish. 

My finished card measures 4" x 8 1/4" so of course needed a custom envelope, easily achieved with a sheet of red envelope paper, my trusty Envelope Punch Board and my Envelope Expert tool - a winner every time! If you haven't yet tried it or my Box Buster tool you should check them out - custom envelopes and boxes with perfect results every time!

I'll be back tomorrow with another project; until then, happy stampin'!


Stampin' Up! Supplies Used:

Table built using Product Table Builder by The Crafty Owl - Independent Stampin' Up! Demonstrator.


Peaceful Holly Sprig Clean and Simple Christmas Card

by Joanne James3. December 2015 08:05

Today it's time for a new challenge over at Create With Connie and Mary and this week we have a great colour combination for you:


I have another CAS card for you today - I'm still making lots of cards to send out so unfussy and quick to mass-produce is something of the order of the day. For this card I decided to go with the holly sprig from the Peaceful Wreath set:


I used a base of Cherry Cobbler and added a strip of In-Colour Mossy Meadow washi tape and a sliver of silver foil cardstock along the edge of my offset Whisper White top layer for  a little extra interest. On my front panel I stamped the holly sprig in Mossy Meadow and then used my aquapainter to roughly watercolour the leaves in the same colour and then added some Cherry Cobbler for my berries. I stamped the second part of my sentiment from the same set in Cherry Cobbler and decided to add a Christmas Greetings diecut silver glimmer 'peace' for a quick touch of festive sparkle to really draw the eye and ground my design. The washi tape I used is included in this week's Wednesday Deals, so now would be a good time to snap some up for the bargain price of £5.44!

Do visit the other Design Team members to see what they did with this week's colours; there's lots of inspiration over on their blogs too! I'm also linking up today's card with the lovely ladies over at Less Is More as I haven't played there for a few weeks and this week's theme is 'fruit' - and fortunately for me this includes holly berries and mistletoe too!

Enjoy your day and I'll be back tomorrow with another project; until then, happy stampin'!


Stampin' Up! Supplies Used:

  • 2014-2016 In Color Designer Washi Tape
  • Peaceful Wreath Photopolymer Stamp Set
  • Cherry Cobbler Classic Stampin' Pad
  • Cherry Cobbler A4 Cardstock
  • Mossy Meadow Classic Stampin' Pad
  • Whisper White A4 Cardstock
  • Aqua Painters
  • Christmas Greetings Thinlits Dies
  • Silver Glimmer Paper
  • Silver Foil Sheets


Christmas Cheer With Project Life Seasonal Snapshot 2015

by Joanne James2. December 2015 11:46

It's Wednesday already? The week is zipping by! I'm sure that time moves quicker the nearer to Christmas we get! I have a great festive monochromatic Christmas card for you today: big on layers, easy to recreate - just what we like at this time of year! I made today's card with a couple of challenges in mind:

    CYCI#97

The sketch over at CAS(E) This Sketch this week is a classic and I just love the inspiration photo at CanYouCaseIt - so much shine! I took my inspiration from the red and white elements and the shiny foil which I incorporated into the border frame for my card:

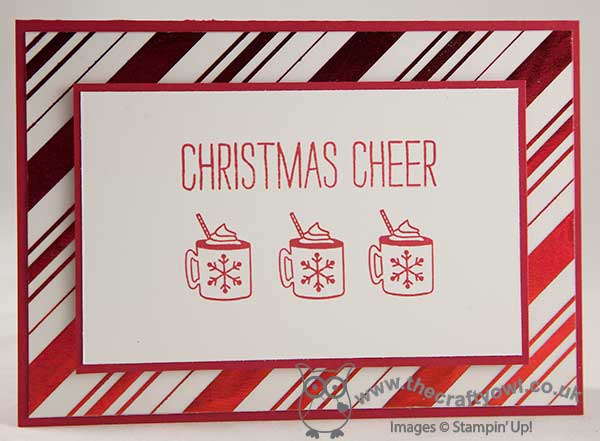
Isn't that striped Holiday vellum just gorgeous? I matted it on a piece of Whisper White cardstock before adhering to my Real Red base so that the red foil stripes would really stand out. For the focal point of my card, I used the sentiment from the 'Cheer All Year' stamp set - so versatile - and my little hot cocoa mugs are from the 'Project Life Hello December 2015' stamp set - another one of those sets that is useful for so much more than its designed purpose.

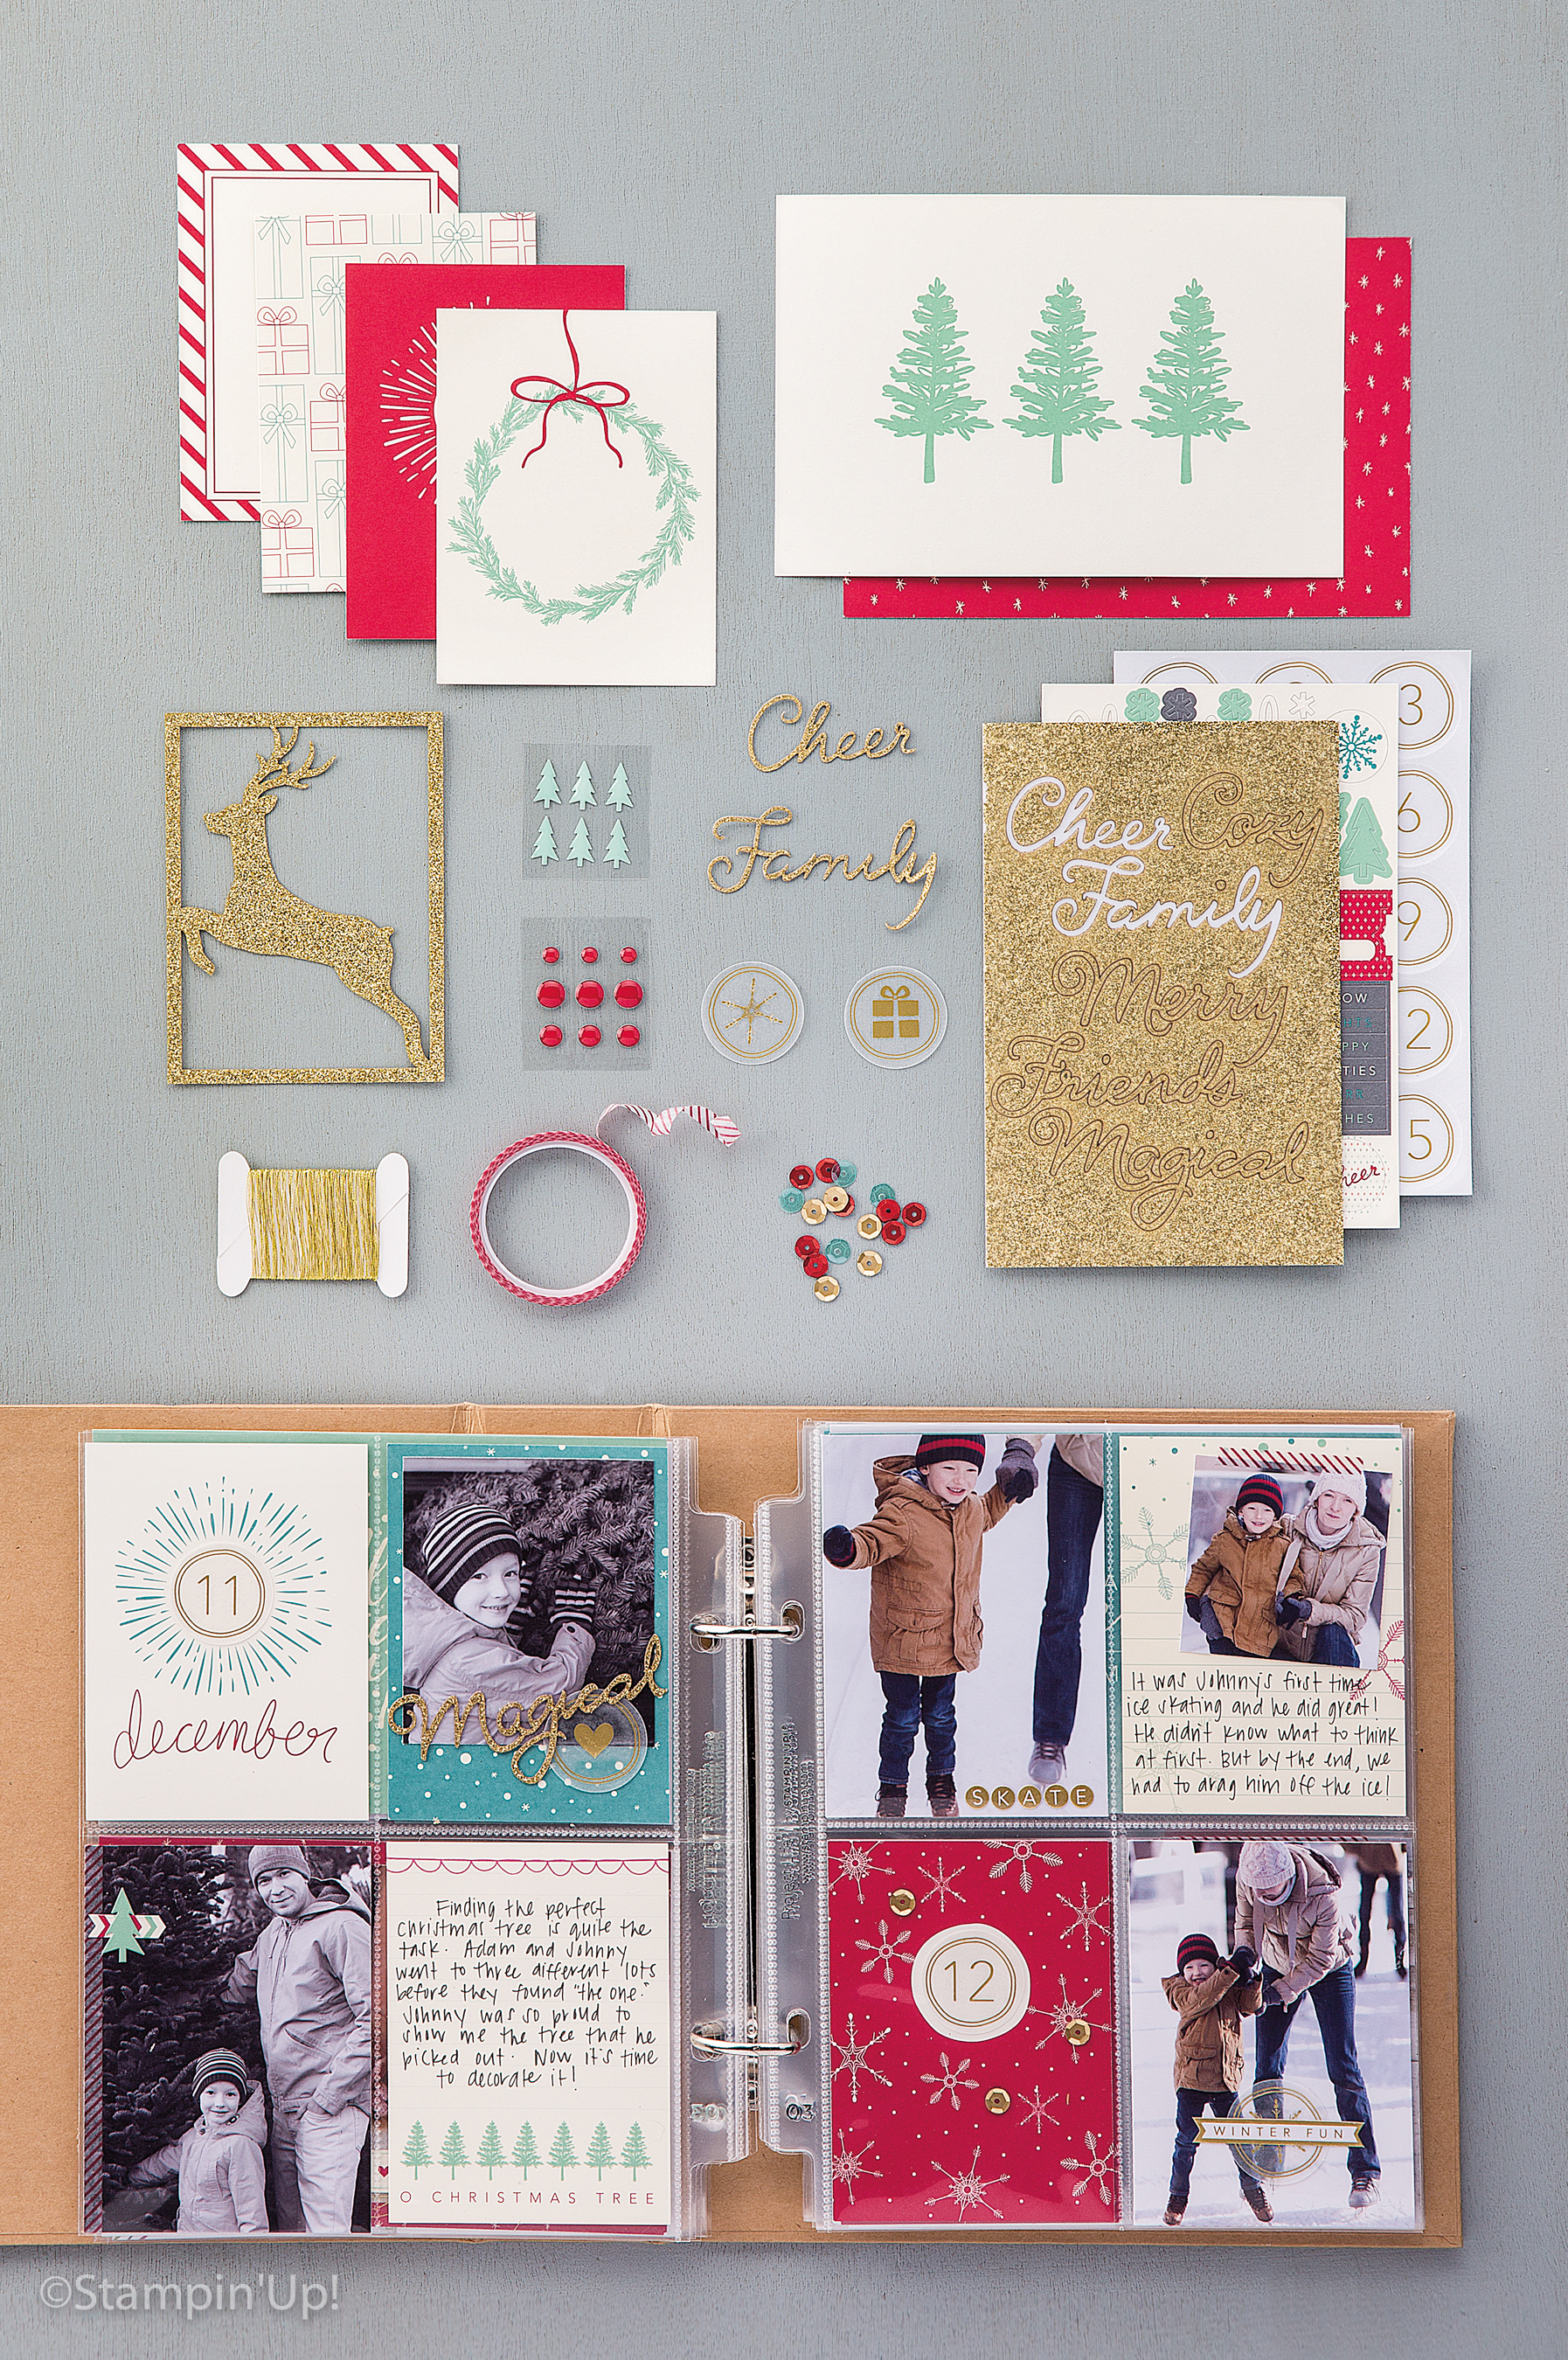
Are any of you out there joining in with the #decemberdaily project? I love to create a Project Life mini-album each December documenting the goings on in the James household during the festive season, so the above stamp set was a must for me to decorate this year's journalling, along with the Hello December 2015 Project Life Card Collection and Accessory Kit:

I'm mindful that I don't often share my Project Life documenting here on my blog - I just tend to get on with it! - but I'm trying to consciously change that, so throughout December I will be sharing some of the inspiration for my daily journalling and occasionally some of my completed pages in the hope that they will inspire you to get involved in active memory keeping too. Yesterday's page will feature the arrival of our Christmas Elf Charlie, who often gets up to mischief in the run up to Christmas and yesterday appeared with a fun piece of home decor I made to remind the James Juniors that good behaviour is important more now than ever since the elf will be reporting back to Santa on everything he sees and hears:

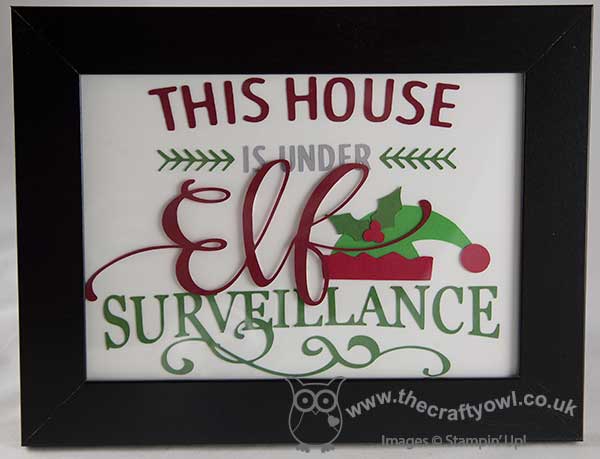
Isn't that fun? Surprisingly easy to create with the help of my e-cutter and some Stampin' Up! cardstock. Here's a picture of Charlie as he made his first appearance of the year:

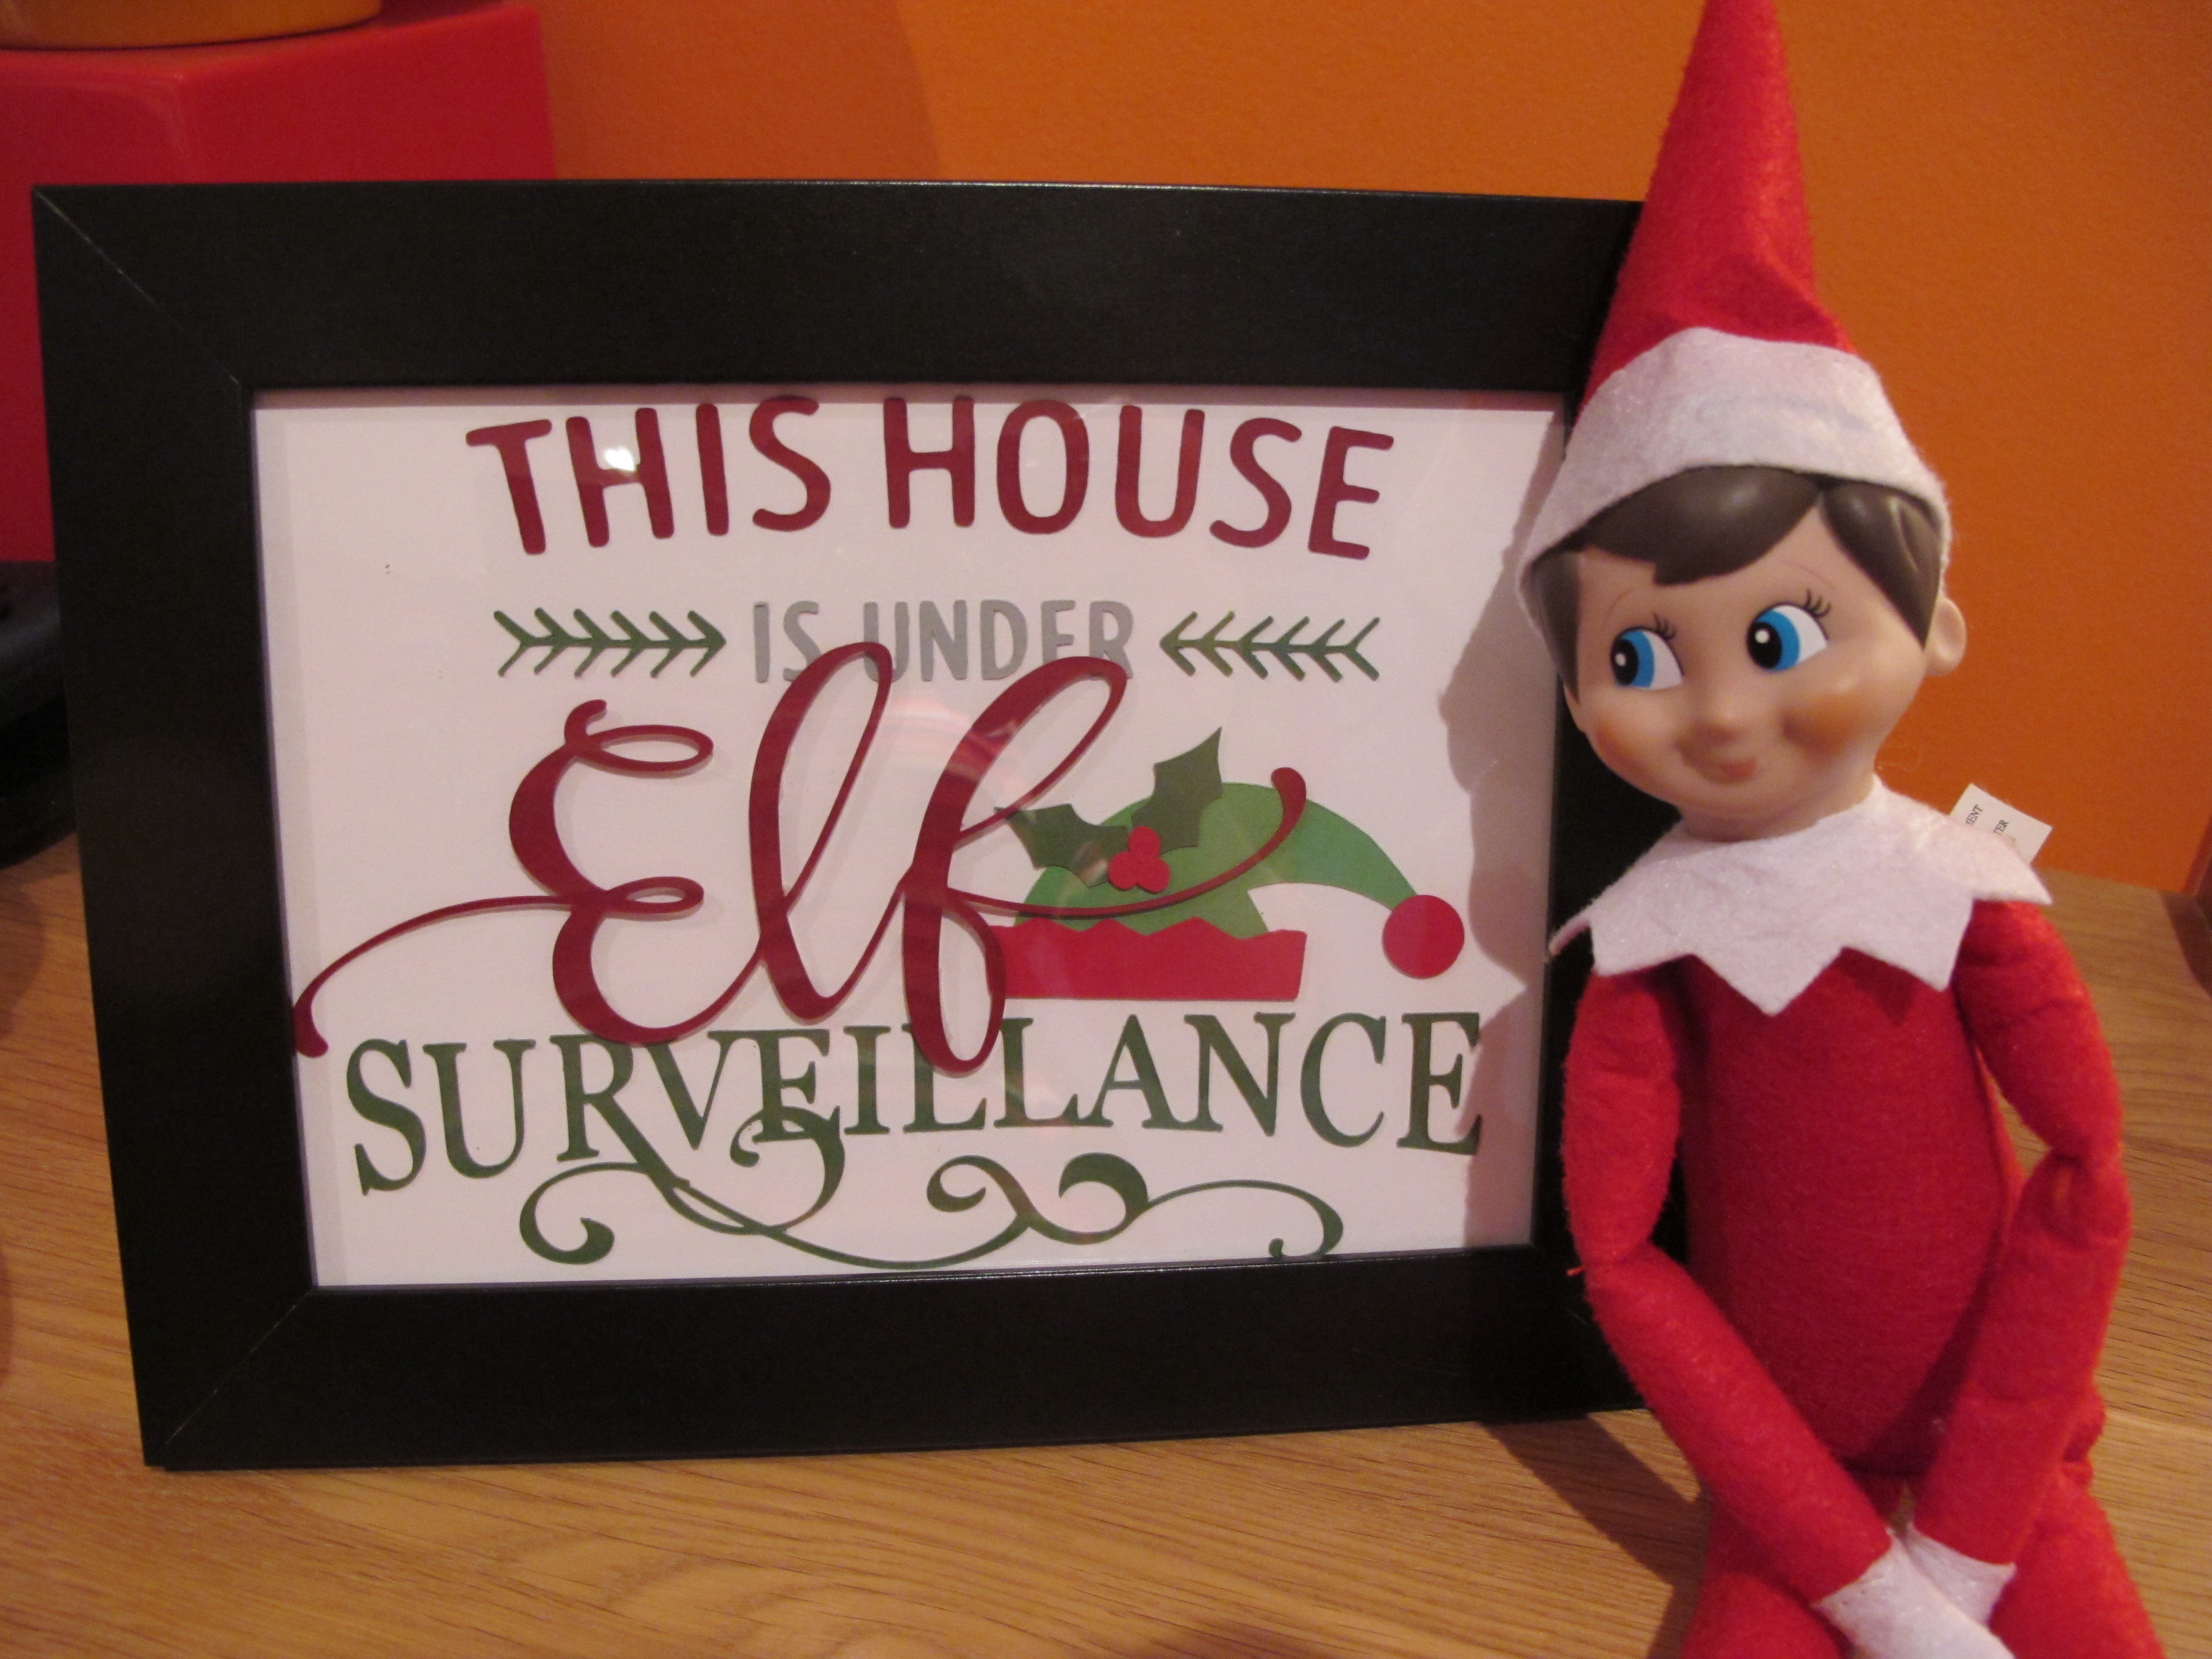
This morning Ben was out of bed, up and dressed in record time and off on the hunt for Charlie to see what mischief he had got up to overnight; he eventually found him hiding in the basil pot amongst the herbs on the kitchen windowsill. Here's to more mayhem as the month progresses!

If you would like to join me in documenting your December, it's not too late to order the supplies to create your own album; just click on the links below to go to the online store or give me a call and I would be happy to place an order for you. More tips and Project Life #decemberdaily inspiration to come! Equally, if you would like to share your own #decemberdaily memories, feel free to upload them to my Facebook page here - I would love to feature them.

That's all from me today; I'll be back tomorrow with a festive card for this week's new challenge over at Create With Connie and Mary. until then, happy stampin'!


Stampin' Up! Supplies Used:

Table built using Product Table Builder by The Crafty Owl - Independent Stampin' Up! Demonstrator.


Project Life #dailydecember Stampin' Up! Supplies Used:

Table built using Product Table Builder by The Crafty Owl - Independent Stampin' Up! Demonstrator.


Santa's On His Way!

by Joanne James1. December 2015 09:00

It's Tuesday and I'm a little later with my post today as I've had the first of my December technique classes this morning - more on those projects another day. Today I have a card for this week's Pals Paper Arts challenge. Before we get to it though, I would like to say thank you to the designers over there for choosing this card as a PPA Pick last week - challenges are fun and it's always nice to have your work recognised so thank you PPA Peeps! This week's sketch was intriguing:

11-25 PPA 277

I immediately saw this sketch rotated through 90 degrees as the two elements looked like a signpost to me; my card didn't finish up quite where I started out - here it is:

I decided to go with a sign of sorts using this fun sentiment from the 'Cup of Cheer' stamp set and a wide ribbon banner behind for some added texture - and of course I couldn't resist adding a fussy cut santa from the 'Home for Christmas' designer series paper to finish. This card uses surprisingly few supplies but has a real festive feel I think.

As today is the 1st of December, I want to remind you all that if you haven't already registered your Stampin' Up! Wishlist with me, you still have time to do so. It's the best way to ensure that you get the Christmas gifts that your heart desires - and still have a surprise on Christmas Day! The last date for orders to be received in time for Christmas is 13th December, so don't leave it too late to place your yours. Please give me a call on 07773 421446 or email me for more details - I will even gift wrap for you!

A quick visit from me today; off shortly on the school run and then piano lessons - it's all go here! Back tomorrow with another festive project; until then, happy stampin'!


Stampin' Up! Supplies Used:

Table built using Product Table Builder by The Crafty Owl - Independent Stampin' Up! Demonstrator.


Snow Friends Framelit Snowman Card

by Joanne James30. November 2015 12:48

As promised - here is my second card of the day, this time for this week's challenge over at The Color Throwdown:

I saw the colours and those adorable snowman treats and knew that I had the perfect idea for a card to play along! The feedback on this card last Thursday where I used my Snow Friends framelits to create a 'negative space' graphic snowman was well received with lots of positive comments, so today I went one step further - and added in a carrot nose! Take a look:

The best thing of all - I used one of my Snow Friends framelits to create it! Are you wondering which one? Yes, it was the ice cream cone - I simply trimmed away the icecream and it left a perfect carrot nose shape. I love it when you can multi-purpose things!! I also added in some twig arms on this card, because the colours worked so well. I think everything else is pretty self-explanatory - check out the layered die cut 'snow' too, cut using the die in the Seasonal Frame Thinlits set and adhered with ease using the fine tip glue pen - perfect for narrow elements like this! Any other questions, leave me a comment below - I read then all and will be sure to post you an answer if you have any queries on this or any of my cards!

Right, off to nurse the poorly one and hopefully fit in an hour or two at my desk before doing the school run. Back tomorrow with another project; until then, happy stampin'!


Stampin' Up! Supplies Used:

Table built using Product Table Builder by The Crafty Owl - Independent Stampin' Up! Demonstrator.


Mini Catalogue

BROWSE THE CATALOGUE

The mini catalogue is now live! Read and download your copy here.

Shop Online

Access my online shop 24 x 7, 365 days of the year:

Current April hostess code:

VDKNV7BH

Shop Online

Join My Team

It's always a great time to join Stampin’ Up! New team members can get £130 worth of products for only £99 + free business supplies + free shipping + all the fun being a part of Stampin’ Up! Stampin' Up! has something for everyone: join my growing team and benefit from my support to enjoy Stampin' Up! however you choose.

If you're interested, call me for a chat to understand how I can help you realise your goals. Alternatively, if you have already decided to sign up and you just can't wait, please click here for the link to the online form where you can sign up and order your starter kit right away! 

Latest Kit!

Stampin Cut and Emboss

The Rock Legend Kit has all you need to make 8 cards with coordinating envelopes. Along with the new Panda Friends Kit, both are available from January 4th for just £14 each - get yours here!

2023-24 Annual Catalogue

BROWSE THE CATALOGUE

Click on the catalogue for a full list of current SU! supplies - if you would like to order any of the items featured, please drop me a line at [email protected] or give me a call on 07773 421446 - I'd be happy to help.

New Online Exclusives

There are new products available exclusively in the online store from 5 March - check them out here.

About Me

Hi I'm Joanne and live in Northampton and when I'm not looking after my husband and two beautiful children, am an avid crafter with a passion for all things Stampin' Up!

I must confess that I have never been a big rubber stamper - until I discovered Stampin' Up! that is. I love the fact that I can get such great results with co-ordinating stamps, inks, papers and punches - the possibilities are endless! Join me on my stamping journey as I share the things I love and be inspired to create amazing things yourself!

Follow Me

Monthly Newsletter

Box Builder

Click the button above to use Box Buster to create your custom box design using the Envelope Punch Board!

Kits Collection Now Available!

Stampin Cut and Emboss

The new Kits Collection from Stampin' Up! is now available!

Click here to see the current kits available and order yours online today.

I Design For


Stampin' Up Stuff

This is my personal blog and is not endorsed by Stampin’ Up! I hope you find it a plentiful source of ideas and personal inspiration but please don't copy my designs for contest submission or use for classes, publication or sale without express permission.