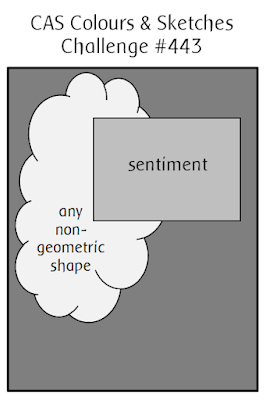
It's Tuesday and time for a new challenge over at CAS Colours & Sketches. Vicky is hosting this month and for her last challenge of the month she has a great sketch challenge for us:
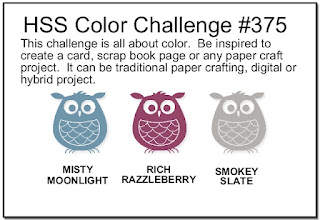
Feel free to flip or rotate the sketch when making your card. For my card today I decided to pair the sketch with the colours over at Hand Stamped Sentiments to create a 'thinking of you' card, but must confess it wasn't entirely plain sailing! Initially I had created a completely different card for this challenge - then when I went to upload it on our Design Team page realised I had missed Vicky's reference to 'any non-geometric shape' - I will share that card another day - and back to the drawing board I went! I eventually came up with the following clean and simple card:
Here's the low-down on today's card:
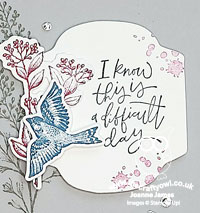
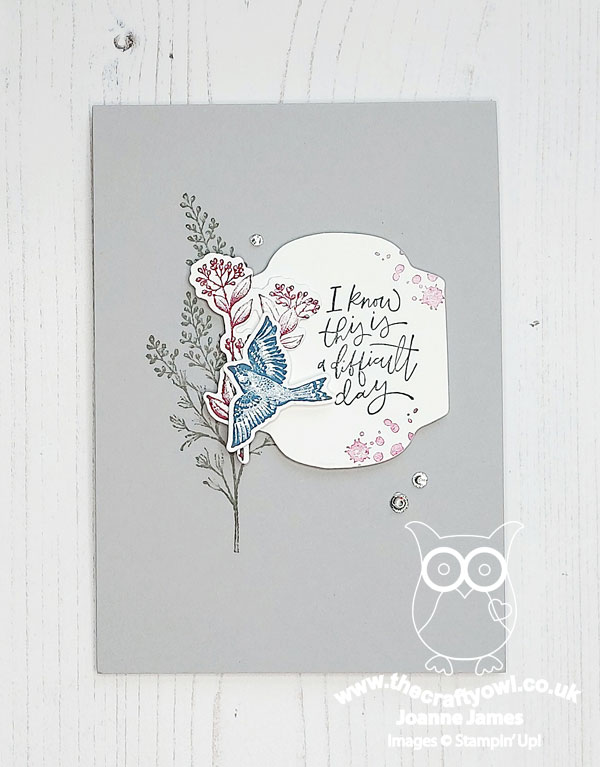
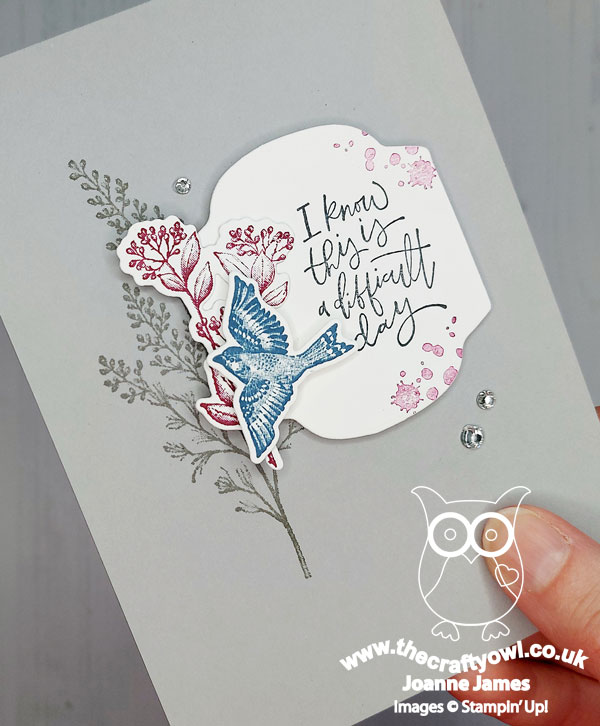
Beauty Of Tomorrow - I reached for the 'Beauty of Tomorrow' stamp set as it has a collection of images in a variety of sizes, including the larger, feathery grass stem that I used on my Smoky Slate card base as the start of my design. I cut a label using my Seasonal Labels dies to which I added my sentiment and some ink splats, then added another seed stem and a bird, which I popped up on a dimensional for extra lift:
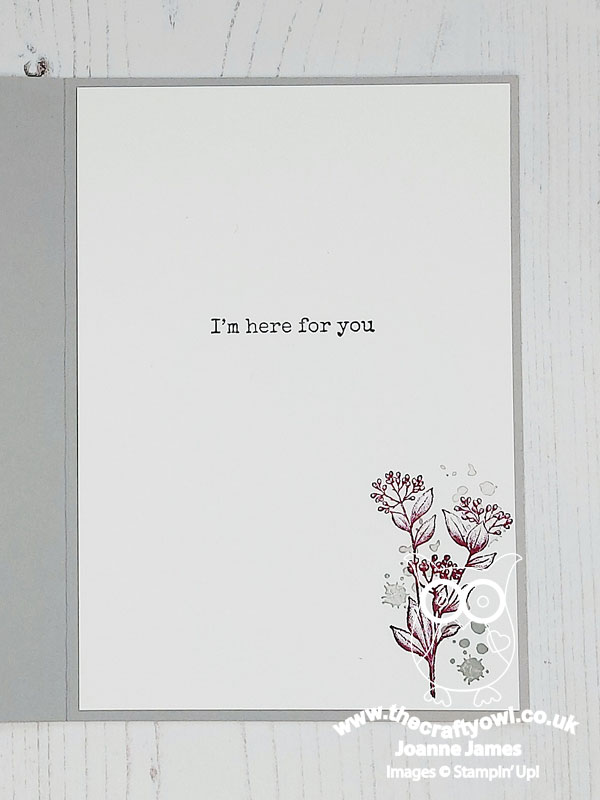
I also used the same set to add a little decoration to the inside of my card:
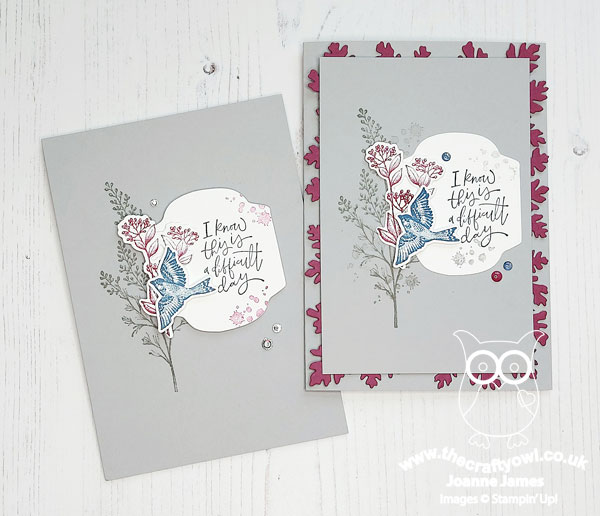
A Lesson In CAS - I ended up making two cards today and thought I would share the reasons for that here with you, not least because we have a design team call out over at CAS Colours & Sketches this week so for anyone thinking they might like to join the team, it might prove useful! My regular readers will know that my 'go-to' style is generally clean and layered and one of the reasons I initially joined this team was with a view to honing my 'clean and simple' card making skills. I initially laid out the card you see above, but thought it looked a little plain, so I made another card - the one you can see below. Once complete, I no longer felt like it met the CAS brief; whilst there was still lots of 'white space', the additional layering, the coloured gems and diecut detail took this card beyond it. I still love it - and this is the card I'm sharing over at HSS - but I ended up making another card to my original design, the one you see above, and funnily enough once finished I decided I liked it much better than I had the first time around now that I had something else to compare it to - go figure!
Take Two - Here is that second card! I added in an additional couple of layers, cutting up one of the large leaves from the die set to add interest to the border, along with more splats and coloured gems:
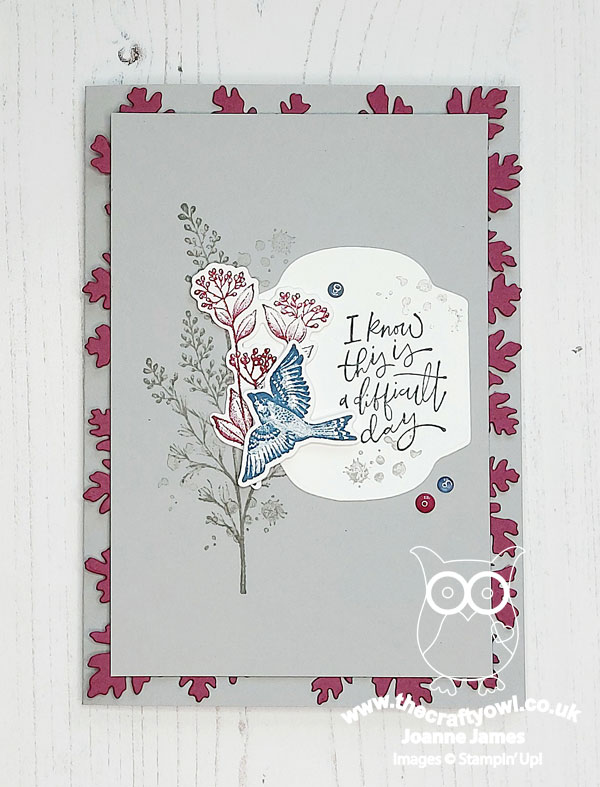
And here's another photo so you can see the extra colour that my subtle changes add:

I hope you found reading about my trials in card making interesting and useful - our challenge is all about the 'clean and simple', although it can be easy to get carried away with the colours or sketch and forget this. You can see a photo of both cards together below - do you prefer one more than the other? Do leave me a comment - I'd love to hear your thoughts.
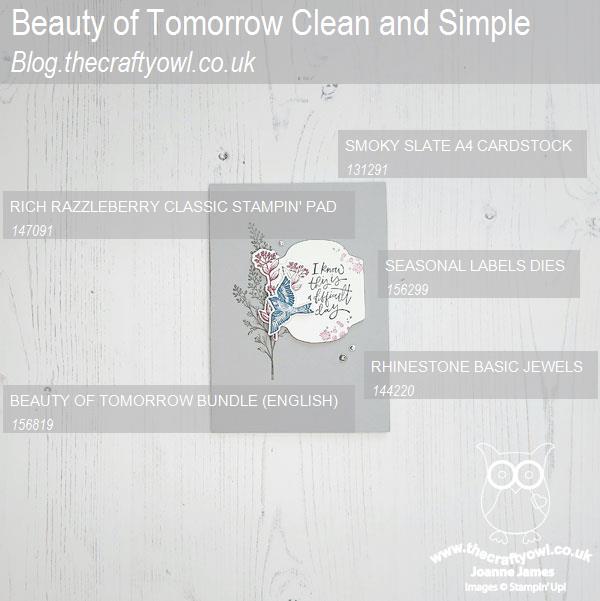
Here is the visual summary of the key products used on today's project for you to pin for easy reference:
You can see all of my 'How To' summaries on my 'How To - Tips and Techniques' Pinterest board in case you've missed any.
As a reminder, for our colour challenges, you must use all of the stated challenge colours. You may also use neutral colours; however, the challenge colours should be the most noticeable ones featured on your card. We use Stampin' Up! color names for reference, but you are welcome to use any other companies' products as long as you match the challenge colours as closely as possible.
Enjoy your day and I'll be back tomorrow with another project. Until then, happy stampin'!
Stampin' Up! Supplies Used: