Something Lacy Congratulations Card

by Joanne James12. May 2015 21:32

I've had a busy couple of days with this month's classes (hence no blog post yesterday - I'm sorry about that!) so today I thought I would share with you one of the cards we made. This month's technique class has focused on using background stamps and our chosen feature stamp set was the lovely 'Something Lacy'. The class also featured heat embossing and this card shows how coloured embossing powder adds a real touch of luxury to a card:

For our Blushing Bride monochromatic wedding card, we stamped the Something Lacy background stamp in Versamark and heat embossed with Blushing Bride embossing powder. This panel was wrapped with some White satin ribbon before adhering the Blushing Bridge cardstock base. A couple of layered labels cut with the Big Shot and Labels framelits were then added, with the sentiment chosen from the now retired 2015 Sale-A-Bration set 'Simply Wonderful', which was also heat embossed. A few pearls and punched flowers, along with a big bow, finish my card. This card has a lovely sheen in real life that really isn't captured in the photograph and the monochromatic colour scheme is so very pretty.

The 'Something Lacy' background stamp is available until the end of the current seasonal catalogue on the 2nd June and isn't carrying over into the annual catalogue, so if it's on your wish list, you only have a couple of weeks left to purchase. The Labels Framelits are retiring and have already sold out, however Blushing Bride embossing powder is still in stock and half price, so there's still time to snap up a bargain!

That's all from me today; back tomorrow with another project and this week's Wednesday Weekly Deals. Until then, happy stampin'!


Stampin' Up! Supplies Used:

Table built using Product Table Builder by The Crafty Owl - Independent Stampin' Up! Demonstrator.


World of Dreams Meets All Abloom

by Joanne James10. May 2015 10:00

It's Sunday - my favourite day of the week and time for a new challenge over at The Paper Players. I loved the variety of the transportation-themed cards in the gallery last week. This week, the lovely LeAnne has an interesting colour challenge for you to play along with: 


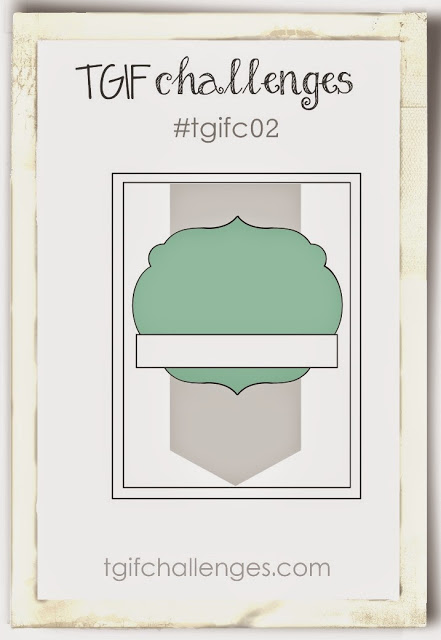
I'm also playing along with the TGIF Challenge this week as I've used their sketch as the inspiration for my layout this week. So I deliberately used the word 'interesting' for LeAnne's choice of colours this week - this colour combo had me stumped for a good long while! Then I remembered the piece of Lost Lagoon and Pistachio Pudding patterned DSP in the All Abloom paper stack; I think it's the only piece I've never used (and I've been through a few packs!) as I prefer the pattern on the reverse,so I decided to challenge myself to see if I could make it work on today's card. Here is my finished card:

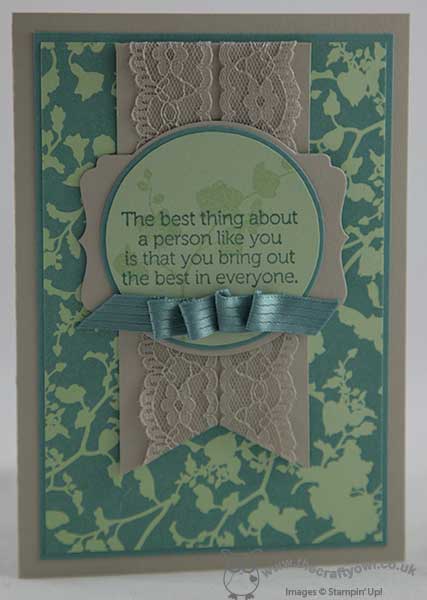
I used Sahara Sand for my base and a mat of Lost Lagoon, then went all out and covered the entire card front with my DSP. This is such a busy pattern, I knew I would have to be careful what else I used on my card to avoid it looking too busy. For my focal point, I chose to stamp one of the silhouette flower stamps in Pistachio Pudding on a circle in the same colour - the paper pattern reminded me of this set - and stamp the sentiment over the top in Lost Lagoon. I mounted this on a slightly larger circle of Lost Lagoon and then a piece of Sahara Sand cut with my Big Shot and a Deco Label framelit. I mounted this on a banner of Sahara Sand that I added a little lace trim to in the same colour - something for a little texture and interest, but not wanting to clash with the strong pattern. Lastly, I added a piece of Lost Lagoon ribbon that I ruched across the front of the card. 

This isn't my usual type of card, but I quite like it. The Sahara Sand does a great job of toning down the pattern and also meant I didn't use any Whisper White cardstock at all, which is quite unusual, not even for my sentiment panel. The thing that pleases me most though - I actually managed to use the sheet of patterned paper effectively!

Before you reach for your paper and inks, check out what our amazing team has created to inspire you this week:

The Paper Players Design Team
 
Here's a quick recap of our challenge rules:
 
1.  Create a new paper project
2.  Upload your creation to your blog with a link back to us and provide a direct link to the post featuring your challenge submission.
3.  Please link your card to no more than three challenges, TOTAL.
4.  Have FUN! 

I look forward to seeing how you interpret this week's colour palette. I'm off to finish the preparation for my technique classes this week and enjoy the rest of the weekend.

Back tomorrow with another project; until then, happy stampin'!


Stampin' Up! Supplies Used:

Table built using Product Table Builder by The Crafty Owl - Independent Stampin' Up! Demonstrator.


Hooray For Today What's My Type Goldfish Card

by Joanne James7. May 2015 08:05

It's Thursday and time for a new challenge over at Create With Connie and Mary and this week we have a fun colour challenge for you:

I spent a little while bemusing how I was going to use these colours together this week, but once I'd decided my card came together in record time. I decided to go with some super simple punch art this week - take a look:

I love the big, bold shapes in the 'What's Your Type' stamp set; not only are they great for creating patterns but they can also be used to create fun objects too. For today's card, I stamped the wavy lines from 'Work of Art' in Bermuda Bay - stamped three times, bottom to top without re-inking to give my water an ombre effect - and stamped my sentiment from the 'Geometrical' stamp set in Versamark and heat embossed it in gold. I then used my 2" Circle punch to cut two circles out of Tangelo Twist cardstock. One of them I cut in half and overlapped by a quarter to create the fish body. The second one I cut in half then stamped the semi-circle lined stamp from 'What's Your Type' stamp set in Versamark and heat embossed this in gold too and glued this to the body piece. I added a single gold sequin to my fish for his eye, then adhered this to my card with a dimensional for some lift. A few Bermuda bay sequins for air bubbles finished off my card. I think this would be a fun birthday card for a toddler - I know my children would have loved it in years gone by!

Do check out what the other CCMC designers have in store for you today - there's a great variety of inspiration to get you going with this colour palette - and we look forward to seeing your entries in the gallery this week!

I'll be back tomorrow with another project; until then, happy stampin'!


Stampin' Up! Supplies Used:

  • What's Your Type? Photopolymer Stamp Set
  • Work Of Art Clear-Mount Stamp Set
  • Geometrical
  • 2" Circle Punch
  • Embossing Buddy
  • Versamark Pad
  • Gold Stampin' Emboss Powder
  • Heat Tool - Uk Plug
  • Whisper White A4 Card Stock
  • Gold Sequin Trim
  • Bermuda Bay Sequin Trim
  • Tangelo Twist A4 Cardstock
  • Bermuda Bay Classic Stampin' Pad
  • Card Stock A4 Bermuda Bay


Tags: , , , , , , , ,

Cards | Punch Art | Stamping

Home Decor Spring Flower Wreath using Stampin' Up! Flower Frenzy Bigz L Die

by Joanne James6. May 2015 09:37

Good morning everyone - today I have something a little different for you! I ran a very successful class a little while ago to make a beautiful home decor Spring flower wreath. I am demonstrating how to make this wreath at a Spring Open Evening at Bell Of Northampton this evening so thought this was a good opportunity to share it with you too:

We started with a polystyrene wreath base and covered it with a roll of burlap, then decorated it with a selection of flowers made with a variety of dies and punches. The largest flower, leaves and the bases for the medium flowers were made using the Big Shot and Flower Frenzy Bigz L Die; the remaining flowers were made using a combination of the retiring Blossom punch, the Pansy punch and the Petite Petals punch. The Blossom punch and Flower Frenzy Bigz die are now out of stock, as is the patterend paper that I used, but you could make something similar with other punches and dies. We used a variety of buttons, brads and embellishments to decorate our flowers: I used Vintage Faceted Buttons, Something Borrowed Embellishments and some retired brads from my stash to decorate mine. I chose Elegant Eggplant, Smoky Slate and Pear Pizzazz as my colourway but each of the ladies tailored their colour choices and embellishments to their personal preferences. Here's a closeup of my flowers - I think they are gorgeous:


I created an album with pictures of their finished wreaths on my Facebook page here - you really should go and check them out as there are some amazing pieces and they all look so very different in the various colourways. If you haven't already, perhaps you could give me a 'like' whilst you're there - I'm only 10 away from my next milestone!

If you live in or around Northampton and would like to see me demonstrate how to make these flowers, do pop along to Bell's between 6-9pm this evening:

I hope you like today's project - it's one of my favourites! Back tomorrow with a card for this week's new challenge over at Create With Connie and Mary. Until then, happy stampin'!Full details via the link above and on my Facebook Page. There are lots of other demonstrations taking place - there will be someone fabulous chefs in residence cooking up delicious treats, a little pampering as well as other in-store delights that will all make for a pleasant browsing experience.


Stampin' Up! Supplies Used:

Table built using Product Table Builder by The Crafty Owl - Independent Stampin' Up! Demonstrator.


New Wednesday Weekly Deals!

by Joanne James6. May 2015 09:28

It's Wednesday and you know what that means: a new collection of Wednesday Weekly Deals! This week's deals are included below - they will be available for one week only, before a new collection of deals is announced. 

As always, if you want to take advantage of any of the deals on offer, you can support my business by placing your order online by clicking here or using the link to my store on the right hand side of my blog page where it says 'Shop Online' or with me in person. Don't forget to add the Hostess Code for May FZZMG3JY and be sure to make sure that you don't check the 'no contact' box if you'd like to be kept updated with the progress of you order and receive a little thank you in the post from me. 

Here's a summary of this week's one-week only Wednesday deals - click on each item to go to the online store to purchase:

Table built using Product Table Builder by The Crafty Owl - Independent Stampin' Up! Demonstrator.

Lots more great products on offer this week, especially the framelits - I'm especially fond of the Wonderful Wreath Framelits Dies, which can be used all year round and not just for Christmas. There is some new co-ordinating product for these in the new annual catalogue, so this would be a great time to snap these up at the offer price of £15.71.

Back shortly with today's creative post; until then, happy shopping!

Tags: , , , , , ,

Promotions | Shop Online

Happy Birthday Balloons

by Joanne James5. May 2015 12:45

Happy Tuesday everyone - or at least it is for me, as today is the day that Stampin' Up! demonstrators can place their pre-orders for goodies from the new annual catalogue. The catalogue doesn't launch until 2nd June, but if you can't wait until then do give me a call for a no-obligation chat about what's involved in becoming a demonstrator. All new demonstrators are allowed to include pre-order items in their starter kits, so if the new in-colours are your thing or you would like to get your hands on some new cool tools before everyone else, then pick up the phone to me today!

Onto today's card - a bright, clean and simple one today using the colours over at As You See It this week:


I am a big fan of Brights - they are my 'go to' colour family - so I couldn't resist playing along with a fun clean and simple birthday card:

I used a base of Tempting Turquoise with an offset mat of Real Red and  focal panel of Whisper White, stamped with a trio of balloons from the Celebrate Today' stamp set, one in each of the challenge colours. I overlapped each of them and the edge of the cardstock slightly - so easy to do with photopolymer stamps - and for the main turquoise balloon, I used the balloon with the negative 'happy' sentiment and then added the 'birthday' separately in Real Red. To finish, I added some strings, hand-drawn with my Stampin' Write markers, and a red polka dot bow to the main balloon, cut out with the co-ordinating Balloon framelits and popped up on a dimensional. 

Such a super clean and simple card in colours that would work for boys or girls, young or old - who doesn't love balloons, right? Apparently anyone who suffers from globophobia (a fear of balloons - it's a thing!) If you like me love them, you might want to consider joining my next Stamp-A-Stack card class on Friday 9th May, as most of our cards will be featuring balloons of all shapes and sizes. 12 clean and simple, post-friendly cards in 3 hours; the class costs £15 or is free with a £45 order on the day. I still have a couple of spaces left - if you are interested, please get in touch to book your place. As always, you can find my current class schedule with details of all my upcoming classes here.

Back tomorrow with another project; until then, happy stampin'!


Stampin' Up! Supplies Used:

Table built using Product Table Builder by The Crafty Owl - Independent Stampin' Up! Demonstrator.


Tags: , , , , , ,

Cards | Stamping

Cheers To Love Wedding Card

by Joanne James4. May 2015 18:54

It's a Bank Holiday here in the UK today and whilst I made today's card this morning, I have spent a pleasant afternoon gardening so am late with my blog post today! I used this week's sketch over at Freshly Made Sketches for today's card and I am squeezing in just under the wire for a link-up (hopefully!) Here is the sketch:

I decided to use one of my retiring and not-yet-inked-up (shock, horror!) sets to make a wedding card today - here it is:


I went with a 'black and white and hint of pink' colour scheme today, using a base of Basic Black with mats in Pink Pirouette and Basic Black and a strip of 'Stacked With Love' DSP for my patterned edge. I made my card slightly narrower than usual to allow for the overhanging element and still fit into a standard envelope. I stamped the main stamp from the 'Cheers To Love' stamp set in Memento Black onto my right hand panel of Whisper White and then for my 'over the edge' element I chose a couple of stacked hearts, stamped with the 'Mr' and 'Mrs' stamps from the same set and punched with my Sweetheart punch. Lastly I added a tiny pink heart punched with my trusty Owl Builder Punch to the main sentiment and a few rhinestones to the hearts for a little sparkle.

I really love this set and it has everything you need to create beautifully co-ordinated wedding stationery, not just wedding cards. So it might be retiring, but for me it's a keeper (best make extra room on my shelf...)

I hope you like today's card; back tomorrow with another project. Until then, happy stampin'!


Stampin' Up! Supplies Used:

Table built using Product Table Builder by The Crafty Owl - Independent Stampin' Up! Demonstrator.


Tags: , , , , , , ,

Cards | Stamping | Weddings

To A Classic Masculine Card

by Joanne James3. May 2015 10:00

It's Sunday and time for a new challenge over at The Paper Players. There were some great takes on Anne's sketch last week and today we are kicking off with a challenge from the talented Sandy, who has chosen a great theme for you to play along with this week:


I used this week's layout over at Mojo Monday as the basis for my card (although I didn't go tall and skinny!). As soon as I knew Sandy's theme this week, I knew immediately that I wanted to do something using the vintage car in the 'Guy Greetings' stamp set. Here's what I came up with:

I decided the layout was perfect for showcasing some of the fabulous masculine patterned papers in the 'Adventure Bound' DSP stack too and used the plaid paper as the inspiration for my colour scheme. The base and mat layers are Smoky Slate, with a layer of Island indigo in between along with a band in the same colour across the front of the card, which I tied with a piece of thread split from the white jute ribbon in the current Occasions catalogue. I then used my piece of DSP for the vertical panel and stamped my car in Island Indigo onto a 2" punched circle of Whisper White, with the sentiment stamped in the same colour onto a banner of Smoky Slate, which I then laid over the top.

A great masculine card that could be paired with any of the other sentiments in the same stamp set for a special husband, dad or grandad, and would be suitable for a birthday or Father's Day alike. 

So before you reach for your paper and inks, check out what our amazing team has created to inspire you this week:

The Paper Players Design Team
 
Here's a quick recap of our challenge rules:
 
1.  Create a new paper project
2.  Upload your creation to your blog with a link back to us and provide a direct link to the post featuring your challenge submission.
3.  Please link your card to no more than three challenges, TOTAL.
4.  Have FUN! 

I look forward to seeing how many different modes of transport get into the gallery this week. I'm off to enjoy a nice long Bank Holiday weekend here in the UK - let's hope the sun shines!

Back tomorrow with another project; until then, happy stampin'!


Stampin' Up! Supplies Used:

Table built using Product Table Builder by The Crafty Owl - Independent Stampin' Up! Demonstrator.


Tone on Tone Mother's Love Tag Card

by Joanne James1. May 2015 19:57

Yay - it's Friday! I've been a busy bee out and about today so am only just getting around to my blog post. I'm squeezing in a card to join the lovely ladies over at Less Is More this week where we need to have a tag on our card and I'm using this week's Color Throwdown colours, which I love:


I decided to 'go bold' with colour today and use the aqua in Coastal Cabana as my background for both my card and tag, to give a tone-on-tone look - take a look:

I order that my sentiment and flower would have an impact, I stamped both in Versamark and heat embossed in white which gives a lovely sheen. I then used my aquapainter to paint the detail of the flower petals and leaves with white craft ink and when it was dry, I painted them again with Strawberry Slush and Pear Pizzazz ink respectively. I punched my tag with the angle tag topper punch and added some white seam binding ribbon tied with some Strawberry Slush thick baker's twine to finish, before popping up with some dimensionals for a little extra lift. A super clean and simple card and I love the white on the aqua background, with the delicately watercoloured flower. Not to mention that lovely sentiment pairing from 'Mum's Love' - a favourite of mine. I'm also going to link today's card up with SUO Challenges, where the current challenge is to make a Mother's Day card, although this card would also work for a Mum's birthday card too.

I hope you like today's card; back tomorrow with another project. Until then, happy stampin'!


Stampin' Up! Supplies Used:

Table built using Product Table Builder by The Crafty Owl - Independent Stampin' Up! Demonstrator.


Tags: , , , , , , ,

Cards | Stamping

Mini Catalogue

BROWSE THE CATALOGUE

The mini catalogue is now live! Read and download your copy here.

Shop Online

Access my online shop 24 x 7, 365 days of the year:

Current April hostess code:

VDKNV7BH

Shop Online

Join My Team

It's always a great time to join Stampin’ Up! New team members can get £130 worth of products for only £99 + free business supplies + free shipping + all the fun being a part of Stampin’ Up! Stampin' Up! has something for everyone: join my growing team and benefit from my support to enjoy Stampin' Up! however you choose.

If you're interested, call me for a chat to understand how I can help you realise your goals. Alternatively, if you have already decided to sign up and you just can't wait, please click here for the link to the online form where you can sign up and order your starter kit right away! 

Latest Kit!

Stampin Cut and Emboss

The Rock Legend Kit has all you need to make 8 cards with coordinating envelopes. Along with the new Panda Friends Kit, both are available from January 4th for just £14 each - get yours here!

2023-24 Annual Catalogue

BROWSE THE CATALOGUE

Click on the catalogue for a full list of current SU! supplies - if you would like to order any of the items featured, please drop me a line at [email protected] or give me a call on 07773 421446 - I'd be happy to help.

New Online Exclusives

There are new products available exclusively in the online store from 5 March - check them out here.

About Me

Hi I'm Joanne and live in Northampton and when I'm not looking after my husband and two beautiful children, am an avid crafter with a passion for all things Stampin' Up!

I must confess that I have never been a big rubber stamper - until I discovered Stampin' Up! that is. I love the fact that I can get such great results with co-ordinating stamps, inks, papers and punches - the possibilities are endless! Join me on my stamping journey as I share the things I love and be inspired to create amazing things yourself!

Follow Me

Monthly Newsletter

Box Builder

Click the button above to use Box Buster to create your custom box design using the Envelope Punch Board!

Kits Collection Now Available!

Stampin Cut and Emboss

The new Kits Collection from Stampin' Up! is now available!

Click here to see the current kits available and order yours online today.

I Design For


Stampin' Up Stuff

This is my personal blog and is not endorsed by Stampin’ Up! I hope you find it a plentiful source of ideas and personal inspiration but please don't copy my designs for contest submission or use for classes, publication or sale without express permission.