by Joanne James21. October 2013 20:22So following the excitement of yesterday's Christmas banner class, I'm back down to earth with a bump today with the first day of the half-term holiday for both James juniors and madness and mayhem about to ensue for the next two weeks! I will do my best to keep up with my blogging as there will be lots to share this week, not only in projects but also news: the 25th October is Stampin' Up's official 25th Anniversary day so there will be more announcements and special offers to share by way of celebration.
Today's project involves some stamping but is another 3D project - some clean and simple packaging for a birthday gift. As my regular blog readers know, I love the variety of packaging options that are available in the current annual and seasonal catalogues: bags and boxes in all shapes and sizes that turn gift-giving into an art form, but needn't take hours of time, effort or expertise to achieve. For my niece's birthday, I had a couple of awkward-shaped gifts that were just asking for a box to be wrapped in - the new extra-large gift boxes in the seasonal catalogue were just the thing. For the decoration, I took my inspiration from the seasonal catalogue and this is where I ended up:

Using my Melon Mambo marker pen and inkpad, I created a 'faux ribbon' by stamping one of the stamps from 'Really Good Greetings' directly onto the box, all the way around on four sides, then finished off with a double bow in some vintage Melon Mambo designer paper and a co-ordinating tag made using one of the Chalk Talk framelits and finished with a polka dot paper border.
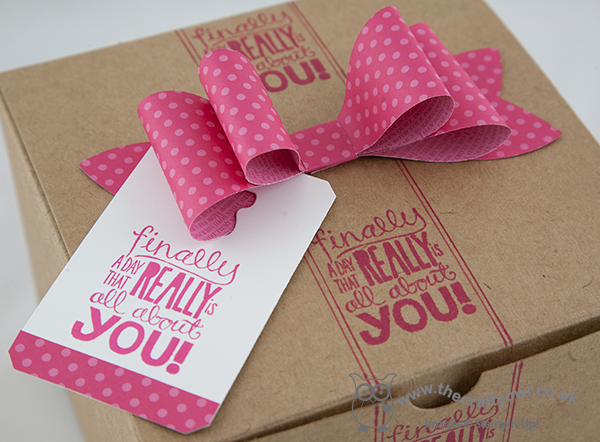
This box took no time at all to decorate, yet I love its simplicity. It seemed to hit the spot with its teenage recipient too - always a bonus! I'm linking today's post up with the team at CAS-ual Fridays where the challenge theme this week is 'Tags and Bags' CFC118, as this is about as CAS as packaging gets! Why don't you pop over to their sit and say 'hi' and look at the great projects that they are showcasing this week.
Lastly, today is the last day to take advantage of Stampin' Up's 'Join for £25' offer - you have until 10.50pm GMT this evening to sign up online if you would like to take advantage of this great deal and becoming a member of my growing team of Crafty Owls - I would love to welcome you to the parliament (that's the name for a collective group of owls, in case you didn't already know!) Just click the link from the 'Join My Team' section on the right hand side of the page.
Come back tomorrow for some very important news from Stampin' Up - I can't tell you what it is yet, but you are definitely going to want to hear it so be sure to call by for tomorrow's updates. It's going to be a busy Tuesday; until then, happy stampin'!
Stampin' Up Supplies Used:


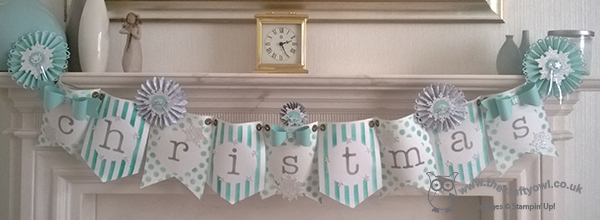
by Joanne James20. October 2013 20:51Well, today has been a fun day with a Christmas Build a Banner project class this morning. Following many laughs and giggles and a fair number of inky fingers, the lovely ladies attending my class each made a festive banner using a variety of papers and embellishments and the Build a Banner set. So there are lots of photos in this post! First of all, here is my finished banner that served as their inspiration:
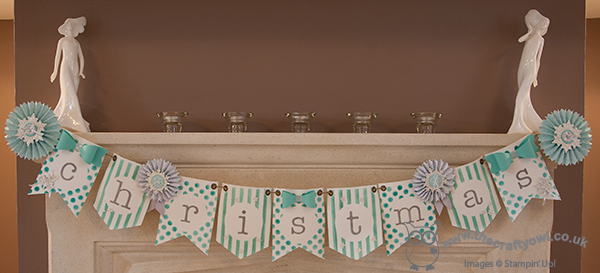
My colours are Bermuda Bay and Coastal Cabana, with rosettes made from some of the lovely Winter Frost DSP and Smoky Slate chevron ribbon and finished with Coastal Cabana bows. Here's some close-ups of the rosettes - the grey one:
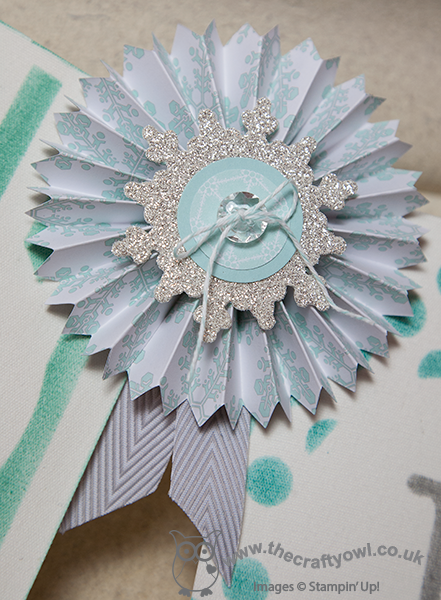
And here's one of the Pool Party ones:
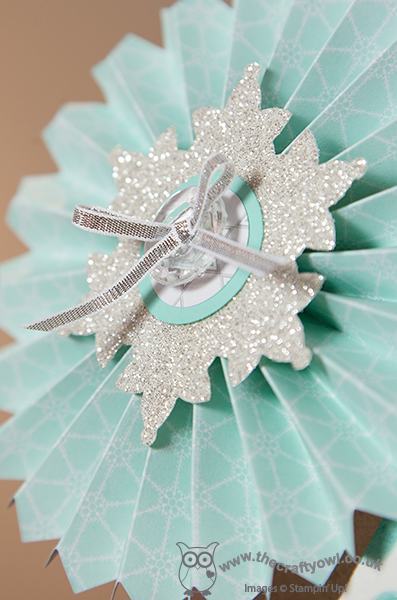
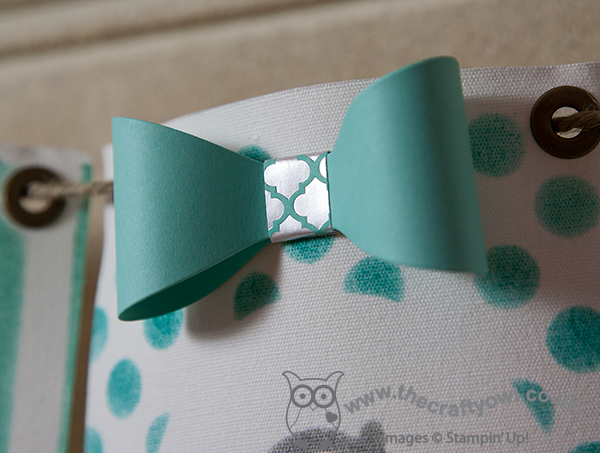
Here's a close up of one of the bows, so easy to put together using the new Bow Bigz Die:
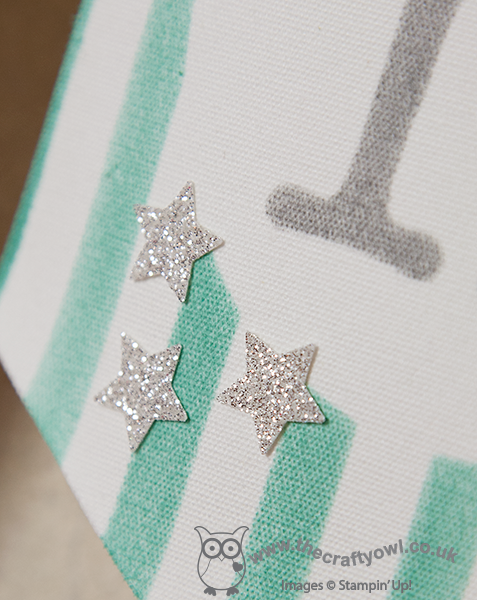
And lastly one showing some of the added glimmer on the flag itself:
Here are two of the ladies' lovely finished banners. Firstly, Kathy's, also in the grey/blue colourway:
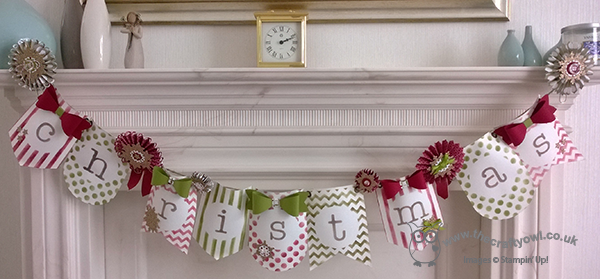
And this one is Julie's, in the red-green colourway with champagne glimmer accents:
Aren't they just beautiful? I didn't manage to get photos of the other two, but I can assure you they were just as lovely. We are all feeling a little more ready for Christmas now, with one more thing ticked off our Christmas home décor list. The Build A Banner kits are great and come highly recommended; at £17.95 for the full kit including stencils and just £8.95 for the basic set, they are great value. Rebecca has put first dibs on the remaining 9 pieces in my banner kit for a name banner for her bedroom (pictures will no doubt follow in due course!). I can see me having to buy another one so that Ben can have one too ...
If you live in or around Northampton and would like a current class schedule
Back tomorrow with another project; until then, happy stampin'!
Stampin' Up Supplies Used:


0e05a67d-baaf-4e06-9547-98092151d1e6|0|.0|96d5b379-7e1d-4dac-a6ba-1e50db561b04
Tags: 3D Projects, Christmas, Classes, Festive Flurry Framelits, Gift Bow Bigz L Die, circle punch, scallop circle punch, Season of Style, Shop online, Stampin' Up, Stampin' Up Supplies, Winter Frost
3D Projects | Classes
by Joanne James19. October 2013 19:26Today I'm sharing a card that I made a few weeks ago, but couldn't share at the time. I actually made this card for my husband's birthday, but as he photographs all my cards for me I couldn't share until after the event. I used my This and That DSP as the inspiration for the colour scheme for my card (it's not just for journaling with!) and a stamp from the retired set 'Word Play' as the feature for this card:
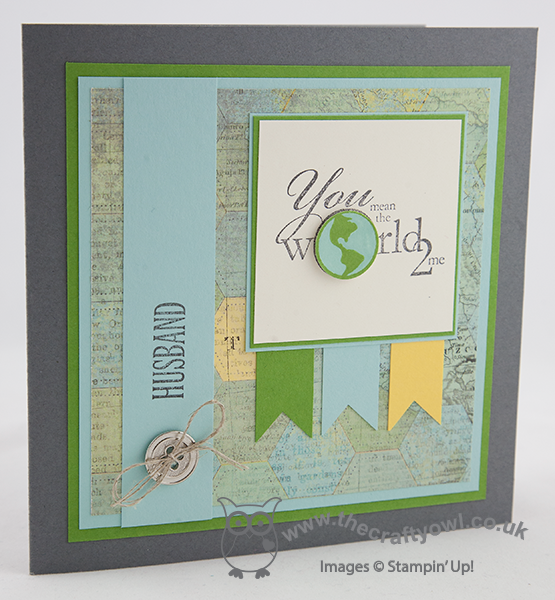
I chose the hexagon map paper to fit with the globe in the sentiment; I stamped the sentiment twice and punched out one of the globes and coloured it with markers before putting on a dimensional. A nice shiny button tied with twine and done; these buttons are now available on Clearance Rack for only £2.19 - bargain!
Hope you like it; back tomorrow with another rather special project. Until then, happy stampin'!

Stampin' Up Supplies Used:


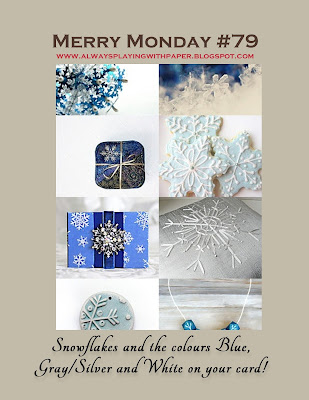
by Joanne James18. October 2013 21:06I know, you're probably thinking 'Merry Monday? It's only Friday!' I'm not wishing away my weekend, far from it. Rather today's card is another Christmas card made with the challenge over at Always Playing with Paper in mind. The challenge was to use blues, grey/silver and white and snowflakes:
I've been wanting to use a sketch layout I saw over at the Paper Pal Arts site a little while ago; here's the card I made:
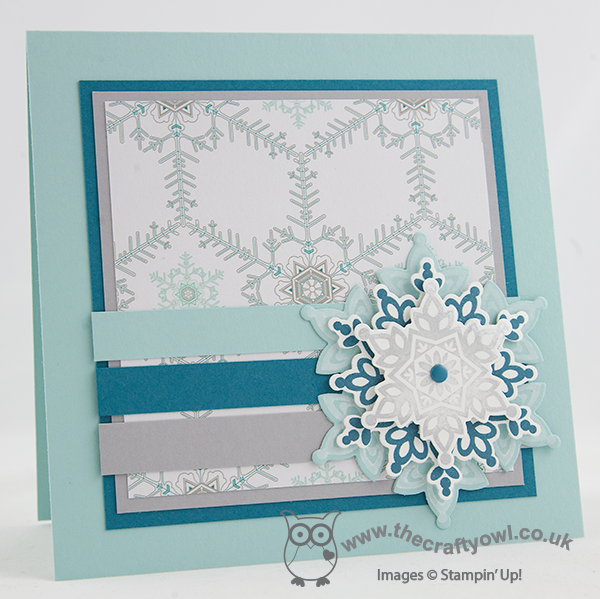
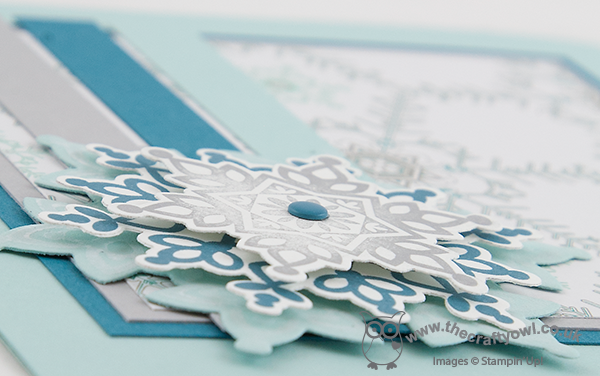
I used Pool Party for the base of my card and layered with Island Indigo and Smoky Slate and some of the Winter Frost DSP for the top layer. My design is anchored with a lovely Festive Flurry layered snowflake , which is stamped Whisper White on Pool Party cardstock for the first layer, Island Indigo on Whisper White for the second layer and then Metallic Silver on Whisper White for the top layer, finished with a single Island Indigo candy dot - I love these! Here's a close up of the snowflake, with the shimmery metallic silver finish (that is very difficult to photograph!):
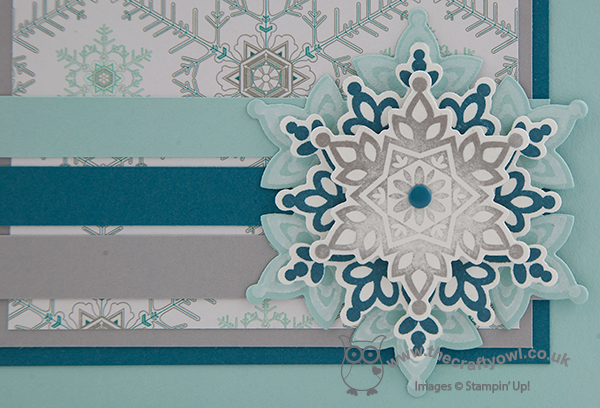
This photo shows the build of layers of the snowflake - this set is so good for this and the framelits make cutting out so easy:
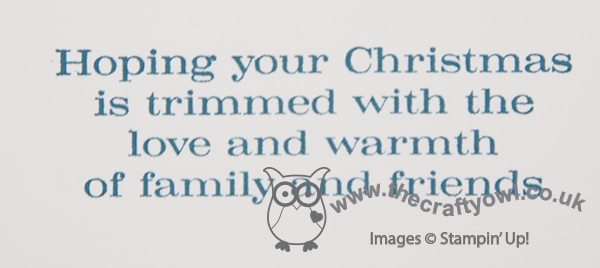
I finished the inside by stamping this verse from the Christmas Messages set:
As of today the James Juniors are on half term for two weeks. We have lots of homework to do, but I am relieved to be having a break from some of the challenges and routine of school life and looking forward to having fun with some pre-Christmas activities of our own. I'm also looking forward to another of my special project classes this weekend; I have a group of lovely ladies coming to make Christmas banners using the Build a Banner kit. Check out my Facebook page tomorrow if you would like a 'sneak peak'; otherwise I will be sharing the completed banners next week.
Back tomorrow with another project; until then, happy stampin'!
Stampin' Up Supplies Used:


ddeb249c-3846-4e93-a87f-ed70704c824d|0|.0|96d5b379-7e1d-4dac-a6ba-1e50db561b04
Tags: Christmas, Christmas Messages, Festive Flurry, Festive Flurry Framelits, Shop online, Stampin' Up, Stampin' Up Card, Stampin' Up Card ideas, Stampin' Up Supplies, Big Shot, Candy Dots
Cards | Stamping
by Joanne James17. October 2013 21:51
I managed to grab a quick hour of crafting today in between other jobs and as I debated with my self whether or not to brave the washing line or resort to the tumble dryer, the sun broke through the clouds and I had a sudden flash of crafting inspiration for this week's sketch at Retrosketches. So instead of my planned post, I thought I'd sneak this one in before the close. Here is the inspiration sketch:

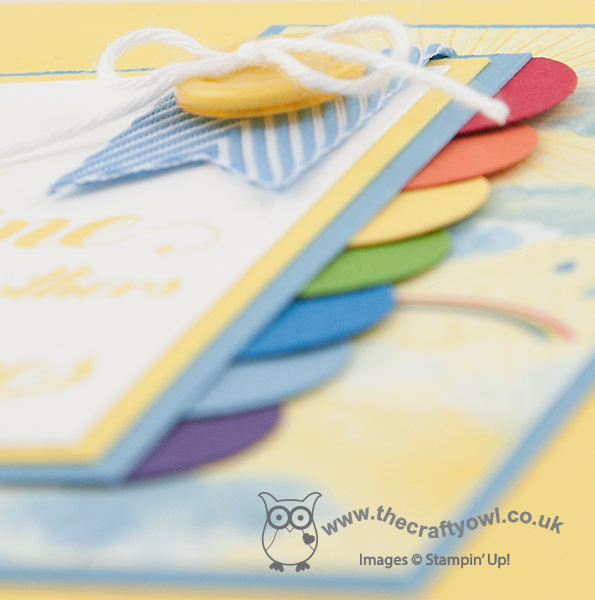
Here is my interpretation of the sketch:
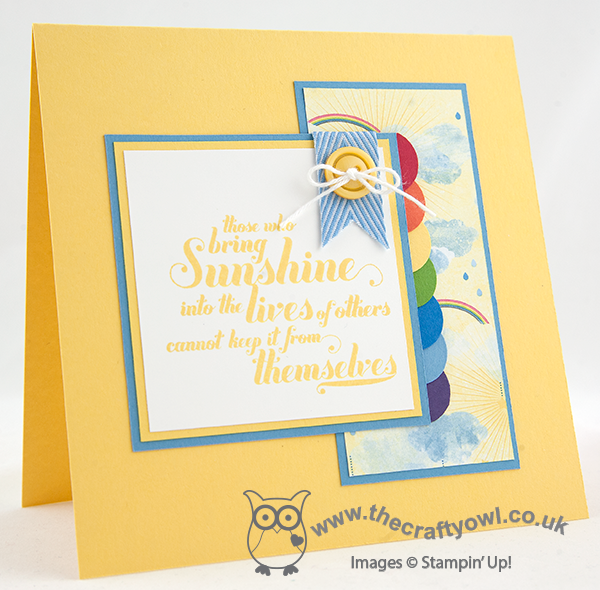
I have been so 'in the zone' with Christmas cards that I've been struggling to look at sketches and think about anything else. I think we can all agree that this card couldn't be further from Christmas if it tried! It cheered me up no end though - yellow is one of my favourite colours. I used some retired 'sunshine and sprinkles' DSP (eliminating the and a row of coloured overlapping circles to create a rainbow border in place of the scalloped edge. The perfect background for one of the 'Feel Goods' stamped sentiments, along with the sunny yellow of course.
Lastly, a quick reminder: only 4 more days to take advantage of Stampin' Up!'s incredible joining offer where you can sign up and receive all the benefits Stampin' Up! has to offer for just £25. Click here to read more details about this rarest of offers - I would love to welcome you to my team.
Back soon with another project; until then, happy stampin'!
Stampin' Up! Supplies Used:


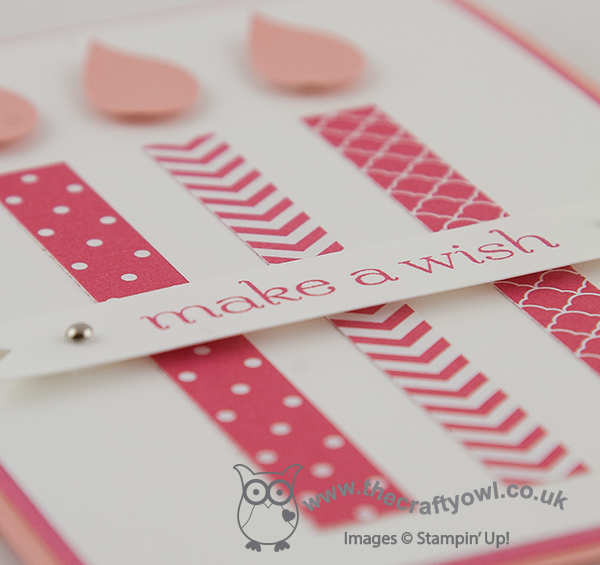
by Joanne James15. October 2013 20:23A quick post from me today as I'm keen to finish watching the rest of tonight's Great British Bake Off semi-final. Here's a birthday card I made last week, very similar to this one by Mary Fish, which is so easy yet so effective:
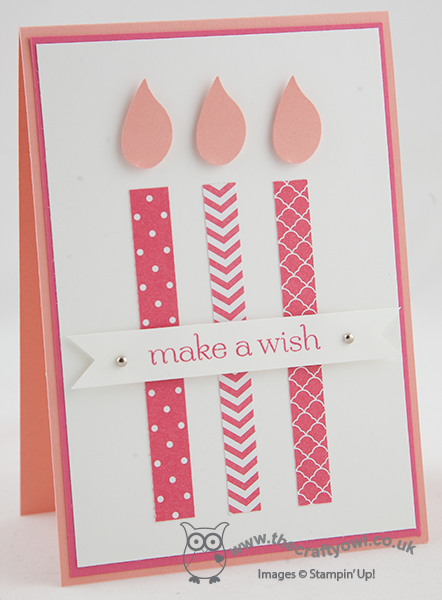
I thought this would be the perfect card for my teenage niece - girly, but not too childish with clean geometric lines. The in-colour designer paper does most of the work here without the need for lots of stamping. It was also a good excuse to get my bird punch out of the drawer, as he hasn't been used in a while. If you're quite new to stamping and reading this and thinking I've finally lost the plot as there isn't a bird to be seen on this card, you'd be right - but the wing shape from the punch in question makes the perfect flame for the birthday candles (so I'm not completely mad, just a little!)
Just before I go, it's Tuesday which means MDS Digital Download Day. Here's a quick look at some of today's new downloads:

Just click on the date button to go straight to my online store to download them.

Back tomorrow with another project - right now I'm off to watch the end of the Bake Off! Until tomorrow, happy stampin!
Stampin' Up Supplies Used:


by Joanne James14. October 2013 20:28Today I'm sharing another birthday card that I made last week, this time for my daughter to give to one of her school friends who celebrated his birthday yesterday. After much consultation, we decided that we would go with something fun. They've both seen the Dispicable Me movies, so I decided to have a go at creating my very own punch art minion. Here is the end result:
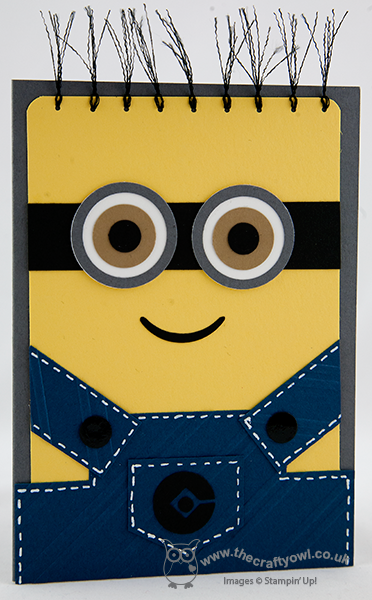
He was actually quite easy to make with the aid of a selection of circle punches and I'm very pleased with the result. I particularly like the striped embossing on his dungarees and the white stitching to add definition. The hair was made following a tip by Tanya Bell of StampingT.com.au by stripping some standard black ribbon into strands and threading through some holes. I've never been one for sewing, but as far as cards are concerned I think this is about as far as it gets! The only stamping on this card was on the inside - I don't have a photo, but I used my ABC 123 Sketch Alphabet to stamp 'You're One In A Minion!' A perfect sentiment to finish off this fun card.
Before I go, a quick reminder that we are 7 days in to the 14 day 'Join Stampin' Up! for £25'. This is a once in a lifetime offer to celebrate Stampin' Up's 25th anniversary and is unlikely to be repeated. You can find more information in my previous post here - if you're thinking of signing up, do give me a call to talk about the benefits that being a part of Stampin' Up and my team has to offer.
Back tomorrow with another project. Until then, happy stampin'!
Stampin' Up Supplies Used:


by Joanne James13. October 2013 20:57Well, the weather here has been dreadful here but yesterday our monster home-grown pumpkin was harvested during one of the day's few dry spells (photos to follow!) and today we went to the theatre to watch 'Dinosaur Zoo', so all in all not a bad weekend. Today I've a change from Christmas cards for you: I thought I would share a birthday card commission I made for someone whose birthday it is today. Another football-mad Chelsea fan, so here's what I came up with:
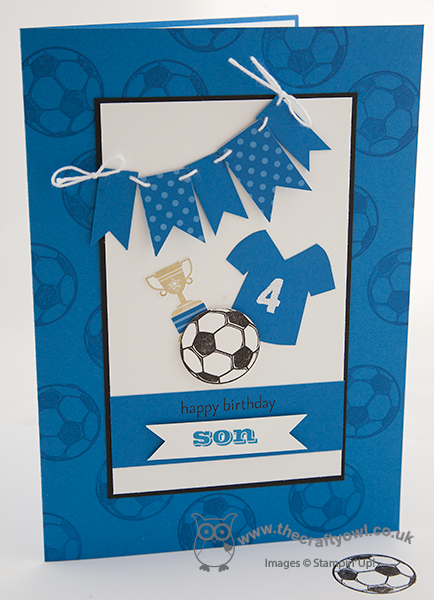
I used my 'Great Sport' football stamp to decorate a background base panel, then created a central panel with some great football paraphanelia: a trophy, a shirt with the recipient's player number (not age, as one of my eagle-eyed offspring was quick to point out!) and a football and finished the panel with some co-ordinating bunting, Chelsea blue, of course.
If you're a stamper and wondering where I got the trophy stamp from, it's from one of the stamps in the 'Tag It' set. I've just covered the wording with a DSP 'ribbon' so that it fits with my football theme.
Hope you like the card; tomorrow I'll be sharing another birthday card; until then, happy stampin'!

Stampin' Up Supplies Used:


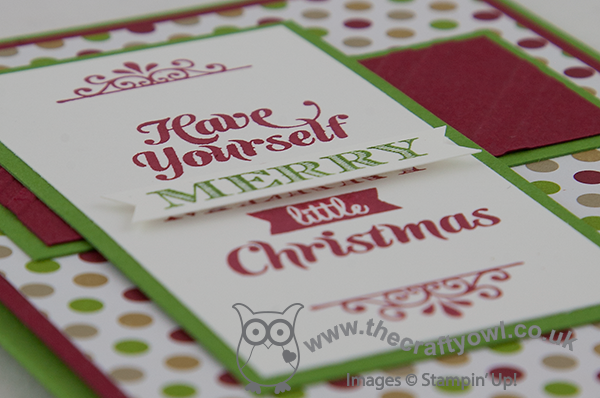
by Joanne James12. October 2013 20:27It's the weekend and today I have the last of the cards from this week's class to share with you. This time another Merry Little Christmas, but with spots instead of stripes:
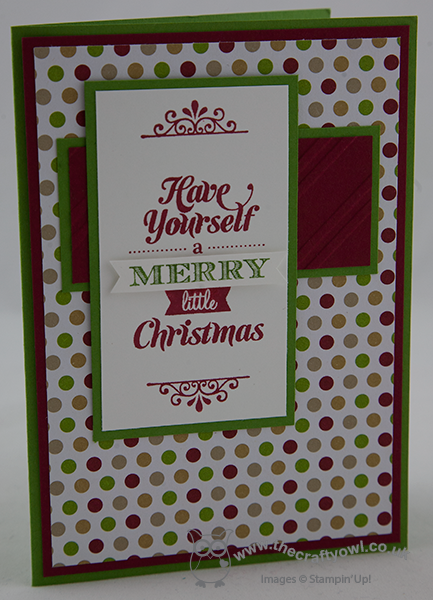
This time I used two of the stamps in the Merry Little Christmas set, and stamped the 'Merry' part of the main stamp again in Gumball Green and cut out with paper snips into a little banner to add some dimension. I also embossed the background piece of Cherry Cobbler with the Stylish Stripes embossing folder to add texture. Another simple yet effective design.
All the ladies at this month's classes were very pleased with their makes and we are already looking forward to next month when we will be adding to our Christmas card collection. If you would like to join us, please contact me for more details.
Back tomorrow with a birthday card; until then, happy stampin'!
Stampin' Up Supplies Used:


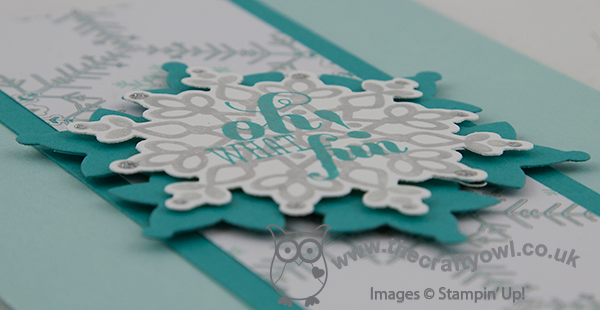
by Joanne James11. October 2013 19:53Today I'm sharing another of this week's class cards using the Festive Flurry stamp set and framelits bundle. Another simple layout featuring the Winter Frost paper stack. Here's the card we made:
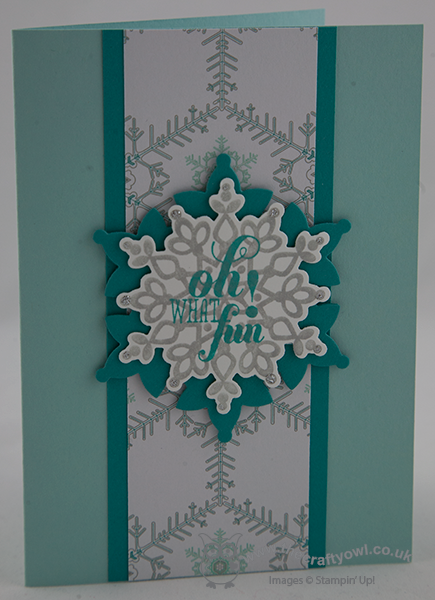
This time we layered the snowflakes and overstamped on the top one (the snowflake was stamped in Smoky Slate, having been stamped off once first onto scrap paper to give a softer background). Bermuda Bay cardstock adds a real striking background and gives this colourway quite a modern feel. Some silver Dazzling Details on the tips of the snowflake adds a little finishing sparkle.
We used both of the seasonal colourways in our class, and I'm really undecided as to which one I prefer most. Which one do you like the most?
Back with another card tomorrow; until then, happy stampin'!
Stampin' Up Supplies Used:


6a2ba4c3-2cd4-4294-9958-badb0e698470|0|.0|96d5b379-7e1d-4dac-a6ba-1e50db561b04
Tags: Big Shot, Christmas, Festive Flurry, Festive Flurry Framelits, Christmas Messages, Magnetic Platform, Shop online, Stampin' Up, Stampin' Up Card, Stampin' Up Card ideas, Stampin' Up Supplies, Winter Frost
Cards | Classes | Stamping